Garden Gear M1E-LD-115 User manual

1
Hedge and Edge Trimming Shears: Model M1E-LD-115
Instruction Manual
For correct usage, read these instructions carefully and keep in a safe
place for future reference.

2
Introduction
IntroductionIntroduction
Introduction
The Hedge and Edge Trimming shears are only intended for domestic
light trimming of garden hedges, shrubs and lawn edges. The
trimming shears are not suitable for commercial purposes, and any
such use will void the guarantee.
Description of parts
Description of partsDescription of parts
Description of parts
1 Soft grip handle 7 SDS blade cover
2 Safety lock 8 SDS blade release switch (for
changing blades)
3 Main housing 9 Charging inlet
4 Grass shear blade 10 LED light
5 On/off trigger 11 Battery charger
6 Trimming blade
1
2
4
3
5
11
9
10
6
7 8

3
Safety
SafetySafety
Safety
Precautions
PrecautionsPrecautions
Precautions
Explanation of symbols:
Warning notice
Read the instruction manual.
Do not expose the tool to rain.
Warning! The cutting blades continue to move after switching off.
Warning! Keep bystanders away.
Only use the battery charger indoors.
Battery charger contains a safety transformer
Eye protection must be used

4
WARNING!
•Before adjusting or cleaning the trimming shears, make sure that they
are switched off first.
•When in use keep your hands well away from the moving blades.
•When switching the trimming shears off, keep your hands well away
from the blades, as they will continue to turn for a short time after
switching off.
•Use the tool correctly and do not force it to perform jobs for which it
was not intended.
•Read all safety warnings and all instructions. Failure to follow the
warnings and instructions may result in electric shock, fire and/or
serious injury.
•The user is responsible for any accidents involving other people or
anyone’s property.
•Save all warnings and instructions for future reference.
•The term “power tool” in the warnings refers to your battery operated
(cordless) trimming shears.
Work area
•Keep the work area clean and well lit, as cluttered and dark areas can
result in accidents.
•Power tools create sparks, which may ignite dust or fumes. For this
reason, do not operate the tool in explosive atmospheres, such as in the
presence of flammable liquids, gases or dust.
•While operating the power tool, keep children and bystanders away as
distractions can cause you to lose control.

5
Electrical Safety
•Make sure the power rating on the plug matches the outlet.
•Never modify the plug in any way.
•Do not use any adaptor plugs with earthed (grounded) power tools.
Unmodified plugs and matching outlets will reduce risk of electric shock.
•To prevent the risk of electric shock, when operating the tool avoid body
contact with earthed or grounded surfaces, such as pipes, radiators,
ranges, refrigerators and never operate the tool in the rain. You must also
never expose the tool to moisture.
•Never use the power cable for carrying, pulling or unplugging the power
tool.
•Damaged or entangled cables can increase the risk of electric shock, for
this reason; keep the power cable away from heat, oil, sharp edges or
moving parts.
Personal safety
•Stay alert, watch what you are doing and use common sense when
operating a power tool. Do not use a power tool while you are tired or
under the influence of drugs, alcohol or medication. A moment of
inattention while operating power tools may result in serious personal
injury.
•The operation of any power tool can result in foreign objects being thrown
into your eyes, which can result in severe eye damage. Before beginning
tool operation, always wear safety goggles or safety glasses with side
shields and a full-face shield when needed. We recommend the use of a
Wide Vision Safety Mask for use over glasses, or standard glasses with
side shields. Always wear eye protection, which conforms to ANSI Z87.1.
To prevent the risk of injury, you must also wear non-slip safety shoes,
hardhat, earmuffs and dust mask when required.
•Do not wear loose clothing or jewellery when operating the tool, as they
could become caught in the moving parts. If you have long hair keep it tied
back above shoulder height.
•To prevent unintentional starting of the tool, ensure the safety switch is in
the off-position before connecting it to the mains power supply, or when
picking up or carrying the tool. Never carry the power tool with your finger
on the power trigger.

6
•Remove any adjusting key or wrench before turning the power tool on. A
wrench or a key left attached to a rotating part of the power tool may
result in personal injury.
•To maintain full control of the tool, keep a proper footing at all times with
your weight evenly balanced over both feet and never overreach.
•To maintain full control of the tool, keep the handle dry, clean and free
from oil and grease.
Power tool use and care
•Do not force the power tool to do jobs for which it was not intended. The
correct power tool will do the job better and safer at the rate for which it
was designed.
•Do not use the power tool if the power switch is faulty. Any power tool that
cannot be controlled with the switch is dangerous and must be repaired.
•To prevent the risk of accidentally starting the tool, make sure the tool is
disconnected from the mains power supply before making any
adjustments, changing accessories, or storing the tool.
•Power tools are dangerous in the hands of untrained users. When not in
use store the tool out of the reach of children, and do not allow persons
unfamiliar with the tool (or these instructions) to operate it.
•To prevent the risk of accidents, periodically check the tool for
misalignment, binding of moving parts, breakage of parts and any other
condition that may affect the operation of the power tool. If the tool is
damaged in any way, take it to your local hardware store for repair.
•Keep cutting tools clean and sharp. Properly maintained cutting tools with
sharp cutting edges are less likely to bind and are easier to control.
•Use the power tool and accessories in accordance with these instructions,
taking into account the working conditions, and the work to be performed.
Use of the power tool for jobs for which it was not intended could result in
injury.
•To ensure that the power tool is safe, have it serviced at your local
hardware store using only identical replacement parts.
Special safety warning for this product
•Only use this tool in daylight, or good artificial light.
•When in use, keep all parts of your body away from the cutting blade. Do
not remove cut material or hold material to be cut when the blades are
moving.
•Make sure the power switch is off when clearing jammed material. A
moment of inattention while operating the machine can result in serious
personal injury.
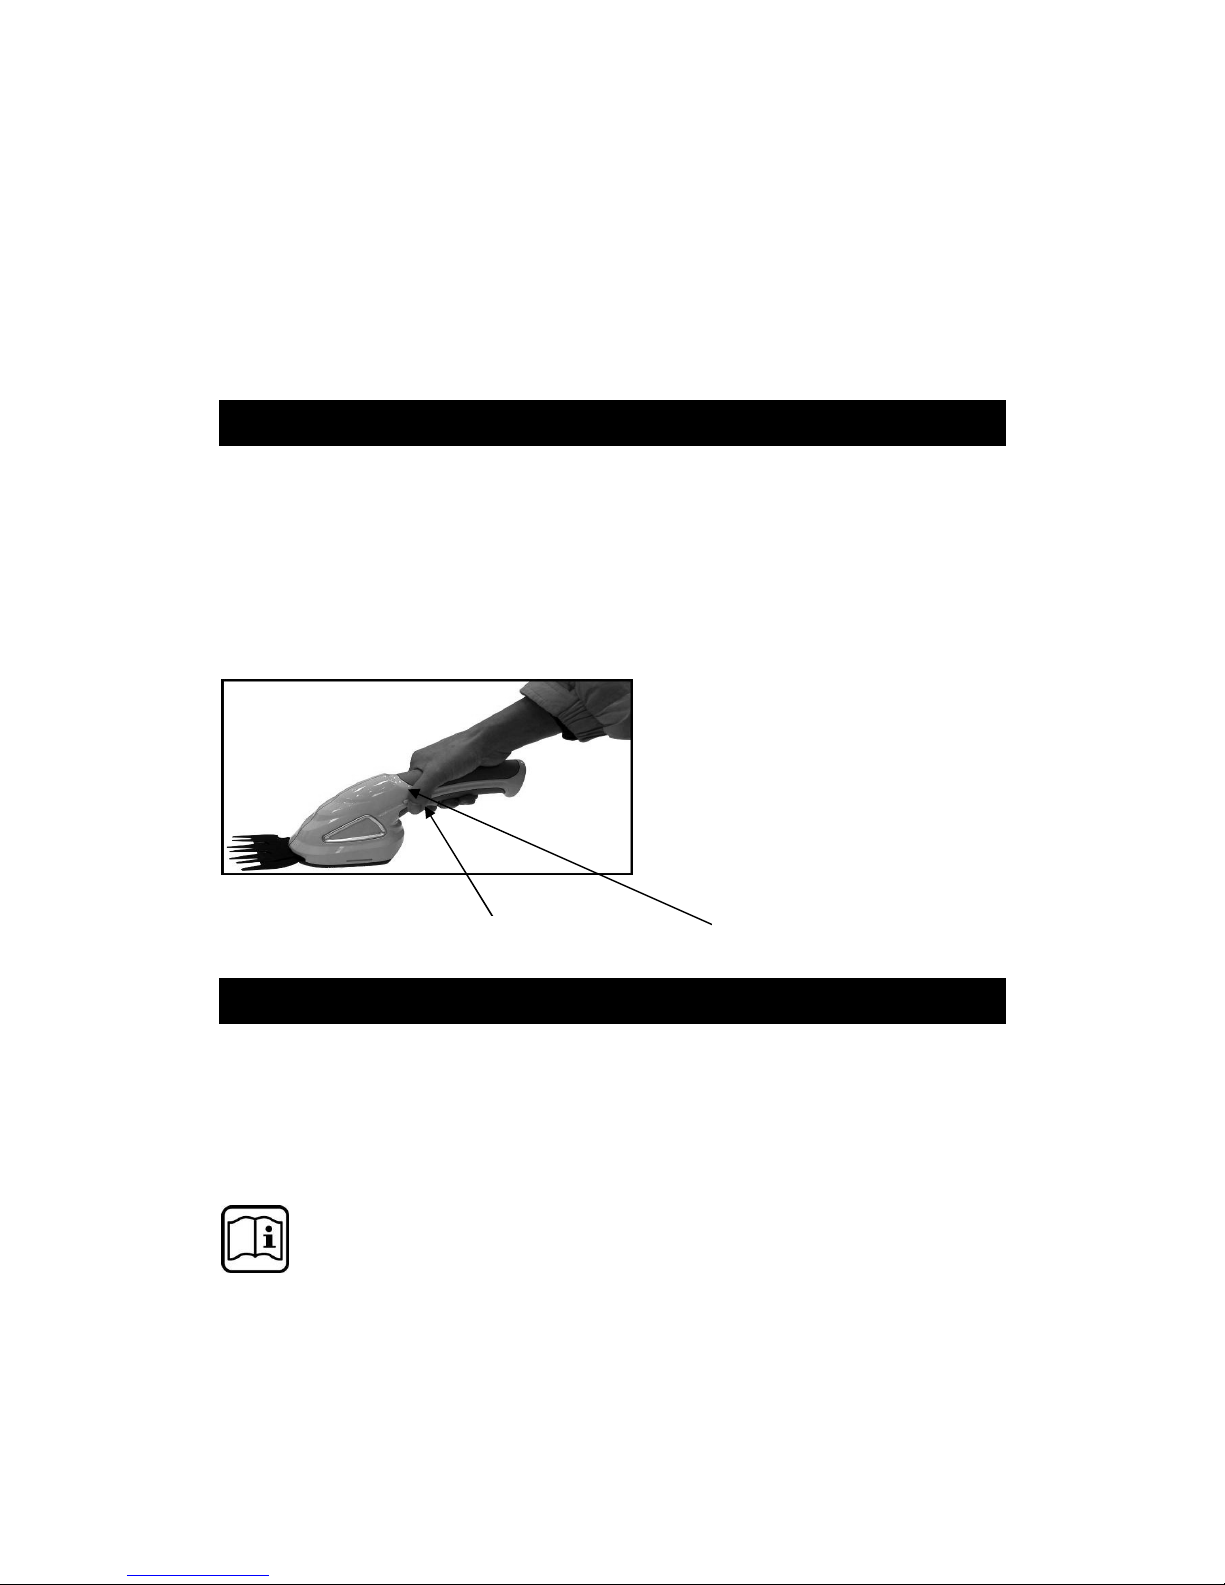
•Carry the tool by the handle with the cutter blade stopped. When
transporting or storing the tool, always fit the blade protector. Proper
handling of the machine will reduce possible personal injury from the
blades.
•Only switch the motor on when your hands and feet are away from the
cutting blades.

7
•Always disconnect the machine from the power supply whenever the
following conditions apply:
-Whenever leaving the tool unattended.
-Before clearing a blockage.
-Before checking, cleaning or working on the unit.
-After striking a foreign object.
-Whenever the tool starts vibrating abnormally.
•Always ensure that the ventilation openings are kept clear from debris.
Battery/Battery charger safety warnings
•To prevent the risk of electric shock, protect the battery charger from rain
and moisture.
•Recharge the battery only with the charger provided. A charger that is
suitable for one type of battery pack may create a risk of fire when used
with another battery pack.
•The supplied battery charger is only suitable for charging the trimming
shears and, to prevent the risk of fire and explosion must not be used for
charging any other tool.
•Before each use, check the battery charger, cable and plug for signs of
damage. If the battery charger is damaged, do not use it or attempt to
repair it. Instead take it to your local hardware store for repair, as
damaged battery chargers, cables and plugs increase the risk of electric
shock.
•To prevent the risk of fire, do not operate the battery charger on
flammable surfaces (e.g. paper, textiles, etc.) or in combustible
environments.
•If the trimming shears are dropped, or subjected to a hard impact, liquid
can be ejected from the battery. Should this liquid accidentally contact
your skin, immediately flush the area with water as it can cause irritation
and even burns. Should the liquid contact your eyes you will also need to
seek medical attention.
•To prevent the risk of short circuit, do not open the battery yourself.
•To prevent the risk of explosion, protect the battery from heat, such as
continuous sunlight or fire.
•To prevent the risk of explosion, do not short-circuit the battery.
•If the battery becomes damaged due to improper use, vapour may be
emitted. Should this happen get fresh air and consult a doctor should any
respiratory complaint develop.

8
Delivered Items
Delivered ItemsDelivered Items
Delivered Items
Carefully remove the tool from its packaging and check that the below
contents are included:
•Shear with grass shear blade assembled.
•Trimming blade.
•Blade guards (for both grass and trimming shear blades).
•Battery charger.
•Operating instructions.
Before Use
Before UseBefore Use
Before Use
•The battery charger supplied matches the lithium battery installed in
the trimming shears, and you must not use any other charger to
recharge the trimming shears.
•To protect the lithium battery against deep discharging, when the
battery is flat the tool will automatically switch off via a protective
circuit. The blade will stop moving and a slight whistling sound will be
heard.
If the On/Off switch is used continually, the lithium battery can be damaged.
Fig. 1
Charging Procedure (Fig. 1)
1. Insert the charger cable into charging inlet (9) on the tool.
9

9
2. Making sure the wall outlet in your home is normal household voltage
(AC230V, 50Hz); insert the battery charger plug into the mains power
supply.
•During the charging process, the handle of the tool will warm up, but
this is perfectly normal.
•When not using the tool for extended periods, disconnect the battery
charger from the socket.
•When the trimming shears are charging, you must not use them.
Starting and Stopping
Starting and StoppingStarting and Stopping
Starting and Stopping
Starting and Stopping (Fig.2)
Starting:
1. Push in the safety lock (2) and press the On/Off trigger (5) at the same
time.
2. Release safety lock (2).
Stopping:
Release the On/Off switch (5).
Fig. 2
Operating Instructions
Operating InstructionsOperating Instructions
Operating Instructions
Proper use
Important! This product is intended for light trimming of shrubs, hedges and
lawn edges. Please note that this tool is not designed for commercial, trade or
industrial use. Our warranty will become void if the machine is used for
commercial, trade or any other purpose.
Any use, which is not expressly permitted in the manual, may result in
damage to the machine and place the user in serious danger. Please carefully
read the restrictions in the safety instructions.
Before each use, check for damaged/worn parts, especially:
1. Check the blade for proper alignment.
2
5

10
Trimming shear blade
Use the trimming blade for trimming and shaping hedges, shrubs and bushes.
Cutting shrubs
•Before cutting, check the shrubs for foreign objects e.g. wire.
•When using the tool hold it away from yourself and stand in a secure
position with your weight evenly balanced over both feet.
•When cutting, move steadily along the line of cut, so that stems are fed
directly into the cutter blades.
•After use, replace the blade transport guard.
Recommended cutting/trimming times:
–Cut hedges with deciduous leaves in June and October.
–Cut evergreen hedges in April and August.
–Cut conifer and other fast growing shrubs approx. every six weeks from May
onwards.
Grass shear
Use the cordless grass shear for decorative trimming of grass around
walkways, trees, flowerbeds, and so on.
Edging
When using the tool hold it away from yourself and stand in a secure position
with your weight evenly balanced over both feet.
Guide the tool along the edge of the lawn. For larger lawns, it is advisable to
use the telescopic handle (sold separately).
After use replace the blade guard.
Tips:
•Do not force the unit through dense growth, and if the blades slow down,
reduce your speed.
•Avoid trimming too close to dirt, sand or gravel, as this could dull the
blades and reduce the cutting efficiency.
•Do not allow the blade to contact paved surfaces, stones or garden walls,
as this will rapidly wear down the blade.

11
Changing Blades
Changing BladesChanging Blades
Changing Blades
Wear gloves when changing blades.
Blades can cause injury. Do not press the safety lock of the shear
during blade changes.
Removing (Fig. 3-6)
•Slide your thumb under the SDS blade changing release switch (8) and
then slide the cover away from the housing (7) as shown in Fig. 3-4.
Fig. 3 Fig. 4
•Lift the cover (7) away from the housing (Fig.5).
•Lift the blade out. (Fig.6)
Fig. 5
Fig. 6
8
7

12
Fitting (Fig. 7-8
•Fit the blade, by aligning the holes in the blade onto the drive pins. (Fig.7).
•When refitting the SDS blade cover, ensure all 4 legs are inside the
housing before sliding the cover into place.
•Replace the blade cover, by sliding it back towards the blade (Fig.8).
Fig.7 Fig.8
Maintenance
MaintenanceMaintenance
Maintenance
Blades can cause injury. Do not press the safety lock of the shear during
maintenance work.
Note: To ensure long and reliable service, regularly carry out the following
maintenance:
•Check for obvious defects such as a damaged/ loose blade, fixings or
components.
•If the tool should stop working properly, repair should be carried out by
your local hardware store.

13
Blade Maintenance
Blade MaintenanceBlade Maintenance
Blade Maintenance
Blades can cause injury. Do not press the safety lock of the shear during
maintenance work.
Never clean the trimming shears in water (especially running water), as there
is a risk of personal injury and damage to the shears.
•To obtain good cutting results, always make sure the blades are sharp,
and clean them from time to time with a soft dry cloth.
•For easier operation and longer blade life, use light machine oil to
lubricate the trimming and grass shear blades before and after each use.
•Check the condition of the cutting edges of the blades, and always
immediately remove notches and burrs caused by stones etc.
Re-sharpening the trimming blade (Fig.8):
1) Allow the trimming blade to stop completely.
2) Clamp the blade assembly in a vice and file the exposed cutting surface of
each blade tooth, making sure the original angle of the tooth is maintained
(Fig.8).
3) Remove the trimming blade from the vice, start and stop the shear so that
the unsharpened edges of the blade teeth are exposed.
4) Repeat the sharpening procedure as described above.
Fig. 8

14
Re-sharpening the grass shear blade (Fig.9):
1) Remove the blade from the shear.
2) Separate the upper blade (12) and lower blade (13) (Fig.9).
3) Remove any grass and dirt between the upper and lower blades.
4) Sharpen the blades by using a sharpening stone.
5) Fit the blades on the shear.
Fig.9
•Ensure that the blade is covered with the blade guard supplied when not
in use.
Cleaning / Storage
Cleaning / StorageCleaning / Storage
Cleaning / Storage
•Clean the exterior of the machine thoroughly using a soft brush and cloth.
Do not use water, solvents or polishes.
•Remove all debris, especially from the ventilation slots.
•After use, cover the blades with the guards provided.
•Charge the battery 3-5 hours before storing.
•During storage, charge the battery at least once every three months to
protect it from damage.
•Store the machine in a dry, secure place out of reach of children.
•Do not place any other objects on top of the machine.
12 13

15
Product Specification
Product SpecificationProduct Specification
Product Specifications
ss
s
Model M1E-LD-115
Battery type Lithium
Battery pack voltage DC 3.6V
Battery pack capacity 1300mAH
Battery type Lithium-ion
No load speed 900rpm
Grass shear blade cutting width 80mm
Trimming blade cutting length 115mm
Tooth spacing: 8 mm
Noise power level LWA 84 dB (A)
Noise power level LPA 71 dB (A)
Vibration < 2.5 m/s
2
Charger (adaptor) input AC230V 50Hz
Battery Charging time 3-5 hour

16
Declaration of Conformity
Declaration of ConformityDeclaration of Conformity
Declaration of Conformity
We
Clifford James
Gladden Place
West Gillibrands
Skelmersdale
WN8 9SX
England
Declare that the
Hedge and Edge Trimming Shears
Model M1E-LD-115
Conforms with the following EEC Directives their supporting Statutory
Instruments
and relevant Standards, where applicable as follows.
The Machinery Directive 98/37/EC
The EMC Directive 2004/108/EC
The Outdoor Directive 2000/14/EC
EN60335-1/A2:2006
EN60335-2-77:2006
EN50366/A1:2006
EN55014-1/A2:2002
EN55014-2/A1: 2001
EN61000-6-3/A11: 2004
The noise emission in the environment by equipment for use outdoors
(ANNEX V Internal control of production with assessment of technical
documentation and periodical checking) 2000/14/EC.
Measured sound power level: 84dB(A), Guaranteed sound power level:
86dB(A)
Signed:
Mr Daniel Price
Technical Director
Clifford James
Date: Jan 2nd. 2008

17
GUARANTEE
IMPORTANT
Please do not return this product without first calling the Customer
Service number below:
0870 888 1008
Thank you for purchasing this product, which has been made to demanding high
quality standards and is guaranteed for domestic use against manufacturing faults
for a period of 12 months from the date of purchase.
This guarantee does not affect your statutory rights. If your product fails due
to a defect in material or workmanship during this period, please return it to
the place of purchase. Normal wear and tear is not covered under the
guarantee. The trimming shear blades are wearing parts and are not covered
by the guarantee.
Any guarantee is invalid if the product has been misused or subject to neglect
or an attempted repair other than by our own service centre.
Due to continuous product improvement, we reserve the right to change the
product specification without prior notice.
After Sales Customer Service:
Customer Service Department, BVG-Airflo Group plc, Clifford James,
Gladden Place, West Gillibrands Industrial Estate, Skelmersdale, Lancashire,
WN8 9SX, UK
Telephone: 0870 888 1008
E-mail: [email protected].uk
Please retain for future reference.
Colours and contents may vary.
Waste electrical products should not be disposed of with household
waste. Please recycle where facilities exist. Check with your Local Authority or
retailer for recycling advice.
This product contains a lithium-ion battery. Do not dispose of battery
packs/batteries into household waste, water or fire. Battery packs/batteries
must be collected, recycled or disposed of in an environmentally friendly way.
Please dispose of them properly at a public recycling
Table of contents
Other Garden Gear Power Tools manuals