The pairing process
1. Turn on Bluetooth on your phone.
2. Make sure that the smartwatch is on.
3. Open the FitCloudPro app, grant it all permissions and enter the data of
the smartwatch user.
4. Go to Device, click the +Add Device option, then select the device named
HM08-XXX (XXX – the 3 last digits of the MAC address of the watch).
5. When pairing, place the phone and the smartwatch close to each other.
6. After successful pairing, the data will be fully synchronised.
The Garett Action smartwatch works with smartphones that support
Bluetooth 5.0. It is also compatible with Android 4.4 (and higher), as well as
iOS 10.0 (and higher).
Remember to grant the app the required consents and permissions
before pairing so that it works properly. If you refuse, selected functions
may not work properly or will be unavailable.
Garett Action
User manual
Thank you for purchasing the Garett Action
SAFETY ISSUES
Before use, read this user manual carefully and keep it for further
reference. The manufacturer shall bear no liability for any damage/injuries
caused by improper use. Depending on the smartwatch batch, certain
functions may differ from the functions described in this user manual.
Using this device in the vicinity of medical devices may disrupt their
operation. Users should pay special attention when using the smartwatch
in the vicinity of medical devices such as pacemakers, hearing aids and
other electronic medical devices.
Do not dispose of the device in fire. There is a risk of battery explosion and
resulting threat to life and health.
Protect the device from heat sources and direct sunlight.
Do not store the device in damp places or high temperatures, because
it may cause electric shock or fire.
Do not immerse the device in hot water.
Do not dive while wearing the device.
In case of failure/damage, please stop using the product and contact
the Garett service centre. Any attempts to make your own repairs may
damage the device and result in invalidation of the warranty.
The device should only be cleaned with a soft, slightly damp cloth. Do not
use strong detergents or any other stimulants to clean the product.
Garett Action is not a medical device. The smartwatch and the
FitCloudPro app are not designed for medical diagnosis, treatment or as
a preventive measure against illness or disease. You should seek medical
advice first before changing your sleep and physical activity habits.
- 2 - - 3 -
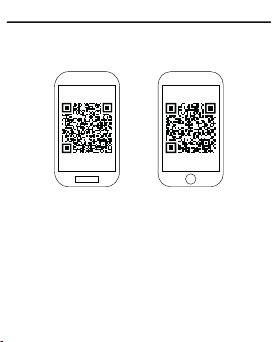
1
2
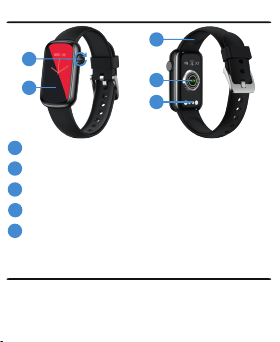
Touchscreen display
3
4
5
1
2
3
4
5
Rotary function button (on/off/back/wake/lock screen/menu
navigation/face change)
Set of sensors
Magnetic charging port
Interchangeable strap
- 4 -
PRODUCT DESCRIPTION
INSTALLATION
Put the watch on your wrist and adjust the strap length so as to ensure the
device strap is not too loose.
OPERATION
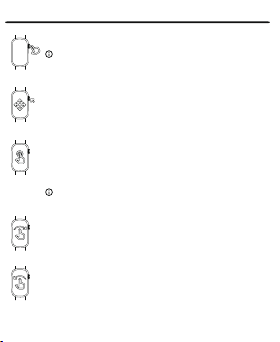
Turning on/off
To start the device, press and hold the function button(2) for
approx. 5 seconds. Repeat the action to turn it off.
If the smartwatch does not start, try charging it.
After starting
The smartwatch is operated using the touchscreen and the
rotary function button.
Changing the watch face
Touch and hold the home screen to display the smartwatch face
change menu. Swipe right/left to select the face, and then click
anywhere on the screen to confirm your selection.
You can also make the changes using the rotary function
button. Turn up/down while on the main screen to select the
watch face; it will change automatically.
More watch faces are available in the FitCloudPro app.
Navigation
Swipe right on the home screen to access the main menu. Touch
the screen to enter the selected function. After entering the
function, swiping right allows you to return to the previous
screen, while pressing the function button(2) takes you to the
home screen.
Swipe left on the home screen to access the quick menu, i.e.:
daily activity summary, heart rate, sleep recording and weather
information.
- 5 -
CHARGING
1. The smartwatch is charged using the magnetic cable supplied with the
device.
2. Attach the end of the magnetic cable so that the contacts of the watch
touch the contacts of the charging cable. Then connect the other end of
the cable to the USB port of a computer or a USB power adapter. When it is
connected properly, the charging animation will appear on the watch
screen.
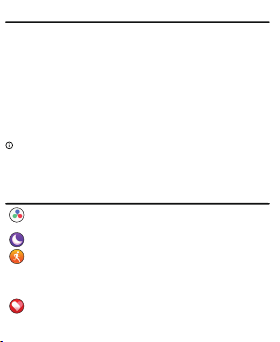
INSTALLING THE FITCLOUDPRO APP
The smartwatch works with your smartphone using the FitCloudPro app.
Before use, you must first download the app from the Google Play Store or
the AppStore and install it on your phone. You can search for the app by
entering "FitCloudPro" in the store search engine or by scanning the relevant
QR code provided below.
Garett Action smartwatch does not require a permanent smartphone
connection, but in order to fully enjoy the functions of the watch you need to
pair it with the app.
Each time the smartwatch is turned on and paired with the app, the data
synchronise automatically. The smartwatch measures and analyses certain
user data in standby mode. Garett Action has a set of sensors that monitor
movement and the measurements taken in order to determine the details of
sleep and physical activity.
- 6 -
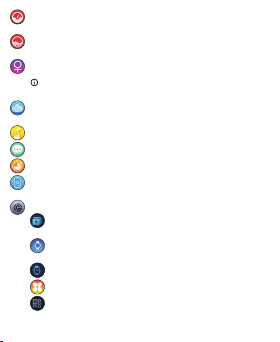
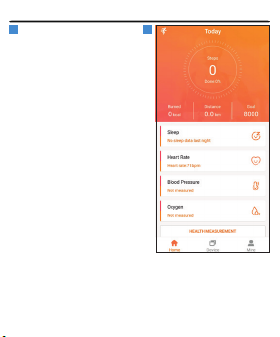
- BP: Blood pressure monitor function. The measurement starts
automatically after entering the function.
- SpO2: Pulse oximeter function. The measurement starts
automatically after entering the function.
- Female: Menstrual calendar. Displays information about the
menstrual cycle.
To activate the function, enter the full user data in the
FitCloudPro app (required gender: Female).
- Weather: Current weather information the
FitCloudPro app.
- Music: Function for controlling the music on your phone.
- Messages: Recent notifications from the phone.
- Stopwatch: Stopwatch function.
- Find phone: Function for finding your smartphone. It triggers an
audible signal on the phone.
- Settings:
- Language: The ability to change the language of the
smartwatch.
- Display: Display settings (change the watch face, brightness,
screen sleep and wake).
- Vibration intensity: Configure the level of vibration intensity.
- Menu style: The ability to change the main menu style.
- QR code: Displays the QR code for the dedicated app.
- 7 -
Swipe down on the home screen to access the settings bar. This
allows you to quickly change selected functions
Swipe up on the home screen to access the recent notifications.
This allows you to display/delete notifications.
Android iOS
If there is no animation, make sure the watch is properly connected.
When the battery has completely run out, the animation may take 10 - 20
minutes to appear. It is recommended to charge your smartwatch for
approx. 2 hours before turning it on for the first time.
The charging voltage should not exceed 5V.
The recommended maximum charging current is 1A.
PAIRING
- 8 - - 9 -
TAKING MEASUREMENTS
Before you start the measurement, make sure that
the sensor is touching the skin. The measurement
area should be kept clean; dirt may adversely affect
the result.
To start, go to the desired function in the
smartwatch (Heart rate, BP or Blood oxygen). The
measurement starts automatically and should
take about 1 minute to get the best result.
Keep your body relaxed and still during tests. Hold
the device at the same height as your heart; do
not speak during the test.
MAIN MENU
- Data: Daily activity summary (number of steps, calories burned,
distance covered).
- Sleep: Information about your last sleep.
- Workout: Sport modes. To start recording an activity, select it from
the list; recording of the exercise will start automatically. After
finishing the training, swipe right or press the function button(2)
and press End to save the result. The data will be saved and will be
available in the FitCloudPro app.
- HR: Heart rate monitor function. The measurement starts
automatically after entering the function. Swipe up to access
measurement statistics.