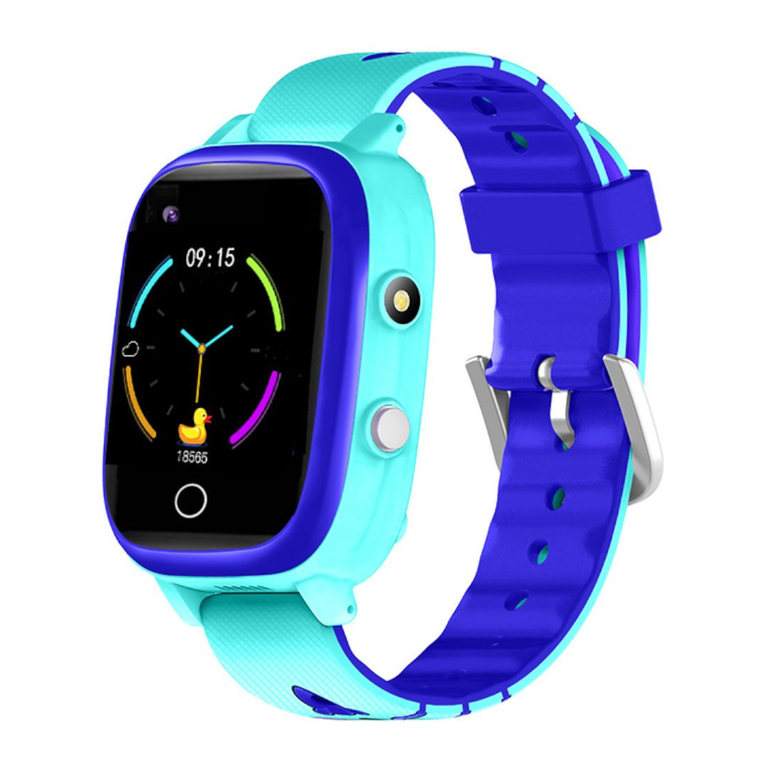
Garett Smile User manual

User manual
MULTILANGUAGE
www.garett.eu
SmartWatch
Locator GPS
Garett Smile

MULTILANGUAGE
English 3
Polski 20
Română 107
Magyar 72
Nederlands 90
Slovenčina 124
Lietuvos 55
Українська 141
INFO (EN/PL) 158
Český 38

English
lClean the device only with a soft, slightly damp cloth. Do not use chemicals
or detergents to clean this device.
lIt is forbidden to throw equipment into the fire. There is a risk of battery
explosion and, as a consequence, life and health hazards.
lDo not dive in the device.
lThe device should be protected against heat sources and direct sunlight.
lUsing this device near medical devices may interfere with their operation.
Pay special attention when using the smartwatch near medical devices,
such as pacemakers, hearing aids and other electronic medical devices.
lDo not immerse the device in water.
Before use, carefully read the user's manual and save it for later use. The
manufacturer is not responsible for any damage / injury caused by
improper use. Depending on the particular SmartWatch, some functions
may differ with the functions described in the user manual..
lIt is forbidden to use the device if it is damaged.
lIn the event of damage, have the device serviced by an authorized service
center for inspection / repair. Attempting to repair it yourself may lead to
damage to the device and will void the warranty.
SECURITY ISSUES

3. Camera
5. Nano SIM card slot
4. Charging Port
6. Microphone
7. Speaker
1. Display
2. Turn on / o ff/ wake up /
screen / return / reject
connection
PRODUCT
DESCRIPTION
REQUIREMENTS FOR NANO SIM CARD
1. Install the card in the Nano SIM standard.
2. The SIM card must meet the following conditions:
lThe card must be active (if the new card, should be activated in a mobile
phone by making an outgoing call)
lThe card must be top up on the account (for pre pay cards)
lThe card must support work mode 2G, it must have a service, internet
and number identification functions.
lThe card can not have an active PIN (to check the card has an active
PIN lock installed on the mobile phone and check if it will be asked for
the PIN code during the launch. If yes, the lock is active and you will
need to put it in the phone settings or by contacting operator)

Due to the fact that the device uses the Internet connection, in order
not to generate additional costs, we recommend to buy an internet
package from the operator. Package 1GB per month is enough. The
cost of internet connection, and the amount of voice and SMS
messages are regulated by the pricing of the mobile network operator.
ATTENTION: SIM cards offered by the operator as online, dedicated to
e.g. tablets, may not work in the device.
INSTALLATION OF NANO SIM CARD
STANDARD
SIM MICRO
SIM NANO
SIM
V
1. Firstly, using the included
Screwdriver, unscrew the screws
that secures the plug, the SIM card
port (5) located on the back of the
watch.
2. After unscrewing the screw and
removing the plug, install the Nano
SIM card so that its chip contacts in
the slot of the device and cut corner
matches the cut corner in the slot.
It is recommended to install the
SIM card when the device is
turned off.

CHARGING
2. Mount the watch in the holder so that the two contact pins (4) join the
contact of the handle. Then set up the other end of the cable with a USB
port of the computer or a USB adapter, e.g. from a mobile telephone. When
we properly connect the cable, the screen will appear the loading
animation. When the battery is completely discharged, the animation
may appear only after several minutes.
1. SmartWatch charge using a dedicated magnetic holder attached to the
device.
Before the first switch on the watch, it is recommended to charge it
for 2 hours.
SMARTWATCH ON HAND
Be sure to put the watch on cild wrist and adjust the strap so that it will be
not too loose.
FIRST USE
1. When the SIM card is correctly installed in the watch and meets all the
above conditions, we can start the device by pressing and holding the
button for + 3 seconds (2).

4. When Internet connection is active, we can go to the next stage which is
the installation of the Global Tracker application on our smartphone. The
main menu of the watch will be described in the following part of the
manual, because the full functionality of the smartwatch is obtained after
registering and configuration through Global Tracker applications.
2. After starting the watch you will see a main screen displaying the most
important information, such as hour, date, GSM coverage and battery level.
Inactive icons will be in grey color.
3. After starting the watch, we wait a few seconds and the icon of the range
and the connection to the Internet will become active (white) as in the
picture above. Connecting to the Internet is necessary for further
configuration of the device. If after a minute the range and Internet
connection will not be active (grey color), make sure that the SIM card
meets all previously described requirements and the watch is in a place
with a strong range. You might also turn o ffand restart the watch.

APPLICATION INSTALLATION
GLOBAL TRACKER
Full functionality of the localizer and configuration is obtained after installing
the Global Tracker application on our smartphone with Android or iOS.
The application is compatible with Android 4.4, iOS 7 (and higher). Find
applications by typing in the search engine the name " Global Tracker "or by
scanning the corresponding QR code shown below.
Android iOS
REGISTRATION IN THE APPLICATION
1. Launch Global Tracker application.
3. To register a new account, click on the "Register" option.
2. After starting the application, you will see a login screen where you can log
in to your account if you have already created it or register it: a new account or
change the application's language.

7. Next, click "Register". After the
correct registration, the following
message will be displayed:
"Successful Registration "and return
to the login screen.
4. In the first field, enter any active
email address, which will be the login
to the application.
5. In the next field Enter the code:
123456
6. In the next field, we provide a
password, which together with the
email address will be as the login data
in the application. Password can
have from 6 to 16 characters. We can
use numbers and letters.
8. Next, click "LOGIN" to log in to the
newly created account. In the next
step, we will be asked for a phone
number. Enter the number of the
person who installs the applications
and will manage the settings of the
watch. After entering the number,
click "Confirm".
9. In the next window we will pair the
watch with the created account. To do
this, click "Bind Watch". It will display
a screen that will allow you to scan
the individual QR code of the watch.
The code can be entered manually.
10. After the scan or enter the QR
code we can go to the next stage.
In this step, we choose the
relationship between the
administrator and the user of the
watch: e.g. Dad - the
administrator is the user's daddy,
Mom - the administrator is the
mum for the user, etc. Under
such a name the administrator
will be in the phone book of the
watch. We do not need to use the
default relationship names. By
entering the name in the field
"Device name" we can give: any
name for the administrator. After
code we can go to the next stage.

11. It will display some information
about the user of the watch:
selecting the name for the
administrator, click "Next Step.
lMobile phone: phone number the
card on the watch.
lName: name the user of the watch.
lBirthday
lHeight
lWeight
After adding the data, click ,, confirm
". When the assignment of the watch
succeeds, the following message will
appear: "Binding success" and on the
screen will appear: ,, Registration
Succes ".
ATTENTION: When using any
application function, or if you want
to configure the settings, the
following message will be
displayed: "Device is not on the
network" means that the smart
watch has no active internet
connection. Check whether the
SIM card meets all the
requirements described earlier in
the manual. If the card meets the
requirements, the most common
reason for this message is not the
lGender
proper APN configuration. The
APN configuration is
described in the following
section of the manual in the
PROBLEM SOLVING section.

MAIN MENU
APPLICATION
After the correct registration, the
main screen of the application will be
displayed, on which we will see the
map, along with the last location of
the watch. Above the pin indicating
the location, the approximate
address, date, time of the last
location is displayed.
ATTENTION: When using any
application function, or if you want
to configure the settings, a
For the location of the watch to be
determined with the greatest
accuracy, the smartwatch must be
in the open area to have GPS
signals. When the watch is not on
the open area, GPS signal,
because, for example, is located in
the building, the location is
determined based on the closest
network transmitter.

1. Map: clicking on the map on the main screen of the application we will
display a larger version of the map. The bottom part of the map shows the
approximate address of the location, the date of the last location and its
source: GPS / WiFi / LBS. By clicking on the blue icon in the top right corner of
the map, you will see the route from selected day by the watch. Clicking on the
message will appear with a request to check the connection, i.e. the
smartwatch does not have an active internet connection. Check whether
the SIM card complies with all the requirements described earlier in the
manual and try to switch on and restart the watch.

icon the viewfinder in the lower
left corner will force refreshing of
the location. By clicking the icon;
arrows in the bottom right corner
we will start navigation to the
current location of the watch.
2. Call: a function that performs a
voice call to your watch.
3. Chat: with this feature we have
the option of sending short notes
(up to 10 seconds) and receiving
them from the watch. To record
messages, click and hold the
"hold down to talk" button. After
recording the message, we
release the button and it will be
automatically sent to your watch.
A new message will appear on the
watch, so that you can listen the
voice memo by clicking on it.
4. Photo: function thanks to which we remotely take a photo with the camera
of the watch. The captured photo will be automatically send to the application
and you will be notified. You will be able to view them in the ” Message center
"(8).
5. Activity (geo fence): with this function we will determine the area in which
the user of the watch can move. When the area is exceeded, the application
will inform us about it. To set the area, click icon “ plus “ in the right upper
corner, set the map in the place where we want to designate a geo fence, then
click with the finger on the map to mark the center of the fence. Use the + / -
buttons to increase / decrease the diameters of the area, enter the name of the

Personal data: configuration of administrator information.
6. Device management: by clicking on the icon of the portrait, we will display,
change the information about the watch's user or remove the relation of the
watch with the account (Unbound). Then the other user will be able to register
the watch with a new account in the application and become its administrator.
7. Sport: a function that displays statistics on the activity of the watch user
from the current day.
l Alarm: alarm clock function activated on the watch.
lNo strange calls: only contacts from phone book are enabled to call your
watch. Calls from unsaved numbers will be automatically rejected.
8. Message center: all notifications and alerts about the watch are displayed
here.
fence and confirm it with the button "Save safe area". To delete a selected
fence, move your finger to the left and click "Delete".
l Device switch: switch between the devices assigned to the account.
l Add device: assigning another device to the account.
lAdministrators: Administrator and guardians assigned to the watch. The
administrator can be one, only he has full rights to configure the watch
settings. To be the device's administrator and the find the watch must be
registered account in the application in accordance with the previous
instruction and assign a watch to the created account. The administrator
can give any guardian administrator rights, then the selected user becomes
the administrator, and the current administrator loses his rights and
becomes the guardian.
lLooking for device: searching for a lost watch. The function runs smart
alarm.
List of devices: displaying the list of devices assigned to the administrator
account on which we are currently logged in. You can add another device
using the "Add device" function. The "Edit Name" function allows you to
change the name of the active device. The "current" field displays the name
and ID of the active device. To set the watch as active, click on the button on

At any given time, it can be active only one device. This means that we
can specify locations and configure only one device. When you want to
locate another device from the list, you must set it as active. To quickly
switch between devices, you can use the "Change" button in the lower
left corner of the main application screen. Notifications and alarms
come from all devices, even those that are not currently set as active.
New message tips: disable notification in the application.
Change password: change the administrator password used to log in to the
application.
Log out: log out of the account in the application.
9. SETTINGS: main settings of the watch and applications:
Device setting:
Number setting: add SOS numbers and family member numbers to the
phone book. We can add 3 SOS numbers. Using the "SOS call" function on the
watch will automatically select the first call from the first number on the call and
if the first number is not answered, the watch will automatically dial the second
and the corresponding third number.
the right, next to the ID number of the selected watch.
Message center: all notifications and alerts about the watch are displayed
here.
Device mute: mute the device. It does not work with that watch model.
Class disable: enable / disable and configure a function that blocks the ability
to make calls from the watch within the set time interval. Note: when the
function is active, we will not be able to call the watch, you will not be
able to make the call from the watch. Making a call from the watch will
only be possible by using the SOS function.
Privacy clause: privacy clause.
Remote shutdown: remote switching on from the watch. When the SIM card
is on the watch and the watch has an internet connection, it is related to the
application, we will not disable it by pressing the (2) button on the watch. We

can only turn it o ffremotely by using this function, or by removing the SIM card.
The watch can only be restarted holding down the o ffbutton (2) for approx. 8
seconds. The watch will turn o ffand restart. It is a safeguard against
unauthorized switching of the watch by the user.
Watch language: change the menu of the watch.
Positioning mode: select modes for refreshment reference: Manual mode,
Auto mode, Time period model (automatic mode only at certain times)
Note: the choice of the automatic mode will shorten the time of the watch
on the battery.
System settings: information about the application and the device.
After the correct configuration in the application, the smartwatch is ready to
work.
SMARTWATCH MAIN MENU
In the menu and other functions we move by moving the finger left / right:
WeChat: menu of the voice memos. Here we can listen the last received
message. To record new voice memo press and hold the microphone icon in
the lower part of the screen, say the note (maximum 1O seconds) and release
the finger, then the note is automatically sent to the administrator's
applications.
Contacts (phonebook): numbers entered via the application are displayed
here. Moving the left / right finger selects a contact, clicking on the icon of the
selected contact's portrait we make a call to it. We stop the call by pressing
button (2). Incoming calls are picked up by clicking on the green ico, rejecting
the call by clicking on the red icon or by pressing the turn on button (2).
Camera: taking pictures with the built-in camera of the watch. The picture will
We go to the menu of the smartwatch by sliding the finger to the left on the
main screen.

be saved in the device's gallery. Immediately after the shooting, you can send
it to the administrator application of the watch by clicking on the green arrow in
the lower left corner or click on the trash can icon in the bottom right corner.
Settings:
Photos: displays the pictures taken with the camera of the watch. We scroll
the photos by sliding the finger left / right. Holding the finger more than 2 sec on
the picture, we can delete it.
Volume: volume regulation, when we mute the device we will receive vibration
notification.
Language: change the language of the watch menu. We choose language by
moving the finger up / down.
SOS call: Selecting SOS numbers added via applications. Alarm and GPS
position of the watch will be sent to the administrator's applications and phone
number.
Alarm (Alarm): displays information about alarm clocks set by application.
Dialer: the function of dialling any number.

TROUBLESHOOTING
lFrom any mobile phone we send sms with content below to the number which is
on the watch (the SIM card must be in the watch, the watch must be on). The size
of leters is important.The content of the text message:
2. No GSM range, no internet connection (GSM range icon, Internet
connection inactive):
The number from which we try to call is not stored in the watch phone book and
the "No strange calls" option is enabled. It should be check if our number is not
lAPN#01#Operator _name#iapn_name#user_name#passoword#
3. Imprecise GPS localization
lCheck that the SIM card meets all the requirements described at the
beginning
lCheck that the SIM card is correctly inserted into the slot (as per pointers at
the beginning of the instructions)
1. The device does not turn on:
IMPORTANT: In case of problems with APN codes, please contact our service
department: serwis@gare.pl
Charge the device for an hour to the network charger
l instructions, in the section REQUIREMENTS FOR NANO SIM CARD
lCheck the smartwatch is operate with another SIM card.
To be the location of the watch with the largest dock, the smartwatch must be
in the open area to have a GPS signal. When the watch does not have a GPS
signal, for example, it is located in the building and the location is determined
on the basis of the nearest GSM network transmitter (LBS). Restart the watch
(hold the button 2) for approx. 8 seconds).
4. No phone calls to your watch, caller's signature or a subscriber not
available.
lUnplug and restart the device.

reserved. The watch has a GSM range.
Check if the time of charging was not too short. It should be around 2 hours
5. No phone calls from the watch.
The reason may be a GSM signal or missing numbers in the watch phone
book. The numbers are saved using the application: Settings> Phonebook.
6. Short working time and battery:
TECHNICAL SPECIFICATIONS
lGSM modem: GSM 850/900/1800/1900 MHz
lDedicated application: Global Tracker
lBattery: 380 mAh
lDimensions of the dial: 41 * 41 * 14.5 mm
lDisplay: 1.22 inches,
lwaterproof case: Ip54
lWeight: 50 grams
lCompatible with: Android 4.3, iOS7 (and higher)
lWarranty: 24 months

Przed użyciem należy dokładnie zapoznać się z treścią instrukcji obsługi oraz
zachować ją w celu późniejszego wykorzystania. Producent nie ponosi
odpowiedzialności za jakiekolwiek uszkodzenia / urazy spowodowane
niewłaściwym użytkowaniem. W zależności od danej partii SmartWatcha,
niektóre funkcje mogą się różnić z funkcjami opisanymi w instrukcji obsługi.
lUżywanie tego urządzenia w pobliżu urządzeń medycznych może
zakłócić ich pracę. Należy zwrócić szczególną uwagę podczas
korzystania ze smartwatcha w pobliżu aparatów medycznych, takich jak
rozruszniki serca, aparaty słuchowe i inne elektroniczne urządzenia
medyczne.
lZabrania się wrzucać urządzenia do ognia. Istnieje ryzyko eksplozji
baterii i w konsekwencji zagrożenia życia i zdrowia.
lUrządzenie należy chronić przed źródłami ciepła i bezpośrednim
nasłonecznieniem.
lNie należy zanurzać urządzenia w wodzie.
lNie należy nurkować w urządzeniu.
lZabrania się używać urządzenia, jeśli jest uszkodzone.
lW wypadku uszkodzenia, należy oddać urządzenie do autoryzowanego
punktu serwisowego w celu sprawdzenia/ naprawy. Podejmowanie prób
własnoręcznej naprawy, może prowadzić do uszkodzenia urządzenia oraz
skutkuje unieważnieniem gwarancji.
lUrządzenie należy czyścić jedynie za pomocą miękkiej, lekko wilgotnej
ściereczki. Nie należy używać środków chemicznych lub detergentów do
czyszczenia tego urządzenia.
KWESTIE BEZPIECZEŃSTWA
Polski
Table of contents
Languages:
Other Garett Watch manuals

Garett
Garett Kids Life Max 4G RT User manual

Garett
Garett GT20S User manual

Garett
Garett Women LISA User manual

Garett
Garett Action User manual

Garett
Garett Kids 5 User manual

Garett
Garett FIT 14 User manual

Garett
Garett Lady Elegance RT User manual

Garett
Garett SARA User manual

Garett
Garett Men Elegance RT User manual
Garett
Garett Garett Women DIANA User manual