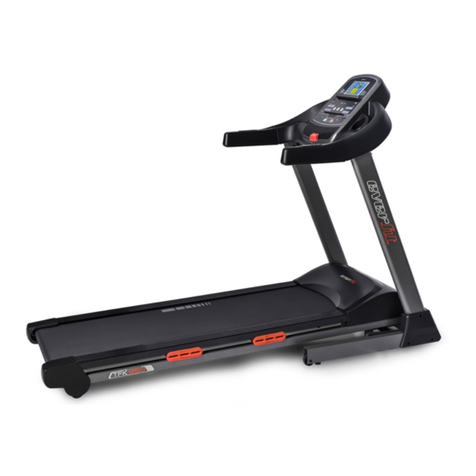
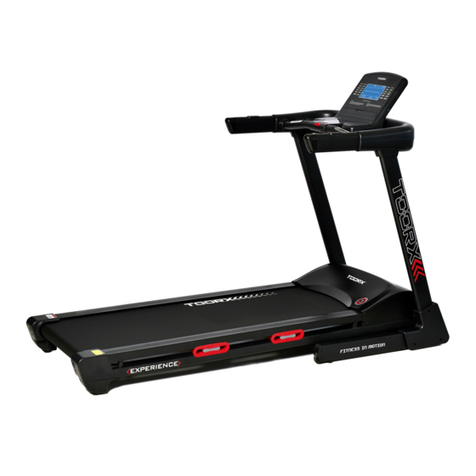
Garlando TOORX MIRAGE C80 User manual

Ed : Rev : Cod:
INSTRUCTION
07/20 GRLDTOORXTRXMC800

2/ 9
1 operation panel
1-1
1-2
1.1. 【buutton】:
<QUICK-I3>incline button 3%
<QUICK-I6> incline button 6%
<QUICK-I9> incline button 9%
<INCLINE->incline -
<INCLINE+>incline +
<PROG>program selection
<START/STOP>start/stop
<MODE>mode selection
<SPEED->speed -

3/ 9
<SPEED+>speed +
<QUICK-S3>speed button 3km/h
<QUICK-S6> speed button 6km/h
<QUICK-S9> speed button 9km/h
1.2. 【display】:
[PROG] mode P00~P24、H1~H3 、U1~U4
[TIME] time
[PACE] time/km
[SPEED] speed
[CAL] calorie
[PULSE] heart rate pulse
[DIST] distance
[INC] incline
[STEP] step counting
[ALT] altitude
2 function
2.1 manual program(P00):
countdown as set target time, calorie, distance
Run directly
2.2 preset program(P01~P24):
24 programs available to select and set running time
24 programs as follow:
•6 changes speed only

4/ 9
•12 changes speed and incline together
•6 changes incline only
2.3 USER
User mode U1~U4,input time, speed and incline manually
2.4 HRC
HRC with 4programs(HRC1,HRC2,HRC3,HRC4),set time, age, weight to display the max heart rate of current
program Max heart rate calculated as 220-age, user can adjust by incline/speed +/- button.
HRC1: 60% max
HRC2: 70% max
HRC3: 80% max
HRC4:90% max
When set in HRC program, treadmill will detect the heart rate; if not detected, speed decrease to 1.0km/h and incline to
0; if detected again, it will +/- speed and incline according to current heart rate.
3 Operation
Before each operation, make sure the safety key is well plugged in, otherwise, console display“----”。
3.1 【turn on】
Before turn on, plug in safety key
Turn on, console display version no.
Then standby, default program P00
Press <SPEED-> and <SPEED+> to enter setting km/mi(1=km 0=mi)
Press <SPEED-> or <INCLINE-> to switch,press <START/STOP> to confirm and
quit

5/ 9
3.2 【Start running】
In standby or after program set, press<START/STOP>, countdown with 3 -2- 1 (3s) then start running
3.3 【Stop running】
During running, press <START/STOP>, motor and incline motor stop
3.4 【Set manual program】
In standby or stop situation, press <MODE>, switch to set target time, distance, calorie.
The target currently setting will blink as notification, press <SPEED+> or <SPEED->、< INCLINE +>或< INCLINE -> to adjust the target value, long press for
continuous adjustment
Target distance: default value 1.00; range 1-9; unit 1
Target time: default value 30:00; range 5:00-99:00; unit 1:00
Target calorie: default value 50; range 10-990; unit 10
During setting, press <START/STOP> anytime to start running
3.5 【Set preset program】
In standby or stop, press <PROG>,display window [PULSE] blinks; press <SPEED+> or <SPEED->、< INCLINE +> or < INCLINE -> to set the preset programs
Range : P01~U4
Switch order as below
P-01—……—>P-24——>H1—……—>H4——>U1—……—>U4
If shoes current preset program, default time 30:00。
During setting, press <START/STOP> anytime to start running
3.6 【Set speed】
In running, press <SPEED+> and <SPEED-> to increase/decrease speeed, unit 0.1.

6/ 9
Quick button <QUICK-S3>,<QUICK-S6>,<QUICK-S9> to set speed
Use right smart ring to adjust speed quickly
Adjust range:1km/h~20km/h
3.7 【Set incline】
In running, press <INCLINE+> and <INCLINE-> to increase/decrease incline, unit 1.
Quick button <QUICK-I3>,<QUICK-I6>,<QUICK-I9> to set incline
Use left smart ring to adjust incline quickly
Adjust range: 0~12
3.8 【Set HRC】
In standby, press <PROG> to select program, press <SPEED+/-> to enter “HRC” value setting.
(1)press <MODE> to set time, default value 30mins, range 5~99 mins
(2)press <MODE> to set age, default value 40, range 10-99
(3)press <MODE> to set weight, default value 68KG, range 40-150
(4)press <MODE> to set target heart rate, default value refers 2.4 max heart rate
Press <START/STOP>, treadmill starts running, default speed 1 km/h, time window displays 30:00 countdowm, when time is 0:00, treadmill stops. During running,
keep hands holding the handle pulse steel in handle bar, speed and incline will adjust according to current heart rate compared with target heart rate; manual
agjust of speed and incline is also available
3.9 【Set USER】
In standby, press <PROG> to select program, press <SPEED+/-> to enter ”U1”,”U2”, ”U3”,“U4”
(1)press <MODE> to set time, default value 30mins, range 5~99 mins
(2)press <MODE> to set speed, default value 1.0km/h, set 30 speed groups and then set 30 groups of incline
Press <START/STOP>, treadmill starts running, speed and incline changes according to user’s setting; countdown to 0:00, treadmill stops.

Practical advice and tips
Anyone who is about to use the mat for the first time will first have to familiarize himself
with the control console and check the functioning of the mat before embarking on a training
program.
a. Turn on the tool using the mains switch, the red switch light lights up, insert the
safety key in the appropriate housing, the console for an instant performs the test by
turning on all the displays, then emits a warning signal.
b. Climb onto the running surface on one side and stand in a central position keeping
your feet on the side platforms.
c. Press the START button to immediately start training at minimum speed, leaning on
the handrails, start walking with a normal cadence and easy pace, keep a low speed
for some time so as to familiarize yourself with the sensation of the rotating belt.
d. When you feel comfortable, increase the speed of the belt by turning the right
SMART RING forward or by pressing the SPEED Up button, then release your grip
on the handrails and continue the exercise by synchronizing the movement of the
arms with that of the legs
e. is. During training it is important to maintain adequate concentration to avoid
accidents.
f. It is advisable to maintain a correct running posture with a forward look and not to
change your position especially at higher speeds.
g. During the exercise, often evaluate the heartbeat, placing both palms of the hands on
the pulse sensors on the handrail or wearing the chest strap, the data will be shown on
the 'PULSE' display.
TRX APP GATE
Smart Bluetooth adapter for treadmill APP READY 3.0 provides a wireless connection
between the treadmill and remote peripherals such as tablets or smartphones, equipped with
Bluetooth connection.
With a simple gesture, it plugs into the dedicated USB port on the treadmill console.
It allows you to immediately take advantage of the most motivating and fun Apps specific to
training with a treadmill. Includes iConsole + Training App with maps, routes, fitness plan
and training data.
Compatible with Zwift App to combine the fun of a video game with the intensity of a
motivating and effective workout.
Compatible with Kinomap Fitness App (subscription not included) with its 120,000 km of
geolocated videos all over the world.
The new TRX APP GATE 3.0 has a double function, in addition to being a BT module to
connect the treadmill with compatible Apps, it also acts as a receiver for Bluetooth heart rate
bands
The Bluetooth adapter must NOT be connected to USB sockets on a computer, laptop,
tablet or smartphone, otherwise it can be damaged.
The special USB socket, located on the side of the console, is specific to power TRX APP
GATE 3.0 which requires a voltage of 3.3 Vdc.
The USB socket cannot be used for powering or charging devices other than TRX APP
GATE 3.0.
- After inserting TRX APP GATE 3.0 into the appropriate socket on the left side of the
console, the wireless connection indicator light turns on.
- After inserting TRX APP GATE 3.0 into the appropriate USB socket, the user can choose
whether to view the training data on the console or via the application installed on the remote

device. When the remote connection via tablet or smartphone is selected, the console sends
back the appropriate pairing beep.
- When the Bluetooth connection between the treadmill and the tablet / smartphone is active,
you can take advantage of the most motivating and fun Apps, specific for treadmill training.
Control console
PULSE - Heart rate
- By placing both palms of your hands on the heart rate sensors or by wearing the wireless
chest strap transmitter, the display shows the heart rate (*).
SPEED - (Belt speed)
To scroll the list of programs or to set the training parameters, press the SPEED Up / Down
buttons or rotate the right SMART RING forward or backward
To increase or decrease the speed of the belt during training, press the SPEED Up / Down
button (each click corresponds to an increase or decrease of 0.1 km / h), keeping the button
pressed the values increase or decrease quickly or turn the SMART dial Right RING forward
or backward (each click corresponds to an increase or decrease of 0.5 km / h)
INCLINE - (Running plane inclination)
To scroll the list of programs or to set the training parameters, press the INCLINE Up / Down
buttons or turn the SMART RING dial on the left of the console
To increase or decrease the inclination of the surface during training, press the INCLINE Up
/ Down buttons (by keeping the button pressed, the values increase or decrease quickly) or
ruo Turn the SMART RING on the left of the console forward or backward
Countdown mode
• Turn on the product by putting the mains switch to ON and connecting the safety key.
• In the P00 program (manual), press the MODE key to define the type of target passing in
succession the "objectives" (Duration, Distance, Calories, Step. The display corresponding to
the selected function flashes and by pressing the SPEED Up / Down or INCLINE Up / Down
keys we can set the target value to be achieved
Duration (range: 5 ÷ 99 minutes), distance (range: 1 ÷ 9.99 km), calories burned (range: 10 ÷
999 Cal) or number of Steps made (range 0 ÷ 9999)
• Once the desired values have been entered, keeping the feet on the side platforms, press the
START / STOP button, after 3 seconds the belt starts at minimum speed.
• Use the SMART RING (right speed - left inclination) or the SPEED and INCLINE buttons
to adjust the speed of the belt and the inclination of the running plane in real time.
• The display relating to the "target objective" selected shows the countdown starting from
the set value up to zero.
• The exercise ends at the end of the "target goal" countdown set. By pressing the START /
STOP button or removing the safety key, the exercise can be stopped at any time.
PRESET PROGRAMS
The console has 24 predefined programs designed specifically to create a complete cardio
fitness workout, the characteristics of the programs are defined below:
- programs from 01 to 06 with variation only of the belt speed;
- programs from 07 to 18 with variation of both the speed of the belt and the inclination;

- programs from 19 to 24 with variation only of the inclination of the top.
• Turn on the product by putting the mains switch to ON and connecting the safety key.
•Get on the running surface, keeping your feet on the side platforms, then press the PROG
button and use the SMART RINGs or the SPEED or INCLINE buttons to select one of the
predefined training programs 01 ÷ 24; the program number appears on the “Pulse” display.
• You can start the selected program immediately by pressing the START / STOP button, in
which case the program will have a duration of 30 minutes.
• Or you can set the duration of the exercise by pressing the MODE button using the SMART
RINGs. Once the desired time has been reached, press the MODE button to confirm and then
the START / STOP button to start the exercise
• After a three second countdown the tape starts according to the selected program profile
• During the exercise, the user can change the speed and inclination manually, using the
SPEED and INCLINE buttons, the change will only relate to the interval of the program in
progress.
• By pressing the START / STOP button or removing the safety key, the exercise can be
stopped at any time.
USER PROGRAMS
• Turn on the product by putting the mains switch to ON and check that the safety key is
inserted.
• Get on the running surface, keeping your feet on the side platforms, then press the PROG
button and act on one of the SMART RINGs to scroll through the programs until you reach
the customizable training programs U01 ÷ U04; the program number appears on the “Pulse”
display.
• Each User program consists of 30 steps or segments, for each of which you can set the
speed of the belt and the inclination of the table
• Press MODE to confirm the selected U program
• will appear on the display
•30 which indicates the step we are setting, 0 which indicates the inclination, 1.0 which
indicates the speed
• Use the SMART RING on the left to set the inclination and the one on the right to set the
speed, then press MODE to confirm
• You will then access the next step (29), set the values as in the previous point and press
MODE to confirm
• Once all the parameters of the 30 steps have been set, TIME will flash in the display, use
one of the SMART RINGs to set the duration of the exercise (5 ÷ 99 minutes). The duration
of each segment is one-thirtieth of the total time set.
• Press the MODE button to confirm the duration, the program is now confirmed.
• Once a User program has been set, it remains stored in the console even when the tool is

turned off. After setting the four User programs, the possible insertion of a new User program
can only be done by changing the settings of one of the "U" programs already set.
• Once the speed / inclination of the 30 segments and the duration have been set, you can start
the exercise by pressing the button START / STOP; the exercise can be started only when all
the segments have been set.
• The program runs according to the set profile. At any time it is possible to increase or
decrease speed and inclination by acting on the SMART RING or the SPEED and INCLINE
buttons. The speed and / or inclination modification takes place within the segment within
which the profile is located at that given moment, when the profile then passes to the next
step / segment the speed / inclination condition envisaged by the stored profile is resumed.
• The duration of the program corresponds to the set time (until the TIME display reaches
zero) or until the exercise is stopped (by pressing the START / STOP button or by removing
the safety key).
HRC PROGRAMS
The HRC program is a training system in which the computer automatically adjusts the
inclination of the running plane and the speed according to the heart rate detected.
The HRC program provides for the mandatory use of the wireless heart rate monitor since the
sensors on the handrails do not guarantee the continuous detection of heart rate and in
addition they force you to keep the grip on the handrails reducing freedom of movement and
preventing correct balance during the race.
The user sets the cardiac threshold value by referring to the indications in the reference table
in the "The training program" section, always and only after consulting your doctor
• Turn on the product by putting the mains switch to ON and check that the safety key is
inserted.
• Get on the running surface, keeping your feet on the side platforms, then press the PROG
button and act on the Smart Rings, until you select the Cardio program, indicated on the
"Pulse" display with the abbreviation HRC.
• Press the MODE button to confirm one of the four available HRC1-HRC4 programs
The four HRC profiles have distinct characteristics and allow different training intensities,
referred to the maximum cardiac threshold value, of 60%, 70%, 80%, 90%.
HRC1 = cardiac regimen for weight loss 60%
HRC2 = 70% cardiac aerobic training regimen
HRC3 = cardiac anaerobic training regimen 80%
HRC4 = cardiac anaerobic training regimen 90%
The cardiac threshold values SUGGESTED by the four programs must be customized by
acting on the SMART RING (but without exceeding the maximum value of the HR (max) =
220-age) based on your state of health and athletic preparation.
It is mandatory to consult your doctor before using these programs!
After pressing the MODE button
• Set the user AGE (default age 40 years) using the Smart Rings to enter the data and press
the MODE button to confirm
•
• Now set the user WEIGHT (default weight 68 kg) using the Smart Rings to enter the data
and press the MODE button to confirm

• A computer suggested heart rate (calculated using a standard algorithm) based on your age,
weight and program level will appear on the display.
• This data must be varied according to your health conditions and the level of athletic
training (always consult in advance with your doctor or athletic trainer) by acting on the
SMART RING. Once the value has been set, press the MODE key to confirm
• Now set the program DURATION (default duration 30 minutes but settable from 05 to 99
minutes) using the SMART RING, press the MODE key to confirm
• After completing the introduction of all the parameters listed above, the chest strap must be
worn to start the HRC program.
• Check that the console is receiving the signal from the belt regularly and press the START /
STOP button. After a three-second countdown, the training will begin according to the
parameters introduced.
• The speed of the belt and the inclination are controlled by the computer which will increase
or decrease it according to whether the detected heartbeat moves away or approaches the set
threshold value.
• The exercise is carried on until the countdown on the TIME display reaches zero.
IMPORTANT NOTES
• When running the HRC program, it is necessary to use the WIRELESS chest strap
transmitter supplied, as this guarantees a more precise detection of the heartbeat than
the detection sensors placed on the handrails which, among other things, prevent
correct balancing while running.
- If no heart rate is detected for more than 10 seconds, the program will be stopped.


N L

1
v
�
o�.
·✓·8
.

FOLD
UNFOLD
ADJUST WHEN FLOOR NOT FLAT TRANSPORTATION

GARLANDO SPA
Via Regione Piemonte, 32 - Zona Industriale D1
15068 - Pozzolo Formigaro (AL) - Italy
www.toorx.it - info@toorx.it
Table of contents
Other Garlando Treadmill manuals
