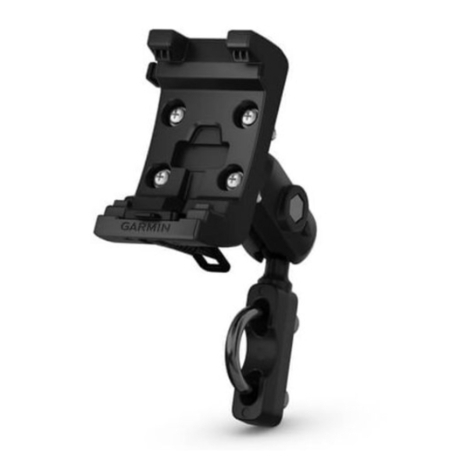
Garmin 1501288103 Installation instructions

Motorcycle/ATV Mount Instructions................................................................................................... 2
Instructions pour le support moto/véhicule tout-terrain...................................................................... 4
Istruzioni del supporto per moto/ATV.................................................................................................6
Motorrad-/Geländefahrzeughalterung – Anweisungen...................................................................... 8
Instrucciones de montaje en motocicletas/vehículos todoterreno................................................... 10
Instruções do Suporte ATV/Motocicleta...........................................................................................12
Instrukcje montażu na motocyklu i quadzie..................................................................................... 14
Pokyny k držáku na motocykl / čtyřkolku (ATV)............................................................................... 16
Navodila za nosilec za motocikle ali štirikolesnike........................................................................... 18
Upute za montažu na motocikl/ATV.................................................................................................20
Инструкции по установке на мотоцикл/квадроцикл.....................................................................22
Garmin® and the Garmin logo are trademarks of Garmin Ltd. or its subsidiaries, registered in the USA and other countries. These trademarks may not be used without the express permission of Garmin.
El número de registro COFETEL/IFETEL puede ser revisado en el manual a través de la siguiente página de internet.
GUID-BA7D3F67-718D-4BE5-A684-4D0CF7123F5E v2May 2020

Motorcycle/ATV Mount Instructions
WARNING
See the Important Safety and Product Information guide in the
GPS device product box for product warnings and other
important information.
Garmin® strongly recommends having an experienced installer
with the proper knowledge of electrical systems install the
device. Incorrectly wiring the power cable can result in damage
to the vehicle or the battery and can cause bodily injury.
Connecting Power to the Mount
1Select a mounting location based on available power
sources, safe cable routing, and an unobstructed view.
You should not run cables near high-heat sources.
2Connect the cables.
Item Wire Color Wire Function
Red (+) Power
Black (-) Ground
Yellow Serial data input
Blue Serial data output
Green Serial ground wire
Audio jack
3Insulate and secure unconnected wires.
Installing the Device in the Mount
NOTICE
Before you place the device in the mount, ensure the metal
contacts on the device and the mount are dry. Moisture on the
contacts causes equipment damage. Use the weather cap to
keep the mount cradle dry.
1Place the weather cap in the storage area on the mount.
2Align the contacts on the device with the contacts in the
mount, and place the side of the device into the cradle ,
contacts first.
3Tilt the device to the opposite side until it snaps into place to
prevent the device from falling out.
4Using the security screw tool , tighten the security screw on
the side of the mount .
NOTE: The security screw is used to deter device theft and
helps prevent you from accidentally pressing the release
latch.
Removing the Device from the Mount
When you do not plan to use the device for an extended period
of time, you should remove the device from the mount or power
it from an ignition-controlled relay.
1Loosen the security screw.
2Press the button on the mount to release the device.
3Lift the device out of the mount.
4Place the weather cap securely over the contacts on the
cradle.
Mounting Your Device in a Motorcycle
NOTE: The motrocycle mount is not included with all rugged
mount accessories. See your Garmin dealer, or go to
buy.garmin.com to purchase mounting accessories.
2 Installation Instructions

Installing the Handlebar Base
The device includes parts for two handlebar installation
solutions. Custom mounts may require additional hardware.
Installing the U-bolt and Handlebar Base
1Place the U-bolt around the handlebar , and thread the
ends through the handlebar base .
2Tighten the nuts to secure the base.
NOTE: The recommended torque is 50 lbf-in (5.65 N-m). Do
not exceed torque of 80 lbf-in (9.04 N-m).
Installing the Handlebar Base to the Clutch-Clamp or Brake-
Clamp Brackets
1Remove the two factory bolts on your clutch-clamp or brake-
clamp bracket .
NOTE: Both 1/4 in. standard and M6 bolts are included.
Match the size of the factory bolts on your clutch-clamp or
brake-clamp bracket.
2Thread the new bolts through the handlebar base, spacers
, and clutch-clamp or brake-clamp bracket.
3Tighten the bolts to secure the base.
Attaching the Base Plate to the Motorcycle Mount
NOTICE
Direct, sustained contact with the base plate, or any part of the
motorcycle, may damage the mount over time. To prevent this
kind of damage, you must place the mounting spacers between
the mount and base plate, and make sure that no part of the
device or mount touches the motorcycle.
1Thread the M4 x 20 mm panhead screws through the
washers , cradle, bushings, spacers , and base plate .
2Tighten the nuts to secure the base plate.
Attaching the Base Plate to the Handlebar Base
1Align the ball of the handlebar base and the ball of the
base plate with each end of the double-socket arm .
2Insert the ball of the handlebar base and the ball of the
base plate into the double-socket arm .
3Tighten the knob slightly.
4Adjust for optimal viewing and operation.
5Tighten the knob to secure the mount.
Specifications
Fuse 3 A
Input voltage 10 to 30 V
Input current 1.5 A Max.
Input current without device
installed
0.5 mA Max.
Operating temperature range From -20º to 60ºC (from -4º to 140ºF)
Limited Warranty
The Garmin standard limited warranty applies to this accessory.
For more information, go to www.garmin.com/support/warranty.
Installation Instructions 3

© 2020 Garmin Ltd. or its subsidiaries support.garmin.com
Other Garmin Motorcycle Accessories manuals


