GDP GDP12460 User manual

USER MANUAL
2010-2019 ford ecoboost
mycalibrator

Disclaimer
By installing this product onto your vehicle, you assume all risk and liability associated
with its use.
GDP Tuning, LLC. is not responsible for misuse of its products. By installing this prod-
uct, you release GDP Tuning, LLC. of any and all liability associated with its use.
The purchaser and end user releases, indemnities, discharges and holds harmless
GDP Tuning, LLC. from any and all claims, damages, causes of action, injuries, or
expenses resulting from or relating to the use or installation of this product that is in
violation of the terms and conditions on this page, the product disclaimer, and/or the
product installation instructions. GDP Tuning, LLC. will not be liable for any direct, indi-
rect, consequential, exemplary, punitive, statutory, or incidental damages or fines
caused by the use or installation of this product.
1
Caution
Never work on a hot vehicle. Serious injury in the form of burns can result if the vehicle
has been in use. Allow vehicle to cool prior to installation. Always wear eye protection
when working on or under any vehicle.

2
GDP12460
A. Loomed electrical wires
B. Dial stickers
C. Switch control board
2010-2019 ford ecoboost
mycalibrator
A. C.
B.

3
Step 1
The very first thing you want to do is go to our website www.gdpproducts.com and down-
load the MyCalibrator software to your computer. You will find it under: Program-
mers<GDP MC<Download Software. Once this has been done, plug the device into your
computer using the supplied USB Cable. After powering up, click the “Update” button to
the top right to check for the latest version of the software. Newer versions will contain
support for newer vehicles that may not be represented on previous software versions.
It will either let you know you are already on the latest version, or you will be prompted to
follow a few quick steps to update the software. (insert image #0154)
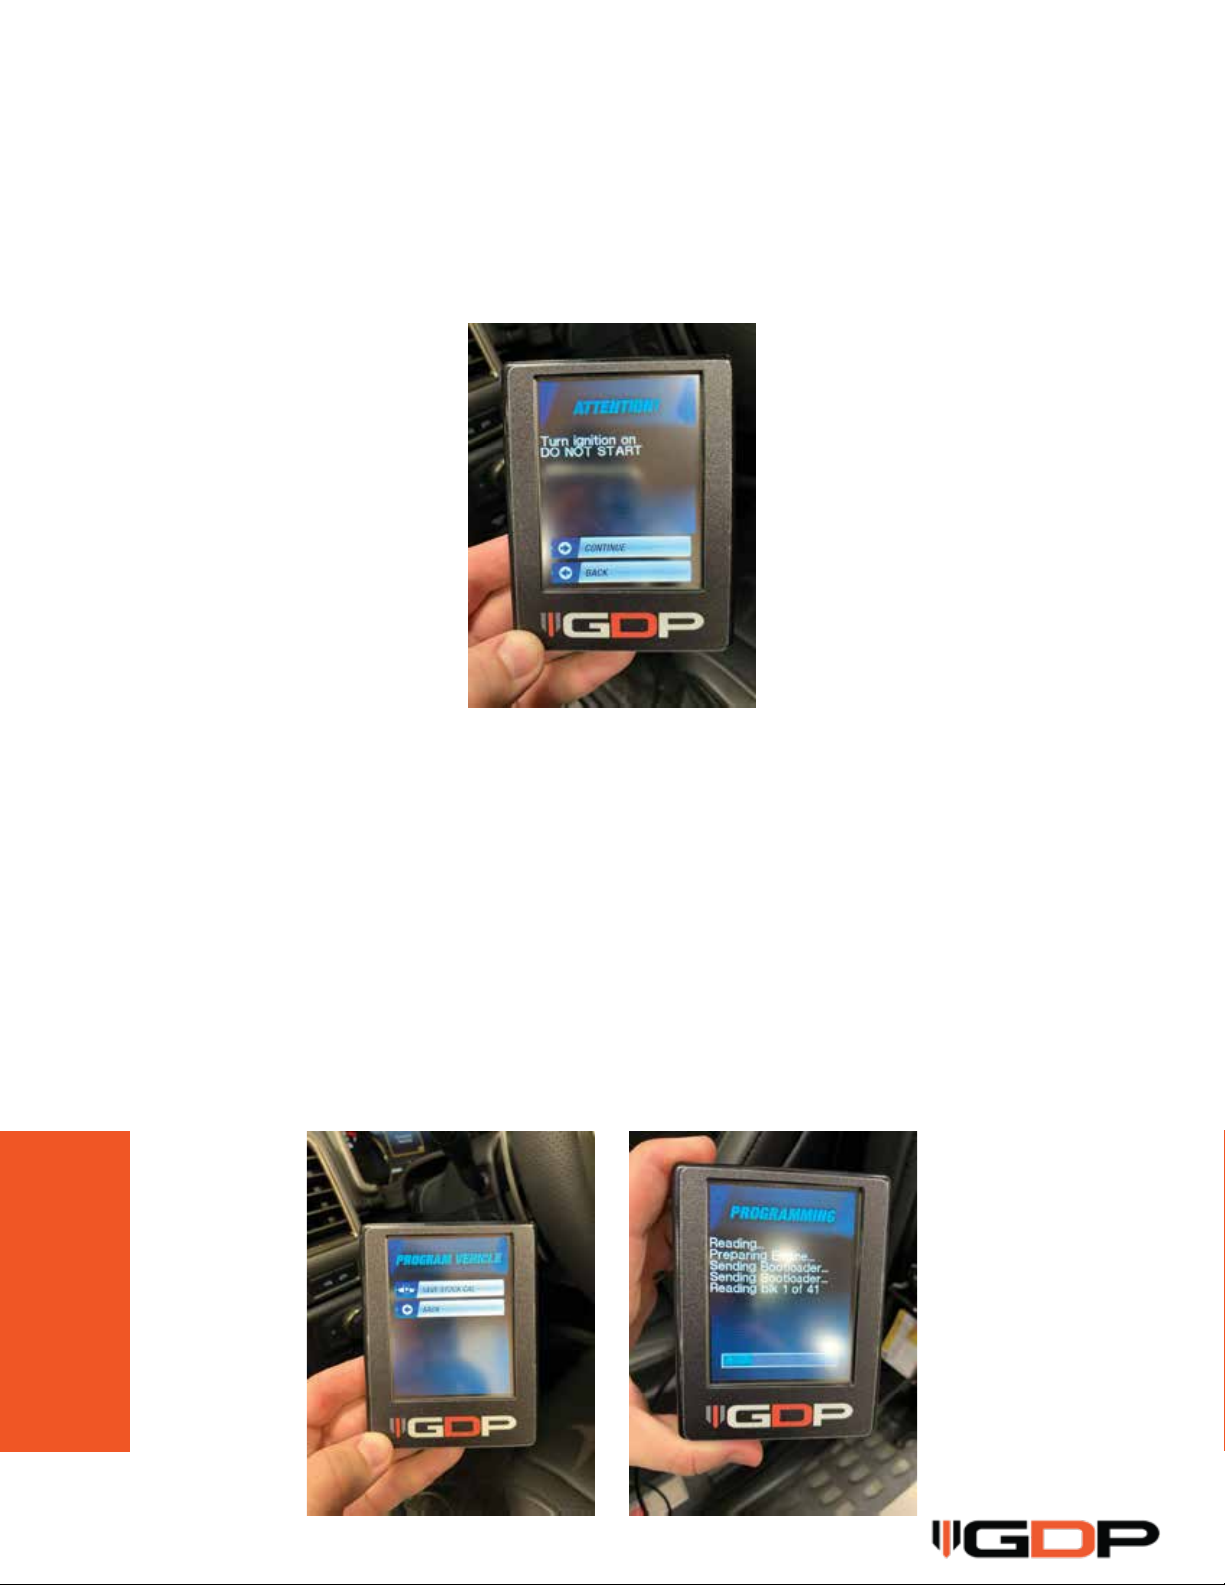
Step 2
Now bring the device out to your vehicle and plug the OBDII cable into the back of the
device, and then plug that same cable into your vehicle’s OBDII port. Turn the ignition on,
to the run position, do NOT start the vehicle.
Notice:
Make sure that your battery has a good charge and won't fall below 12 volts. If you are
unsure, then to be safe you should hook up to a battery tender for the duration of ALL
file reads and installs. In addition, you should make sure to disconnect/unplug any
electronic devices from any power sources, ports, etc, and turn radio, auto lights, a/c,
etc. off as well. Lastly, make sure to not open the vehicle doors during install or
reads, as that can draw power as well.

4
Step 3
Once the device has powered up, the End User License Agreement will pop up. Hit “I
Agree” at the bottom. (insert image #0074)
Step 4
The next screen will have 6 options to choose from, and you want to select “Program-
ming” which is the very first option. (insert image #0075)

5
Signal = Blue connector, pin 69
Ground = Blue connector, pin 49
GDP Wires
Signal = Purple
Ground = Black
Step 5
It will now say “Turn ignition on, Do Not Start”……your vehicle is already in the run posi-
tion, so just hit “Continue” at the bottom. (insert image #0076)
Step 6
On this next screen, hit the “Save Stock Cal” button. (insert image #77) The screen will
switch again and start reading your Factory Program and saving it to the device. This
process will take up to 20 minutes as is saves your Engine file first (ECM) and then
Transmission file second (TCM). (insert image #0080 & #0081) If by chance you have a
newer vehicle model that hasn’t had the strategy loaded to the latest software version,
you will get an error after Step#5 that will tell you your vehicle is not support. If this
happens, please email us at support@gdptuning.com with the vehicles’ VIN#, modifica-
tions, and the device’s Serial#, which can be found under “Module Info” on the startup
screen. (insert image #0079) From there we will check to see if your vehicle is support-
ed, and if it is, we will send an update to your device, which will be activated by unplug-
ging it from your computer & plugging it back in, then hitting Update.

6
Signal = Blue connector, pin 69
Ground = Blue connector, pin 49
GDP Wires
Signal = Purple
Ground = Black
Step 7
Once the stock programming has been saved to the device, take and plug it back into
your computer. With the software open, you will begin exporting the stock programming
it had just saved. (insert image #0082) Once that has completed, disconnect the device
from your computer, and then reconnect. Your tune options should now start to populate
on the software screen. (insert image #0083) NOTE: The system has 2 functions, one of
which automatically uploads tuning options once connected and read, but the other is
where tune profiles are shared manually after contacting the dealer. If by chance yours
is manual, it will say to “Contact your Dealer”. If you get that message, please email us at
support@gdptuning.com and we will make sure to get your tune profiles sent to your
device. Once we have sent them to you, we will have you disconnect the device from your
computer, then reconnect, and you will notice the tune profiles being transferred on the
software screen. (insert image #0085)
Step 8
You should now see your tune profiles. Disconnect from the computer and bring out to
your vehicle, plug in to the OBDII port again, and put vehicle in the “Run Position” do NOT
start.

7
Signal = Blue connector, pin 69
Ground = Blue connector, pin 49
GDP Wires
Signal = Purple
Ground = Black
Step 9
Once again hit “Programming” and you now see that it says “Performance Cals” above
“Return to Stock”. Select “Performance Cals”. (insert image #0086)
Step 10
You will see a number of tuning options. Depending on the octane of fuel you generally
run is what should determine which files you are ready to use. Choose either a Towing or
Performance tune that relates to your octane level. (insert image # 0087) The print is
small, but rest assured that in the next screen it will display which level you had pressed.
If It displays the correct file you want to load then select “Continue”, and if it was wrong
then hit “Back” and try again. (insert image #0088)

8
Signal = Blue connector, pin 69
Ground = Blue connector, pin 49
GDP Wires
Signal = Purple
Ground = Black
Step 11
After you’ve hit Continue on the profile you wish to load, you will see the device start to go
through a series of functions. This will take up to 20 minutes to complete, especially if
you are loading a Transmission file as well. (insert image #0091)
Step 12
Transmission files are not required, but some like the adjustments we have made with
the shift points and common factory programming complaints. If we have provided you
with TCM files, you will simply follow the same steps as you did with the ECM files. (insert
image #0092 & #0093) NOTE: You are able to flash different ECM tunes at any point and
your TCM file will stay the same. To go back to factory transmission tuning, you will need
to flash the truck back to stock using the stock programs that have been saved to the
device. Once that is done, you will just need to flash an ECM tune back to the vehicle.

9
Signal = Blue connector, pin 69
Ground = Blue connector, pin 49
GDP Wires
Signal = Purple
Ground = Black
Step 13
You are now ready to go. If you have flashed a TCM file you will notice some firm and
different shifts for the first 1-2 weeks of consistent driving, until the transmission has
relearned. If no TCM file was used, then you will simply be ready to enjoy the extra power
and drive-ability.
Popular Diagnostic Equipment manuals by other brands

Siemens
Siemens FXS2061-O user guide

KTM
KTM AVL HV SAFETY 2000 owner's manual

Hofmann Megaplan
Hofmann Megaplan megaline SSENCE Series installation manual

Ripley
Ripley ODM DLS 350 Device Manual and Quick-Start Guide

Autel
Autel MaxiSys ADAS Assembly instruction

Ridgid Kollmann
Ridgid Kollmann SeeSnake KD-125M Operator's manual