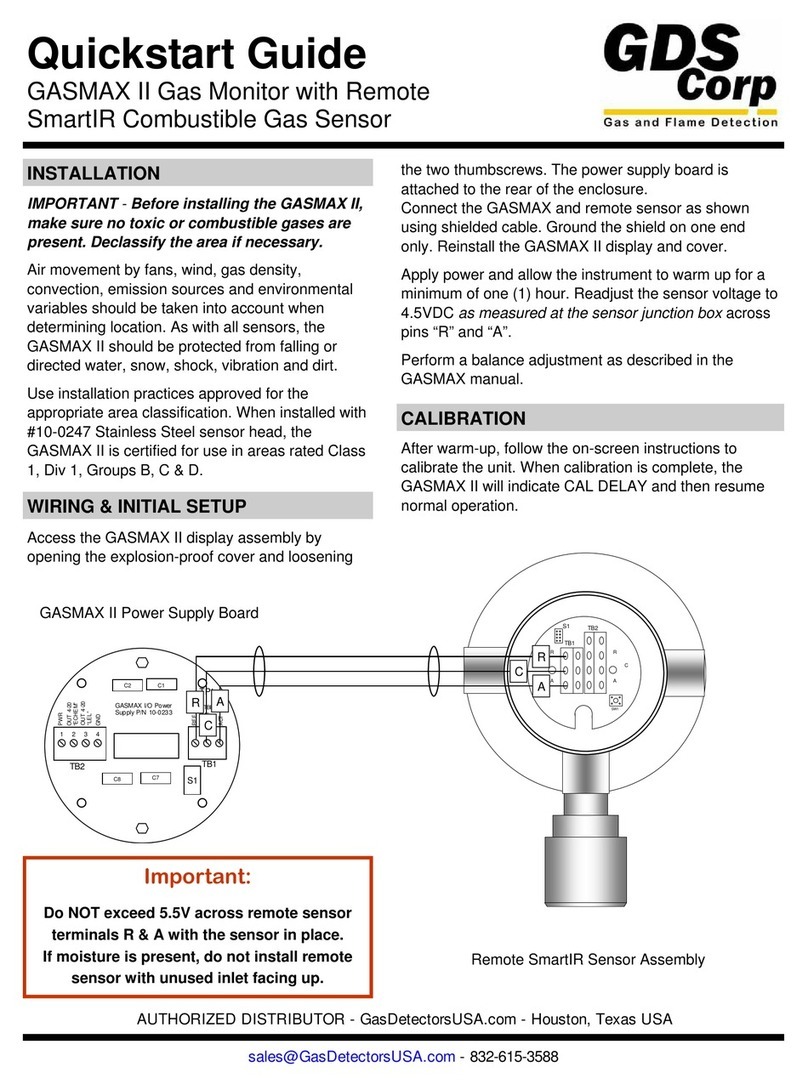
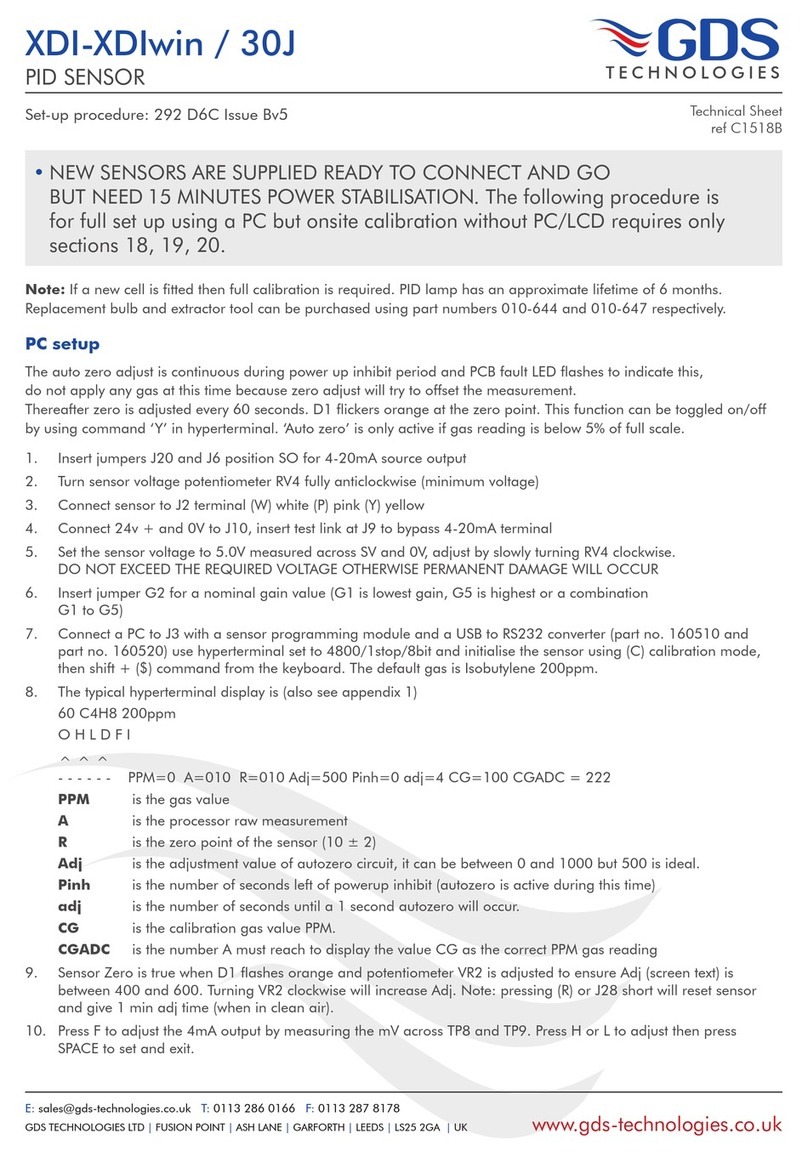
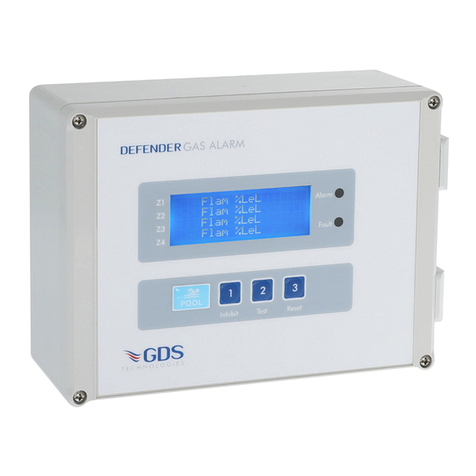
GDS 404 Series User manual

TECHNOLOGIES
GDS TECHNOLOGIES LTD |FUSION POINT |ASH LANE |GARFORTH |LEEDS |LS25 2GA |UK www.gds-technologies.co.uk
This document is not contractual and the equipment specification may be modified at any time without prior notice.
C922
Manual No. 043DIC
Issue E.v4
GDS404
SERIES
OPERATING HANDBOOK

2
Contents
Description ..........................................................................................................................................................................3
Technical Specification......................................................................................................................................................... 4
Installation...........................................................................................................................................................................5
Commissioning....................................................................................................................................................................6
Service - routine attention.................................................................................................................................................... 8
Fax back sheet for service / maintenance plan.......................................................................................................................9
Table of lower explosive limits.............................................................................................................................................10
Table of occupational exposure limits - P.P.M. .......................................................................................................................10
ILLUSTRATIONS
Fig
1 Front View - Controls.............................................................................................................................................. 11
2 Display Boards........................................................................................................................................................12
3 Mother Board Detail and Field Terminals ..................................................................................................................13
4 Alarm Board - Component Layout............................................................................................................................14
5 Sensor Termination..................................................................................................................................................15
6 CV Transmitter - Toxic Oxygen..................................................................................................................................16
7 CV Transmitter - Flammable.....................................................................................................................................17
8 XDI-XDI win / 30J Flammable Sensor .......................................................................................................................18
9 XDI-XDI win / 30J Toxic/Oxygen Sensor - 4/3/2 wire sensor ......................................................................................20
10 XDI-XDI win / 30J Prime Sensor................................................................................................................................22
11 XDI-XDI win / 30J 4~20mA Input.............................................................................................................................24
SYSTEM DATA
Manufacture date: Works Order No:
Sensor type: life: life: life: life:
Gas:
Range:
Low alarm trip:
High alarm trip:
Fault Relay: Normally Energised - Latched
Alarm Relays: Normally De-Energised - Latched
Details:

3
Description
The GDS 404 is a multi channel combustible and toxic gas monitor, which can accommodate up
to 4 sensor channels housed in wall mounting enclosure. Sensors may be added or removed as
required, but should be carried out with the power to the unit switched off. Each sensor continuously
monitors for gas, with the digital display sequentially sampling each sensor reading. Where a
particular sensor reading requires to be viewed, the hold button should be pressed when the
channel indicator is on the appropriate sensor, pressing the hold button again will restart the
sampling sequence.
The gas alarms are activated at preset levels and will remain on until the gas clears, these in turn
activate the appropriate alarm relays. The fault indicator is initiated should the sensor connecting
lines become open/short circuit, or an electronic fault be detected.
The control unit requires an a.c. mains power supply and/or a low voltage d.c. power supply.
When both are provided the low voltage d.c. acts as a standby supply in the event of an a.c. mains
power failure.
HOLD (Fig.1) Pressing and releasing the button will hold the meter display on a particular sensor
channel which is indicated by the amber L.E.D., press again to continue the auto step sequence.
RANGE INDICATORS Three range indicators are positioned directly above the panel meter %L.E.L.
(Lower Explosive Level), PPM (Parts Per Million) and %Volume, each sensor is addressed to indicate
its appropriate range.
MAINS ON LAMP (P) GREEN indicates that power is being supplied to the control unit.
When the optional standby battery is fitted loss of mains supply will result in the GREEN Mains ON
Lamp changing to RED.
ALARM LAMPS C1, C2, C3, C4 - Lo and Hi RED illuminated when the gas concentration increases
beyond the alarm trip points.
FAULT LAMP (F) AMBER illuminated in the event of a sensor cable fault or sensor supply circuit /
electronic fault or DC output / fuse fault.
SOUNDER initiated in the presence of a fault or gas alarm condition.
TEST When pressed for 15 seconds alarm L.E.D’S are activated. If pressed for a further 15 seconds
alarm relays will change state.
RESET used to mute the sounder and reset alarms, gas alarms cannot be reset until the gas
concentration has decreased below the set alarm level.
ALARM RELAY INHIBIT Pressing the reset pad for 15 seconds will inhibit the alarm relays which is
indicated by the fault light coming on. To remove the inhibit press the reset pad for 15 seconds, the
fault light will turn off.
ZERO POTENTIOMETER meter zero adjust when the sensor is monitoring a gas free atmosphere.
SPAN POTENTIOMETER used to adjust the meter indication to read correctly when the sensor is
subject to a test gas of known concentration.
ALARM SET SWITCH alarm trip points setting.
SENSOR CURRENT POTENTIOMETER sensor supply adjustment.

4
Technical Specification
NUMBER OF CHANNELS
ONE, TWO, THREE OR FOUR CHANNELS
OUTPUTS
Common Relays - user selectable
High alarm RL2 - D.P.C.O. normally energised or de-energised - factory set de-energised
Latched or unlatched - factory set latched
Low alarm RL1 - D.P.C.O. normally energised or de-energised - factory set de-energised
Latched or unlatched - factory set latched
Fault alarm RL3 - S.P.C.O. normally energised or de-energised - factory set de-energised
Latched or unlatched - factory set latched
Global Alarm Relay RL4 - S.P.C.O. changes on all alarms and is resettable at all times.
Channel Relays
High and low alarm S.P.C.O. normally energised or de-energised
- factory set de-energised
Latched or unlatched - factory set latched
All contacts rated 3A/230v AC
Analogue output 4~20mA into 200 ohms max load
SENSOR CABLE
Flammable (catalytic) - 3 core, 1.5mm screened cable, mineral insulated copper sheathed or steel wire armoured –
maximum cable loop resistance 20 ohms.
Toxic/Oxygen – 3 core 0.5 mm screened cable, mineral insulated copper sheathed or steel wire armoured – maximum
cable loop resistance 200 ohms.
POWER SUPPLY
230, 110v, AC 50/60Hz. or 24v DC (21-30 volts tolerance)
POWER CONSUMPTION
Per channel
Normal operating condition 3w
Full alarm condition 4.5w
OVERLOAD PROTECTION
1A fuse - AC
1 amp anti-surge fuse - DC
2 amp anti-surge fuse - Batteries.
ACCURACY
±5% F.S.D
REPEATABILITY
±2% F.S.D
ENVIRONMENTAL
Ambient operation temp. 0 to 50 degrees centigrade
Storage temperature -20 degrees to +60 degrees centigrade
Humidity range 0 to 90% RH
Case Ingress Protection IP52 - Option IP65
MISCELLANEOUS
CE Cert No. C511
Dimensions 310mm wide x 265mm high x 75mm deep
Weight 3.5kg
ADD ON OPTIONS:
Standby battery 1 hour - Field installation - position the batteries so that they are supported by the plastic base block
and then retained using the tywrap, connect the battery connectors to terminal blocks JP11 and JP12.

5
Installation
The GDS 404 Series control instrumentation is designed for installation in a safe area only. Siting of the instrument
should be chosen with regard to the following points:
(a) Cable within the enclosure should be cut back to the minimum length and having been terminated should be kept
away from electronic components and the ribbon cable. Cable requiring to pass from the bottom of the enclosure to
the top should be run down the right hand side adjacent to the enclosure metalwork.
(b) Away from sources of local heat and with room for adequate ventilation.
(c) Within easy reach and audible distance of operating personnel.
(d) Convenient to a separately fused power supply.
(e) Incoming sensor cables and outgoing alarm annunciation.
(f) Sensor cables to be electrically shielded i.e. M.I.C.C., steel wire armoured, screened cable.
To prevent any effect from earth currents the cable shielding should be grounded at one end only.
The instrumentation should be subjected to a minimum of vibration and shock.
Ascertain the voltage rating of the power supply to which the instrument will be connected
SITING THE SENSING HEADS
A key feature of the installation is the correct siting of the sensing head. Several considerations must be taken into
account, the most important being the density of the gas.
Density (air = 1)
Acetone 2.0 n-Hexane 3.0
Ammonia 0.6 Hydrogen 0.1
Benzene 2.8 Methane 0.6
n-Butane 2.0 n-Octane 3.9
Carbon monoxide 1.0 n-Pentane 2.5
Ethane 1.0 n-Propane 1.6
Ethyl alcohol 1.6 Town gas 0.4-0.7
n-Heptane 3.5 Xylene 3.7
Under still air conditions, a ‘lighter than air’ gas such as methane leaking from a small orifice at ground level, will rise
in a plume the shape of which approximates an inverted cone. As the gas rises, it draws air from the surroundings and
creates a turbulence. Resulting from this there occurs rapid dilution and, unless a sensor is positioned within the plume,
there will be no initial indication of a leak.
As gas continues to escape, the diluted concentration rises to ceiling level and begins to layer. In time the concentration
at ceiling level will increase and this, in turn, will displace air downwards.
Dangerous levels will, therefore, tend to occur at ceiling level and the thickness of this layer will increase with the
passage of time.
Ventilation of the room will of course alter the situation significantly but it should be remembered that if the ventilator is
not at ceiling level, a dangerous concentration can still occur between the top of the ventilator and the ceiling.
For heavier than air gases such as propane or butane, the formation of dangerous layers occurs at ground level. These
gases tend to behave like water and will run down gradients and pool at the lowest point.
The number of heads required in individual rooms is determined by the number of possible hazards in the vicinity.
Gas leakage may occur around valves, flanges and anywhere where gas pipes are jointed. It may be possible to cover
several probable gas leaks in one room by the careful siting of a single head. Cable ducts, trenches and manholes are
also likely places where a build up of heavy gases may collect.
When siting a head in such places it is most important to ensure that there is no likelihood of flooding by water, or
excessive dust which may block the sintered disc and prevent gas reaching the sensor.
When monitoring gases outside, those lighter than air will be quickly dispersed, but gases heavier than air will tend to
form in layers and again cause a dangerous hazard. When siting heads outside prevailing winds must be taken into
consideration and adequate protection given against wind and rain.

6
POISONING OF CATALYTIC SENSORS
Catalytic elements used in flammable gas sensors are liable to be rendered inactive due to ‘poisoning’ by certain
groups of compounds.
In general contact with any gaseous compound capable of producing an involatile residue upon heating is to be
avoided.
Examples of such substances are:
a. Silicon containing vapours, as emitted by silicone polishes, greases and oils.
b. Petroleum vapours containing tetra-ethyl lead or other organo-metallic compounds.
c. Phosphorus in the form of phosphate esters.
These compounds will permanently affect the detector and if their presence is suspected the response of the detector
should be determined by the calibration procedure.
It is also possible that the reaction of the detector to a flammable gas could be inhibited by halogen containing gases
such as chloroform, carbon tetra chloride and trichloro-ethylene. this effect is not permanent.
Commissioning
Before applying power to the instrument ensure that all detector heads are connected to the sensor terminals on the
printed circuit board (fig 2) and that each detector head is connected to its appropriate channel, identified by a small
circular, coloured label:
WARNING – DO NOT INSERT OR REMOVE ALARM CARDS FROM THE MOTHERBOARD WHILE THE POWER IS ON
Red = flammable
Yellow = toxic
Blue = oxygen
Green = others
Switch on power to the instrument.
Check that the green ‘P’ power lamp is on.
Each channel alarm card has a green (ACTIVE) indicator located on the mother board (D102, D202, D302, D402).
On power up these will flash for 60 seconds indicating that the sensors are stabilising, during this period all alarms are
held in the off condition.
Where an internal standby battery has been supplied the connectors should be made on JP11 and JP12.
Re-set alarms by pressing the reset button located on the front panel.
Allow ten minutes for the sensors to stabilise.
Select channel 1 and for flammable or toxic sensors adjust meter to read zero by means of appropriate ZERO
POTENTIOMETER marked (Z) on the alarm module, or for oxygen sensor adjust the s-span potentiometer for a reading
of 20.8 repeat for Channel 2, 3 and 4.
CALIBRATION
Establish calibration figures with respect to the L.E.L. limit or the T.L.V. limit of the calibration gas being used.
See page 10.
The following calibration gases are recommended:
Flammable gases - 2.5% methane in air. Toxic gases - T.L.V. When using this gas ensure adequate ventilation.
If necessary zero each detector channel in clean air (for ambient oxygen monitoring the meter should be adjusted to
read 20.8% using the s-span potentiometer).
Apply the calibration gas to the appropriate head at a flow rate of approximately 1 litre per minute.
When the meter reads a steady value adjust the Span Potentiometer marked (S) to obtain the correct reading for the
calibration gas being used.
SERVICE ADJUSTMENTS
The following adjustments need only be made if the standard factory settings (see test certificate) are to be adjusted.
CALIBRATION WHEN USING CV TRANSMITTER (4~20MA DEVICE)
Where a sensor CV transmitter has been supplied the setting up procedure as described on page 18 or 19 should be
followed. The standard transmitter for toxic sensors is supplied as a two wire device set in a loop powered mode, and
the flammable sensor is supplied as a three wire device.
NOTE: Where a CV transmitter is used, adjustment of the alarm module calibration potentiometer is not required (factory
set for 4~20mA input signals), gas calibration need only be carried out at the detector head end.

7
ALARM LEVEL ADJUSTMENT
1. Alarm levels may be adjusted as follows: -
For toxic/flammable gases zero the instrument in clean air using the zero potentiometer (for ambient oxygen
monitoring the meter should be adjusted to read 20.8 using the s-span potentiometer).
2. Press the alarm set switch for approximately 5 seconds the sounder will bleep and the low alarm indicator will come
on, the green power indicator will turn off, release the alarm switch.
3. Using the zero potentiometer adjust the digital display for the required low trip level reading, press the alarm set
switch until the high alarm indicator comes on, release the alarm set switch.
4. Adjust the digital display to read the required high trip level reading and again press the alarm set switch both
alarm indicators will come on.
5. Zero the digital display (toxic/flammable) or 20.8 for oxygen and press alarm set switch, alarm indicators will turn
off and the green power indicator will turn on.
SENSOR SUPPLY ADJUSTMENT (CATALYTIC SENSOR)
Factory set – no further adjustment required unless a change of sensor type is being made.
For ease of setting, measurements are taken across a 1ohm resistor (located on each sensor board) which is connected
in series with the supply to the detector head. Current required by each type of sensor is (VQ21-300mA/VQ23 DCP-
335mA) therefore, measuring mV across the 1 ohm resistor at test point TP1 or TP2 (on the mother board) and sv test
point on each sensor board, will provide a mV reading proportional to mA’s supplied, adjustment may be carried out
using the sensor volts adjustment potentiometer.
Alternatively the sensor voltage may be set at the detector head across terminals P and W (VQ21 2v/VQ23 DCP 2.5v)
and again use the sensor volts adjust potentiometer.
4-20MA OUTPUT ADJUSTMENT
Adjustments: With the load connected to the appropriate 4~20-mA output terminal (typically 100 ohms) and a digital
volt meter connected to the test pins TP3 + TP4 - ensure that the sensor is in clean air, and that the instrument is reading
zero.
Adjust the 4mA potentiometer to read 4mV on the digital voltmeter.
Using the appropriate sensor zero potentiometer adjust the alarm panel digital display for full scale reading.
Adjust the 20mA output potentiometer until the digital voltmeter reads 20mV
Return the alarm panel digital display reading to zero by readjusting the zero potentiometer.
RANGE & SCALE SELECTION
The range and scale reading is normally factory set but where a sensor alarm board is to be added the following
selections should be made on the display board PCN037.
Note: Power to the system should be off when adding or removing a sensor board.
RANGE
1. Range - for the appropriate channel select %L.E.L., %Vol. or PPM range by connecting the jumper across the
indicated selector pins.
2. Scale - Select the scale required by connecting the jumper across the appropriate DP pins.
No jumper - Digital panel meter reading 100
DP1 - Digital panel meter reading 10.0
DP2 - Digital panel meter reading 1.00

8
Service – routine attention
The owner or occupier of the premises should place the supervision of the system in the charge of a responsible
executive whose duty it should be to ensure the day to day operation of the system and to lay down the procedure for
dealing with a gas alarm or fault warning. To ensure reliability an agreement should be negotiated for regular servicing.
When a service contract cannot be arranged an employee with suitable experience of electrical equipment should be
trained to deal with the more simple servicing and instructed not to attempt to exceed the scope of such training.
Liaison should be established with those responsible for maintenance of the building fabric or redecoration etc. to
ensure that their work does not cause a fault or otherwise interfere with the operation of the gas alarm installation.
Particular attention appertaining to the Detector Head.
The operating instructions should be kept available preferably with the control unit, all faults, service tests and routine
attention given should be recorded.
DAILY: A check should be made that any fault condition which may be indicated is in fact being attended to and that all
other indicators are normal.
WEEKLY: In plants involving a high risk process or having gases which may cause loss of sensitivity a check on
calibration should be carried out.
TWICE YEARLY MAINTENANCE SCHEDULE
1. All zeros at the control unit to be checked, logged and aligned.
2. Each detector to be gas tested and reading logged (sensitivity checked).
3. Field indicators to be tested.
4. All alarm set points checked and re-aligned.
5. Lamp Test.
6. All faulty parts replaced where required.
7. All filter elements checked and replaced as necessary.
8. Power supply - complete functional check.
9. Visual inspection made to confirm that all cabling fitting and equipment is secure, undamaged and adequately
protected.
FAULT DIAGNOSIS
Unable to zero meter 1. Sensor open circuit
2. Sensor leads incorrectly connected
3 Alarm card not positioned correctly
No front panel indication - Check ribbon cable is connected correctly
ACTION TO BE TAKEN IF THE APPARATUS ALARM SOUNDS:
A Extinguish all naked flames, including all smoking materials.
B Turn off all gas appliances.
C Do not switch on or off any electrical lights or appliances.
D Turn off the gas supply at the gas emergency control and/or (with L.P.G supply) the storage tank.
E Open doors and windows to increase ventilation
If the alarm continues to operate, even after an alarm re-setting action where appropriate, and the cause of the leak
is not apparent and/or cannot be corrected, vacate the premises and immediately notify the gas supplier and/or the
gas emergency 24 hour service in order that the installation may be tested and made safe and any necessary repair
carried out.

9
For telephone inquiries your contact is: Julie Mitchell 0113 286 0166
GDS Technologies Ltd
Fusion Point, Ash Lane, Garforth, Leeds UK LS25 2GA
Tel +44 (0)113 286 0166 Fax +44 (0)113 287 8178
E-Mail: sales@gds-technologies.co.uk
TECHNOLOGIES
FAX BACK SHEET
SERVICE / MAINTENANCE PLAN
GDS Technologies can offer comprehensive maintenance & service cover on all of your
gas detection systems. Should you require further details, please complete and fax / return this
document for an immediate response.
Company Name
Company Address
Tel No.
Fax No
Site Location
(if different from above)
Contact Name
Product Type (if known)
No. of Sensors

10
Table of lower explosive limits - L.E.L.
The figures quoted below are taken from British Standards Institute publication BS EN
60079-20-1:2010 and show the L.E.L. of some of the more common gases and vapours:
GAS L.E.L. % VOLUME
Acetone........................................................................... 2.5
Ammonia ............. ........................................................ 15.0
Benzene. ......................................................................... 1.2
n-Butane ......................................................................... 1.4
Carbon monoxide.......................................................... 10.9
Ethylene .......................................................................... 2.3
Heptane ........................................................................ 0.85
Hexane ........................................................................... 1.0
Hydrogen ....................................................................... 4.0
Methane.......................................................................... 4.4
Propane ......................................................................... 1.7
Pentane ........................................................................... 1.1
Toluene ........................................................................... 1.0
Xylene ............................................................................. 0.9
Table of occupational exposure limits - P.P.M.
The figures quoted below are taken from guidance note EH40 from the
Health and Safety Executive and ACGIH.
GAS 8 HOUR - T.W.A. - P.P.M.
Hydrogen sulphide.............................................................. 5
Carbon monoxide............................................................. 30
Sulphur dioxide................................................................... 2
Nitrogen monoxide........................................................... 25
Nitrogen dioxide................................................................. 3
Chlorine.......................................................................... 0.5
Ammonia ......................................................................... 25
Ozone............................................................................. 0.1
Ethylene oxide .................................................................... 5

11
Hi
Lo
%LEL PPM %VOL
C1 C2 C3 C4
FP
TEST RESET HOLD
Range Indicator
L.E.L. - Lower Explosive Limit
PPM - Parts Per Million
% vol. - % Volume
Hi - High Alarm
Lo - Low Alarm
C1-C4- Channel Selection (Sensor)
F - Fault Indicator
P - Power On (Green)
- Mains Fail (Red)
Hold - Channel Selection
Reset - Sounder/Alarms
Test - Electronic System Test
Fig. 1

12
Fig. 2
A B
Display Boards
On the original display board “A” the channel numbers are ordered (1…2…3…4) but on the new compact display
board “B” the channel numbers are ordered (4…3…2…1). All functions are the same with either display board.
For Channel Numbers 1-4 jumper section allows the LED indicating the gas measurement units to be selected.
The options are %LEL, PPM and %VOL and are channel specific. (See labelling on PCB for correct jumper location).
Likewise a selection can be made for each of the four channels to show either 1 or 2 decimal places with the jumper on
or no decimal places with the jumper off. (See labelling on PCB for correct jumper location).
Finally there is a global jumper ON/OFF selection for the LCD backlight to be active (jumper ON) or not (jumper OFF).
(See labelling on PCB for correct jumper location).

13
Fig. 3
Mother Board
RELAY SELECTION
Common High Relay - Normally energised/Normally de-energised - (J3)
Common Low Relay - Normally energised/Normally de-energised - (J1)
Common Fault Relay - Normally energised/Normally de-energised - (J5)
Channel relays (1-4) A/B (Lo/Hi) see alarm board page 14
SOUNDER PERMANENT MUTE
JP10 remove
STANDBY BATTERY
Connect leads to - (JP11 and JP12)

14
Fig. 4
Alarm Board
RELAY SELECTION
Channel Relay A - Low/High Alarm - Lo/Hi - Factory set - Low }for A+B
Channel Relay B - Low/High Alarm - Lo/Hi - Factory set - High
Normally energised or de-energised - E/D - Factory set - De-energised (D)
AUTOMATIC OR MANUAL RESET - A/M
Oxygen Monitoring (factory set) - O2
Oxygen Alarm Set Low/Low Alarm - LL
Time delay to alarm - T1 - 10 secs
T2 - 30 secs
When used with GDS300 Flow sample systems - FS
SENSOR SELECTION
24v (4/20mA input) P - Pellistor (mV input)
4~20MA OUTPUT
TP3/TP4
CALIBRATION
TP1/TP2
ADJUSTMENTS
Potentiometer RV1 - Sensor Zero
Potentiometer RV2 - Sensor Calibration
Potentiometer RV3 - 4~20mA signal output - 4mA adjust
Potentiometer RV4 - 4~20mA signal output - 20mA adjust
Potentiometer RV5 - GDS 404 display span (factory set)
Potentiometer RV6 - Sensor Supply

15
3 WIRE REDLINE (2 PCB) INFRA RED SENSOR
W
Y
P
W +
Y SIG
P -
Fig 4
W
Y
P
+24V
Hi
Lo
Ov
4~20mA
Panel
W
Y
P
24V +
OV
+
-
SIG
Panel
IR
Transmitter
W
Y
P
+24V
Hi
Lo
Ov
4~20mA
W
Y
P
W +
Y SIG
P -
Panel
2 wire sensor
Transmitter
Panel
Combi direct sensor
Transmitter
Panel
Combi direct sensor
Transmitter
mV - pellistor / CV / IR
sensor Transmitter
W
Y
P
W +
Y SIG
P -
Fig 4
SENSOR – 3 WIRE
SENSOR – 2 WIRE
INFRA RED SENSOR – 3 WIRE
Gas Detector
Control Unit
Detector Head
mV (pellistors) or 3 wire CV
W
Y
P
W +
Y SIG
P -
E
Gas Detector
Control Unit
CV
Transmitter
Gas Detector
Control UnitTransmitter
W
Y
P
24V +
OV
+
-
SIG
Sensor
Sensor
Sensor
TOXIC
SENSOR CELL
OXYGEN
PW
YP
Y
Fig. 5
RED ident R = flammable
YELLOW ident Y = toxic
BLUE ident B = oxygen
GREEN ident G = others
W
Y
P
W +
Y SIG
P -
Fig 4
W
Y
P
+24V
Hi
Lo
Ov
4~20mA
Panel
W
Y
P
24V +
OV
+
-
SIG
Panel
IR
Transmitter
W
Y
P
+24V
Hi
Lo
Ov
4~20mA
W
Y
P
W +
Y SIG
P -
Panel
2 wire sensor
Transmitter
Panel
Combi direct sensor
Transmitter
Panel
Combi direct sensor
Transmitter
mV - pellistor / CV / IR
sensor Transmitter
3 WIRE SENSOR
2 WIRE SENSOR

16
Fig. 6
INSTALLATION
For hazardous area equipment see specific instructions supplied with
the equipment, or visit our website for technical information. Siting of
the equipment should be chosen with regard to the following points:
1. Away from sources of heat and with room for adequate air
circulation.
2. Within easy reach for operating and maintenance personnel.
3. Connecting cables to be electrically shielded, i.e. M.I.C.C., steel wire
armoured, screened cable or steel conduit.
4. For sensor location see our website.
Note: Sensor cables should not be run in the same ducting as power cables.
SET UP
1. Having powered up allow 5 minutes for the sensor to stabilise.
2. The sensor current/voltage should be set by connecting a voltmeter
(mV range) across TP3/TP4 and adjusting the sensor voltage
potentiometer (10 turn) until the required voltage reading is
obtained (mV meter reading = mA sensor current) caution – do not
exceed 360mV (mA).
3. Zero the card in clean air by adjustment of the potentiometer
marked zero until the green ON/Zero LED just turns from GREEN/
RED to GREEN. (At this point the output will = 4mA). If you require
to check this, connect a digital meter (mV range) to the test pins
marked TP1 and TP2, if adjustment is required adjust the 4mA
potentiometer (4mV = 4mA).
4. Where a digital panel meter is fitted to the CV card the reading may
be adjusted by the DPM Z potentiometer (zero).
CALIBRATION
With the digital meter connected to the test pins TP1 and TP2 and a
reading of (4mV clean air) apply test gas and wait until a maximum
reading is obtained, if necessary adjust the 20mA potentiometer for the
required mV reading for the calibration gas being used.
Where 4 ~ 20mA span = 0 ~ 100% L.E.L. (Lower explosive level) and
the sensor is to be calibrated for Methane which has an L.E.L. of 5%
vol, when using 1% Methane in air test gas (20% L.E.L.) a reading of
7.2mv (7.2mA) would be required.
Where a Digital panel meter is fitted the display may be adjusted by
using the DPM S potentiometer (span).
ADDITIONAL RELAY BOARD ALARM TRIP POINT
ADJUSTMENT
This level will normally be set at 20% of the range reading i.e. 7.2mA.
1. Connect the DVM as above, using the zero potentiometer adjust for
the required trip level (mv)
2. Adjust the alarm level potentiometer until the relay just changes
state.
3. Using the zero potentiometer re-adjust the DVM to 4mV.
The above adjustment may be carried out in house by connecting the
CV transmitter directly to a DC power supply.
TECHNOLOGIES
CV TRANSMITTER
FLAMMABLE
Technical Sheet
ref C323D
C-V
TRANSMITTER
-
+
E
SIG
-
+
-
+
E
SIG
-
-
+
+
-
+
E
SIG
SAFE AREA SENSOR BOARD Exd SENSOR BOARD
JP1 Jumpers AD
JP1 Jumpers DB
JP1 Jumpers AC
2 Wire
no 4~20m
A
signal
3 Wire
Sink
3 Wire
Source
DCBA
P
-
+
YW
PYW
LK1
SENSOR
Sig
ON/ZERO
ZERO
20mA
4mA
E
TP2
– +
TP1
–+
JP1
SENS
VOLTS
ADJ
TP4
D1
TP3
+
Y SIG
Field Terminals to
GDS alarm unit
Output Signal
Adjust
WY P
No CNc
NC
C
NO
Sensor
Terminal
Sounder
RELAY
BOARD
F
EOL
1A
Relay
RL2
Sensor
volts adjust
Sensor
Alarm
Set
Alarm
LED
Gas
3A
Relay
RL1
ON/Zero
DPMZ
20mA
4mA
Zero
DPMS
E
WY P
J4
JP1
A B
C
LK1
JP2
W+
P -
+
+-
TP1
TP3
Sensor
Volts TP4
TP2
L A
24v DC
Output
-
TECHNICAL
Gas Type – Flammable Gases
Current – Nominal 160mA
Output Standard
Analogue 4~20mA (250 ohms max) - 3 wire (source mode – standard)
Option 1~5v output – Link - LK1
Sensor Cable
3 core 1.5mm screened, maximum cable loop resistance 20ohms
Alarm Relay Relay contacts S.P.C.O. rated 1A/24vDC 0.5A/120vAC
option 5A/230vAC
Options (safe area board only)
Fire Alarm panel signalling - Remove LK1
Logic output - JP1 position L and end of line link JP2 – normally set at A
(analogue)
Full Board Options – On board sounder
30J
30J
30J

17
Fig. 7
C284 CV Transmitter - Toxic/Oxygen
TECHNICAL
Input voltage 12-30v DC – 24v nominal
Output Standard Analogue 4~20 ma (250 ohms max) – source
Option 1–5v output – solder G
Alarm relay board options 3 wire system only (2 wire if the 4~20mA signal is not used)
(safe area board only) Signal relay contacts S.P.C.O. rated 1A/24v (Logic and fire panel signal only)
Mains relay S.P.C.O. 5A/230v AC
Trip Indicator LED – trip point selectable 10% to full scale
Fire Alarm panel signalling – cut F
Logic output - JP3 position L and end of line link JP4
Full board On board sounder
(safe area board only) Auxiliary output DC volts – standard-as input volts 24v (selection by fixed voltage regulator U5 - 5.12,15v)
DPM – gas readout display – (zero and span potentiometers used only for DPM setting)
INSTALLATION
Siting of the equipment should be chosen with regard to the
following points:
a) Away from sources of heat and with room for adequate air
circulation.
b) Within easy reach for operating and maintenance personnel.
c) Connecting cables to be electrically shielded, i.e. M.I.C.C.,
steel wire armoured, screened cable or steel conduit.
Note: Sensor cables should not be run in the same ducting as power
cables.
SET UP
1. Connect a digital voltmeter (miIIivolt range) to the + and –
test terminals (2 wire system) or X and Y test terminals (3 wire
system)
For 3 wire systems the CV is preset in the current source mode.
2. In clean air check that the DVM reads 4mV, if not adjust the
4mA potentiometer on the CV transmitter board.
3. Apply test gas and wait until a maximum DVM reading is
obtained, if necessary adjust the 20mA potentiometer for the
required mV reading for the calibration gas used (see range/
reading on test certificate or printed on the CV circuit board).
4. For oxygen level monitoring remove the sensor terminal
connector from the PCB J4 and adjust the 4mA potentiometer
for 4mA (4mv).
Reconnect the cell and allow reading to stabilise adjust the DVM
reading for 17.3mA (20.8% Vol. ambient oxygen) using the 20mA
potentiometer.
Where a Digital panel meter is fitted readings should be taken
directly from the readout and if required adjusted using the 4-20mA
potentiometers.
ADDITIONAL RELAY BOARD ALARM TRIP
POINT ADJUSTMENT
This level will normally be set at 20% of the range reading i.e.
7.2mA.
1. Connect the DVM as above, using the 4mA potentiometer
adjust for the required trip level.
2. Adjust the alarm level potentiometer until the alarm LED just
comes on.
3. Using the 4mA potentiometer re-adjust the DVM to 4mV.
The above adjustment may be carried out in house by connecting
the CV transmitter directly to a DC power supply.
Should a full board be required to operate on a 2 wire loop then the
relay must be disabled - remove JP2
Gas Type Programming – Works/preset.
CO. H2S, SO2. H2 remove R4, R6, R15, R28, R29, R10
HCN remove R4, R6, R8, R15, R28, R29, R10
NO2, CL2 O3, remove R4, R7, R11, R28, R29, R10
NO, HCL, C2H4O Remove R3, R4, R6, R12, R15, R28, R29, R10
O2 Remove R3, R8, R6, R15, R42, R43, IC-U2
NH3 Remove R3, R4, R6, R12, R15, R28, R29, R10, R8.
A
B
C
D
XP
-
-
+
-
+
+
YW
PYW
SENSOR
FIELD TERMINALS
TO GDS
ALARM PANEL
PCN149
E
Y
20mA
4mA
TP2
TP4
TP1
RV3
JP1
RV4
TP3
Aux
Output
WY P
No CNc
NC
C
NO
-+
Sensor
Terminal
Sounder
FULL CV BOARD
RELAY
BOARD
CV
TRANSMITTER
Sensor
Terminal
EOL
1A
Relay
Output Signal
Adjust
Test Points
Alarm Level
Adjust
Alarm
LED
JP2
5A
Relay
20mA
4mA
Span
Zero
DPM
E
A
JP1
-+
WYR
-+
J4
JP3
JP4
XY
B
C
D
W+
Y SIG
P -Field Terminals
to GDS Alarm Unit
U5
LK1
C-V
TRANSMITTER
2 Wire
Loop
Powered
3 Wire
Sink
3 Wire
Source
BMS
MONITOR
JPI Jumpers AD
JPI Jumpers DB
JPI Jumpers AC
-
+
E
SIG
-
+
-
+
E
SIG
-
-
+
+
-
+
E
SIG
A L
SAFE AREA BOARD EExd BOARD
Specification Sheet
ref ref C284D
30J
30J
30J

18
TECHNOLOGIES
XDI-XDIwin – 15/30J
FLAMMABLE SENSOR
General Data Sheet: 198D1C Issue S.v7 Technical Sheet
ref C893
Power Supply
15 to 30Vdc 24v nominal
Outputs
3 wire 4~20mA / 4 wire CANbus
Relays Low alarm SPCO
High alarm SPCO 0-5A @ 30Vdc
Fault alarm SPCO
Inhibit option during servicing
Logging Intervals - variable time
Roll over/stop
Storage - 2,880 readings
Requires RS232 lead
PC or laptop (dedicated)
Hyperterminal (download from GDS website)
Set up procedure:
New sensors are supplied ready to connect to the system.
The following procedure is for full set up and where the
sensor cell has been replaced - only sections 5, 6, 7, 9
and 11 need to be carried out. Voltage measurements
are made wrt AG unless otherwise specified.
1. Insert jumpers J20 and J6 position SO for 4-20mA source
output.
2. Turn sensor voltage potentiometer anti-clockwise
(minimum voltage).
3. Connect sensor to J2 terminal W-white Y-yellow P-pink.
4. Connect 24V + and 0V to JP10, short the 4~20mA
terminal by inserting test link at J9.
5. Measure the sensor voltage at SV and adjust by turning
sensor volts pot for the correct reading.
(standard sensor CAT300 = 2Vdc.) DO NOT EXCEED
THE REQUIRED VOLTAGE OTHERWISE PERMANENT
DAMAGE WILL OCCUR. See sensor cell supply
table.
6. Rotate 20mA pot fully anti-clockwise (minimum span.)
7. When in clean air the sensor bridge is zeroed by adjusting
zero pot until the dual colour LED D1 is off.
8. Connect PC hyper terminal using RS232 Combi adaptor
(part no. 160-510 and lead part no. 160-515) at 4800
baud connected to J3. Ensure jumper J29 is fitted before
programming and initialise the sensor using (C) calibration
mode, then shift + ($) command from the keyboard.
9. Using a digital mV meter measure across test pins TP8/9
and adjust 4mA pot for 4mA (zero) = 4mV
10. Then press (Z) on the PC to zero the reading.
11. Apply a known test gas to the sensor (56% LEL = 2.5% vol
methane) for 1 minute at a flow rate of 1 litre to give a
13mA = 13mV across test pins TP8/9, adjust 20mA pot for
correct mV reading.
12. When using a PC press (S) to enter span mode and using
(H) or (L) adjust the reading to 56% LEL.
13. Press (space) to exit span and then (X) to exit the calibration
mode.
An example of continuous data output to the PC from a
Flammable sensor is shown below and is the format for all gas
types.
O, Hand L represent the Over
Range High and Low alarms
respectively.
D indicates if a duplicate address
is detected
Findicates a fault present
Ishows that this sensor has its alarms inhibited
under the O H L the ^ ^ v represent the direction of the
alarms. Lis falling and Hand Oare rising. A(*) under the
letter(s) OHLDFI represents a detected state so in this example
the sensor would be in high alarm and a fault present.
‘Gas val 35.6’ represents the value of the gas present at the
sensor head. Pressing (R) on the PC causes a reset to occur.
Gas type with address and serial number are then output to the
PC together with alarms and calibration date.
A full command list via PC is available by pressing the letter P
which will relist on the PC.
Flam %LEL
OHLDFI
^^v
-*--*-Gas val = 35.6
Command Use
A = Set CAN address Sets the CAN address
G = Select gas type Select the gas type from a list
Z = Zero Press when no gas on sensor to give zero
S = Span Use when calibration gas applied,
H and L change reading
D = Enter calibration date Enter the calibration date
Y = Toggle auto zero Auto zero is ON or OFF, small drift is cleared
H = Set high alarm Sets the high alarm threshold
L = Set low alarm Sets the low alarm threshold
O = Set over range alarm Sets the over range alarm threshold
P = List command List these commands on screen
X = Exit calibration mode Exit this PC mode
$ = Initialise this sensor Use on new PCB to set gas type to Flam
U = Alarm direction Sets rising or falling alarms
R = Range Allows a change in maximum value
N = Decimal points Toggles between 1 and 2 decimal places
E = Edit user gas text Choose gas description
B = Toggle deadband Deadband of 2.5% can be on or off
F = Toggle fault Input External fault input contact can be disabled
# = Normally energised Low /high alarm relays and fault relay can be
made normally energised
V= View gas log From current log, display how many historical
readings to display, up to 2880
C = Clear gas log Set all 2880 log readings to 0.00
I = Log interval Choose how many seconds between each log
reading and whether the log will roll over or
stop at 2880 (60 second interval and 2880
readings = 48 hours)
14. Connect the sensor to a Combi alarm panel and ensure
that it reports in correctly.
Note:- Fit the end of line (EOL) link J1 if the sensor is to be
installed at the end of the sensor cable.
15. If front panel display board is fitted via connector J5 and
U12 adjust contrast for LCD contrast.
16. Remove J9 test link for normal operation.
17. Insert link J12 to enable the bridge fault detection.
(4-20mA output falls to 2mA in fault).
18. Ensure J29 address link is removed (this is only used when
changing address from a Panel)
Fig. 8

19
TECHNOLOGIES
Fig.1
Fig.2
Fig.3
Technical Sheet
ref C893
The Combi sensors which have an LCD display fitted also
incorporate 3 reed switches which can be activated using external
magnets through the glass window of the flameproof XDIwin
enclosure. These magnets do not act instantly and have to
be in close proximity to L, M and R on the front display for
a few seconds to activate a software setup function.
The left magnet enters the Auto zero ON or OFF menu.
This allows small drift changes in the sensor to be compensated
for but is not operational when the sensor readings are greater
than 5% of full scale. Therefore auto zero is inactive when a larger
gas reading is present. When the remove magnets message
appears, move the left magnet away and then the display shows
if auto zero is ON or OFF. The left magnet puts auto zero ON
and the right magnet turns it OFF. With no magnets present, the
display will return to normal after a few seconds timeout.
The right magnet allows the CAN address of the sensor to be
changed. When the ADDRESS menu is displayed with a prompt
to remove the magnet, and then the display shows the address
and that the right magnet decreases it whilst the left magnet will
increase it. This is then stored in internal non volatile memory
and the display will automatically revert to normal operation.
The centre magnet is used to inhibit the sensor. As with the left
and right magnet functions the display requests that you remove
the magnet and then the state of the inhibit appears on the LCD.
The left magnet then puts the sensor into inhibit whilst the right
magnet removes it. An amber LED on the front panel under the
LCD flashes when the sensor is inhibited. When all magnets are
removed, the display will revert to normal operation.
The left and right magnets together allow the calibration
menu to be used.
Removing both magnets as instructed on the LCD presents the
first part of this multi menu which is ZERO. With no gas present
use the left magnet to increase the reading and the right magnet
to decrease to achieve a zero reading on the display. A timer
is displayed on the LCD and when this reaches 0, the next
menu is displayed. This timer is 15 seconds approximately and
is reset back each time a magnet is near. Waiting till timeout
is acceptable but this timeout can be speeded up by placing a
magnet near to the centre position.
SPAN is the next part of the menu and gas should be applied to
the sensor at this time.
The left magnet increases the gain and the right magnet reduces
gain. The actual sensor value can be seen on the display to rise
or fall respectively.
LOW ALARM is the next menu and left and right magnets increase
and decrease this value.
HIGH ALARM is next followed by OVER RANGE alarm.
The direction of the alarms is displayed as ^ for rising and v for
falling but these can be changed using left and right magnets
together.
Sensor cell supply table
CAT300A 2v/300mA
CAT170A 2v/175mA
SEM-1 4v/170mA
GDS PRIME 4v/125mA
CAT335C 2.5v/335mA
THE300A 2v/300mA
SS10 2v/175mA
CAT335A 2.5v/335mA
CAT335B 2.5v/335mA
CAT100A 2v/100mA
EOL
CAN
4-20
MPU
FAULT
TP1
OV
TP11
TP9
TP5
TP8
TP10
198M1C
ISS M
TP7
ZERO
ZERO
TP12
DISP
MPU active LED
(Flashing)
Fault LED
Sens V Te st Point
TP7 + TP12 Sensor cell input Sensor Volts
(RV3)
Zero
(RV2)
Span
(RV1)
4mA
(RV4)
Sensor Zeroing LEDs
CAN Transmitting LED
4-20mA SInk/Source
4-20mA Test
Jumper
End-of-line Jumper
Relay/Win Ribbon
LCD Contrast
Win Only
RS232
PC Data In/Out
Win Data Ribbon Cable
4-20op Test Points
FIELD TERMINALS
HI LO
24V Can+ Can- OV 4-20mA
24V Hi Lo OV 4-20
mA
PYW
Control Unit
CAN 1 or 2
Sensor
Addressable
+24
Hi
Lo
0v
4~20mA
+24
Hi
Lo
0v
Control Unit
4~20mA Input
Sensor
3-Wire Direct
4~20mA Signal
+24
Hi
Lo
0v
4~20mA
+24
Sig
0v
EOL
T
FAULT
MPU
SK
SE
204M1C
ISS M
CONTRAST
Fault LED
Gas Type Header
Sensor cell input
20mA
Span
(RV2)
4mA
Zero
(RV1)
Sensor 4-20mA Routing Configurations
(see diagram)
CAN Transmitting LED
4-20mA Test
Jumper
Relay/Win Ribbon
LCD Contrast
Win Only
End-of-line Jumper
+24V Test Point
(w.r.t 0V)
+24V
RS232
PC Data In/Out
Win Data Ribbon Cable
4-20mA Test Pins
4-20mA Sink Source
External 4-20mA Input
(eg. Infrared)
+24V O/Pt
(eg. Infrared)
FIELD TERMINALS
HI LO
24V Can+ Can- OV 4-20mA
24V Hi Lo OV 4-20
mA
PYW
Mainboad to Sensor wiring Sensor Jumper configuration
Control Unit
CAN 1 or 2
Sensor
Addressable
+24
Hi
Lo
0v
4~20mA
4~20 IN
SO
SK
+24
Hi
Lo
0v
Control Unit
4~20mA Input
Sensor
3-Wire Direct
4~20mA Signal
+24
Hi
Lo
0v
4~20mA
+24
Sig
0v
Control Unit
4~20mA Input
Sensor
2-Wire Direct
4~20mA Signal
+24
Hi
Lo
0v
4~20mA
+24
Sig
0v
Control Unit
CAN 1 or 2
Sensor
Addressable 4~20mA Input
+24
Hi
Lo
0v
4~20mA
+24
Hi
Lo
0v
4~20 IN
SO
SK
4~20 IN
SO
SK
4~20 IN
SO
SK
ange
t magnets
J10
J10
J10
Using magnets (set up)
Display
Contrast
Field terminals
Relay PCB
Connector
Display PCB
Connector
Test
Test Pins
24v DC
OV
FLT
OUT
IN
AG
Zero LED
ADDR
4mA
20mA
Sensor
Zero
Sensor Volts
Comms
Port
EOL
Vo

20
Fig. 9
TECHNOLOGIES
XDI-XDIwin – 15/30J
TOXIC/OXYGEN SENSOR
General Data Sheet: 204D1C Issue Tv3 Technical Sheet
ref C894
Power Supply
15 to 30vDC 24v nominal
Outputs
2 wire 4~20mA output only
3 wire 4~20mA output +
4 wire CANbus
Relays Low alarm SPCO
High alarm SPCO 0-5A @ 30v DC
Fault alarm SPCO
Inhibit option during servicing
Logging Intervals - variable time
Roll over/stop
Storage - 2,880 readings
Requires RS232 lead
PC or laptop (dedicated)
Hyperterminal (download from GDS website)
Set up procedure:
Direct 4~20mA 2/3 wire (no processor)
New sensors are supplied ready to connect to a system
with all jumpers inserted. This procedure shows how
to recalibrate as part of routine maintenance or cell
replacement.
The first part is to set up the 4-20mA section which is produced
by the CELL circuit. Note some cells take time to stabilise. If
used as 2 or 3 wire then only steps 1 to 5 are required.
1. Connect the cell to terminal J2 and use +24V, 0V and
4~20mA connections on terminal J10 for 3 wire (or +24V
and 4~20mA for 2 wire - see note)
2. Measure voltage across test pins AG to Vo and adjust
reading to zero mV using offset potentiometer
3. Measure the output current mV=mA at test pins TP1/TP2
and adjust reading to 4mV using 4mA pot
4. Apply span gas to cell and adjust 20mA pot to give correct
mV reading at test pins TP1/TP2. NOTE: at 50% span
gas, the mV reading at TP1/TP2 should be 12mV and the
voltage across test pins AG and Vo should not exceed 1 volt
so that 100% of range is achievable.
5. Remove the span gas and re-adjust 4mA pot to 4mV if
required.
4 wire CANbus / 3 wire 4~20mA
with processor communication
6. With power applied ensure that MPU led is flashing and the
CAN led is on or flashing.
7. Connect RS232 pod to J3 connector and to a PC running
HyperTerminal at 4800 baud. Ensure jumper J29 is fitted
before programming.
8. The terminal output screen shows continuous data output/
commands and allows input from the PC keyboard.
Pressing ‘C’ enters calibration mode
a. Press ‘SHIFT $’ to initialise the sensor and reset to default
“Flam 100% LEL” setting.
b. Then press ‘G’ to change the gas type to match the cell
being used.
NOTE: the range of the new gas has a default value but
can be changed by pressing ‘R’.
c. Press ‘A’ to change the address of this sensor if required
d. Press ‘N’ to select the number of decimal places to 1 or
2, (ie: dp=1 or dp=2)
e. With no gas applied and 4mV measured at test pins
TP8/TP9 press ‘Z’ to zero the gas reading/see note.
f. Then apply span gas and press ’S’ to enter span mode,
optain correct mV reading for test gas used by adjusting
20mA pot. The displayed reading can be made HIGHER
by pressing ‘H’ or lower by pressing ‘L’
g. Pressing ‘SPACE BAR’ will exit the span mode
h. Press ‘V’ to view log of sensor readings if required
i. Pressing ‘X’ will exit the calibration mode.
Note: Oxygen cells only use the P+ and Y terminals J2. To
adjust for “zero” it is normal practice to disconnect 1 wire from
the cell and adjust the 4mA pot for a 4mV reading across test
pins TP8/TP9 FOR 3 wire sensors, or for 2 wire sensors use
TP1/TP2. When the cell is reconnected in air at 20.8% oxygen
the span can be adjusted for 17.3mV reading across the same
test pins using 20mA pot.
If an LCD option is fitted then calibration and other settings
using magnets instead of a PC can be achieved
- see over.
Command Use
A = Set CAN address Sets the CAN address
G = Select gas type Select the gas type from a list
Z = Zero Press when no gas on sensor to give zero
S = Span Use when calibration gas applied,
H and L change reading
D = Enter calibration date Enter the calibration date
Y = Toggle auto zero Auto zero is ON or OFF, small drift is cleared
H = Set high alarm Sets the high alarm threshold
L = Set low alarm Sets the low alarm threshold
O = Set over range alarm Sets the over range alarm threshold
P = List command List these commands on screen
X = Exit calibration mode Exit this PC mode
$ = Initialise this sensor Use on new PCB to set gas type to Flam
U = Alarm direction Sets rising or falling alarms
R = Range Allows a change in maximum value
N = Decimal points Toggles between 1 and 2 decimal places
E = Edit user gas text Choose gas description
B = Toggle deadband Deadband of 2.5% can be on or off
F = Toggle fault Input External fault input contact can be disabled
# = Normally energised Low /high alarm relays and fault relay can be
made normally energised
V= View gas log From current log, display how many historical
readings to display, up to 2880
C = Clear gas log Set all 2880 log readings to 0.00
I = Log interval Choose how many seconds between each log
reading and whether the log will roll over or
stop at 2880 (60 second interval and 2880
readings = 48 hours)
Table of contents
Other GDS Gas Detector manuals