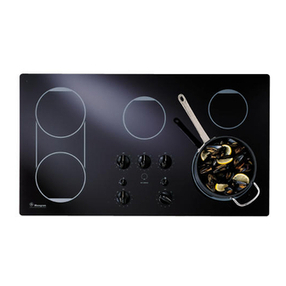
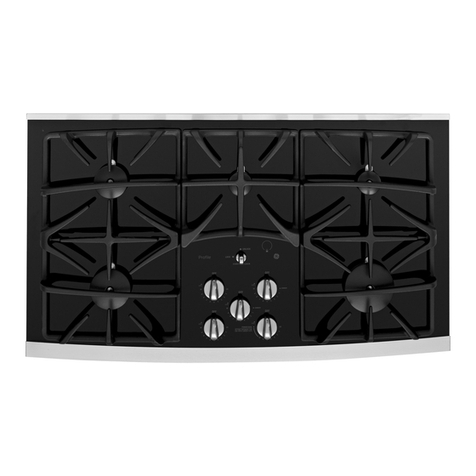
GE JP939 User manual

www.GEAppliances.com
©
Safety Instruc_tions ...... 2-4
Operating Instruc_tions
Cookware Tips ......... l 0, l l
Dual Surface Unit ......... 7
Features of Your Cooktop .... 5
Kitchen Timer . ............ 9
I,ocking the Cooktop ....... 9
Pan Detection Feature ....... 9
Pan Sizing Feature .......... 9
Surface Units ........... 6-9
_'armer Surface Unit ....... 8
Care and Cleaning
Control I,ock Pad ......... 13
(;lass Cooktop ......... 13, 14
Packaging Tape ........... 12
Troubleshooting Tips .. 15, 16
Consumer Support
Consumer Support ........ 20
Product Registration .... 17, 18
_'arranty ................ 19
Write the model and serial
numbers here:
Model #
Serial #
You can find them on a lal)el
under the cooktop.
j-P969
164D4290P119 49-80162 09-02JR

IMPORTANTSAFETYINFORMATION.
READALLINSTRUCTIONSBEFOREUSING
I
For your safety, Ne information in Nis manual must be followed to minim)e the risk of fire or
explosion, electric shock, or to prevent property damage, personal injury, or loss of life.
2
SAFETYPRECAUTIONS
When using electrical appliances, basic safety precaufions should be followed, including
the following:
Use this appliance only %r its intended use
as described ira this manual.
Do not attempt to repair or replace any
part of your cooktop unless it is specifically
recommended in this manual. All other
servicing should be refened to a qualified
tech nician.
Always kee I) dish towels, dishcloths, pot
holders and other linens a safe distance
away flom your cooktop.
Always kee I) wooden and plastic utensils
and canned food a safe distance away flom
yonr cooktop. They may become hot and
could cause hums.
Before performing any service,
disconnect dm cooktop power supply
at the household distribution panel by
removing the fltse or switching off the
citvuit breaken
Ne_er wear loose-fitting or hanging
garments while using the appliance.
Flammable mamrial could be ignimd if
brought ira contact wifla hot smt_ace units
and may cause sexere bums.
Be sure your appliance is properly installed
and grounded by a qualified technician in
accordance with the provided installation
instructions.
Haze the installer show you the location of
the circuit breaker or fltse. Mark it for easy
reference.
Do not leme children alone--children
should not be left alone or unattended
ira an area where an appliance is ira use.
They should nexer be allowed to sit or
stand on any part of the appliance.
Teach children not to play with the
controls or any other part of the cooktop.
Do not allow anyone to climb, stand or
hang on the cooktop.
CAUTION:Items ofinterestto
children should not be stored ira cabinets
aboxe a cooktoi>--children climbing on the
cooktop to reach items could be seriously
injured.
Always kee I) combustible wall coxefings,
curtains or drapes a safe distance from
yonr cooktop.
Use only dUpot holders--moist or damp
pot holders on hot surfaces may result in
burns from smam. Do not let pot holders
touch hot surface units. Do not use a towel
or other bulky cloth. Such cloths can catch
fire on a hot sni_tce unit.
Do not use water on grease fires. Never
pick up a flaming pan. Turn the controls
off: Smother a flaming pan on a surtZace
unit by covering the pan completely with a
well-fitting lid, cookie sheet or fiat m_y. Use
a multi-purpose di T chemical or foam-type
extinguishen
Flaming grease outside a pan can be put
out by co\_fing with baking soda or;
if available, by using a multi-purpose dU
chemical or foam-type rite extinguisher
When preparing flaming foods under the
hood, tnlIl the fan on.
COOKMEATANDPOULTRYTHOROUGHLY...
Cookmeatandpoultry thoroughly--meat to at leastan INTERNALtemperatureof 16O°Fandpoultry
to atleast an INTERNALtemperatureof 180°ECookingto thesetemperaturesusuallyprotectsagainst
foodbomeillness.

www.GEAppliances.com
AWARNING!
SAFETYPRECAUTIONS
Do not touch glass ceramic surface m_its
while cooking. This surface may be hot
enongh to hlllrl even though it may appear
dark in color During and after use, do *lot
much, or let cloflting or oflmr flammable
mamrials contact file cooking surPace. Nora
tile hot indicator lights and allow sufficient
time for cooling first.
Hot surfaces may include both rite cooktop
and areas Pacing tile cooktop.
To minimize fire possihili U of burns,
ignition of flammable mamrials and
spillage, the handle of a container should
be turned toward file center of tile
cooktop without exmnding ox>r any
nearhv surface units.
Always tun_ off tile suifi_ce unit control
before removing the cookware.
Use proper pan size--select cookware
having fiat bottoms larg_ enough to co\_r
the sur/_ace unit heating element. The use
of undersized cookware will expose a
portion of the suiiCace unit to direct
contact and may resuh in ignition of
clothing. Proper relationship of cookware
m surPace unit will also improxe efficiency.
Never lem> suiJ_ace units unattended at
high heat settings. Boilo_ers may cause
smoking and greasy spillox>rs m W ignite.
(;lass and ceramic cookware is not
recommended for use with your radiant
ceramic glass cooktop.
Kee I) an eye on foods being fried at high
or medimn-high heat settings.
Foods for fiTing should be as &T as
possible. Frost on fiozen foods or moisture
on fresh foods can cause hot fiat to bubble
up and ox>r tile sides of the pan.
Avoid placing aW objects on or near dte
keypads in order to prevent accidental
activation of the cooktop controls.
Use little/_at for effective shallow or
deeI>fat flTing. Filling file pan too flfll of
fi_tcan cause spillovers when food is added.
If a combination of oils or fats will be used
in fEving, stir mg>ther before heating, or as
t:ats meh slowly.
_Always heat fat slowly, and watch as it heats.
Use a deep-/_at fllennomemr whenex_r
possible to prevent oveflteafing fat beyond
the smoking point.
Never uw,to move a pan of hot/_at,
especially a deep-fat fiTen X_'ait until the fat
is cool.
Do not store flammable mamfials near
the cooktop.
Kee I) dm hood and grease filmrs clean to
maintain g_od x>nfing and to ax_id grease
fires.
Do not store or use combustible mamrials,
gasoline or other flammable vapors and
liquids in the viciniw of this or any
appliance.
Clean only parts lismd in this Owner's
Manual.
Do not leave paper products, cooking
utensils or food on the cooktop when not
ill use,
Kee I) cooktop clean and free of
accumulation of grease or spilloxers
which may ignite.
Never heat unopened food containers.
Pressure buildup may make container
burst and cause injm T.
Ne_>r leave jars or cans of/_at drippings
on or near your cooktop.
Nex>r use your appliance for wanning or
heating the room.
3

IMPORTANTSAFETYtNFORMATIONo
READALLINSTRUCTIONSBEFOREUSING
WARNING!
RADIANTSURFACEUNITS
Use care when touching the cooktop. Theglass surface of the cooktop will retain heat after the
controls have been turned off.
Avoid scratching tile glass cooktop.
Tile cooktop can be scratched with items
such as sharp instruments, rings or ofl_er
jewel U.
Nexer use tile glass cooktop surPace as a
cntting hoard.
Do not place or store items on top of the
glass cooktop surfi_ce when it is not ill use.
Be carefld when placing spoons or other
stining utensils on glass cooktop surtZace
when it is in use. Timy may hecome hot
and could cause bums.
Axoid heating all empW pan. Doing so may
damage the cooktop and the pan.
Do not allow water, other liquids or g_ease
to remain on the cooktop.
Do not operam file glass surPace units if
the glass is broken. Spillovers or cleaning
solution m W penetram a hroken cooktop
and create a risk of electrical shock.
Contact a qualified technician immediately
should your glass cooktop become hroken.
Spilled or burnt,on foods may cause
accidental actix ation or deactixation of tile
keypad. Clean the keypad thoroughly, and
controls will resume nomml operation.
To prexent accidental actixation of tile
cooktop, do not place ally objects on or
near the keypad.
Clean the cooktop with caution. Always
lock tile control panel using file conuol
lock featule and wait until tile entire glass
surPace is cool before attempting to clean
die cooktop. See die Locking the Cooktop
section for derails. If a wet sponge or cloth
is used m wipe spills on a hot surPace unit,
be carefld to axoid smam hnrns. Some
cleansers call produce noxious flm_es if
applied m a hot snrt_ace.
NOTE."W:e recommend that you moid
wiping any surlCace unit areas nnfil they
haw cooled and tile indicator ]igtlt has
g_ne oft: Sugarspills are the exception to
this.Please see the Cleaning the glass
cooktop section.
When the cooktop is cool, use only
CERAIVlA BRYTE _ (:eramic Cooktop
Cleaner and tile CERAMA BRYTE _
Cleaning Pad to clean the cooktop.
To mold possihle damage to tile cooking
sur_me, do not apply the cleaning cream
to the glass surtZace when it is hot.
After cleaning, use a dUcloth or paper
towel to remove all the cleaning cream
residue.
Read and follow all instmctions and
warnings on tile cleaning cream labels.
i,arge scratches or impacts to cooktops call
lead to broken or shattered glass.
Use care when tonching tile cooktop. Ti_e
glass sni_tce of the cooktop will retain heat
after the connols haw heen turned OFF.
Do not stand on the glass cooktop.
READANDFOLLOWTHISSAFETYINFORMATIONCAREFULLY.
SAVETHESEINSTRUCTIONS
4

Featuresofyourcooktop, vvvvw.GEAppliances.com
Throughout this manual, features and appearance may vary from your model.
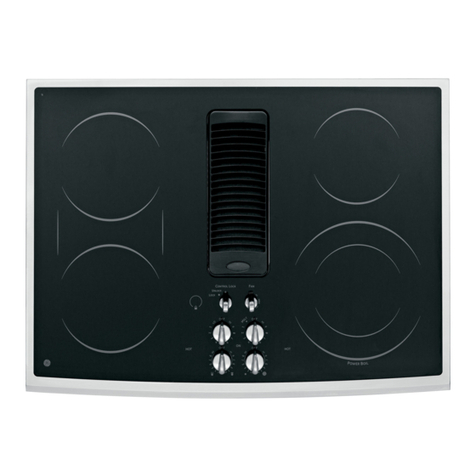
JP969
JP939
FeatureIndex (Featuresand appearances may vary.) Explainedonpage
0Single Smti_ce Unit 6
@ _'_';llIlleI" Stllbfil(-e Ullit S
O Dual Stllthce Unit 7
OSingle Smti_ce Unit Control Pad 6
Dual Sud,me Unit Control Pad 7
O_Ahm]er Smti_ce Unit Control Pad 8
Kitchen Timer Control Pad 9
OPan Sensor Control Pad 9
Control Ix>ck Pad 9
Hot Stlll'ilce h]dicator i fights {one for each surface unit) 9
5

Usingthesurfaceunits.
Yournew Profile Cooktopmakesan eloquent statement of style, convenience, and kitchen planning flexibility. Whether you
chose it for its purity of design, assiduousattention to detail, or for both of these reasons--you'll find that your Profile
cooktop's superior blend of formand function will delight you for years to come.
Thiscooktop contains several new features such as pan detection and pan sizing. Thetouch controls give youprecise
control of the surface units. Youcan quickly switch between a steady low heat and full power or anysetting in between.
Theinformation on the following pages will help youoperate and maintain your cooktopproperly.
NOTE:Throughout this manual, features and appearance may vary from your model
Never cook directly on tlTeglass.
Always use cookware.
Always place thepan in tlTecenter of
tlTesurface unit you are cooking on.
DO Rot slide cool(ware across the
controlor cooktopsurfacebecause
it cat?scratchtheglass.Theglassis
scratch-resistant,notscratchprooL
About the radiant surface units...
The radiant cooktop teatures heating
units beneath a smooth glass sm_i_ce.
Cooktop temperatures increase with
the number of Stlll'ilce units that are
on. With 3 or 4 units turned on, surli_ce
temperatures are high. _Mwavs use
caution when touching the cooktop.
The ON/OFF indicator lights will come
on next to the Wamler and Dual burne_
when activated, i,ights also activate t0r
the Pan Demct and Control I,ock
features when they are turned on. The
indicator lights will go off when the
surtilce unit or teature is turned off.
The ai)i)ropriate HOTSURFACE indicator
light will glow when its corresponding
radiant element is turned on and will
remain on until the surli_ce has cooled
below 150°K
NOTE."
Hot surface indicator light will:
Comeon when the surfaceunit is
turned on.
Stay oneven after theunit isturnedoff
Glow brightly until theunit has cooled
below 150°£
NOTE:A slightodor/snormalwhenanew
cooktopisusedforthefkst time.It/s causedby
theheatingofnewpartsandinsulatingmaterials
andwilldisappearina shorttime.
It is sale to place hot cookware fl'om the
oven or surli_ce on the glass cooktop
when the Stlitilce is cool. Neverplace
cookware on the control area.
Even alter the surti_ce units are turned
ofl_ the glass cooktop retains enough
heat to continue cooking. To avoid
ovei'cooking, i'eil/ove l)_lns ][i'oIl/ tile
surtilce units when the toed is cooked.
Avoid plating anything on the stm'i_ce
unit until it has cooled completely.
Waterstains (mineraldeposits)areremovable
using thec/ean/bgcreamor furl strength white
vinegar
Useof window cbaner may leavean
iridescent film on thecool<top.Thecleaning
cream will removethisdiscoloration.
Don'tstoreheavyitemsabovethecooktop.
If theydropontothecooktop,theycancause
damage.
DonotusethesurfaceasacuttingboarcL
Radiant Surface Units
The controls for the radiant surli_ce milts
allow fiw l l different heat settings: ixm;
1-9 and High. The heating element may
not visibly glow at hm' heat settings.
NOTE:Thiscooktophasa rapidheat-upfeature.
ff thecooktopiscoolwhenturnedon,it willglow
redfora shortperiodoftimeuntilthedesked
powersettingisreachec_If thecooktopisalready
warm,therapidheat-upfeaturemaynotactivate.
OR
i i iiii!ii !
Single Surface Un#
To ttlx'n on a single StlX]il('e tlnit:
[] Touch tile ON/OFF pad, then touch
the (+)/(-) pad. Tile smti_ce unit will
turn on to power setting 5.
[] Use the (+)/(-)pad to choose the
desired power setting. The control
will beep each time a pad is touched.
To turn off a standard stmfhce unit, touch
the ON/OFF pad again.
6

www, GEApptiances,com
Cooking Guide for Using Heat Settings
High (H) - Q_dck start _br cookim_g;
brim_g water to a boil.
Medium High (7-9) - Fast _D, I:)am_
broil; maim_tah_s a first boll on large
;H_OIIm_ts of fk)od,
Medium (4-6) - Sam_ am] _)_)_r[_;
mail_taim_s a slow boil o1_ large amoiH_ts
o_ food.
Medium Low (2-3) - Cook a{}er
startim_g at high; cooks with little water
im_covered pa_.
Low (1) - Steam rice, cereal; maimm_im_s
servim_g temperature o{ most {oods.
Slow cookh_g am] simmerim_g.
Lowest (L) -Keeps {hod warm, melts
chocolate am] bl*tter.
At high or medium-high settings,
never leave food tmattended.
Boilovers cause smoking; greasy
spillovers may catch on fire.
It is sati _ to place hot cookware
t]'Oll] the ()veil or surthce tlnits Oil
the glass-ceramic sm'tace when it is
cool. Never place cookware on the
control area.
NOTE:Cooktoptemperaturesincreasewith the
numberof surfaceunits that areon. With 3or
moreunits turnedon,surface temperaturesare
highsobe careful when touchingthe cooktop.
Thehot surfaceindicatorhght{s)will remain fit
after the surface unit is off until thesurface has
cooledbelow 150°E
Fault Code
If an error occurs in the control
operation, a fimlt code will flash
and the control will signal.
Tocorrect:
[] Touch the CONTROLLOCKpad to
reset the control.
[_ Attempt to set the control to the
desired cooking setting.
[_ If the error is not cleared, allow the
cooktop to cool completely:
[] _Mier cooling, touch the CONTROL
LOCKpadagain to reset the control.
Again attempt to set the control to
the desired cooking setting.
[] If the error is still not cleared, turn
off the cooktop power at the circuit
breaker or fuse box fi:,r ()lie Illintlte.
[] If the error reappears, call fi:,r
serxice.
®
OR
Dual Surface Unit
The dual stu_i_ce trait has a pan sizing
sensor which will automaticallv set the
small or huge smti_ce m]it to match the
size (ff your pail (see the Using Pan Sizing
section). To ovenide the atltoi/latic l)an
sizing sensor and select the small or huge
surti_ce unit:
[] Touch the dual sm_hce trait ON/OFF
pad.
[] Use the (+)/(-)pad to set the desired
power setting.
[] Touch the SIZE SELECTpad once to
tm'n on the hu'ge sm'li_ce m]it. Touch
the pad again to mrn on the small
sm_i_ce m]it.
XYhen the indicator light next to the SIZE
SELECTpad is on, the large sm_me unit is
on. X_q_enit is off, the small surlm'e unit
is on.
To mrn the dual sm_i_ce m]it off, touch
the ON/OFFpad.

Usingthesurfaceunits,
®Warmer Surface Unit
To tuFn on tile waiiller StliS[iice unit:
[] Touch tile ON/OFF pad, then touch
tile WARMERpad. Tile surli_ce unit
will turn on to wam_er power setting
Wl (low).
[] Use tile (+)/(-)pad to choose
additional settings of _A2(medium)
and _,_T_(high),
To mrn off the wam/er power settings,
touch tile ON/OFF pad. To change ti'om
tile wammr settings to regular cooking
settings, press tile WARMER pad. Tile
surfi_ce trait will be on power setting
I, (low). Tile stul'ilce unit nlav then be set
to tile desired setting using tile (÷}/(-}
pads. To mrn off tile sm_i_ce trait, touch
tile ON/OFF pad again.
FoodType ControlSetting
Breads/Pastries Wl (L0 W)
Sauces W2 (Medium)
Soups(cream) W2 (Medium)
Stews W2 (Medium)
Vegetab/es W2 (Medium)
HotBeverages W3 (HIGH)
Soups(liquid) W3 (HIGH)
Thechartaboveshowslbitlalsuggestedsettings
on/gThetemperature,typeandamountoffood,
andthetimeheldwillaffectthequafityof the
food
CAUTION: Donot warm foodon the WARMER
for more than twohours.
Donot usep/astic wrapto coverfood.P/astlc
maymelt ontothe surfaceand be verydifficult
to remove.
Useon/ycookwararecommendedfor top-of-range
cooking.
Tile WARMER will kee I) hot, cooked food
at seI_'ing temperature. _Mways start with
hot tood. Do not use to heat cold food.
Placing uncooked or cold food on surface
warmer could result in foodbome illness.
For best results, all food on tile
WARMER should be covered with a lid or
aluminum foil. _]/en wam/ing pastries
or breads, the cover should be vented to
allow illoisttlre to escape.
Alwa)_s use potholde_ or oven nlitts when
removing food ti'om tile WARMER as
cookware and plates will be hot.
A hot sm_hce indicator light will glow
when the glass Stlrlilce is hot and will
remain on tmfil tile sm'lilce has cooled
below 150°E

vvvvw.GEAppliances.com
How to Lock the Cooktop
IMPORTANT.As a convenience, you can
lock the entire cooktop at am' time when
it is not in use or befi)re cleaning.
I,ocking the cooktop will prevent sudhce
units fl'on] being turI]ed on accidentally
Tolock the cooktop:
Touch and hold the CONTROLLOCKpad
fin" 3 seconds.
A two-beep signal will souI]d, the word
"I,O(:K" will appear in the TIMERdispla>
and the Control i,ock light will turI] oil,
indicating that the cooktop is locked.
If the cooktop is locked while the sudi_ce
units or timer are in use, they will
automatically turn off'.
Tounlock:
Touch and hold the CONTROLLOCKpad
again tot 3 seconds.
A two-beep signal will sound, aI]d the
Control I.ock light will go out, indicating
that the cooktop is unlocked.
@Q,@
How to Operate the Kitchen Timer
NOTE"7-hekitchen t#ner wi// NOT turn off the
surfaceunits when the time reachesO0.OI)
To operate the kitchen fimeI; use the
pads beh/w the TIMERdisplay.
Touch the ON/OFFpad and then touch
the (+)/(-)pad to choose the desired time
setting. If the (+)/(-)pad is held fin.
several seconds, the timer will increase or
decrease at a fi_ster rate.
Alter w)u have chosen your desired time,
the timer will automatically start to count
down from the home/minutes that u)u
have selected. _A]]en the timer counts
down to the last minute, the control will
beep once and the timer will count down
in seconds until 00:00. Then the control
will beep twice every five seconds until
the timer is turned off. Touch the ON/OFF
pad to turn the timer off.
!j!!ij!(i! Usingthe PanDetection Feature
This {batm'e almm_atka]E mrus ella
sm'fhce m_it a{rer 6(1 sec(md!s if a paN_is
absem_t t}'om the smti(ce m_it. The power
]e',e] display will flash m_ti] the sm'fi_ce
m_it is tm'N_ed!o{_ where] the c(mtro]
detects the abse]_ce o{ a pare
7"oactivate and deactivate pan detection Nr
all surface units:
Tol_ch the PAN pad. (At least one surface
unit must be on.) The display B'r[]]}]ash
"PAN ()N" wbem_ the paN_detect]om_
fbatm'e is on.
A signal wi]] som_d and a light next to
the PaNpad will indicate whether the
fbatm'e is active. If the light is on, pan
detection is om amid!if the light is oil
pm_ detection is oft. \_l_en the [:xm
d[etecti(m teatm'e is disabled, the [xm
si/h_g ti_atm'e is also disab]e(L
NOTES:
For this feature to work properly, the
pan diameter must be greater than 4.0
inches and centered on the sudilce
unit.
This teature may not operate i)roperly
with rounded, cma'ed or waq)ed pan
bottoms (see the Typos of Cookwaro
section).
This teature will not work with glass
cookware (see the Typos of Cookwaro
section).
!j:i:iil¸@':i ijiii¸ UsingPan Sizing
This {batm'e is o]_]v used om_the (;b_a]
s._i,ce ..it ,,he. the pa. detecdo.
matm'e is emd)]edk \\l_en a small pam_is
placed o]_ tile sm'fi_ce m_it, the small
sm'fi_ce m_it will activate. \V]]en a pan
larger tha_ 6.0 h_d]es is placed! o_ the
sm'tace m_it, the large s_*rfhce m_it _r[]]
m_tomatica]]y activate. This {batuse may be
overridden tbra single cooking session
while leaving the pan detection tbatm'e
adive (see Dual Surface Unit sectio_).
Tot_rn off this feature and the pan detection
_eature:
To_ch the PNN pad.
The light next to the pad _rH]] g() ()_t,
i_ldic:_ti_]g that [:nm [eatm'es are tm'_led ore
NOTE" Thepan mustbe centeredover tf_e
surfaceunit for this feab'm to work properly:
9
Selecting typesofcookware.
Thefollowing information will help you choose cookware which will give good performance on glass cooktops.
//7¸¸T:¸¸:
Checkpansforflatbottomsby
usinga straightedge.
Stainless Steel: G"
recommended
Aluminum: G"
heavyweightrecommended
Good conductMq:. Muminmn residues
sometimes appear as scratches on the
cooktop but can be removed if cleaned
immediately: Because of its low melting
point, thin weight almninmn should not
be used.
CopperBottom: @"
recommended
Coi)per may leave residues which can
appear as scratches. The residues can be
relnoved, as long as the cooktop is
cleaned immediately. However; do not let
these pots boil dry: Overheated metal can
bond to glass cooktops. An overheated
coppe>bottom pot will leave a residue
that will pemmnenfly stain the cooktop if
not removed immediately:
PorcelainEnamel-CoveredCookware:O"
not recommended
Some l)orcelain-coxered cookware ('_111
bond to the hot cooking surlilce.
Glass-Ceramic/Stoneware: ){
not recommended
Poor peffommnce. May scratch the
StlI]ilce.
Use pans that match the diameter of
the surface trait. Cooking perflmnance
will not be as good if the cookware is
either smaller or larger than the
surtace unit.
Pans with rounded, curved,
ridged or warped bottoms are not
recommended. Pan Detection/SizflTg
may not work properly with these
types of pans.
@° Pan Detection/Sizing xdll work properly with these _])es of cookware.
_Pan Detection/Sizing will not work with these Ic},'l)esof pans.
Z
Do notplacewetpans
ontheglasscooktop.
DonotusewokswithSupport
rings0ntheglasscooktop,
For Best Results
_} Place only (liT pans on the surti_ce
milts. Do not place lids on the sm'ti_ce
milts, particularly wet lids.
Do not rise wo]cs that have SUl)port
rings. This ffpe of wok will not heat on
glass surti_ce units.
Use only a flat-bottomed wok,
available ti'om many l)opular cookware
manufi_cture_. The bottom of the wok
should have the same diameter as the
SUlqfilce unit to insure proper contact.
Some special cooking procedures
require specific cookware such as
pressure cooke_s, deep-tat fl'ye_s, etc.
M1 cookware inust have fiat bottoms
that match the size ot the stmfhce milts.
Use {lat-bottomed woks
on the glass cooktop.
10

vvww.GEAppliances.com
Wrong'
Note: Flat-bottomed canners are
required for glass cooktops.
Observethe Following Points in Canning
Whe0_ cm_ m_im_gwit]] wate>bad_ or
pressm'e cam_m_er.]arge_diameter pots
may be I_sed. This is because boi]im_g
water tempe);_tm'es (even imder
pressm'e) are tier harmfll] to the
cooktop sm'{;_ces SmTolmdim_g t]_e
sm'{i_ce Im]ts.
HOWEVER, DO NOT LJSE lARGE-
DIAMETER CANNERS OR OTHER
IJkRGE-DIAMETER POTS FOR
FRVI NG OR BOII,iNG FOODS
OTHER THAN WATER. Most syrup or
smxce mixtures--amid a]] b'pes of
f_'}_m_g--cook at tempe_tm'es ml_.ch
higher tham_ ]boi]im_g ware): S_uch
tempemtm'es col_]d eventually harm
the glass cooktop sm'ti_ces.
] Be sm'e the cm_m_er {its over the
ten ter of the sm'ii_ce Imit. If veto"
cooktop Or its ]ocatio)m? does m?o)t
a]]o_ the cam)er to be ce])tered
om_the sm'S_ce m_it, use smalle>
diameter pots fin" good cm/m/im/g
resl_]ts.
] F]abbottomed cam_ers ml0st be
iose(]. Do m)t lose cam/m/e]s _,_l[[h
fkmged or x]pp]ed bottoms (often
fblmd im_emm_e]ware) becal*se
they don't make enoug]) co0?tact
with the sm'fi_ce Imits amid take a
]omg time to boil water.
[] \'_hen cm_[_)g, lose recipes m_d
procedures item rei:mtab]e
som'ces. Reliable recipes a_]d
procedm'es are available {}'ore the
mam*lt_cmrer of yore" ca_er;
mam_{_0ctm'ers of g]ass.iars for
cam)i_g, such as Ba]] a_d Kerr
bra0_d; a_d the []_ited States
Depa rtm e0_t of Agricld tm'e
Exte_sio_ Service.
[] Remember that cml_li_]g is a
process that _ge_ei'ates ]']]'<,e,
am(olmts of steam. To) avoid blitzes
f_'om steam or ])eat, be carefll]
whe0? cam?h?g.
NOTE: If your house has low voltage,
canning may take longer than expected,
even though directions have been
carefully foflowed. The process time will
be shortened by:
(1) usinga pressure canner, and
(2) starting with HOTtap water for fastest
heating of large quantities of wate,:
CAU_O_
Safe canning requires that harmful
microorganisms are destroyed and that
thejars are sealed completely. When
canning foods in a water-bath canner,
a gentle but steady boil mustbe
maintained for the required time. When
canning foods in a pressure canner, the
pressure must be maintained for the
required time.
After you have adjusted the controls,
it is very important to make sure the
prescribed boil or pressure levels are
maintained for the required time.
Since you mustmake sure to process
the canningjars for the prescribed
time, with no interruption in processing
time,do not can on any cooktop
surface unit ff your canner isnot flat.
17

Careand cleaningofthecooktop.
Be sure electrical power is off and aft surfaces are cool before cleaning any part of the cooktop.
How to Remove Packaging Tape
To assure no damage is done to the finish
ot the product, the satest way to remove
the adhesive left from packaging tape
and cooktop labels on the new appliances
is an application of a household liquid
dishwashing detergent, mineral oil or
cooking oil.
Apply Mth a soft clofl_ and allow to soak.
X,_]pe dry and then apply an appliance
polish to thoroughly clean and protect
the surti_ce.
NOTE: Theadhesivemust beremoved froma//
partsbefore using thecooktop. It cannotbe
removedif it is bakedon.
/2

Cleaningtheglass cooktop. . .GE4ppliances.com
Control Lock Pad
Begin by h)cking the cooktop; see
the Locking the Cooktopsection. Lrse
the same cleaning methods as those
described for the glass-ceramic top.
!
i
Clean your cooktop after
each spill Use CERAMA
BRYTE®Ceramic Cooktop
Cleaner.
Normal Daily Use Cleaning
ONLY use CEIL_,iA BRYTE " Ceramic
Cooktop Cleaner on the glass cooktop.
Other creams may not be as effective.
To maintain and protect the surfi_ce of
yore" glass cooktop, tollow these steps:
[] gefi}re using the cooktop fiw the
fi]_t tim e, dean it with CEIL_d_IA
BRYTE ':Ceramic Cooktop Cleaner.
This helps protect the top and
makes cleanup easiei:
[] Daily use of CEIL_dMA BRYTE (_)
Ceramic Cookto I) Cleaner will help
keep the c{}{}ktop looking ne_:
[] Shake the cleaning cream well.
Apply a few droi)s of CElL./L4_
BRYTE (_)Ceramic Cookto I) Cleaner
directly to the c{}oktop,
[] Use a i2aper towel or CEIL_4A
BRYTE _)Cleaning Pad fin" Ceramic
Cooktops to clean the entire
cooktop stmfi_ce.
[] Use a dry cloth or paper towel
to reinove all {leaning residue.
No need to rinse.
NOTE:Itis veryimportantthat youDONOT
heat thecooktopuntil it hasbeencleaned
thoroughl_
i I iii_iiiii iii/ ii _ii _ _i
_i(i /i _ i_ i_ ii _i_i_i_i_i_i
Use a CERAMABRYTE*_CleanflTg
Pad for Ceramic Cooktops or a
Scotch-Brite ®Multi-Purpose No
Scratch blue scrub pad.
Burned-On Residue
WARNING:DAMAGEtoyourglasssurface
mayoccurif youusescrubpadsotherthanthe
padincludedwith yourcooktop.
[] Allow the cooktop to cool,
[] Spread a few droi)s of (2EILA2vIA
BRYTE (_)Ceramic (:ooktop Cleaner
on the entire bm_]ed residue area,
[] Llsing the included CEI_qA
BRYTE (_)Cleaning Pad for Ceramic
(_ookt{}ps, it]b the residue area,
appl)ing pressure as needed,
[]
[]
If any residue remains, repeat the
steps listed above as needed.
For additional protection, alter all
residue has been remo'.e(l, polish
the entire stn'lhce with CEIL_IA
BRYTE _ Ceramic (_ooktop Clea]ler
and a paper towel.
...................................................... )
The CERAMABRYTE_Ceramic
Cooktop Scraper and all
recommended suppfies are
available through our Parts Center.
See itTstructimTsunder "ToOrder
Parts" section on next page.
NOTE:Do not use a dull or
nicked blade.
Heavy, Burned-On Residue
[] Allow the cooktop to coo].
[] [Ise asim]g]e-edge razor blade
scraper at approximately a 45 °
m]g]e agaim]st tile glass sm'tace
am](] scrape the soil It w]]] be
m]ecessar} to apply pressl*re to
the razor scraper im] order to
remove the resi(hle.
[] After sc_:q)im]g wit]] the razor
scrape_; spread a {ew drops of
CERAMA BI&TE < Ce_:m]ic
Cooktop Cleam]er (m the e_]dre
bm'm]ed resi(b_e area. Use the
CERAMA BRUTE < C]eam]h]g Pad to
remove am]yrema]m]im]gresid_]e.
[] For additiom_] protecti{m,
aRer a]] resi(b_e has bee]]
removed, polish the e_]tire
sm'fsce wit]] CERAMA BR}rTE <
;rod a paper towel
13

Cleaningtheglass cooktop.
Metal Marks and Scratches
[] Be caretul not to slide pots and pans
across your cooktop. It will leave
metal markings on the cooktop
S/lI_;Ice.
These marks are removable using
tile CEIL_/IA BRYTE (':Ceramic
Cooktop Cleaner with the CEbDd_JIA
BRYTE _ Cleaning Pad tot Ceramic
Cooktops.
[] If pots with a thin oxerla? of
almninmn or copper are allowed
to boil (liT, the overlay may leave
black discoloration on tile cooktop.
This should be removed
immediately betin'e heating
again or the discoloration may
be permanent.
WARNING'. Carefullycheckthe bottom ofpans
for roughnessthat would scratchthe cooktop.
Glasssurface potential forpermanent damage.
Our testing shows that if you
are cooking high sugar
mixtures such as jelly or
fudgeand have a spillover, it
can cause permanent
damage tothe glass surface
unless the spillover is
immediately removed.
Damage from Sugary Spills and Melted Plastic
[] Turn off all sm_hce milts. Remove
hot pans.
[] _4'eaiJng an oven mitt:
a. Use a single-edge razor blade
scraper (CEIL_MA BRYTE <:
Ceramic Cooktop Scraper) to
move the spill to a cool area on
the cooktop.
b. Remove the spill with
paper t_wels.
[] Any remaining spillover should be
lett until the sm]i_ce of the cooktop
has cooled.
] Don't use tile sm_i_ce milts again
tmtil all of the residue has been
completely removed.
NOTE:Ifpitting or Indentatbn in the glass
surfacehasalready occurred,thecooktopglass
will have to be replaced In thb case,service will
benecessan/
To Order Parts
To order (;El_d'dA BRYTE ':Ceramic
Cooktop Cleaner and the cookto I)
scrapex; please call our toll-fl'ee number:
National Parts Center 800.626.2002.
CERAMA BRYTE®Ceramic
CooktopCleaner ........... _ WXIOX300
CERAMA BRYTE_Ceramic
CooktopScraper ........... # WXIOX0302
Kit ........................ # WB64XS027
(Kitincludescream and cooktopscraper)
CERAMA BRYTE_Cleaning Pads for
Ceramic Cooktops ......... # WXIOX350
/4

Beforeyoucall forservice...
Troubleshooting -tips
Save time and money! Review the charts on the following
pages first and you may not need to carl for service.
www.GEAppliances.com
Surface unitswill not
maintaina rolling boil
or cookingis slow
Possible Causes
Improper cookwaxe
being used.
What ToDo
•Use pans which are absolutely flat and match
the diameter of the surihce unit selected.
Surface units do A fuse in your home may be •Replace the fl/se or reset the circuit breaker:
not work properly blown or the circuit breaker
tripped.
Cooktop controls • (:he('k to see the correct control is set for the surthce
improperly set. unit you are using.
Scratches (mayappear Incorrect clemfing •Scratches are not removable. Tiny scratches will become
as cracks) on cooktop methods being used. less visible in time as a result of cleaning.
glasssurface Cookware with rough bottoms •To avoid scratches, use the recommended cleaning
being used or coarse parfides procedures. Make sm'e bottoms of cookwm'e are clean
(salt or sand) were between heft)re use, and use cookware with smooth bottoms.
the cookware m_d the surface
of the cooktop.
Cookware has been slid
across the cooktop surface.
Areas of discoloration Food spillovers not cleaned •See the Cleaning the glass cooktop section.
on the cooktop before next use.
Hot surface on amodel •This is normal. The stu'ihce may al_l)ear discolored
with a light-colored glass when it is hot. This is temporary and will disapl)ear
cooktop, as the glass cools.
Plastic melted to Hot cooktop came into • See the Glass surface -potential for permanent damage
the surface contact with plastic placed sectiou in the Cleaning the glass cooktop section.
on the hot cooktop.
Pitting (or indentation) Hot sugar mixture spilled • Call a qualified technician for rel)lacemeut.
of the cooktop on the cooktop.
Frequent cycling Improper cookware •Use only flat cookware to minimize cycling.
off and on of being used.
surface units
Cooktop feels hot Improper cookware •The glass (ooktop suriace may seem hotter th:m you
being used. are used to. This is normal. Use pans which are
al)solutelv flat.
Unresponsive keypad Keypad is contaminated. •Clean the keypad.
Pan detection/sizing Improper cookware •Use a flat, metallic pan that is 4.0" or larger.
not working properly being used.
Pan is improperly placed. •Make sure the l)aU is ceutered ou the corresl)oudiug
surthce trait.
15

Before YouCallForService...
Troubleshooting -tips
Save time and money! Review the charts on the following
pages first and you may not need to call for service.
TEMPLTDappears
in thedisplay
Surfaceunitis
glowing hot when it
shouldbe ona low
power setting
Possible Causes
Thne-Out feature activated.
Cooktop feature activated.
What To Do
• Allow the suriace unit(s) to cool for 1/2 to 1 hour
before using again.
• The cooktop has a rapid heat-up te'attlre and is
designed to do this.
"F" and a number
appear in the display
and the cooktop beeps
You have a function
error code,
• Write down the "F:- - -" and touch the CONTROL
LOCKpad. Disconnect the power to the cooktop and
then reconnect. If an Dcode appears again, call for
service.

GE Service Protection Plus '_'
GE, a imme recog_fized _;odd_;kte fbr qmdhy and depeIldabilhy, offers ?(m
Sere;ice Protecfio_ } h_s --comp_ ehe_s_ e protecti(m o_ all yore" appliai_ces--
No Matter What Brand!
Benefits Include:
* Backed by GE
. All brands covered
. U_imited service calls
. _ parts and labor costs included
*No out-of-pocket expenses
* No bidden deductibles
* One 800 nnmber to call
We ?i Cover Any App!iance.
Angwhoro. Angtfmo.
Yim wi]] be completely satisfied wit]] oLlr service [:)rotectiom_ or vol_ may reql_est yore" member back
o_ the remaim_im_g x'ab_e of yol_r tom, tract. No ql_estiom_s asked. It's that simple.
Protect velar rdHgerato_; dishwasher; washer a_/d d_ye_; raN_ge, TVI VCR al_d m_ach more--any brand!
Pbas there's _o extra charge ti)r emergel_cy service m_d ]o_* mol_tb]y fi_la_ci_g is a_ai]ab]e. Eve_ icemaker
coverage a_d %od spoilage protectiol_ is oftered_ '_)_ ca_ rest eas}, ki_owi_g that a]] vo_r w_bmb]e
bo_sebo]d prod_cts are protected agai_st expel_sive repairs.
for more
,_ (Jill hel_
Please place in envelope and mail to:
General Electric Cempanf
Warranty Registration Department
P.O. Box 3215(}
Louisville, KY 4(}232-215(}
77

Consumer Product Ownership Registration
Dear Customer:
Thank you for purchasing our product and thank you for placing your confidence in us.
_A/eare proud to ha_e you as a customer!
Follow these three steps to protect your new appliance investment:
Complete and mail
your Consumer
Product Ownership
Registration today.
tlaw' tim peace ot
mind of knowing wc
C_lll COlltact VOI/ ill
the tmlikely ev(nt of a
satbly modificalion.
Aiter mailing the
registration below,
store this docmnent
ill a sati' place. It
contains inlormation
you will need should
you require service.
Our selwice number is
800.GE.CARES
(8t)0.432.2737).
Read your Owner's
Malmal careihllv.
It will help you
operat( your lie'*t`
appliance properly.
Model Number Serial Number
,,,,,I I ,,,,,,,I
Important: If you did not get a registration card with your
product, detach and return the form below to
ensure that your product is registered, or register
online at www.GEAppliances.com.
................................................................................................... _(MI 11(1-<
Consumer Product Ownership Registration
Model Number Serial Number , I
Ms. M*>,. Mix_,
Fir,,1 I IL_sl]
Name IIIIIIIII Nain(! I I I I I I I I I I I I
_1 r( (!1 I
Addr< ss IIIIIIIIIIIIIIIIIIIIIII I
Ap_.#l, , , , , , , IE-lnailAddress*
Zip I
l )u(, pla_ed _._,l,<,rlI, I-I,, I-I,,, I
Monlh
Q* Pl(asc F,rovide y 1 - c- a address Io r(cciv(, via e-mail, discounts, special off'( rs and ofll(r impormnl
communi(ations h-oln GE Apl)lian(es (GEA).
Ch((k h(r( if you do nol want to re(( ire (olnmtmi(ations h-ore (;EA's (arefully sel((ted partners.
6E Appfiances
Gallar_d Etac_ric Compaxly
Louisville, Kalltucky
ww_z6EAppti_tlcesconl
13

GEElectric CooktopWarranty.
Aft warranty service provided by our Factory Service
Centers, or an authorized Customer Care®technician.
Toschedule service, on-line, 24 hours a day, visit us
at www. GEAppfiances.com, or call 800.GE.CARES (800.432.2737).
Staple your receipt here.
Proof ofthe original purchase
date is needed to obtain service
under the warrantg
Fromthedateof the
origina!purchase
GEWill Replace:
Anypartof the cooktop which fifils due to a defect in materials or workmanship.
During this fullone-yearwarranty,GE will also provide, freeofcharge,all labor
and ix>home service to replace the defective part,
Fromthedateof the
originalPurchase
A replacement glass cooktop if it should crock due to themml shock, (liscolo_;
or if the pattern wea_s ofl_
Areplacement radiautsurface unitif it should bm'n out.
During this limited additional four-year warranty, you will be responsible for any labor or
in-home service.
Service trips to your home to teach you how to use the
product.
hnproper h_stadlation.
Failure of the product if it is abused, misused, or
used for other thma the intended purpose or used
commercially.
Dmnage to the glass cooktop caused by use of demmrs
other thm_ the recommended clem_hlg cretans mad
pads.
Damage to the glass cooktop caused by haxdened spills
of sugaJ_y materiaJs or melted plastic that are not clemmd
according to the directions in the Owner's MmmaJ.
Replacement of house fuses or resetting of circuit
breakers.
Damage to the product caused by accident, fire, floods
or acts of God.
h_cidentaJ or consequential damage caused by possible
defects with this applimlce.
This warranty is extended to the original purchaser and any succeeding owner for products purchased for
home use within the USA. In Alaska, the warranty excludes the cost of shipping or service calls to your home.
Some states do not allow the exclusion or limitation of incidental or consequential damages. This warranty
gives you specific legal rights, and you may also have other rights which vary from state to state. Toknow
what your legal rights are, consult your local or state consumer affairs office or your state's Attorney General.
Warrantor: General Electric Company.Louisville, KY 40225
/9

ConsumerSupport.
GEAppliancesWebsite www.GEAppliances.com
Have a question or need assist;race with your appliance? Try the (;E Al)pliances Website 24 hom_ a (la);
any day of the year'. For greater convenience and faster se_Mce, you can now download Owner's Manuals,
order parts, catalogs, or even schedule service onqine. You can also "_&sk Our Team of Experts <, your
questions, and so much i/lore...
ScheduleService www.GEAppliances.com
Expert (;E repair setMce is onlx one step awa) fl'om your do(n; Get on-line and schedule your service at
your comenience 24 hom_ am da_ of the ',ear! Or call 800.GE.(:ARES 800.432.2737) during n(mnal
business hom_.
RealLifeDesignStudio www.GEAppliances.com
GE supports the ILrnive_al Design concept--products, services and environments that can be used by
people of all ages, sizes and capabilities. _'e recognize the need to design fi)r a wide range of i)hysical and
ment;d abilities and imi)aim_ents. For details of GE's Universal Design api)lications, including kitchen
design ideas for people with disabilities, check ()tit ()Ill" _4'ebsite today. For the hearing impaired, please
call 800.TDD.GEAC (800.833.4322).
ExtendedWarranties www.GEAppliances.com
Purchase a (;E extended warrant_, and learn about special (liscount_ that are axailable while your warranty
is still in effect. You can purchase it on-line anytiine, or call 800.626.2224 during nomml business hou_.
(;E Consumer Home Serxices will still be there after )our warranty expires.
PartsandAccessories www.GEAppliances.com
Individuals qualified to service their own appliances can have parts or accessories sent directly to their
homes (VISA, MasterCard and Discover cards are accepted). Order on-line today, 24 hom_ every day or by
phone at 800.626.2002 during nomml business hom_.
Instructionscontainedin thN manualcoverprocedurestoheperformedbyanyuser.Otherservicinggenerally
should be referred to qualified service personnel. Caution must be exercised, since improper servicing may cause
unsafe operation.
ContactUs www.GEAppliances.com
If' you are not satisfied with the service you receive from GE, contact us on our _'ebsite with all the details
including your phone numbe_; or write to: General Manage_; Customer Relations
GE Appliances, Appliance Park
I,ouisville, KY 40225
RegisterYourApp/iance ww CEapplia,ces.com
Register your new applimlce on=_e--at your conveMence! Timeh, [)ro(lhwt registrati(m,, will allow hn"
e]_h;mced ai)d prompt service imder the terms o{ _ol0r war]_mty should [he m_eed arise.
_i_l_ may also mail im_the preprim_ted regist_tio_ card im_c]l_ded im_the [>ackh_g_ material
20 Printed in fl?e United States
Other manuals for JP939
1
This manual suits for next models
1
Table of contents
Other GE Cooktop manuals

GE
GE CGP650SETSS User manual

GE
GE JP256WM1WW Operating instructions

GE
GE Monogram ZGU48N4G User manual

GE
GE Monogram ZGU366LPSS Manual

GE
GE Monogram ZHU30RSR User instructions

GE
GE RGA720EKWH Original instructions

GE
GE 36 ELECTRIC RADIANT COOKTOP ZEU36R User manual

GE
GE PROFILE JP969BH User manual

GE
GE JP340BJ User guide

GE
GE MONOGRAM ZGU36L4RHSS User instructions