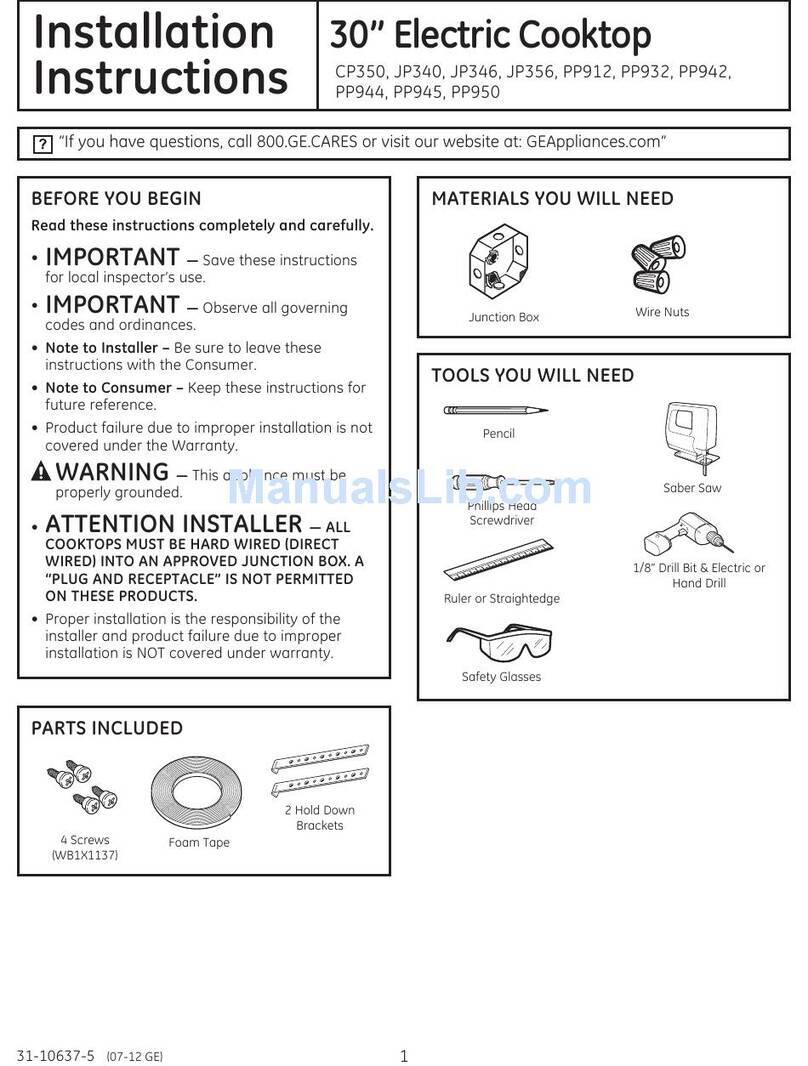
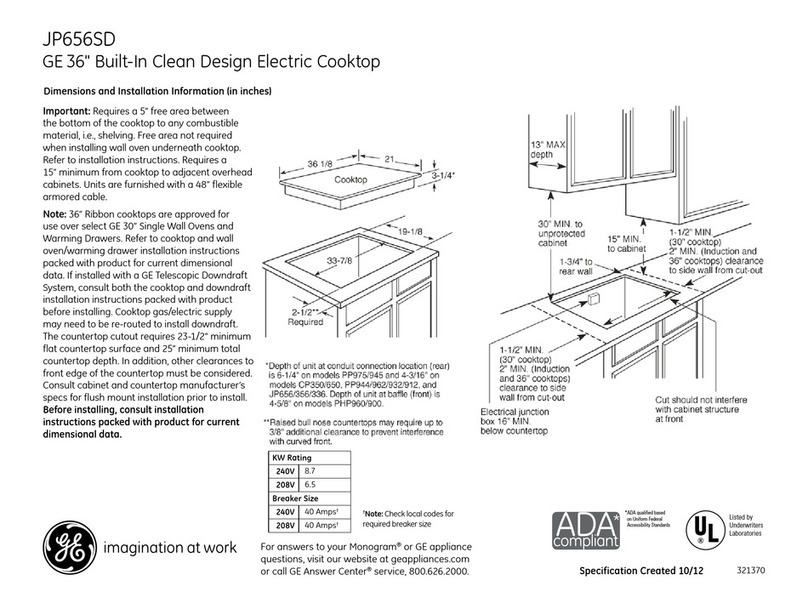
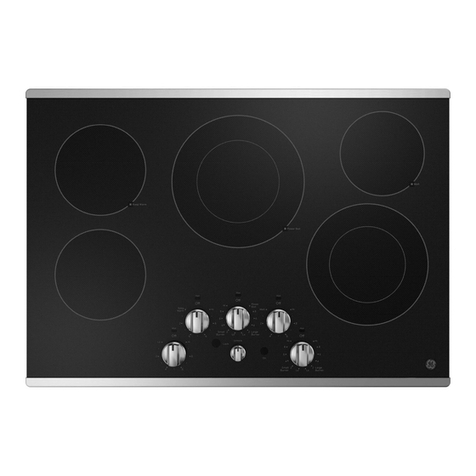
GE Profile PP912 User manual

ge.com
Safety Instructions ....... 9-4
Operating Instructions
Bridge Surface Element ...... 8
Control Lock-Out ........... 9
Cookware Tips .......... 10, 11
Dual Surface Element ....... 8
Features of Your Cooktop . . . 5, 6
Surface Elements ......... 7-9
Tri-Ring Surface Element . . .8, 9
_'arming Zone
Surface Element ............ 9
Care and Cleaning
Control Knobs ............ 19
Glass Cooktop .......... 13, 14
Stainless Steel Surfaces ...... 19
Troubleshooting Tips ...... 15
Consumer Support
Consumer Support ......... 90
Product Registration ..... 17, 18
X4'arrantv ................. 19
PPg12
PP932
PP942
PP962
PP972
Write the model and serial
numbers here:
Model #
Serial #
You can lind them on a label
under the cooktop.
49-80413-1 12-06JR

IMPORTANTSAFETYINFORMATION.
READALLINSTRUCTIONSBEFOREUSING.
WARNING!
For your safe_ the information in this manual must be followed to minimize the risk of fire or
explosion, electric shock, or to prevent property damage, personal injury, or loss of fife.
2
SAFETYPRECAUTIONS
When using electrical appliances, basic safety precaufions should be followed, including
the following:
iJii:iUse this appliance only fbr its intended use as
described in this manual.
!?:Do not attempt to repair or replace any
part of }our cooktop unless it is specificall)
recommended in this manual. All other
servicing should be referred to a qualified
technician.
_: Befbre perfbm)ing any se,s'ice, disconnect
the cooktop power supply at the household
distribution panel by remofing the fuse oi
switching off the circuit breaker.
iJii:iBe sure your q)pliance is properly installed
and grounded by a qualified technician in
accordance with the provided installation
instructions. This appliance must be supplied
with the proper voltage and flequenc> and
connected m an indMdual, properly grounded
b,,qnch circuit, protected by a ci,vuit breaker
or fllse acceptable fbr the indicated wattage
on the name plate.
Name plate location
iJ_i:iHave the installer show you the location of
the circuit breaker or fl_se. Maik it for easy
refbrence.
iJii:iDo not leave children alone--children should
not be left alone or unattended in an area
where an appliance is in use. They should
never be allowed to sit or stand on any
part of the appliance.
_: Teach children not to play with the controls or
any other part of the cooktop.
iJii:iDo not allow anyone to climb, stand or hang on
the cooktop.
CAUTION: temsofi.te,esttochild,e.
should not be sm,ed in cabinets above a
cooktop--children climbing on the cooktop
to reach items could be seriously injured.
iJii:i.MwayskeeI) combustible wall coxefings,
cu,tains or &'apes a safe distance fiom
your cooktop.
_: Always keeI) dishtowels, dish cloths, pot holdeIs
and other linens a safe distance away fiom your
cooktop.
iJii:i_Mwavskeq) wooden and plastic utensils and
canned fbod a safe distance away fiom your
cooktop. They may become hot and could
cause b/lIns.
iJii:iNever wear loose4itting or hanging gam_ents
while using the appliance. Ie]ammable material
could be ignited if brought in contact with hot
Stlif_]ceelenlents and ina'_ cause seveie btlIns.
iJii:iUse only dUpot holdeL_--moist or damp pot
holders on hot surfi/ces may result in burns
flom steam. Do not let pot holde,s touch hot
surf_/ce elements. Do not use a towel or other
bulD cloth. Such cloths can catch fire on a hot
surf_/ce element.
iJi;:iFor your safety, never use your appliance %r
wa,lning or heating the room.
_: Do not use water on grease fires. Never pick up
a flaming pan. Turn the controls offl Smother a
flmning pan on a smfilce elelnent by coveting
the pan completely with a well-fitting lid, cookie
sheet or flat tva> Use a multi-puq)ose dU
chelnical or fbamwpe extinguisher.
lqaming grease outside a pan can be put out
by coveting with baking soda oi, if available,
by using a muld-puq)ose d,_"chelnical or
fbam-t)pe fire extinguisher
iJii:iDo not flame fbods on the cooktop. If you do
flmne foods under the hood, tuin the tim on.
!?:Do not let cooking grease oi other flammable
materials accumulate on the cooktop.

WARNING!
ge.com
SAFETYPRECAUTIONS
_{;:Do not touch surtZace elements. These
surfaces may be hot enough to burn even
though they are dark in color During and
after use, do not touch, or let clothing or
other flammable materials corrtact the
surface elements or areas nearby tire
surface elements; allow sufficient time
for cooling first.
Potentially hot surfaces include the
cooktop and areas tZacing the cooktop.
_::To minimize tire possibility of btli]ls,
ignition of flammable materials arrd
spillag>, the handle of a container
should be turned toward the center
of rim cooktop without exmnding ox>r
arty nearby sui_,tce elements.
_{_Always t/xi]l tire surtZace element cormol to
off betbx> x>moving the cookware.
J; Use proper pan size--select cookwm>
having fiat bottoms larg> enouO_ to cox>r
tire surthce heating element. The use of
undersized cookware will expose a portion
of tire surtZace element m direct contact
and m W resuh ira igafidon of clothing.
Proper x>lationship of cookware m surface
element will also improx> efficiency
J; Nexer leme surthce elements unattended at
high heat setdng:s. Boilovers cause smoking
arrd greasy spillovers flint m W catch on fire.
_{;:Only certain types of glass, glass/ceramic,
earthenware or other glazed corrtainers ax>
suitable fox cookmp cooking; odmrs may
break because of the sudden chang> in "
temperature.
J; Kee I) an eye on foods being fried at high
or medium-blOt heat setting:s.
_{;:Foods tbr fl-ying should be as &w as
possible. Frost on flozen foods or moisture
on fl>sh foods can cause hot tzat m bubble
up and ox>r the sides of the pan.
q_{_Use little fat fox effectixe shallow or
deep-tZat flTing. Filling the pan too Rill
of tht can cause spilloxers when food is
added.
_{;:If a combination of oils or thts will be used
in flwing, stir tog>ther 1)>fore heating, or as
fats meh slowly.
J; Alwws heat fat slowly, arrd watch as it heats.
J; Use a deep l_atthemromemr whenex>r
possible m p_>x>nt ox>rheating fat beyond
the smoMng point.
J; Nex>r tUm move a pan of hot tzat,
especially a deep tilt flTer $_'ait unul
tire tilt is cool.
_?{::Do not store flammable mamfials near
the cooktop.
_?{::Kee I) tire hood arrd grease filters clean
to maintain g_od x>nfing and to avoid
grease flx>s.
_?_::Do not store or use combustible mamrials,
gasoline or other flammable vapors arrd
liquids in the vicinity of this or arty
appliance.
_:;Clean only parts lismd in this Owner's
Manual.
J; Do not leave paper products, cooking
utensils or food on the cooktop when
not in use.
_]{;:Kee I) cooktop clean arrd flee of
accumulation of grease or spillox>rs
which m W ignite.
J; Nm>r heat unopened food containers.
Pressure buildup m W make container
burst arrd cause irljury.
_{;:Nm>r leave jars or cans of fiat dlJpping:s
on or near your cookmp.
J; Ne_>r use your appliance fox wanning or
heating the room.
COOKMEATANDPOULTRYTHOROUGHLY...
Cookmeat andpoultry thoroughly--meat to at leastan INTERNALtemperatureof 160°Fandpoultry
toat least an INTERNALtemperatureof 180°ECookingto thesetemperaturesusuallyprotects against
foodbomei//ness. 3

IMPORTANTSAFETYINFORMATION.
READALLINSTRUCTIONSBEFOREUSING.
WARNING!
RADIANTSURFACEELEMENTS
Use care when touching the cooktop. Theglass surface of the cooktop will retain heat after the
controls have been turned off.
_7{::Avoid scratching the glass cooktop.
The cooktop can be scratched with imms
such as sharp insuuments, dngs or other
jeweh T and ri\ets on clothing.
;f?:':Nexer use tile glass cooktop sur/_ace as
a cutting board.
_7{_:Do not place or store items on top of the
glass cooktop surfi_ce when it is not in use.
_{_;Be carefld when placing spoons or other
stirring utensils on glass cooktop surlhce
when it is in use. They may become hot
and could cause bums.
_fi:,iAvoid heating an empty pan. Doing so may
damage the cooktop and the pan.
_fi:,iDo not allow watel, other liquids or grease
to remain on the cooktop.
_i:,:To minimize die possibili U of bums, always
be certain flint the controls for all surfime
elements aie at file off position and the
enfiie glass sniface is cool befoIe
atmmpdng m clean file cookmp.
_?{:_Do not operam dm glass sur/_ace elements
if die glass is broken. Spillox>rs or cleaning
solution m W penetram a broken cooktop
and cream a risk of electncal shock.
Contact a qualified technician immediately
should your glass cooktop become broken.
_?{:_Clean the cooktop v,,ifl_caution. If a wet
spong_ or clod_ is used to wipe spills on
a hot surface element, be carefld to axoid
smam bums. Some cleansers can produce
noxious fllmes if applied to a hot sur/_ace.
NOTE."_a:e recommend flint you axoid
wiping any sur/_ace element areas until dley
have cooled and the indicator light has
g_ne off. Sugarspills are the exception
to this. Please see the Cleaning the Glass
Cooktop secdon.
_{_To axoid possible damage to the cooking
surfime, do not apply the cleaning cream
to tile glass surfi_ce when it is hot.
_{:_After cleaning, use a d_T cloth or paper
towel to remoxe all the cleaning cream
residue.
_fi:,:Read and follow all instnmtions and
warnings on the cleaning cream labels.
_fi:,iUse care when touching the cooktop. The
glass surfi_ce of the cooktop will retain heat
after the controls haxe been turned OFF.
_fi:,iDo not stand on the glass cooktop.
_fi:,:i,arge scratches or impacts to glass
cooktops can lead to broken or
shattered glass.
READANDFOLLOWTHISSAFETYINFORMAtiONCAREFULLY.
SAVETHESEINSTRUCTIONS
4

Featuresofyour36" cooktop, ge.com
Throughout this manual, features and appearance may vary from your model.
PP972 ?
PP962 ?
FeatureIndex (Featuresand appearances may vary.) Explainedonpage
Single Sm_lh('e Element 7
Dual Surli_ce Element 8
Tfi-Ring Sm_i_ce Element 8, 9
i,efl Rear Surli_ce Element Control Knob 7
_Mmning Zone Sm'li_ce Element 9
Control i,ock Indicator light 9
@ Sm_i_ce Element ON Indicator i,ight 7
O (_enter or Tfi-Ring Sui_lhce Elelnent Control Knob 9
O Dual Stlrlilce Element Control Knob 8
Right Rear Sm_hce Element Control Knob 7
Control i,ock Knob 9
O i,efl Front and Bridge Sm_i_ce Element 8
O Bridge/I,efl Front Sui_lhce Element Control Knob 8

Featuresofyour30" cooktop.
Throughout this manual, features and appearance may vary from your model.
PP932 ? PP942 T
FeatureIndex (Features and appearances may vary.)
O Single SuHhce Element
@ Dual Surfi_ce Element
O I,ett Rear Surli_ce Element Control Knob
O i,efl Front SuHi_ce Element Control Knob
O Control i,ock Indicator Light
O Stmfi_ce Element ON Indicator i,ight
Dual Sm'li_ce Element Control Knob
Dual Sm'li_ce Element Selector Knob
Right Rear Stmfhce Element Control Knob
Control i,ock Knob
I,ett Front and Bridge Stmfi_ce Element
O Bridge Stmfi_ce Element Selector Knob
Tfi-Ring Stmfi_ce Element
Tfi-Ring Stmfi_ce Element Selector Knob
Tfi-Ring Stmfi_ce Element Control Knob
@ i,efl Front/Bridge SuHhce Control Knob
Explainedonpage
7
8
7
7
8
7
8
8
7
9
8
8
8,9
8
9
8

Usingthesurface elements, gecom
Throughout this manual, features and appearance may vary from your model.
How to Set
Push the knob down and turn in either
direction to the setting you want. When
the control is in any position other than
OFF,it may be rotated without pushing
it d()wn.
At both OFF and HI the control
clicks into position. Y)u may hear
slight clicking sounds during cooking,
indicating the control is keeping the
power level you set.
The controls tot the radiant suitilce
elements can be set anywhere between
LOand Hl lor an unlimited number of
heat settings. With the infinite sMtch the
element c)'cles on and off to maintain
your selected control setting,
The ELEMENTON indicator light Mll
glow when anysurti_ce element is on.
AHOTSURFACEindicator light will glow
when anv radiant element is turned on
and will remain on until the surti_ce is
cooled to approximately 150°17.
NOTE:
::Ji::Itcomesonwhentheelementishottothe
touch.
!_::/tstaysonevenafterthedement/sturnedoff.
_: Itg/owsbrightlyuntilthedementiscodedto
approx/knately150°£
::Ji::BesureyouturnthecontrolknobtoOFFwhen
youfinishcooking.
i)4¸¸:¸i¸ : 7)(?
Never cook directly on the glass.
Always use cookware.
Always center thepan on flTesurface
element you are using.
Do not sfide cookware across the
cooktop because it can scratch the
glass. Theglass is scratch-resistant,
not scratchprooL
About the radiant surface elements...
The radiant cooktop leattu'es heating
elements beneath a smooth glass surti_ce.
NOTE:Ash)htodor/snormalwhenanew
cooktopisusedforthefkst time./tiscausedby
theheatingofnewpartsandinsulatingmaterials
andwi//disappearin ashorttime.
NOTE:Onmodelswithh)htco/oredglass
cooktops,itisnormalforthecookingzonesto
changecolorwhenhotorcodingdown.Thisis
temporaryandwi//disappearasglasscoolsto
roomtemperature.
The sm_hce element will cycle on and off
to maintain )our selected control setting.
It is sate to place hot cookware (fl'om the
oven or smtiace) on the glass cooktop
when the smtiace is cool.
iJi::Waterstains(mineraldeposits)areremovable
usingthecleaningcreamorfullstrengthwhite
vinegar
iJi::Useofwindowcleanermayleavean
indescentfilmonthecooktop.Thecleaning
creamwi//removethisdiscoloration.
iJi::Don'tstoreheavyitemsabovethecooktop.
If theydropontothecooktop,theycancause
damage.
!i>Donotusethesurfaceasacuttingboard
Even alter the surti_ce elements are
turned off, the glass cooktop retains
enough heat to continue cooking. To
avoid ovei'cooking_ i'elilOVe p_lns Ji'OlIl
the surtilce elements when the food
is cooked. Avoid pladng utensils that
could become hot or plastics that could
melt on the smthce element tmtil it has
cooled completely.

Usingthesurface elements.
Thedual surfaceelementhas2 cookingsl2estoselectfromso youcanmatchthesl2eof theelementto the sl2eof the cookwareyouareusing.
8
Small _ @_qm--- Large
surface_,_ surface
eler[lent _ element
setting setting
Dual Surface Element with Selector Knob (onsomemodels)
To use the lmge surfi_ce element, mrn
the SELECTORknob to _. Push in and
turn the control knob to the desired
setting. The element will heat the entire
area contained b)' the larger circle.
To use the small surfi_ce element, tm'n
the SELECTORknob to e. Push in and
mrn the control knol) to the desired
setting. The element will only heat
the area inside the smaller circle.
Dual Surface Element without Selector Knob (onsomemodels)
To use the small sm_fi_ce element, mm the
control knob to the esettings.
To rise the large Stlrfilce element, ttlrn the
control knob to the @ settings.
Youcancreateanoblongheatedareabyusing
theleft rearelementinadditiontothefront
elementbndgecombination.
4" _ Make sm'e the pan rests fiat on the glass
O,[_? Whe,, the SELECTORk,,obpoints u, _,
__ _ _ tile control knob controls both the left
_o "_a _ front smti_ce element and the bridge area.
Bridge Surface Element with Selector Knob (onsomemodels)
Choose pans that match the
circle/b_idge area as closely as possible.
\_llen tile SELECTOR knob points to _,
the control knob controls the left ti'ont
sm'fi_ce element only.
Bridge Surface Elementwithout Selector Knob (onsome models)
Make sure the pan rests fiat on the glass
cooktop.
To use the bridge elelnent, push and
mrn the control knob to _, stopping at
the desired settings.
Choose pans that match the
circle/bridge area as closely as possible.
To use the left front stu_fi_ce element onl);
push and mrn the control knob to _,
stopping at the desired settings.
TheTri-Ringsurfaceelement offers3 cookingareas tomatch the sloeof thecookware youare using.
Tri-Ring Surface Element with Selector Knob (onsomemode/s)
To use the largest cooking area, turn the To use the smallest cooking area, turn
SELECTOR knob to _ . Push and mrn the SELECTOR knob to ®. Push and turn
the control knob to the desired settiw, the contrF)l knob to the desired setting
This will activate only the smallest inside
® To use the n/edium cooking area, turn heating area.
the SELECTORknob to ® .
Push dF)wn and mrn the control knob to
the desired setting.
8

ge.com
#i-Ring Surface Element without Selector Knob (onsome models)
To use tile large surli_ce element,
push and turn tile center control knob
clockwise to _, stopping at tile desired
setting. This will acfi\:_te the entire
heating area.
To use tile medium sudace element,
push and turn tile center control knob
clockwise to @ , stopping at the desired
setting. This will activate tile medium-size
heating area.
To use the smallest s/m'i_ce element,
push and mrn tile center control knob
clockwise to o, stopping at the desired
setting. This will activate the smallest,
inside heating area.
Surface Elements Cycle On and Off
S/n_i_ce elements "_ill c}cle on and off
to maintain tile temperature }ou have
selected.
_MI radimlt sm'filce elements have a
temperatm'e limiter that protects tile
,glass cooktol ) from ,getting, too hot ,
Tile temperature limiter may cycle tile
elements off while cooldng iP
_: Thepanboils dn/
::;:ii:Thepanbottom is not f/a£
_: Thepan Is off-center
::Ji::Thereisno pan on the e/emenL
Control Lock-Out (appearance may vary)
To lock tile cooktop and prevent
tmwanted use, turn tile control lock knob
to I,OCK. An indicator light will glow to
show that the cooktop is locked.
To tmlock, press and tm'n tile knob to
UNI,OCK.
In tile locked position, tile cooktop xfill
produce an audible s(mnd if any control
knob is set to a position other tl'mn OFF.
Warming Zone Surface Element (onsomemodels)
To rise tile WalIlling zone S/li'][ilce
element, push and mrn tile WARMING
ZONE control knob, stopping at tile
desired setting (HI, MED or I,O).
FoodType ControlSetting
Breads/Pastries L (LOW)
Sauces t (LOW)
Soups(cream) L (LOW)
Stews L (LOW)
Vegetables L (LOW)
HotBeverages H (HIGH)
Soups(liquid) H(HIGH)
Thechartaboveshows lbitlal suggestedsettlbgs
only Thetemperature,typeandamount of food,
and the time held will affect thequafity of the
food
CAUTION:Donotwarmfoodonthe
WARMINGZONEformorethantwohours.
Do not useplastic wrap tocoverfood Plastic
maymelt onto thesurface and be ven/difficult
to remove.
Useonlycookwarerecommendedfor
top-of-rangecooking.
Tile WARMING ZONEwill kee I) hot,
cooked t0od at serving teml)eramre.
_Mwavs start with hot fi)od. Do not use to
heat cold food. Placing uncooked or cold
food on the warming zone could result in
foodbome illness.
For best results, all food on tile
WARMINGZONEshould be covered with
a lid or aluminum foil. When wam/ing
pastries or breads, tile cover should be
vented to allow moisture to escape.
_Mwa}s use I)otholdets or oven mitts when
rei/lo\'ing food fl'OIl/ tile WARMINGZONE
as cookware and plates will be hot.
A hot surfilce indicator light will glow
when the glass SlWtime is hot and will
remain on tmti] the stm'i_ce has cooled
below 150°E

Selectingtypesofcookware.
The following information will help you choose cookware which will give good performance on glass cooktops.
Stainless Steel'.
recommended
"Aluminum:
Check pans for flat bottoms by heavywelght pans recommended
using a straiglTtedge. Good conducti\'i_'. J_dt/Illint/ll/ residue
sometimes appemN as scratches 011 the
cooktop but can be removed ff cleaned
immediately. Beta use ()f its l()w melting
point, thin weight ahmfinum should not
be used.
Copper:
recommended
PorcelainEnamel-CoveredCastIron:
recommended
_s long as the cookware is covered
completely with porceMn enamel, this
cookware is recommended. Caution is
recomlnended fi)r cast-ii'on cookware
that is not colnpletely covered with
slnooth porcelain enalnel, since it inav
scratch the glass ceramic cooktop.
Glass-Ceramic:
usable, but not recommended
Poor pei_timnalwe. May scratch the
st/I_iIce,
Pans wifl7rounded, curved, ridged
or warped bottoms are not
recommended.
CopperBottoms:
usable,butnotrecommended
Pans with copper bottoms Inav leave
residue appearing as scratches. Relnove
anv residue ilmnediatelv atter use. Do not
let a pot boil dry: Overheated metal can
bond to the glass cooktop and leave a
i)emmi_ent stain if it is not relnoved
ilmnediatelv:
Stoneware;
usable,butnotrecommended
Poor i)ei_ommnce. Ma) scratch the
StlI_ilce,
Use pails that inatch the dialneter of the
surlilce elelnent. (_ooking pei_Ibi_mance
will not be as good if the cookware is
either slnaller or larger than the
surli_ce elemelK.
Do not place wet pans
on the glass cooktop.
Do not use woks with support
dngs on the glass cooktop
For Best Results
_;i!:Place only dly pans on the surti_ce
elen_ents, Do not place lids on the
sui_ti_ce elenmnts, particularly wet lkls,
f;;_:Do not use woks that have suppolt
rings. This type of wok will not heat on
glass surli_ce elements.
_;;_:_,,Vereconlmend that you use only a
fiat-bottomed wok. They are available
at your local retail store, The bottom
of the wok should have the same
dialneter as the surfi_ce elemei_t
to ensure proper contact,
_: Some special cooking procedures
require spedfic cookware such as
pressure cookels, deep tilt flTels, etc.
_M1cookware illtlst have fiat bottoms
and be the correct size.
use {latrbottomed woks
onthe glass cooktop.
10

ge.com
Righfl
Wrong:
Note: Flat-bottomed canners are
required for glass cooktops,
Observe the Following Points in Canning
Pots that extend beyond 1" of the
smfime element's drcle are not
i'ecoI/llllellded _k)l" IllOSt StlK[;_ce
cooldng. Howevel. when canning with
wate>bath or pressure cannel, laxge>
diameter pots may lie used. This is
because boiling water temperatmes
(e\vn under pressure) are not hamlflll
to tile cooktop surflmes surrounding tile
surfime elements.
HOWEVEP., DO NOT USE IAP.GE-
DDdMETEI).CANNERS OR OTHER
I._M).(;E-DL_dMETERPOTS FOR
FRYING OR BOII,ING FOODS OTHER
THAN _'\;&TER.Most ssrup or sauce
mixtures--and all types of flFing---<ook
at temperatures much higher than
boiling water: Such temperatures
could eventually harm tile glass
c(5okt(sp S tll_;ices.
] Be sure the cromer fits (sver the
center (5_the sm_fitce element.
If your cooktop or its location
does not allow the canner to be
centered on tile surfi_ce element,
use smaller diameter pots fb_ good
camdng results.
] Hat-bottomed clmnei_ must be
[Ised. Do 11(51 tlSe Callllel'S with
flanged or tippled bottoms (often
fk*undin enamelwlue) because
tile)' don't make enough contact
with the surfi_ce elements and take
a long time to boil water.
[_] I_emember that c'mnin,, is "/
it i process that generates large
alll(s/lnts ()[ steam. To a\_sid btlrSls
fl'om steam or heat, be caretnl
when camflng.
NOTE:If yourhousehaslow voltage,
canningmaytake longerthanexpected,
eventhoughdirectionshavebeen carefully
followed. Theprocesstime will be
shortenedby'.
(1) using a pressure canner, and
(2) startingwith HOTtap water forfastest
heatingoflarge quantitiesof water
CAUTION:
_: Safecanningrequiresthat harmful
microorganismsare destroyedand
thatthe jars are sealedcompletely.
Whencanningfoodsin a water-bath
canner,a gentlebutsteadyboil mustbe
maintainedfor therequiredtime. When
canningfoodsin apressure canner,the
pressure mustbe maintainedfor the
requiredtime.
After youhaveadjustedthe controls,
itis veryimportantto makesurethe
prescribed boil or pressurelevelsare
maintainedfor therequiredtime.
Sinceyoumustmakesuretoprocess the
canningjars forthe prescribed time,with
nointerruption inprocessingtime, donot
canon anycooktopsurfaceelementif
yourcannerisnot flat.
[] \'\q_en cmming, use recipes
am-I procedm'es fl'om reputable
sources. Reliable recipes and
procedures are a\_dlable fi'om
tile illalltt_ilCttll'el" 55[ }'O[lI" cannel';
manufhcturers (ff glass.jm_ tbr
caroling, such as Ball and Kerr
brand; and the Llnited States
Department of Agriculture
Extension Service.
/7

Careand cleaning ofthecooktop.
Be sure electrical power is off and all surfaces are cool before cleaning any part of the cooktop.
How toRemoveProtectiveShippingFilmand Packaging Tape
Carefldly grasp a corner of the protective
shipping film with your finge_ and slowly
peel it ti'om tile appliance surti_ce. Do not
use any shaq) items to remove tile film.
Remove all ot tile film betore using tile
appliance tot tile fi_t time.
To _lSS/lI'e ill) dalllage is done to tile
finish of tile product, tile satest way to
remove tile adhesive ti'om packaging tape
on new appliances is an application of a
household liquid dishwashing detergent.
Apply with a sott cloth and allow to soak.
NOTE: Theadhesivemust be removedfromall
parts./t cannot be removedif it isbakedon.
Moldedrib Control Knobs
,....
Stem Thecontrol knobsmaybe removedfor easier
cleaning.
Cleargroove
Make sure tile knobs are in tile OFF
positions and pull them straight off tile
stems ti)r cleaning.
Tile knobs can be cleaned in a
dishwasher or they may also be washed
with soap and water: Make sure tile insides
of tile knobs are dry betore replacing.
Replace tile knobs in tile OFFposition
to ensure proper placement.
Stainless Steel Surfaces (onsomemodels)
Donotusea steelwoolpa& it willscratch
thesurface.
To clean tile stainless steel stu'li_ce,
use _;_t)n suds)' _;_ter or a stainless steel
cleaner or polish. _dwa)'s wipe tile stuti_ce
in tile direction of tile grain. Follow tile
cleaner instructions for cleaning tile
stainless steel surti_ce.
To inqtfire about ptu'chasing stainless
steel appliance cleaner or polish, or to
find tile location of a dealer nearest you,
please call our toll-li'ee ntlI//beI'i
National Parts Center 1.800.626.2002
ge.com
12

Cleaningtheglasscooktop, ge.com
Clean your cooktop after
each spill Use ceramic
cooktop cleaner.
Normal Daily Use Cleaning
ONLY use ceramic cooktop cleaner on
tile glass cooktop. Other creams ma_ not
be as effectixe.
To maintain and protect tile smthce of
yore _glass cooktop, tollow these steps:
[] Betore using tile cooktop fin.
tile fi_t time, clean it with ceramic
cooktop cleane_: This helps promct
tile top and makes cleanup easier:
[] Daily use of ceramic cooktop
cleaner will help kee I) the cooktop
looking new.
[] Shake tile cleaning cream well.
Apply a few drops of ceramic
cooktop cleaner directly to the
cooktop.
[] Use a paper towel or cleaning pad
for cei'alllic cooktops to clean tile
entire cooktop Stli'J[ilce.
[] Use a dry cloth or paper towel
to remove all cleaning residue.
No need to rinse.
NOTE: It is very important that you DO NOT
heat the cooktop until it has been cleaned
thoroughly
¸¸(¸¸2¸
Useacleaningpadfor ceramic
cooktops.
Burned-On Residue
WARNING:DAMAGEto yourg/asssurface
mayoccurif youusescrubpadsotherthanthe
pad inciudedwith yourcooktop.
[] Allow tile cooktop to cool.
[] Spread a few drops of ceramic
cooktop cleaner on tile entire
burned residue area.
[] Using tile included cleanim,
pad fin" ceramic cooktops, rub tile
residue area, ali .))lying, I)ressure
as needed.
[]
[]
If any residue remains, repeat tile
steps listed above as needed.
For additional protection, after all
residue has been remoxed, polish
the entire sm'tace with ceramic
cooktop cleaner and a paper towel.
The ceramic cooktop scraper
and aftrecommended suppfies are
available through our Parts Cente_
See instructions under "ToOrder
Parts" section onnext page.
NOTf: Donot use a dull or
nicked blade.
Heavy, Burned-On Residue
[] Allow tile cool<top to cool.
[] Use a single-edge razor blade
scraper at approximately a 45 °
angle against tile glass surthce
and scrape tile soil. It will be
necessary to apply pressm'e to
tile razor scraper in order to
remove tile residue.
[] After scraping with tile razor
scral)ei, spread a few drops of
cel';llllic cooktop cleaner on tile
entire bm'ned residue mea. IJse
the cleaning pad to remove any
remaining residue.
[] For additional protection,
after all residue has been
remo\ ed, polish the entire
stn'fhce with ceramic cooktop
cleaner and a paper towel,
13

Cleaningtheglasscooktop.
Metal Marks and Scratches
[] Be careflll not to slide pots and pans
across your cooktop. It will leaxe
metal markings on the cooktop
StlI'Jilce.
These marks are remowd)le using
the ceramic cooktop cleaner with
the cleaning pad tor ceramic
cooktops.
[] If pots with a thin oxerla) of
aluminum or COl)per are allowed
to boil dry, the overlay may leave
black discoloration on tile cooktop.
This should be removed
immediately betore heating
again or tile discoloration may
be permanent.
WARNING: Carefu//ycheckthe bottom ofpans
forroughnessthat wouldscratch thecooktop.
Glasssurface--potential forpermanent damage.
Ourtesting shows that if
you are cooking high sugar
mixtures such as jelly or
fudge and have a spillover,
it can cause permanent
damage tothe glass surface
unless the spillover is
immediately removed.
Damage from Sugary Spills and Melted Plastic
[] Turn off all suil'ilce eleinents.
RelllOxe hot l)_lns.
[] Wearing an oven mitt:
a. Use a single-edge razor blade
scraper (ceramic cooktop
scraper) to move the spill to
a cool aI'ea Oil the cooktop,
b. Remove the spill with
paper towels.
[] Any remaining spilloxer should be
lett/mfil tile sm'ti_ce of tile cooktop
has cooled.
] Don't use tile surfi_ce elements
again tmtil all _ff tile residue has
been colnpletely relnoved.
NOTE:/fp/tt/))gor indentation in theglass
surfacehas a/readyoccurred,the cooktopglass
w///have tobe replaced in thiscase,service w///
be necessanz
To Order Parts
To order ceramic cooktop cleaner
and tile cooktop scrape_; please call ore"
toll-fl'ee nunlber:
National Parts Center 800.626.2002.
Ceramic CooktopCleaner # WXIOX300
Ceramic CooktopScraper #WX10)(0302
Kit ........................ # WB64X50£7
{Kitincludescreamand cooktopscraper)
Cleaning Pads for
Ceramic Cooktops ......... # WX10X350
14

Beforeyoucall forservice.., gecom
Troubleshooting -tips
Save time and money! Review the charts on the following
pages first and you may not need to call for service.
Possible Causes What ToDo
Surface elements will not Improper cookware
maintain arolling boil being used.
or cookingisslow
Surface elements do A fuse in your home may be * Rel)lace tile tuse or reset tile circuit breaker:
notwork blown or the circuit breaker
tripped.
Cooktop controls * Check to see the (effect (ontrol is set fl)r the surface
improperly set. element you are usin ;
•Check to be sure that the Control Lock Selector is
turned to UNLOCK.
Cooktop making an Cooktop is locked. • Check to be sure the Control Lock Selector is turned
audible sound to UNI_OCK.
Tiny scratches ormetal Incorrect clemlhag • Use recommended cleaning procedures.
marks or abrasions on methods being used.
radiant cooktop glass
surface Cookware with rough •Be sure cookware bottoms and cookware are clean
bottoms being used or befin'e use. Use cookware with smooth bottoms.
coarse particles (salt Tim' scratches are not removable but will become
or sand) were between less visible in time as a result of clemfing.
the cookware mad the
surface of the cooktop.
•Use pans which are fiat and match the diameter
of the sm'thce element selected.
Cookware has been
slid across the cooktop
surface,
Areas of discoloration Improper cookware •Marks G'om almninmn and Col)per pro> as well as
or dark streaks on the being used. mineral deposits fl'om water or fi)od can be removed
cooktop with the cleaning cream.
Hot surface on a model •This is normal. The st/I't_lce lil_lV _lplke_ll" discolored
with a light colored cooktop, when it is hot. This is temporary and will disal_pear
as the glass cools.
Food spillovers not cleaned •See the Cleaning the glass cooktop section.
before next use.
Incorrect cleaning methods •Use recommended cleaning l)rocedures.
being used.
Plastic melted to Hot cooktop came into • See the Glass surface--potential for permanent damage
the surface contact with plastic placed section in the Cleaning the glass cooktop section.
on the hot cooktop.
Pitting (or indentation) Hot sugar mixture spilled •Call aqualified technician for rel)lacement.
of the cooktop on the cooktop.
Frequent cycling off and Improper cookware •Lrse onE" fiat cookware to minimize cycling.
on of surface elements being used. See the Surface elements cycle on and off section.
Controlknobwill
notturn Cooktop controls
improperly set.
• When the knob is in the OFFposition, it must be
I)ushed in l)etm'e it can be tin'ned. When the knob
is in any other position, it can be tin'ned without
being i)ushed in.
15

€_
r_
Immb
--°
q_
€_
w4r_
m
Q_
qll
/Vetes.
16

GE Service Protection Plus 'M
GE, a name recognized worldwide fbr quality and dependability, of;%rs you
Service Protection Plus'_'--comprehensive protection on all yore appliances--
No Matter What Brand!
Benefits Include:
* Backed by GE
* All brands covered
* Unlimited service calls
. All parts and labor costs included
o No out-of-pocket expenses
o No hidden deductibles
o One 800 number to call
We 71Cover Any Appliance.
Anywhere. Anytime.
You will be completel) satisfied with our service protection or )ou ma) request your mone) back
on the remaining value of your contract. No questions asked. It's that simple.
Protect yore" refrigerator, dishwasher, washer and dryer, range, TV_ VCR and much more--aaay brand!
Plus there's no extra charge flw emergency service and low monthly financing is available. Even icemaker
coverage and fl)od spoilage protection is offered. You can rest easy, knowing that all your valuable
household products are protected against expensive repairs.
Place ,our confidence in GE and call us in the U.S. toll-free at _UU._Z_.ZZZ_
for n/ol'e in_ol'I-t/a[iOll.
:i,k*]l I)l?}ln(/s (o_.(tl_(%L tip to _0 )eltl?S ill(I, ]11 the (ontillenl tl [.S.
_ (]tll here
Please place in envelope and mail to:
GeneralElectricCompany
Warranty Registration Department
P.O. Box 32150
Louisville, KY 40232-2150
77

Consumer Product Ownership Registration
Deal Customer:
Thank you tbr purchasing our product and thank you for placing your confidence in us.
_4'e are proud to haxe you as a customer'.
Follow these three steps to protect your new appliance investment:
Complete mid mail
your Consumer
Product Ownership
Registration today.
II_vc the peace of
mind of knowing we
C_lll conI_ICt yOll ill
the unlikelx event of a
satbtv modification.
After mailing the
registration below,
store this (IOC/llnellt
in a satb place. It
contains information
vou will need should
you require service.
Our service numl)er is
800.GE.CARI{S
(800.432.2737).
Read VOllr ()wller'g
Mamml carehflly.
It will hel l) you
operate your new
appliance properly.
Model Number Serial Number
, , , , , , , , , I I , , , , ,
Important: If you did not get a registration card with your
product, detach and return the form below to
ensure that your product is registered, or register
online at ge.com. _ (illt her(
Consumer Product Ownership Registration
Model Number Serial Number
Mr. his. Mrs. Miss
Fil"st I ] Last I
Nam_ I I I I I I I I I Nam_ I I I I I I I I I I I I
Stl'e( t [
Address IIIIIIIIIIIIIIIIIIIIIII
, I
I
I
ApI. # ] I [
City ] [ [
Illm Phl:l d
hi Use ] I ]
Month
I I I I
I I I I
I)ay] II
I ] E-lnail Addr< ss:
I I I I I I I [ S,a.,I
Pholle
Nimr ] I ] Num xw I I
Zip
J C,,d,I,, ] [ ]
GE Consumer& Industrial
Appliances
General Electric Company
Louisville, KY40225
ge.com
18
*Please provide your eqnail addrc',,, to receive, xia e-mail, discounts, special ott_ 1"_and other important
communications fi-om GE Appliances (GK\).
Check here if wm do not want to receive communicalions from (;EA's carcfiflly selected partnel'_.
E\ILL RE TO COMPI.ETE AND RE'I'[ rRN Tt tlS CM{I) DOES NOT DIMINISt t h_)l JR
_,\7\RI_ \N'['Y RIGt fFS.
For more information about (;1GVs privacy and data usage polk?; go to ge.com and click on
"Privacy Poli(y" or call 800.626.2224.

GEElectric CooktopWarranty.
Aft warranty service provided by our Factory Service Centers,
or an authorized Customer Care®technician. Toschedule
service, on-line, 24 hours a day, vis# us at ge.com, or carl
800.GE.CARES (800.432.2737).Please have serial number and
model number available when calling for service.
Staple your receipt here.
Proof of the original purchase
date is needed to obtain service
under the warranty.
GE Will Provide:
One Year Anypattof the cooktop which tifils due to a defect in materials or workmanship. During this
Fromthedateof the limitedone-yearwarranty,GE will alsol)rofi(le, free ofcharge, all labor and in-home service
originalpurchase to rel)lace the def_'cti\'e l)art.
FiveYears
Fromthe dateof the
originalpurchase
A replacement glass cooMop if it should crock due to themml shock, (liscolo_; or
iI the pattern weai_ off.
Areplacement radiant surface elementif it should burn otlt.
DtMng this lim#ed additional four-year warranty, you will be responsible for any labor or
in-home service.
_ Service trips to your home to teach you how to use
the product.
_ Improper installation, delivery or maJntenm_ce.
_ Failure of the product if it is abused, misused,
or used for other than the intended purpose or
used commerciaJly.
::Ji::Damage to the glass cooktop caused by use of demlers
other than the recommended deaJlh_g creams and
pads.
?_:Damage to the glass cooktop caused by hm*dened
spills of sugancy materiaJs or melted plastic that
are not demaed accordhlg to the directions in
the Owner's MmmaJ.
_: Replacement of house fuses or resetting of circuit
breakers.
_: Dmnage to the product caused by accident, fire, floods
or acts of God.
_: IncidentaJ or consequential dmnage caused by possible
defects with this appliance.
iJi::Dmnage caused after delivery.
!i?:Product not accessible to provide required service.
EXCLUSIONOFIMPLIED WARRANTIES--Your sole and exclusive remedy isproduct repair asprovided in this Limited
Warranty.Any implied warranties, including the implied warranties of merchantability orfitness fora particular purpose,
are limited to one year or the shortestperiod allowed by law.
This warranty is extended to the original purchaser and any succeeding owner for products purchased for
home use within the USA. If theproduct is located in an area where service by a GEAuthorized Servicer is not
available, you may be responsible for a trip charge or you may be required to bring the product to an Authorized GE
Service location for service. In Alaska, the warranty excludes the cost of shipping or service calls to your home.
Some states do not allow the exclusion or limitation of incidental or consequential damages. This warranty
gives you specific legal rights, and you may also have other rights which vary from state to state. Toknow
what your legal rights are, consult your local or state consumer affairs office or your state's Attorney General.
Warrantor: GeneralElectric Company.Louisville, KY 40225 19

ConsumerSupport.
q"J GEAppliancesWebsite ge.com
Haxe a question or need assist;race with your appliance? Try the GE Al)pliances _ ebsite 24 hom_ a day,
any da)of the year'. For greater comenience and faster ser\'ice, you can now download Owner s Manuals,
order parts or e;en schedule service on-line.
ScheduleService
Expert (;E repair setMce is onl) one step awa} fl'om your do(n: Get on-line and schedule your service at
your, {'on;enien{'e 24 hotu_ am {lax of the xear! Or {'all 800.(;E.(_ARES (800.432.2737) dtmng n{mnal
business hout_.
ge.com
RealLifeDesignStudio ge.com
GE SUl)ports the Uni\'et_al Design concept--l)roducts, services and environments that can be used by
people of all ages, sizes and capabilities. _Ve recognize the need to design fi)r a wide range of physical and
mental abilities and impaim_ents. For details of GE's Universal Design applications, including kitchen
design ideas fin" people with disabilities, check out our _Vebsite today. For the hearing impaired, please call
800.TDD.GEAC (800.833.4322).
ExtendedWarranties ge.com
Purchase a GE extended warrant_ and learn about special discounts that are axailable while _our, warranty
is still in effect. You can purchase it on-line anxtime, or call 800.626.2224 during nomml business horus.
(;E Consumer Home Set\ices will still be there after your warrant} expires.
PartsandAccessories ge.com
Individuals qualified to setMce their own appliances can have parts or accessories sent directly to their
homes (VISA, MasterCard and Discover cards are accepted). Order onqine today, 24 hotu_ every' day or
by phone at 800.626.2002 during nomml business hout_.
Instructions contained in this manual cover procedures to be performed by any user. Other servicing generally
should be referred to qualified service personnel Cautionmust be exercised, since improper servicing may cause
unsafe operation.
ContactUs ge.com
If you are not satistied with the service you receive fl'om GE, contact us on our Website with all the details
including your phone number; or write to: General Manager; Customer ]?.elations
GE Appliances, Appliance Park
I,ouisville, KY 40225
lRegisterYourAppliance
Register your new applim_ce on-lhae---at your convenience! Timely, l_r°duct registration, will allow fin.
enhanced communication and prompt service under the terms of your warrant), should the need arise.
......................................................You max also mail in the preprinted registration card included in the I)ackin'"_ material.
ge.com
20 Printed in the United States
Other manuals for Profile PP912
1
This manual suits for next models
4
Table of contents
Languages:
Other GE Cooktop manuals

GE
GE Profile PP945 How to use

GE
GE JP362BK Installation instructions

GE
GE jgp336wev2ww User manual

GE
GE Profile CleanDesign PHP960SM Manual

GE
GE 36 ELECTRIC RADIANT COOKTOP ZEU36R Operating and installation instructions

GE
GE JGP633 User manual

GE
GE JGP985BEJBB User manual

GE
GE Profile PP950 User manual

GE
GE Monogram ZEU30R User manual

GE
GE Profile PP950SMSS Manual