manuals.online logo
Brands
  1. Home
  2. •
  3. Brands
  4. •
  5. GE
  6. •
  7. Dishwasher
  8. •
  9. GE 165D4700P371 User manual

GE 165D4700P371 User manual

This manual suits for next models

7

Other GE Dishwasher manuals

GE GSD1125 User manual

GE

GE GSD1125 User manual

GE PDWT500RWW - Profile 24 in. Dishwasher Manual

GE

GE PDWT500RWW - Profile 24 in. Dishwasher Manual

GE HLD4000 Series User manual

GE

GE HLD4000 Series User manual

GE Profile PDT750SMFES User manual

GE

GE Profile PDT750SMFES User manual

GE WQP12-6501 How to use

GE

GE WQP12-6501 How to use

GE GE Profile PDW7700G User manual

GE

GE GE Profile PDW7700G User manual

GE GSC3500D35WW User manual

GE

GE GSC3500D35WW User manual

GE CDT865SxJ0 Series How to use

GE

GE CDT865SxJ0 Series How to use

GE GSD600L User manual

GE

GE GSD600L User manual

GE Profile PDWT180RSS Manual

GE

GE Profile PDWT180RSS Manual

GE GLD5808V Manual

GE

GE GLD5808V Manual

GE 165D4051G009 User manual

GE

GE 165D4051G009 User manual

GE GSD1120R User manual

GE

GE GSD1120R User manual

GE Adora DBT655SSNSS User manual

GE

GE Adora DBT655SSNSS User manual

GE GDWT260RSS Manual

GE

GE GDWT260RSS Manual

GE PDT750SSFSS Manual

GE

GE PDT750SSFSS Manual

GE HDB727K User manual

GE

GE HDB727K User manual

GE Built-In Dishwasher User manual

GE

GE Built-In Dishwasher User manual

GE GLC4400RBB Assembly instructions

GE

GE GLC4400RBB Assembly instructions

GE GDT225-226 Series User manual

GE

GE GDT225-226 Series User manual

GE GSC700 User manual

GE

GE GSC700 User manual

GE GSD940D User manual

GE

GE GSD940D User manual

GE GE Profile 165D4700P382 User manual

GE

GE GE Profile 165D4700P382 User manual

GE GDF570SSFSS Manual

GE

GE GDF570SSFSS Manual

Popular Dishwasher manuals by other brands

Samsung DW-FN320T user manual

Samsung

Samsung DW-FN320T user manual

LG LDS 5811WW Service manual

LG

LG LDS 5811WW Service manual

Elba EDW-B1462D owner's manual

Elba

Elba EDW-B1462D owner's manual

VESTEL NOVUS Series Service manual

VESTEL

VESTEL NOVUS Series Service manual

Bosch SMS4EMW00E Instructions for use

Bosch

Bosch SMS4EMW00E Instructions for use

Global-Tek GT-CR 2 manual

Global-Tek

Global-Tek GT-CR 2 manual

Smeg Dishwasher 85028 Instructions for installation and use

Smeg

Smeg Dishwasher 85028 Instructions for installation and use

LG LD-4080W Service manual

LG

LG LD-4080W Service manual

Bauknecht GCF 625 operating instructions

Bauknecht

Bauknecht GCF 625 operating instructions

Sharp QW-HX13F47EI-EU user manual

Sharp

Sharp QW-HX13F47EI-EU user manual

Asko D5536XLFI operating instructions

Asko

Asko D5536XLFI operating instructions

Modena WP 7134 WVM User manual book

Modena

Modena WP 7134 WVM User manual book

Beko DFN39340X instruction manual

Beko

Beko DFN39340X instruction manual

AEG FAVORIT 65050 VI1P user manual

AEG

AEG FAVORIT 65050 VI1P user manual

Siemens SN23HI37VE user manual

Siemens

Siemens SN23HI37VE user manual

Maytag MDB4651AWB - Tall Tub Dishwasher User instructions

Maytag

Maytag MDB4651AWB - Tall Tub Dishwasher User instructions

Hotpoint Ariston LL 42 Instruction book

Hotpoint Ariston

Hotpoint Ariston LL 42 Instruction book

Siemens SN45ZW56CS user manual

Siemens

Siemens SN45ZW56CS user manual

manuals.online logo
manuals.online logoBrands
  • About & Mission
  • Contact us
  • Privacy Policy
  • Terms and Conditions

Copyright 2025 Manuals.Online. All Rights Reserved.

ge.com
PDW1800 Series
PDW1860 Series
Owner’s Manual
Dishwashers
165D4700P371 49-55046 05-08 JR
Write the model and serial
numbers here:
Model #____________________
Serial # ____________________
You can find them on a label on the
tub wall just inside the door.
Safety Instructions
........ 2, 3
Operating Instructions
Control Panels and Settings . . . . 4, 5
Loading the
Dishwasher Racks . . . . . . . . . . . . . . . .8
Using the Dishwasher . . . . . . . . . .6, 7
Care Instructions
Care and Cleaning . . . . . . . . . . . .9, 10
Troubleshooting Tips
. . . 11–13
Consumer Support
Consumer Support . . . . . Back Cover
Warranty . . . . . . . . . . . . . . . . . . . . . . . 15
2
IMPORTANT SAFETY INFORMATION.
READ ALL INSTRUCTIONS BEFORE USING —
SAVE THESE INSTRUCTIONS
WARNING!
For your safety, the information in this manual must e followed to minimize the risk of fire
or explosion, electric shock, and to prevent property damage, personal injury, or death.
WATER HEATER SAFETY
PROPER INSTALLATION AND MAINTENANCE
T is dis was er must be properly installed and located in accordance wit t e Installation
Instructions before it is used. If you did not receive an Installation Instructions s eet wit
your dis was er, you can receive one by visiting our website at ge.com.
■Contents washed in Anti-bacterial mode, if
available, may be hot to the touch. Use care
before handling.
■Using a detergent that is
not specifically designed
for dishwashers will cause
the dishwasher to fill with
suds.
■If your dishwasher is connected to a
wall switch, ensure that the switch is
on prior to use.
■On dishwashers with electronic
controls, if you choose to turn the wall
switch off between wash cycles, allow
5–10 seconds after turning the switch on before
touching ON/OFF to allow the control to reboot.
■Non- ishware Items: o not wash items such
as electronic air cleaner filters, furnace filters and
paint brushes in your dishwasher. amage to
dishwasher and discoloration or staining of
dishwasher may result.
■Close supervision is necessary if this appliance
is used by or near children.
■Load light, plastic items so they will not
become dislodged and drop to the bottom
of the dishwasher—they might come into
contact with the heating element and be
damaged.
■Connect to a grounded metal, permanent wiring
system; or run an equipment-grounding
conductor with the circuit conductors and
connect to the equipment-grounding terminal
or lead of the appliance.
■Improper connection of the equipment-grounding
conductor can result in a risk of electric shock.
Check with a qualified electrician or service
representative if you are in doubt whether the
appliance is properly grounded.
■ispose of discarded appliances and shipping
or packing material properly.
■o not attempt to repair or replace any part
of your dishwasher unless it is specifically
recommended in this manual. All other servicing
should be referred to a qualified technician.
■To minimize the possibility of electric shock,
disconnect this appliance from the power supply
before attempting any maintenance.
NOTE: Turning t e dis was er off does not
disconnect t e appliance from t e power supply.
We recommend aving a qualified tec nician
service your appliance.
WARNING!
CAUTION: To prevent minor injury or property damage
Under certain conditions, ydrogen gas may be produced in a water eater t at as not been used
for two weeks or more. HYDROGEN GAS IS EXPLOSIVE.
If the hot water has not been used for two weeks or more, prevent the possibility of damage or injury
by turning on all hot water faucets and allow them to run for several minutes. o this before using any
electrical appliance which is connected to the hot water system. This simple procedure will allow any built-
up hydrogen gas to escape. Since the gas is flammable, do not smoke or use an open flame or appliance
during this process.
Operating Instructions Safety Instructions
Care Instructions
Trou leshooting TipsConsumer Support
3
ge.com
PROPER DISPOSAL OF THE DISHWASHER
Junked or abandoned dishwashers are
dangerous… even if they will sit for “just a
few days.” If you are getting rid of your old
dishwasher, please follow the instructions
below to help prevent accidents.
Before You Throw Away Your Old
Dishwasher:
■Take off the door of the washing compartment
or remove the door latch keeper (as shown).
WARNING! RISK OF CHILD ENTRAPMENT
SAVE THESE INSTRUCTIONS
Door latch keeper
Hold nut at top of dishwasher
while removing screw
■Use this appliance only for its intended purpose
as described in this Owner’s Manual.
■Use only powder, tabs, liquid detergents or rinse
agents recommended for use in a dishwasher and
keep them out of the reach of children. Cascade®,
Cascade®Complete and Electrasol®Automatic
ishwashing etergents, and Jet-Dry®and
Cascade Crystal Clear®rinse agents have been
approved for use in all GE dishwashers.
■Locate sharp items so that they are not likely
to damage the door seal.
■Load sharp knives with the handles up to reduce
the risk of cut-type injuries.
■o not wash plastic items unless marked
dishwasher safe or the equivalent. For plastic
items not so marked, check the manufacturer’s
recommendations.
■o not touch the heating element during or
immediately after use.
■o not operate your dishwasher unless all
enclosure panels are properly in place.
■o not tamper with controls.
■o not abuse, sit on or stand on the door or dish
rack of the dishwasher.
■o not allow children to play around dishwasher
when opening or closing door due to the possibility
of small fingers being pinched in door.
■o not discard a dishwasher without first removing
the door of the washing compartment or the door
latch.
■o not store or use combustible materials, gasoline
or other flammable vapors and liquids in the
vicinity of this or any other appliance.
■o not allow children to play with, on or inside this
appliance or any discarded appliance.
WARNING! When using your dishwasher, follow asic precautions,
including the following:
Consumer Support
Operating Instructions
Safety Instructions Care Instructions Trou leshooting Tips
READ AND FOLLOW THIS SAFETY INFORMATION CAREFULLY.
4
A out the dishwasher control panel.
Control Settings
ON/OFF
With door open, press ON/OFF button to turn the unit ON to begin operation and OFF at the end of a wash cycle.
The ON/OFF light is displayed when the dishwasher is ON.
Wash Cycle Selections
Press CYCLE SELECT button to choose wash cycle. The light under the cycle name will display to indicate which cycle
has been selected.
NOTE: All
cycle times and water usage information contained in this section are approximate values. Actual results
will depend on several factors including, but not limited to, inlet water temperature and household water pressure.
HEAVY 6.2 gal., 105 min.
T
his cycle is meant for heavily soiled dishes or cookware with dried-on or baked-on soils. This
cycle may not remove burned-on foods. Everyday dishes are safe to be used in this cycle. This
cycle also includes heated dry.
NORMAL 5.3 gal., 100 min.
T
his cycle is meant for loads of everyday dishes, glasses and cookware with medium soils that
have not been pre-rinsed. This cycle also includes heated dry.
LIGHT 4.4 gal., 85 min.
T
his cycle is meant for loads of everyday dishes, glasses and cookware with light soils that have
been pre-rinsed. This cycle also includes heated dry.
GLASSES 3.5 gal., 65 min.
T
his cycle is meant for lightly soiled glassware. This cycle has less heating during the wash and
rinse to protect your glassware. This cycle also has a lower temperature heated dry.
AIR-DRY 3.5 gal., 50 min.
T
his cycle is meant for loads of everyday dishes, glasses and cookware with light soils that have
been pre-rinsed and should air dry naturally. This cycle does not include heated dry.
SPEED 5.3 gal., 80 min.
T
his cycle is meant for loads of everyday dishes, glasses and cookware with medium soils that
have not been pre-rinsed. This cycle features reduced wash times to allow for faster cycle
completion. This cycle also has a reduced time heated dry.
RINSE 1 gal., 10 min.
F
or rinsing partial loads that will be washed later. o not use detergent with this cycle. This cycle
does not include heated dry.
2
1
5
23
1 5
Operating Instructions Safety Instructions
Care Instructions
Trou leshooting TipsConsumer Support
5
Delay Hour Option
This option allows you to delay the start of a wash cycle for up to 24 hours.
With the door open, turn the dishwasher ON by pressing the ON/OFF button; then press ELAY HOURS button to
choose the number of hours you want to delay the start of the wash cycle. The hours will show in the display
window.
N
OTE: To cancel the ELAY HOURS option before the start of the cycle, repeatedly press the ELAY HOURS button
until the display is blank or reads “00.”
Starting a Cycle
After selecting the wash cycle (Step 2) and delay hours (Step 3), if desired, close the door of the
dishwasher to start the cycle or begin the ELAY HOURS countdown. When the cycle starts, the
drain begins and approximately 60 seconds later the water fill begins.
Status Indicators
LO RINSE AID T
he red light will display when the rinse aid dispenser needs to be refilled with liquid rinse aid.
Use of
Jet-Dry®
or
Cascade Crystal Clear®
rinse agent removes spots and prevents new
film buildup on your dishes, glassware, flatware, cookware and plastics. See page 6 for
instructions on refilling the rinse aid dispenser.
CLEAN
The green light will display and a beep will sound to alert you that the wash cycle is complete.
5
4
3
ge.com
Consumer Support
Operating Instructions
Safety Instructions Care Instructions Trou leshooting Tips
6
Using the dishwasher.
C eck t e Water Temperature
Use Jet-Dry®or Cascade Crystal Clear®Rinse Agent
Jet-Dry®or Cascade Crystal Clear®rinse agent removes spots and prevents new film buildup on your
dishes, glasses, flatware, cookware and plastic.
Filling the Dispenser
The rinse agent dispenser holds 3.5 oz. of rinse agent. Under normal conditions,
this will last approximately one month. Try to keep it full, but do not overfill.
Make sure the dishwasher door is fully open.
Turn the dispenser cap to the left and lift it out.
Add rinse agent until the indicator window looks full.
Clean up any spilled rinse agent with a damp cloth.
Replace the dispenser cap.
Rinse Aid Setting
The amount of rinse agent released into the final wash can be adjusted.
The factory setting is at the midpoint. If there are rings of calcium
(hard water) spots on dishes, try a higher setting. If you observe foam
in the final rinse, try a lower setting.
To adjust the setting
Remove the dispenser knob; then turn the adjuster counterclockwise
to increase the amount of rinse agent or clockwise to reduce the amount
of rinse agent dispensed.
5
4
3
2
1
The entering water should be at least 120°F and
not more than 150°F for effective cleaning and
to prevent dish damage. Check the water
temperature with a candy or meat thermometer.
Turn on the hot water faucet nearest the
dishwasher, place the thermometer in a glass and
let the water run continuously into the glass until
the temperature stops rising.
M
i
n
M
a
x
Indicator
Dispenser cap
Adjustable setting
■
No prerinsing of normal food soil is required if using
Heavy, Normal or Speed wash cycles.
■
Scrape off hard soils, bones, toothpicks, skins and
seeds.
■
Remove large quantities of any remaining food.
■
Remove leafy vegetables, meat, trimmings and
excessive amounts of grease or oil.
Dis Preparation Prior to Loading
Operating Instructions Safety Instructions
Care Instructions
Trou leshooting TipsConsumer Support
A forgotten dish can be added any time before
the main wash.
Unlatch the door to interrupt the cycle. Pull
the door handle to release the door.
o not open the door until the water spray
action stops. Steam may rise out of the
dishwasher.
Add forgotten dishes.
Close the door and push it in to relatch.
4
3
2
1
ge.com
Proper Use of Detergent
Use only detergent specifically made for use
in dishwashers. Cascade®and Electrasol®
Automatic ishwashing etergents have been
approved. Keep your detergent fresh and dry.
on’t put detergent into the dispenser until
you’re ready to wash dishes.
The amount of detergent to use depends on
whether your water is ard or soft. With hard
water, you need extra detergent. With soft water,
you need less detergent.
Protect your dishes and dishwasher by
contacting your water department and asking
how hard your water is. Twelve or more grains
is extremely hard water. A water softener is
recommended. Without it, lime can build up in
the water valve, which could stick while open
and cause flooding. Too much detergent with
soft water can cause a permanent cloudiness
of glassware, called etc ing.
Use the information in the table below as a
guideline to determine the amount of automatic
dishwasher detergent to place in the dispenser.
When using automatic dishwasher detergent
tablets, simply place one tablet in the dispenser
and close the cover.
To open t e was cover, press t e button and t e cover
will flip back.
For eavily-soiled loads, use t e Pots and Pans or
Heavy Was cycles and add a little extra detergent.
DO NOT USE HAND DISH DETERGENT
NOTE: Using a detergent that is not specifically
designed for dishwashers will cause the dishwasher
to fill with suds. uring operation, these suds will spill
out of the dishwasher vents, covering the kitchen
floor and making the floor wet.
Because so many detergent containers look alike,
store the dishwasher detergent in a separate space
from all other cleaners. Show anyone who may use
the dishwasher the correct detergent and where it
is stored.
While there will be no lasting damage to the
dishwasher, your dishes will not get clean using a
dishwashing detergent that is not formulated to
work with dishwashers.
Forget to Add a Dis ?
Button
Open
cup
Detergent Cups to Fill
15 cup
25 cup
15 and 25 cups
15, 25 cups and the open cup
Num er
of Grains
Less than 4
4 to 8
8 to 12
Greater than 12
7
Consumer Support
Operating Instructions
Safety Instructions Care Instructions Trou leshooting Tips
8
Loading the dishwasher racks.
Silverware Basket
The silverware basket may be used without the topper for quick loading.
With the topper, flatware is better positioned for the dishwasher to
thoroughly wash and dry all pieces by preventing nesting.
Without the topper
Put the flatware in the removable basket with fork and knife handles up
to protect your hands. Place spoons in the basket with handles down.
Mix knives, forks and spoons so they don’t nest together. istribute
evenly. Small plastic items, such as measuring spoons and lids from
small containers, should go in the bottom of the silverware basket with
silverware on top.
With the topper
Place small plastic items, such as measuring spoons and lids from small
containers, in the bottom of the basket and snap the topper in place.
Insert spoons and forks, handles first, through the holes in the topper.
Place knives, blades first, through the holes in the topper.
For best dis was ing results, follow t ese loading guidelines. Features and appearance of racks and silverware
baskets may vary from your model.
Upper Rack
The upper rack is for glasses, cups and saucers. This is also a secure
place for dishwasher-safe plastics. A cup shelf may be placed in the up
or down position to add flexibility. The upper rack is good for all kinds of
odd-shaped utensils. Saucepans, mixing bowls and other items should
be placed face down.
Secure larger dis was er-safe plastics over two tines w en possible.
Make sure small plastic items are secure so t ey can’t fall onto t e eater.
Be sure t at items do not protrude t roug t e bottom of t e rack and
block rotation of t e middle spray arm. T is could result in poor was
performance for items in t e upper rack.
Lower Rack
W en loading t e lower rack, do not load large platters or trays in t e
front left corner. T ey may prevent detergent from circulating during t e
was cycle.
The lower rack is best used for plates, saucers and cookware. Large
items should go along the sides. Load platters, pots and bowls along the
sides, in corners or in the back. The soiled side of items should face the
center of the rack.
Be careful not to let a portion of any item suc as a pot or dis andle
extend t roug t e bottom rack. T is could block t e was arm and
cause poor was ing results.
Operating Instructions Safety Instructions
Care Instructions
Trou leshooting TipsConsumer Support
9
Caring for the dishwasher. ge.com
To clean t e control panel, use a lig tly dampened clot , t en dry t oroug ly. To clean t e exterior, use a good
appliance polis wax. Never use s arp objects, scouring pads or ars cleaners on any part of t e dis was er.
Cleaning the Door Panel
Before cleaning the front panel, make sure
you know what type of panel you have.
Refer to the last two letters of your model
number. You can locate your model
number on the left-hand tub wall just
inside the door. If your model number ends
with BB or WW, then you have a Painted
oor panel. If your model number ends
with SS, then you have a Stainless Steel
oor panel.
Follow the instructions below for cleaning
the door panel for your specific model.
Painted Door Panel (model numbers
ending in BB–black or WW–w ite)
Use a clean, soft, lightly dampened cloth,
then dry thoroughly. You may also use a
good appliance wax or polish.
Stainless Steel Door Panel (model
numbers ending in SS)
The stainless steel panels can be cleaned
with Stainless Steel Magic or a similar
product using a clean, soft cloth. o not
use appliance wax, polish, bleach or
products containing chlorine on Stainless
Steel doors.
You can order Stainless Steel Magic
#WX10X15 through GE Parts by calling
800.626.2002.
Do not wipe t e dis was er wit a soiled
dis clot or wet towel. T ese may leave
a residue. Do not use scouring pads or
powdered cleaners because t ese products
can scratc t e finis .
Cleaning t e Exterior
Cleaning the Control Panel
To clean the control panel, use a lightly
dampened cloth; then dry thoroughly. o
not use sharp objects, scouring pads or
harsh cleaners on the control panel.
Consumer Support
Operating Instructions
Safety Instructions Care Instructions Trou leshooting Tips
10
Operating Instructions Safety Instructions
Care Instructions
Trou leshooting TipsConsumer Support
T e dis was er will flus away all normal food soils. However, objects (fruit pits, bones, etc.) may collect in
openings and s ould be removed occasionally to avoid clogging t e drain system.
CAUTION
Personal injury azard. Before cleaning t e interior, wait at least 20 minutes after a cycle for t e eating
element to cool down. Failure to do so could result in burn injuries.
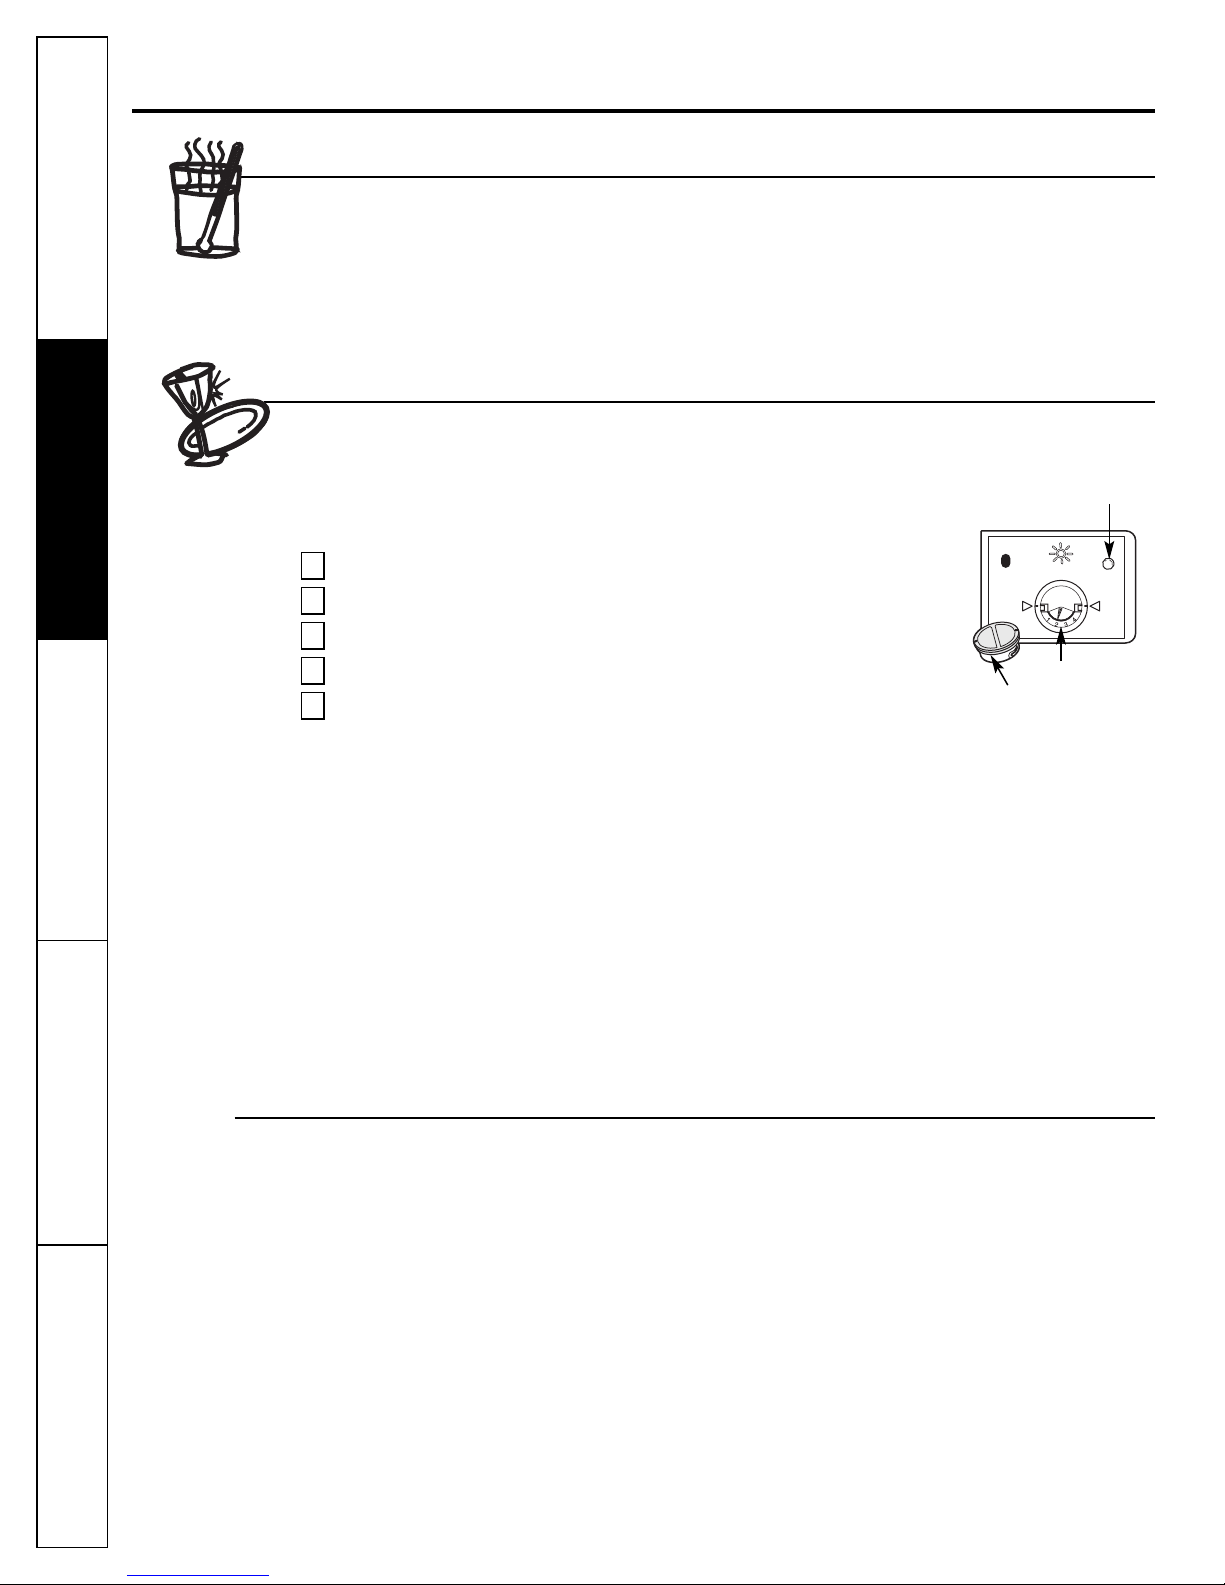
Cleaning the Spray Arms
Because hard water chemicals will clog the
spray arm jets and bearings, it is necessary
to clean the spray arms regularly. To remove
the spray arm, twist the retaining nut 90
degrees and pull the spray arm off the shaft.
Wash the arms in soapy, warm water and use
a soft brush to clean the jets. Replace them
after rinsing thoroughly.
Cleaning the Filters
For best performance and results, the filter
assembly must be cleaned regularly. The filter
efficiently removes food particles from the
wash water, allowing water to be recirculated
during the cycle. For this reason, it is a good
idea to remove the large food particles trapped
in the filter frequently by rinsing the main filter
and cup under running water. To remove the
filter assembly, pull up on the cup handle. The
entire filter assembly should be cleaned at
least once a month. To clean the main filter
and fine filter, use a cleaning brush. Then,
reassemble the filter parts as shown in the
illustration and reinsert the entire assembly
in the dishwasher, positioning it in place and
pressing downward. The dishwasher must
never be used without the filters. Improper
replacement of the filter may reduce the
performance level of the appliance and may
damage dishes and utensils.
Cleaning t e Spray Arms and t e Filters
Main filter
Fine filter
Retaining
nut
Washer
Cup
Protect Against Freezing
If your dishwasher is left in an unheated
place during the winter, ask a service
technician to:
Cut off electrical power to the dishwasher.
Remove fuses or trip circuit breaker.
Turn off the water supply and
disconnect the water inlet line from
the water valve.
rain water from the water inlet line
and water valve. (Use a pan to catch
the water.)
Reconnect the water inlet line to the
water valve.
4
3
2
1
Check the air gap any time your
dishwasher isn’t draining well.
Does Your Dishwasher Have
an Air Gap?
An air gap protects your dishwasher
against water backing up into it if a drain
clogs. The air gap is not a part of the
dishwasher. It is not covered by your
warranty. Not all plumbing codes require
air gaps, so you may not have one.
The air gap is easy to clean.
Turn off the dishwasher and lift off the
chrome cover.
Remove the plastic cap and clean with
a toothpick.
2
1
Two types of
air gaps
Retaining nut
Stainless Steel Interior—
Tu and Inner Door
The stainless steel used to make the dishwasher
tub and inner door provides the highest
reliability available in a GE dishwasher. If the
dishwasher tub or inner door should be
scratched or dented during normal use, they will
not rust or corrode. These surface blemishes will
not affect their function or durability.
Upper rack
Caring for the dishwasher.
General Care Instructions