GE GTD65EBMKWS User manual

GEAppliances.c
a
Dryers
Safety Instructions. . . . . . . . 2–3
Operating Instructions . . 4-11
Control Panels ........... . . . . . . 5-7
Dryer Features............. . . . . . . 8
Loading and Using the Dryer. . . . . 10
Venting the Dryer ......... . . . . . . 11
Troubleshooting Tips . . . 12, 13
Consumer Support
Consumer Support ....... . . . . . . . 16
Warranty ................ . . . . . . . 15
Write the model and serial
number here:
Model # __________________
Serial # ___________________
You can find them on a label
on the front of the dryer
behind the door.
Owner’s Manual
ENGLISH/FRANÇAIS
29-6016-3 06-17 GEA Printed in Mexico
234D2431P004
GE Appliances

2
IMPORTANT SAFETY INFORMATION.
READ ALL INSTRUCTIONS BEFORE USING.
IMPORTANT SAFETY INSTRUCTIONS
To reduce the risk of fire, explosion, electric shock, or injury to persons when using your appliance, follow basic
precautions, including the following:
Read all instructions before using the appliance.
DO NOT dry articles that have been previously cleaned in, washed in, soaked in or spotted with gasoline, dry-cleaning
solvents, or other flammable or explosive substances, as they give off vapors that could ignite or explode.
DO NOT place items exposed to cooking oils in your dryer. Items contaminated with cooking oils may contribute to a
chemical reaction that could cause a load to catch fire.
DO NOT allow children to play on or in this appliance. Close supervision of children is necessary when this appliance
is used near children.
DO NOT reach into the appliance if the drum is moving.
DO NOT install or store this appliance where it will be exposed to the weather.
DO NOT tamper with controls,
r
DO NOT
Before the appliance is removed from service or discarded, remove the door to the drying compartment.
use fabric softeners or products to eliminate static unless recommended by the manufacturer of the fabric
softener or product.
DO NOT dry articles containing foam rubber or similarly textured rubber-like materials.
Clean lint screen before or after each load.
DONOToperate the dryer without the lint filter in place.
The interior of the appliance and exhaust duct should be cleaned periodically by qualified service personnel.
Unplug the appliance or turn off the circuit breaker before servicing. Pressing the Power or Start/Pause button DOES NOT
disconnect power.
DONOToperate this appliance if it is damaged, malfunctioning, partially disassembled, or has missing or broken parts, including a
damaged cord or plug.
DO NOTspray any type of aerosol into, on or near dryer at any time.
DO NOT
use any type of spray cleaner when cleaning dryer
interior. Hazardous fumes or electrical shock could occur
.
See “Electrical Connection” located in the Installation Instructions for grounding instructions.
SAVE THESE INSTRUCTIONS
WARNING
DO NOT repair or replace any part of this appliance or attempt any servicing unless specifically recommended in the user
maintenance instructions or in published user repair instructions that you understand and have the skills to carry out.
DO NOT
store combustible materials, gasoline or other flammable liquids near the dryer.
Keep area around the exhaust opening
and adjacent surrounding areas free from the accumulation of lint, dust and dirt.

3
GEAppliances.ca
ADDITIONAL GAS DRYER WARNINGS
- DO NOT store or use gasoline or other flammable vapors and liquids in the vicinity of this or any other appliance.
- WHAT TO DO IF YOU SMELL GAS:
• DO NOT try to light any appliance.
• DO NOT touch any electrical switch; DO NOT use any phone in your building.
• Clear the room, building, or area of any occupants.
• Immediately call your gas supplier from a neighbor’s phone. Follow the gas supplier’s instructions.
• If you cannot reach your gas supplier, call the fire department.
- Installation and service must be performed by a qualified installer, service agency, or the gas supplier.
WARNING
State of California Proposition 65 Warnings:
WARNING
This product contains one or more chemicals known to the State of California to cause cancer, birth defects or
other reproductive harm.
Gas appliances can cause low-level exposure to some of these substances, including benzene, carbon monoxide, formaldehyde and
soot, caused primarily by the incomplete combustion of natural gas or LP fuels. Exposure to these substances can be minimized by
properly venting the dryer to the outdoors.
SAVE THESE INSTRUCTIONS
- Fire or Explosion Hazard
Failure to follow safety warnings exactly could result in serious injury, death, or property damage.

4
• Clean lint filter • Select drying cycle • Push Start
Step 1 Step 2 Step 3 Step 4
• Add clothes
• Shut door
To reduce the risk of fire, electric shock, or injury to persons, read the IMPORTANT SAFETY INSTRUCTIONS
before operating this appliance.
Throughout this manual, features and appearance may vary from your model.
Operating instructions
Quick Start Guide
WARNING

5
A
B
C
Power
Press to “wake up” the display. If the display is active, press to put the dryer into idle mode.
NOTE: Pressing Power does not disconnect the appliance from the power supply.
Start and Pause
Press Start to begin the cycle. NOTE: The door must be closed for the dryer to start the cycle. Pressing Start again will
pause the cycle, the Start light will blink and “Pause” will display.
To continue the cycle, press Start again.
Display and Status Lights
The display shows the approximate time remaining until the end of the cycle.
In addition, this display will show the dryer status:
• P
(on some models)
ause
The Start/Pause light will flash and the message “Pause” will show in the display when the dryer’s
cycle is paused. The cycle may be re-started by pressing theStart button.
• Controls The dryer is locked - will blink once if you press any button or turn the cycle knob.
• Sensing Indicates the dryer is sensing the level of dampness to determine estimated cycle time remaining.
• Clean Lint Filter The Clean Lint Filter light will stay on for 15 seconds after the cycle stops.
Control Lock
You can lock the controls to prevent any selections from being made. Or you can lock the controls after you have started a cycle.
Children cannot accidentally start the dryer by touching buttons with this option selected.
To lock/unlock the dryer controls, press and hold the Extended Tumble and -(minus) buttons for 3 seconds. The control
lock icon will flash while locking/unlocking, stay on when locked, and turn off when unlocked.
NOTE: The Power button can still be used when the machine is locked.
GEAppliances.ca
A C IE
B F G H
A C IE
B F G HD
D
D
Features and appearance will vary.
• WiFi
(on some models) Will allow your appliance to communicate with your smartphone for remote appliance monitoring
control and notifications.

6
Drying Cycles -
Sensor cycles automatically determine fabric dryness.
Timed cycles run for the selected time.
Steam Dewrinkle For use with larger loads than Steam Refresh. Ideal for loads left in the dryer for an extended time.
(on some models) Steam Dewrinkle is recommended for 9-13 garments
NOTE: Steam cycles are not intended for use with towels.
Important - the temperature setting must be set to HIGH and water must be turned on
before running the Steam Refresh cycle.
Steam Refresh For slightly wrinkled dry garments. Significantly reduces wrinkles. After the Steam Refresh cycle,
(on some models) the unit will beep (if Signal is selected) and display “00.”
Steam Refresh is recommended for 3-5 garments
NOTE: Steam cycles are not intended for use with towels.
NOTE: A single extremely light fabric item may need to have an additional item included in
the Steam Refresh cycle to achieve optimum results.
Important - the temperature setting must be set to HIGH and water must be turned on
before running the Steam Refresh cycle.
Sanitize or This option reduces certain types of bacteria including: Staphylococcus aureus, Pseudomonas
Anti-Bacterial aeruginosa and Klebsiella pneumoniae. The anti-bacterial process occurs when high heat is used
(depending during a portion of the drying cycle.
on model) NOTE: Do not use this cycle on delicate fabrics.
Bulky Items For large coats, bed spreads, mattress covers, sleeping bags, and similar large/bulky items such as
blankets, comforters, jackets, and small ruga.
Towels/Sheets For most towels and linens.
Cottons For cottons and most linens.
Mixed Load
For loads consisting of cottons and poly-blends.
Casuals
For wrinkle-free, permanent press, delicate items and knits.
Delicates For delicate items, special-care fabrics and knits.
Speed Dry For small loads that are needed in a hurry, such as sport or school uniforms. Can also be used if the previous
cycle left some items damp, such as collars or waistbands. NOTE: On some models, the time remaining in
the cycle will show counting down in the display.
Jeans For jeans.
Timed Dry
Set the Cycle Selector at the desired drying time.
Warm Up Provides 10 minutes of warming time to warm up clothes.
Air Fluff Provides 10 minutes of tumbling time with no heat.
eDry
Available for Bulky Items, Towels/Sheets, Cottons, Mixed Load, Jeans, Casuals and Delicates. When the eDry button is
pressed, cycle settings change to reduce the total energy consumption of the selected sensor cycle. NOTE: Cycle times will
change when eDry is selected.
E
F
Operating instructions

Settings
Individual settings for cycle minutes (Time), dryness level (Level) and temperature (Temp) can be set from the minimum
(lowest in column) to maximum (highest in column). In general, the higher up the column, the more energy will be used.
NOTE: The selected cycle set Time can be further adjusted, in one minute increments, by pressing theTime Adjust + (plus)
and -(minus) buttons.
Dryness Level-Selection only used for Sensor cycles. Timed cycles run for the selected time.
More Dry Use for heavy-duty or mixed type fabrics.
Dry Use for a normal dryness level suitable for most loads. This is the preferred cycle for energy savings.
Less Dry Use for lighter fabrics.
Damp
For leaving items partially damp.
Temperature
High For regular to heavy cottons.
NOTE: Steam Dewrinkle and Steam Refresh require the High temperature setting.
Medium For synthetics, blends, delicates and items labeled permanent press.
Low For delicates, synthetics and items labeledtumble dry low.
No Heat For fluffing items without heat. For use only with theAir Fluff cycle.
Extended Tumble
Use this option to minimize the wrinkles in clothes. It provides 1 hour of no-heat tumbling after the clothes are dry. If you are
using the cycle Signal Adjust or Volume and you select the Extended Tumble option, a signal will sound at the end of the
drying time and several times during the Extended Tumble cycle. This will remind you that it is time to remove the clothes.
Damp Alert
This option causes the dryer to beep when clothes have dried to a damp level. Remove items that you wish to hang dry. The
Damp Alert will only beep when this option is selected (but the dry cycle will keep running). Removing clothes and hanging them
when they are damp, can reduce the need to iron some items. The light beside the button will be lit when Damp Alert is on.
Drum Light
The drum light will turn on if the Damp Alert button is pressed for 3 seconds or the door is opened. It will turn off when
the door is shut, the Damp Alert button is pressed again for 3 seconds or after 5 minutes if the door is left open.
Delay Dry
Press the Delay Drybutton to set the delay start time in 1 hour increments up to 24 hours, and then back to clear (0 hours).
After selecting the delay start time, pressStart and the delay time will count down the time remaining until the cycle starts.
NOTE: To set the amout of delay time faster, you can press and hold the Delay Drybutton.
Signal Adjust or Volume (depending on model)
Use the Signal Adjust or Volume button to change the volume of the button presses and the end of cycle signal. Press
the button until you reach the desired volume or off. The clothes should be removed when the end of cycle signal goes
off so wrinkles do not set in.
NOTE:
• Remove garments promptly at the sound of signal. Place clothes on hangers so wrinkles will not set in.
• Use the Signal Adjust or Volume especially when drying fabrics like polyester, knits and permanent press. These
fabrics should be removed so wrinkles will not set in.
My Cycle
As the cycle selector knob is turned, the Time (timed dry), Level (dryness level) and Temp (temperature) settings change
to automatic pre-set default settings. If you desire a different setting, press the appropriate button(s). Then press and hold the
My Cyclebutton for 3 seconds and the dryer will “remember” these settings for that Knob Selection. In the future, when you turn
the selector knob to that cycle, your settings will be automatically recalled. NOTE: Signal volume cannot be set for My Cycle.
H
I
G
GEAppliances.ca
Delay Dry for WiFi Connected Dryers
For more information see the Appliance Communication section.
You have two options to set Delay Dry using your smartphone:
Option 1: Follow Delay Dry instructions. You can use the GE Appliances Laundry App to adjust the amount of time via
your smartphone.
Option 2: Set your dryer to “AP” using the Delay Dry button. This allows you to use the GE Appliances Laundry App
via your smartphone to start your dryer remotely at the time of your choosing. If the dryer is set to AP with no activity,
it will start the dryer 24 hours later.

Sensor Dry
Sensor Dry
This feature is active in all cycles except
Timed Dry, Warm Up and Air Fluff.
The Sensor Dry provides greater drying
accuracy than standard machines, resulting
in shorter dry times and better clothes
care. As the clothes tumble, they touch a
moisture sensor. The sensor will stop the
heating cycle as soon as the clothes have
reached the selected dryness.
This dryer will adjust the initial estimated
drying time of the sensor dry cycles as it
“learns” its installation and usage profile.
Please allow several weeks for the dryer to
customize itself to “you”.
Drying Rack (on some models)
A handy drying rack may be used for drying If your model did not come with a drying rack,
order one on-line at GEApplianceparts.ca
today, 24 hours a day or by phone at
800.661.1616 during normal business hours.
Part Number Accessory
WE01X25160 Drying Rack
delicate items such as washable sweaters.
Hook the rack over the lint filter so
the rack extends into the dryer drum.
NOTE:
The drying rack must be used with the
Timed Cycle.
Do not use this drying rack when there
are other clothes in the dryer.
Alloy Steel Drum (on some models)
The alloy steel used to make the
dryer drum provides the highest reliability
available in a GE dryer.
If the dryer drum should be scratched or
dented during normal use, the drum will
not rust or corrode. These surface blemishes
will not affect the function .
8
About the dryer features.
Drum Light
The drum light is an LED light. Replacement
must be done by a qualified technician.

9
GEAppliances.ca
About loading and using the dryer.
Appliance communication.
WiFi Connect (For customers in Canada only - on some models)
Depending on the model, your dryer is eitherGE Appliances
WiFi Connect enabled, or compatible using the optional
GE Appliances ConnectPlus module.
If enabled: Visit www.geappliances.com/connect and
enter your model number to show you the proper steps
to connect your appliance.
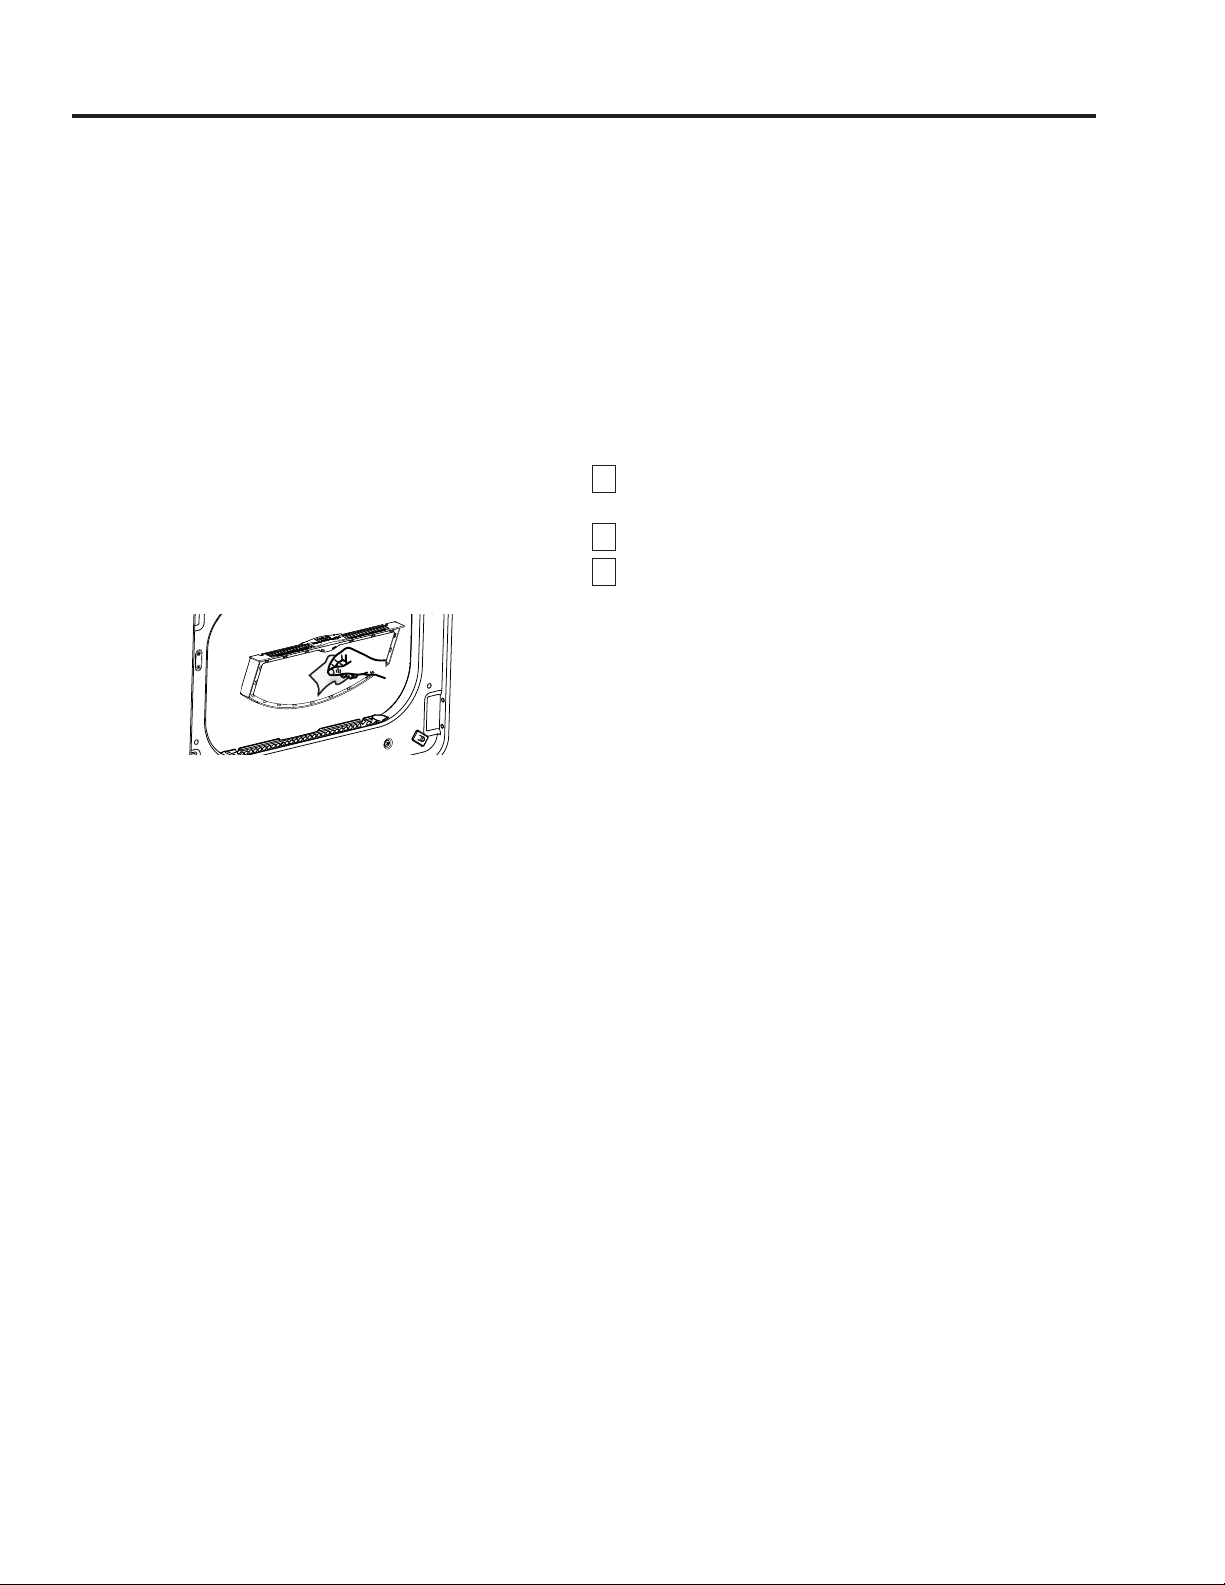
If compatible: To connect this appliance to the internet
you will need to purchase a GE Appliances ConnectPlus
and attach the module to your appliance through
the communication port in the appliance. The GE
Appliances ConnectPlus will allow your appliance
to communicate with your smartphone for remote
appliance monitoring, control and notifications.
Please visit www.GEAppliances.com/connect to learn
more about connected appliance features, to learn
what connected appliance app’s will work with your
smartphone.
WiFi Connectivity: For assistance with the appliance
or the ConnectPlus network connectivity, please call
GE Appliances at 800.GE.CARES.
Visit your local authorized GE Appliances Parts distributor
or order by phone at 800.661.1616 during normal business
hours.
Part Number Accessory
PBX10W00Y0 WiFi ConnectPlus module
Fabric Care Labels
Below are fabric care label “symbols” that affect the clothing you will be laundering.
Tumble
dry
Dry Normal Permanent Press/
wrinkle resistant Gentle/
delicate Do not tumble dry Do not dry
(used with
do not wash)
Heat
setting
High Medium Low No heat/air
Special
instructions
Line dry/
hang to dry Drip dry Dry flat In the shade
Dry Labels
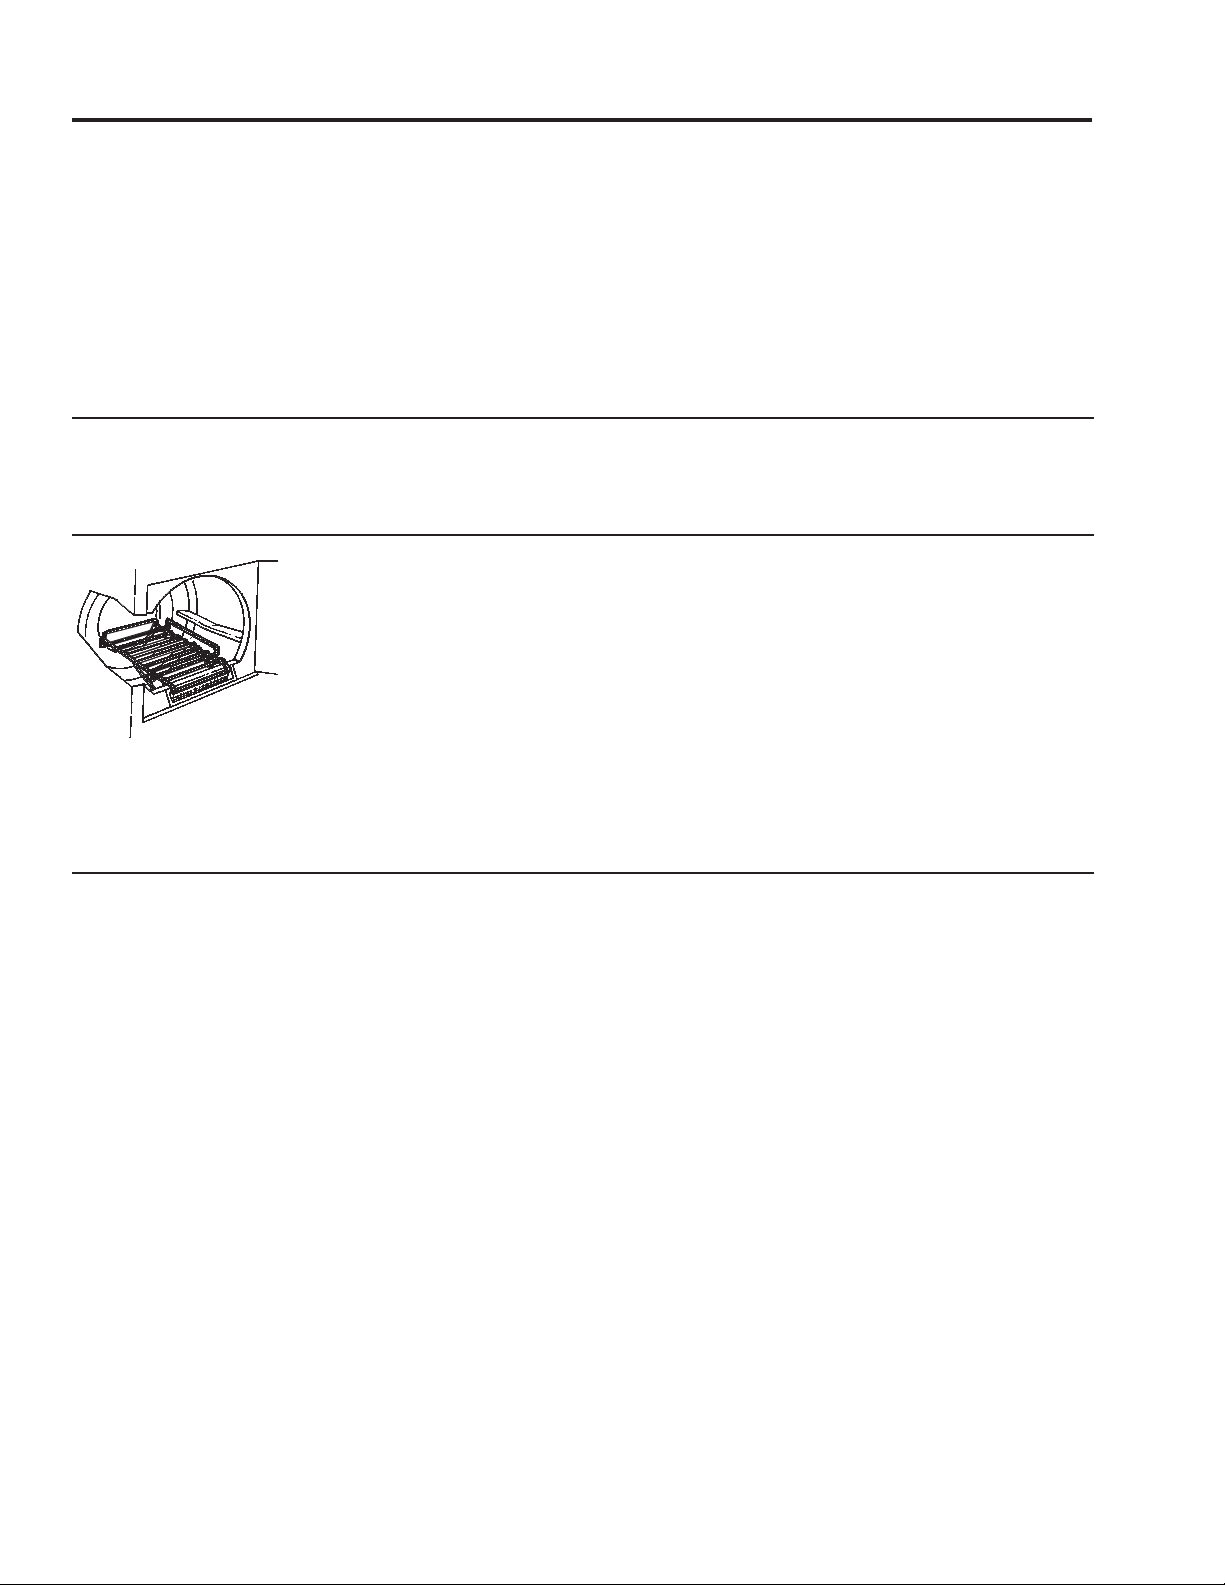
As a general rule, if clothes are sorted properly for the
washer, they are sorted properly for the dryer. Try also to
sort items according to size. For example, do not dry a sheet
with socks or other small items.
Do not add fabric softener sheets once the load has
become warm. They may cause fabric softener stains.
Bounce®Fabric Conditioner Dryer Sheets have been
approved for use in this dryer when used in accordance
with the manufacturer’s instructions.
Do not overload. This wastes energy and causes wrinkling.
Sorting and Loading Hints
Always follow the fabric manufacturer’s care label when laundering.
WARNING WARNING
Explosion Hazard Fire Hazard
Keep flammable materials and vapors, such as gasoline,
away from dryer.
DO NOT dry anything that has ever had anything flammable
on it (even after washing).
Failure to do so can result in death, explosion, or fire.
No washer can completely remove oil.
Do not dry anything that has ever had any type of oil on it
(including cooking oils).
Items containing foam, rubber, or plastic must be dried on a
clothesline or by using an air dry cycle.
Failure to follow these instructions can result in death or fire.
WARNING
Fire Hazard

Care and Cleaning of the Dryer.
The Exterior: Wipe or dust any spills or washing
compounds with a damp cloth. Dryer control
panel and finishes may be damaged by some
laundry pretreatment soil and stain remover
products. Apply these products away from the
dryer. The fabric may then be washed and dried
normally. Damage to your dryer caused by these
products is not covered by your warranty.
The Lint Filter: Clean the lint filter before each use.
Remove by pulling straight up. Run your fingers
across the filter. A waxy buildup may form on the
lint filter from using dryer added fabric softener
sheets.
To remove this buildup, wash the lint screen in
warm, soapy water. Dry thoroughly and replace.
Do not operate the dryer without the lint filter in
place.
Vacuum the lint from the dryer lint filter area if you
notice a change in dryer performance.
Stainless Steel: To clean stainless steel surfaces,
use a damp cloth with a mild, non-abrasive cleaner
suitable for stainless steel surfaces. Remove the
cleaner residue, and then dry with a clean cloth.
Dryer Interior and Duct:The interior of the appliance
and exhaust duct should be cleaned once a year by
qualified service personnel.
The Exhaust Duct: Inspect and clean the exhaust
ducting at least once a year to prevent clogging.
A partially clogged exhaust can lengthen the
drying time.
Follow these steps:
1Turn off electrical supply by disconnecting
the plug from the wall socket.
2Disconnect the duct from the dryer.
3Vacuum the duct with the hose attachment
and reconnect the duct.
The Exhaust Hood: Check from the outside that
the flaps of the hood move freely when operating.
Make sure that there is not wildlife (birds, insects,
etc.) nesting inside the duct or hood.
10

11
About venting the dryer. GEAppliances.ca
For the best drying performance, the dryer needs to be properly vented.The dryer will use more energy and run longer if
it is not vented to the below specifications. Carefully follow the details on Exhausting in the Installation Instructions.
Use only rigid metal 4” diameter ductwork inside the dryer cabinet. Use only rigid metal or UL listed flexible metal 4”
diameter ductwork for exhausting to the outside.
Do not use plastic or other combustible ductwork.
Use the shortest length possible.
Do not crush or collapse.
Avoid resting the duct on sharp objects.
Venting must conform to local building codes.
WARNING
Fire Hazard
- Fire Hazard
WARNING
This dryer MUST be exhausted to the outdoors.
Use only 4” rigid metal ducting for the home exhaust duct.
Use only 4” rigid metal or UL-listed dryer transition duct to connect the dryer to the home exhaust.
DO NOT use a plastic vent.
DO NOT exhaust into a chimney, kitchen exhaust, gas vent, wall, ceiling, attic, crawl space, or
concealed space of a building.
DO NOT install a screen in or over the exhaust duct.
DO NOT install a booster fan in the exhaust duct.
DO NOT use duct longer than specified in the exhaust length table.
Failure to follow these instructions can result in death or fire.
Correct
Venting
Incorrect
Venting

Troubleshooting Tips
Save time and money! Review the charts on the following pages,
Before you call for service…
Problem Possible Causes What To Do
Dryer doesn’t startDryer is unplugged•Make sure the dryer plug is pushed completely into
the outlet.
Fuse is blown/circuit breaker •Check the house fuse/circuit breaker box and replace
is trippedfuse or reset breaker. NOTE:Most electric dryers use
two fuses/breakers.
Dryer doesn’t heat Fuse is blown/circuit breaker is •Check the house fuse/circuit breaker box and replace
tripped; the dryer may tumbleboth fuses or reset both breakers. Your dryer may tumble
but not heatif only one fuse is blown or one breaker is tripped.
Gas service is off•Make sure gas shutoff at dryer and main shutoff are
fully open.
No heat temperature •Select another heat setting.
selected
Dryer shakes or Some shaking/noise is normal. •Move dryer to an even floor space, or adjust leveling legs
makes noiseDryer may be sitting unevenly as necessary until even.
Greasy spots on clothesImproper use of fabric softener •Follow directions on fabric softener package.
Drying dirty items •Use your dryer to dry only clean items. Dirty items can
with clean ones stain clean items and the dryer.
Clothes were not •Sometimes stains which cannot be seen when the clothes
completely cleanare wet appear after drying. Use proper washing procedures
before drying.
Lint on clothesLint filter is full •Clean lint screen before each load.
Improper sorting •Sort lint producers (like chenille) from lint collectors
(like corduroy).
Static electricity can attract lint •See suggestions in this section under Static.
Overloading •Separate large loads into smaller ones.
Paper, tissue, etc., left in pockets •Empty all pockets before laundering clothes.
Static occurs No fabric softener was used •Try a fabric softener.
•Bounce®Fabric Conditioner Dryer Sheets have been
approved for use in all GE Dryers when used in accordance
with the manufacturer’s instructions.
Over-drying •Try a fabric softener.
•Adjust setting to Less Dryor Damp Dry.
Synthetics, permanent press •Try a fabric softener.
and blends can cause static
Inconsistent Type of heat•Automatic drying times will vary according to the type
drying times of heat used (electric, natural or LP gas), size of load,
types of fabrics, wetness of clothes and condition of
exhaust ducts.
The Dry dryness level Load consists of a mixture •When combining heavy and light fabrics in a load,
was chosen but load is of heavy and light fabricschoose More Dryif you are using a sensor cycle.
still damp
Exhaust system is blocked•Inspect and clean exhaust system.
12
or visit GEAppliances.ca. You may not need to call for service.

13
Before you call for service… GEAppliances.ca
Problem Possible Causes What To Do
Clothes take too long Improper sorting •Separate heavy items from lightweight items (generally,
to dry a well-sorted washer load is a well-sorted dryer load).
Large loads of heavy fabrics •Large, heavy fabrics contain more moisture and take
(like beach towels)longer to dry. Separate large, heavy fabrics into smaller
loads to speed drying time.
Controls improperly set•Match control settings to the load you are drying.
Lint filter is full •Clean lint filter before every load.
Improper or obstructed •Check installation instructions for proper
ducting ducting/venting.
•Make sure ducting is clean, free of kinks and
unobstructed.
•Check to see if outside wall damper operates easily.
•Check the Installation Instructions to make sure the
dryer venting is correct.
Blown fuses or tripped •Replace fuses or reset circuit breakers. Since most dryers
circuit breaker use 2 fuses/breakers, make sure both are operating.
Overloading/combining loads•Do not put more than one washer load in the dryer at
a time.
Under-loading •If you are drying only one or two items, add a few items
to ensure proper tumbling.
Clothes are wrinkled Over-drying •Select a shorter drying time.
•Remove items while they still hold a slight amount of
moisture. Select a Less Dryor Damp Drysetting.
Letting items sit in dryer •Remove items when cycle ends and fold or hang
after cycle ends immediately.
Overloading •Separate large loads into smaller ones.
Clothes shrink Some fabrics will naturally shrink •To avoid shrinkage, follow garment care labels exactly.
when washed. Others can be
safely washed, but will shrink •Some items may be pressed back into shape after drying.
in the dryer•If you are concerned about shrinkage in a particular
item, do not machine wash or tumble dry it
Water seen on inside of Steam condenses on these•This is normal.
door and top of lint filter surfaces
when opening door after
steam cycle
Small areas on clothes areSteam condenses on inner drum •If using the Steam Dewrinkle cycle, manually reduce
damp after steam cyclethe cycle time. If using theSteam Refresh cycle, add
more garments to the load.
Collars and waistbandsThe dryness monitor senses•Choose Speed Dryor Timed Dryto dry damp collars
still wet at end of cyclethat the body of the clothes and waistbands. In the future, when drying a load with
is drycollars and waistbands, choose More Dry.
Slight variation This is normal•Due to the metallic properties of paint used for this unique
in metallic colorproduct, slight variations of color may occur due to
viewing angles and lighting conditions.

14
Before you call for service…
Problem Possible Causes What To Do
Small amount of water Inadequate load size for steam • If using the Steam Dewrinkle cycle, manually reduce
on floor in front of dryer cycle selected, excess steam time. If using the Steam Refresh cycle, add more
condenses inside cabinet and garments to the load.
leaks out
Water on floor in back Loose water hose connection to • Tighten connection.
of dryer valve
Hose missing rubber washer at • Install rubber washer provided with hose.
connection with valve
Water drips from door Steam condenses on inner door • This is normal.
when opened after
a Steam Cycle
Cannot see steam at Steam released at different • This is normal.
beginning of cycle time in cycle
Cannot see steam at any The steam nozzle might be • Call 800.GE.CARES to order nozzle replacement kit
time during the cycle clogged with debris from your WE25M71 or to request a service technician to replace this
water supply for you.
Garments still wrinkled Too many garments • Load fewer garments; manually increase time.
after steam cycle
Dryer continues to Extended/Dewrinkle Tumble • Ensure Extended/Dewrinkle Tumble option is not selected.
tumble after display was selected For the Steam Refresh cycle, Extended/Dewrinkle Tumble
says complete will automatically be turned on and cannot be turned off.
Garments are wet after Lint filter not clean • Clean lint filter
Steam cycle
Load is children/infant garments • Use the Steam Refresh cycle.
No numbers displayed Dryer is continuously • This is normal. When the dryer senses a low level of
during cycle, only lights monitoring the amount of moisture in the load, the dryer will display the dry time
moisture in the clothes remaining.
Time Remaining The estimated time may change • This is normal.
jumped to a when a smaller load than usual
lower number is drying
Dryer is running but The Extended/Dewrinkle • This is normal. During Extended/Dewrinkle Tumble, the
00 is displayed in Tumble option was chosen time remaining is not displayed. The extended tumbling
Time Remaining option lasts approximately 60 minutes; dewrinkle 60 minutes.
Clothes are still wet The door was opened mid-cycle. • A dry cycle must be re-selected each time a new load
and dryer shuts off The load was then removed from is put in.
after a short time the dryer and a new load put in
without selecting a new cycle
Small load • When drying 3 items or less, choose Speed Dry or
Timed Dry.
Load was already dry except • Choose Speed Dry or Timed Dry to dry damp collars
for collars and waistbands and waistbands. In the future, when drying a load with
collars and waistbands, choose More Dry.
Dryer is not level • Move dryer to an even floor space or adjust leveling legs
as necessary until even.

GE Appliances Dryer Warranty.
15
What GE Appliances Will Not Cover:
Service trips to your home to teach you how
to use the product.
Improper installation, delivery or maintenance.
Failure of the product if it is abused, misused, or
used for other than the intended purpose or used
commercially.
Replacement of the light bulb.
Replacement of house fuses or resetting
of circuit breakers.
Damage to the product caused by accident, fire, floods
or acts of God.
Incidental or consequential damage caused by possible
defects with this appliance.
Damage caused after delivery.
Product not accessible to provide required service.
Defects or damage due to operation in freezing
temperatures.
Products which are not defective or broken, or which are
working as described in the Owner’s Manual.
Warrantor: MC Commercial, Burlington, L7R 5B6
Staple your receipt here.
Proof of the original purchase
date is needed to obtain
support under the warranty.
EXCLUSION OF IMPLIED WARRANTIES―Your sole and exclusive remedy is product repair as provided in this Limited
Warranty. Any implied warranties, including the implied warranties of merchantability or fitness for a particular
purpose, are limited to one year or the shortest period allowed by law.
For The Period Of: GE Appliances Will Replace:
One Year Any part of the dryer which fails due to a defect in materials or workmanship. During this
From the date of the limited one-year warranty, GE Appliances will also provide, free of charge, all labor and related
service costs to replace the defective part.
original purchase
All warranty support provided by our authorized service centers.
To schedule service, on-line, 24 hours a day, visit us at
GEAppliances.ca or call 800.561.3344 during normal business
hours. Please have serial number and model number available
when calling for service.
This warrantyis extended to the original purchaser and any succeeding owner for products purchased in Canadafor
home use within Canada. In-home warrantyservice will be provided in areas where it is available and deeme
reasonable by MC Commercial to provide.

16
Consumer Support.
GE Appliances Website GEAppliances.ca
Have a question or need assistance with your appliance? Try the GE Appliances Website 24 hours a day,
any day of the year! For greater convenience and faster service, you can now download Owner’s Manuals,
order parts or even schedule service on-line.
Schedule Service GEAppliances.ca
Expert GE Appliances repair service is only one step away from your door. Get on-line and schedule your
service at your convenience 24 hours any day of the year! Or call 800.561.3344 during no.rmal business hours.
Real Life Design Studio GEAppliances.ca
GE Appliances supports the Universal Design concept―products, services and environments that can be used
by people of all ages, sizes and capabilities. We recognize the need to design for a wide range of physical and
mental abilities and impairments. For details of GE’s Universal Design applications, including kitchen design
ideas for people with disabilities, check out our Website today. Call 800.561.3344.
Extended Warranties
Consult your local listings for the nearest extended warranty provider.
Parts and Accessories GEAppliances.ca
Individuals qualified to service their own appliances can have parts or accessories sent directly to their homes.
Visit your local authorized GE Appliances parts distributor or call 800.661.1616.
Instructions contained in this manual cover procedures to be performed by any user. Other servicing generally
should be referred to qualified service personnel. Caution must be exercised, since improper servicing may
cause unsafe operation.
Contact Us GEAppliances.ca
If you are not satisfied with the service you receive from GE Appliances, contact us on our Website with all
the details including your phone number, or write to: Director, Consumer Relations, MC Commercial
Suite 310,1 Factory Lane
Moncton, N.B. E1C9M3
Register Your Appliance GEAppliances.ca
Register your new appliance on-line―at your convenience!Timely product registration will allow for enhanced
communication and prompt service under the terms of your warranty, should the need arise.
You may also mail in the pre-printed registration card included in the packing material.

Service à la clientèle.
Site Web des électroménagers GE Appliances
Vous avez des questions ou besoin d'assistance concernant votre appareil ? Consultez le site Web des
électroménagers GE Appliances accessible 24 heures sur 24, tous les jours de l'année! Pour un service pratique
encore plus rapide, vous pouvez maintenant télécharger des manuels, commander des pièces ou même faire
une demande de réparation en ligne.
Demande de réparation electromenagersGE.ca
Pour bénéficier du service de réparation de GE Appliances, il suffit de nous contacter. Demandez une réparation
en ligne, 24 heures sur 24, tous les jours! C’est pratique! Ou encore, téléphonez au 1 800 561 3344 pendant les
heures normales de bureau.
Centre de conception universelle electromenagersGE.ca
GE Appliances soutient la conception universelle : produits, services et environnements à la portée de tous, quels
que soient leur âge, taille ou capacités mentales et physiques. Nous avons conscience qu’il est nécessaire d’adapter
nos produits à toute la variété de capacités et de handicaps physiques et mentaux existants. Pour plus de détails
sur les applications de conception universelle de GE Appliances, dont la conception de cuisines pour les personnes
atteintes d’un handicap, consultez notre site Web dès aujourd’hui. Les malentendants peuvent téléphoner au
1 800 561 3344.
Garanties prolongées
Veuillez consulter votre annuaire local pour trouver un fournisseur de garantie prolongée.
Pièces et accessoires electromenagersGE.ca
Veuillez consulter votre annuaire pour trouver un distributeur local de pièces GE Appliances. Autrement,
appelez-nous au 800.661.1616.
Les directives stipulées dans le présent manuel comportent des procédures que n’importe quel utilisateur peut
effectuer. Les autres types de réparation doivent généralement être confiés à un technicien qualifié. Faites preuve
de prudence, car une réparation ou un entretien mal effectué peut rendre l'utilisation de l'appareil dangereuse.
Communiquez avec nous electromenagersGE.ca
Si vous n’êtes pas satisfait du service après-vente de GE Appliances, communiquez avec nous sur notre
site Web en fournissant tous les détails et
votre numéro de téléphone, ou écrivez à :
Enregistrez votre appareil electromenagersGE.ca
Enregistrez votre nouvel appareil en ligne au moment qui vous convient le mieux! L'enregistrement de votre
produit dans les délais prescrits permet une meilleure communication et un service rapide, selon les modalités
de votre garantie, si besoin est.
Vous pouvez également envoyer par courrier la carte d'enregistrement préimprimée qui se trouve dans
l'emballage de votre appareil.
16
Directeur, Relations au consommateur, MC Commercial
Suite 310, 1 Factory Lane
Moncton, N.B. E1C 9M3

15
Garantie de la sécheuse GE Appliances.
Ce que GE Appliances ne couvre pas :
Garant : MC COMMERCIAL, BURLINGTON, ON, L7R 5B6
Agrafez votre facture ici. Une
preuve de la date d’achat
d'origine est requise pour
bénéficier du service de
réparation sous garantie.
Pendant une
période de
:
GE Appliances remplacera :
Un an
À compter de la date
d’achat d’origine
Toute pièce de la sécheuse qui se révèle défectueuse en raison d’un vice de matériau ou de
fabrication. Au cours de cette garantie limitée d'un an, GE Appliances fournira également, sans frais,
les pièces et la main-d’oeuvre d’achat d’origine.
Toute visite à votre domicile pour vous expliquer le
fonctionnement de l’appareil.
L'installation, la livraison ou l'entretien inadéquats de
l'appareil.
Toute défectuosité du produit lorsqu’il a été utilisé de
façon abusiveou inadéquate, employé à toute autre fin
que celle pour laquelle il a été conçu ou utilisé à des fins
commerciales.
Le remplacement de l'ampoule.
Le remplacement desfusiblesou le réenclenchement
des disjoncteurs du panneau de distribution de
votre résidence.
Tout dommage au produit attribuable à un accident, à un
incendie, à une inondation ou à une catastrophe naturelle.
Tout dommage accessoireou indirect, causé par des
défaillances possibles de l'appareil.
Tout dommage causé après la livraison.
Tout produit auquel il n'est pas possible d'accéder pour
effectuer les réparations nécessaires.
Les défectuosités ou les dommages causés parune
utilisation de l'appareil à des températures situées sous le
point de congélation.
Les produits qui ne sont pas défectueux ou brisés,ou qui
fonctionnent tel que décrit dans le Manuel de l'utilisateur.
EXCLUSION DES GARANTIES IMPLICITES : Votre seul et unique recours est de faire réparer le produit dans le cadre de
cette garantie limitée.Toute garantie implicite, incluant la garantie de qualité marchande ou d’aptitude du produit à un
usage particulier, est limitée à un an ou à la période la plus courte autorisée par la loi.
Cette garantie est offerte à l’acheteur initial, ainsi qu’à tout propriétaire subséquent d’un produit acheté au Canada en vue
d’une utilisation domestique au Canada. Si le produit se situe dans une zone où aucun réparateur agréé par GE Appliances
n'est disponible, vous devrez peut-être assumer les frais de déplacement de celui-ci ou apporter le produit à un atelier de
réparation agréé par GE Appliances. Si vous avez besoin de pièces de rechange, nous vous recommandons de n'utiliser que
des pièces d'origine spécifiées de GE Appliances. Ces pièces ont été conçues pour fonctionner avec votre appareil et ont été
fabriquées et testées afin de répondre aux spécifications de GE Appliances.
Dans certaines provinces,il estinterdit d’exclure ou de limiter les dommages indirects ou accessoires.Il est alors possible que
les limitations ouexclusions ci-dessus ne s'appliquent pas dans votre cas. La présente garantie vous confère des droits
juridiques spécifiques. Vous pouvezbénéficier d'autres droits, qui varient d'une province àl'autre.Pour connaître les droits dont
vous bénéficiez, communiquez avecle bureau des Relations avecles consommateurs de votre régionou de votre province.
Touteslesréparations sous garantie sont effectuéespar nos centre
de réparation authorisé. Pour une demande de réparation en ligne,24
heurespar jour, visitez le site electromenagersGE.ca ou téléphonez au
1 800 561 3344. Veuillez avoir lesnuméros de série et de modèle de
votre appareil à portée de main lorsque vous appelez pour une réparation.

Avant de contacter un service de dépannage…
Problème Causes possibles Solutions
Présence d'une petite
quantité d'eau au sol devant
la sécheuse
Présence d'eau au sol
derrière la sécheuse
Raccord d'alimentation en eau
desserré sur le robinet
Rondelle en caoutchouc du tuyau
manquante au raccord avec le robinet
De l'eau s'écoule de la
porte lorsque vous ouvrez
cette dernière après un
programme à la vapeur
La vapeur se condense sur la
contre-porte
Impossible de voir la vapeur
au début du programme De la vapeur est libérée à différents
moments du programme
Impossible de voir de
la vapeur pendant le
programme
La buse à vapeur est peut-être
bouchée par des débris provenant de
votre alimentation en eau
Les vêtements présentent
des plis après l'utilisation
d'un programme à la vapeur
Trop de vêtements dans la sécheuse
L'option de culbutage prolongé/
défroissage a été sélectionnée
Les vêtements sont humides
après un programme à
la vapeur La brassée est composée de
vêtements pour bébé/enfant
Le capteur surveille de façon
continue la quantité d'humidité
dans la brassée
Le temps restant a bondi à
un nombre inférieur Le temps restant estimé peut changer
lorsqu'une brassée plus petite qu'àla
normale est dans la sécheuse
L'option Extended/Dewrinkle Tumble
(culbutage prolongé/défroissage) a été
sélectionnée
Les vêtements sont toujours
humides et la sécheuse
s'arrête après une courte
période
La porte a été ouverte pendant le
programme La brassée a été retirée
de la sécheuse et remplacée par une
nouvelle brassée sans qu'un nouveau
programme ait été sélectionné
Petite brassée
La brassée a été séchée, sauf les cols
et les ceintures
La sécheuse n'est pas de niveau Déplacez la sécheuse sur une surface plane ou réglez les pieds de mise
à niveau jusqu'à ce qu'elle soit de niveau.
14
Taille de la brassée insuffisante
pour le programme à la vapeur
sélectionné; l'excédent de vapeur se
condense à l'intérieur de la sécheuse
et fuit à l'extérieur
• Si vous utilisez le programme Steam Refresh (défroissage à la
vapeur), réduisez manuellement la durée du programme. Si vous
utilisez le programme Steam Refresh (rafraîchissement à la vapeur),
ajoutez des vêtements à la brassée.
• Serrez le raccord.
• Installez la rondelle en caoutchouc fournie avec le tuyau.
• Ceci est normal.
• Ceci est normal.
La sécheuse continue à
fonctionner après que
l'afficheur indique que le
programme est terminé
Le filtre à charpie n'est pas propre
Aucun chiffre n'est affiché
pendant le programme, seuls
les voyants sont allumés
Le séchage est en cours,
mais 00 est indiqué dans
l'afficheur du temps restant
• Téléphonez au 1 800 GE-CARES pour commander une buse de
remplacement (n° de pièce WE25M71) ou pour demander qu'un
technicien qualifié la remplace pour vous.
• Chargez moins de vêtements et augmentez manuellement la durée
du séchage.
• Assurez-vous que l'option Extended/Dewrinkle Tumble (culbutage
prolongé/défroissage) n'a pas été sélectionnée. Si vous utilisez le
programme Steam Refresh (rafraîchissement à la vapeur), l'option
Extended/Dewrinkle Tumble sera automatiquement activée et ne
pourra pas être arrêtée.
• Nettoyez le filtre à charpie.
• Utilisez le programme Steam Refresh (rafraîchissement à la vapeur).
• Ceci est normal. Lorsque la sécheuse détecte un faible niveau
d'humidité dans la brassée, la sécheuse affiche la durée de
séchage restante.
• Ceci est normal.
• Ceci est normal. Durant le Extended/Dewrinkle Tumble (culbutage
prolongé/défroissage), le temps restant n'est pas affiché. L'option
de culbutage prolongé prolonge la durée de séchage d'environ
60 minutes; de défroissage de 60 minutes.
• Un programme de séchage doit être sélectionné chaque fois qu'une
nouvelle brassée de vêtements est mise dans la sécheuse.
• Lorsque vous séchez trois articles ou moins, sélectionnez l'option
Speed Dry (séchage rapide) ou Time Dry (séchage minuté).
• Sélectionnez le réglage Speed Dry (séchage rapide) ou Timed Dry
(séchage minuté) pour faire sécher les cols et les ceintures humides.
À l'avenir, lorsque vous faites sécher une brassée qui comprend des
cols et des ceintures, sélectionnez le réglage More Dry (plus sec).

Avant de contacter un service de dépannage…
electromenagersGE.ca
Problème Causes possibles Solutions
Les vêtements mettent trop
de temps à sécher Triage des vêtements inadéquat
Grandes brassées de tissus lourds
(comme des serviettes de plage)
Les commandes sont mal réglées
Le filtre à charpie est plein
Conduit inadéquat ou bouché
Surcharge/combinaison des brassées
Les vêtements présentent
des plis Séchage trop intense
Surcharge
Les vêtements rétrécissent Il est naturel que certains tissus
rétrécissent au lavage. D'autres
peuvent être lavés sans problème,
mais rétrécissent au séchage
La vapeur se condense sur ces
surfaces
De petites zones des
vêtements sont humides
après l'utilisation d'un
programme à la vapeur
La vapeur se condense sur le
tambour interne
Le capteur du niveau de séchage
considère que les principales parties
des vêtements sont secs
Légère variation de la
couleur du métal
Ceci est normal
13
•Séparez lesarticleslourdsdesarticleslégers(de manière générale,
une brassée bien triée pour le lavage l'est aussi pour le séchage).
• Lesarticles volumineuxet au tissu lourd contiennent plusd'humidité et
prennent plusde tempspour sécher.Séparez lesarticles volumineuxet
au tissu lourd en pluspetitesbrasséespour accélérer le séchage.
• Réglez les paramètres de séchage en fonction de la brassée que
vous séchez.
• Nettoyez le filtre à charpie avant chaque séchage.
• Reportez-vous auxinstructions d'installation pour vous assurerd'une
bonne évacuation.
• Vérifiez que le conduit est propre, sans pli et n'est pas obstrué.
• Vérifiez que le registre du mur extérieur fonctionne bien.
• Reportez-vous auxinstructions d'installation pour vous assurerque
l'évacuation est adéquate.
Fusibles grillés ou disjoncteur
déclenché
Brassée insuffisante
• Remplacez le fusible ou réenclenchez le disjoncteur. Comme la
plupart des sécheuses ont 2 fusibles/disjoncteurs, vérifiez qu'ils
fonctionnent tous les deux.
• Ne séchez pas plus d'une brassée à la fois.
•Si vous ne séchez qu'un ou deuxarticles, ajoutez quelques articles
pour assurer un culbutage adéquat.
Articles laissés dans la sécheuse
après la fin du programme
• Sélectionnez un temps de séchage plus court.
• Retirez les articles pendant qu'ils sont encore un peu humides.
Sélectionnez les réglages Less Dry (moins sec) ou Damp (humide).
• Sortez le linge à la fin du programme et pliez-le ou suspendez-le
immédiatement.
• Divisez les brassées volumineuses en de plus petites.
•Pour éviter le rétrécissement,respectez à la lettre lesconsignes
d'entretien des vêtements, sur lesétiquettes.
•Une foisrepassés, certainsarticles reprennent leur forme aprèsle séchage.
•Si vous craignez qu'un vêtement en particulier rétrécisse, ne le lavez
pas à la machine et ne le séchez pas à la sécheuse.
De l'eau se retrouve à
l'intérieur de la porte et sur
le dessus du filtre à charpie
lorsque la porte est ouverte
après l'utilisation d'un
programme à la vapeur
• Ceci est normal.
Le col et la ceinture des
vêtements sont humides
à la fin du programme
• Si vous utilisez le programme Steam Dewrinkle (défroissage à la
vapeur), réduisez manuellement la durée du programme. Si vous
utilisez le programme Steam Refresh (rafraîchissement à la vapeur),
ajoutez des vêtements à la brassée.
• Sélectionnez le réglage Speed Dry (séchage rapide) ou Timed Dry
(séchage minuté) pour faire sécher lescols et lesceintureshumides.
À l'avenir,lorsque vous faites sécher une brassée qui comprenddes
cols et des ceintures, sélectionnez le réglage MoreDry(plus sec).
• En raison des propriétés métalliques de la peinture utilisée pour ce
produit unique, de légères variations de couleur peuvent survenir
selon l’angle de vision et les conditions d’éclairage.
Table of contents
Other GE Dryer manuals

GE
GE GTDS850GDWS Manual

GE
GE DBVH520EJ User manual

GE
GE Spacemaker DSXH43 Operating instructions

GE
GE Profile Harmony PTDS850GM Manual

GE
GE GTX42EASJWW User manual

GE
GE PCVH480EK Original instructions

GE
GE DDE7100R User manual

GE
GE 4500 User manual

GE
GE DuraDrum GTDL310EMWS User manual

GE
GE ddg7680r User manual

GE
GE GTD72EBPN0DG User manual

GE
GE DDE5211 Installation instructions

GE
GE Profile DPVH880GJ Original instructions

GE
GE DWSR483GG Manual

GE
GE GFDS150EDWW User manual

GE
GE DCCH480EK Manual

GE
GE DNCK440EA1WC User manual

GE
GE Profile PTDS650GM Manual

GE
GE Spacemaker DDP1275G Installation instructions

GE
GE DRSR495GG Manual