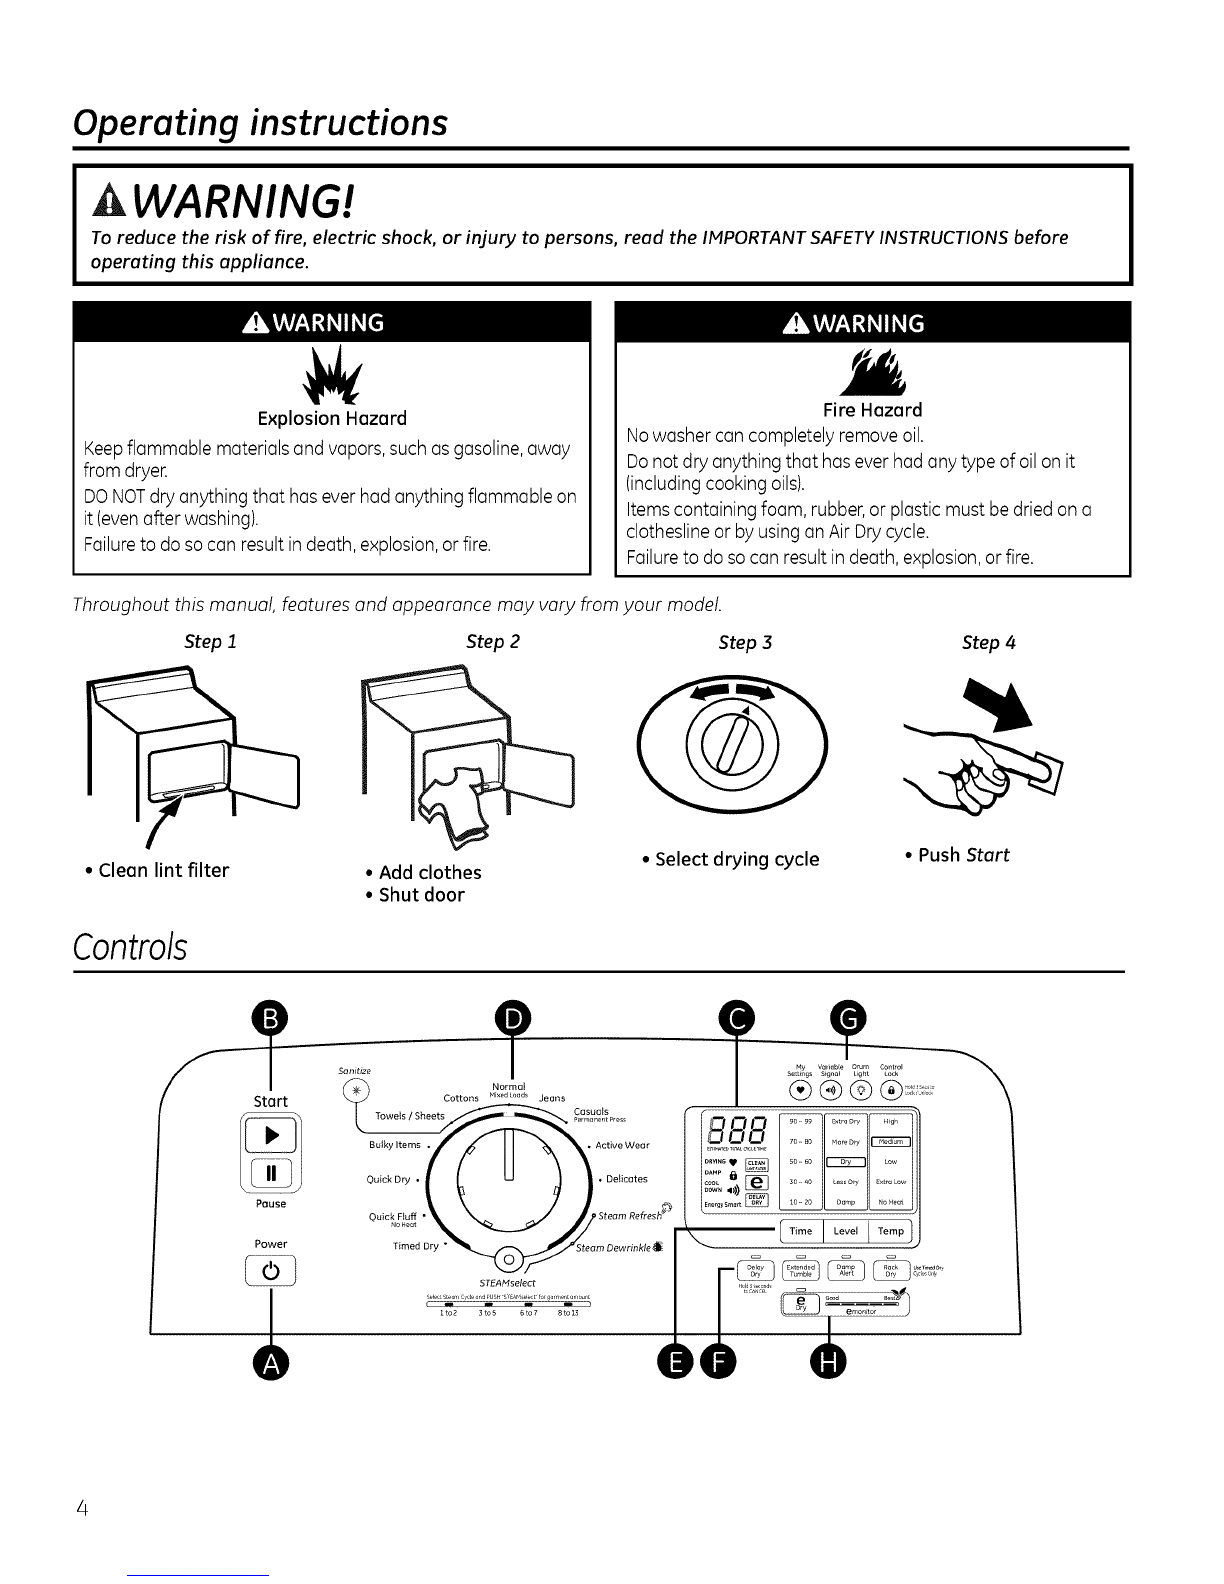
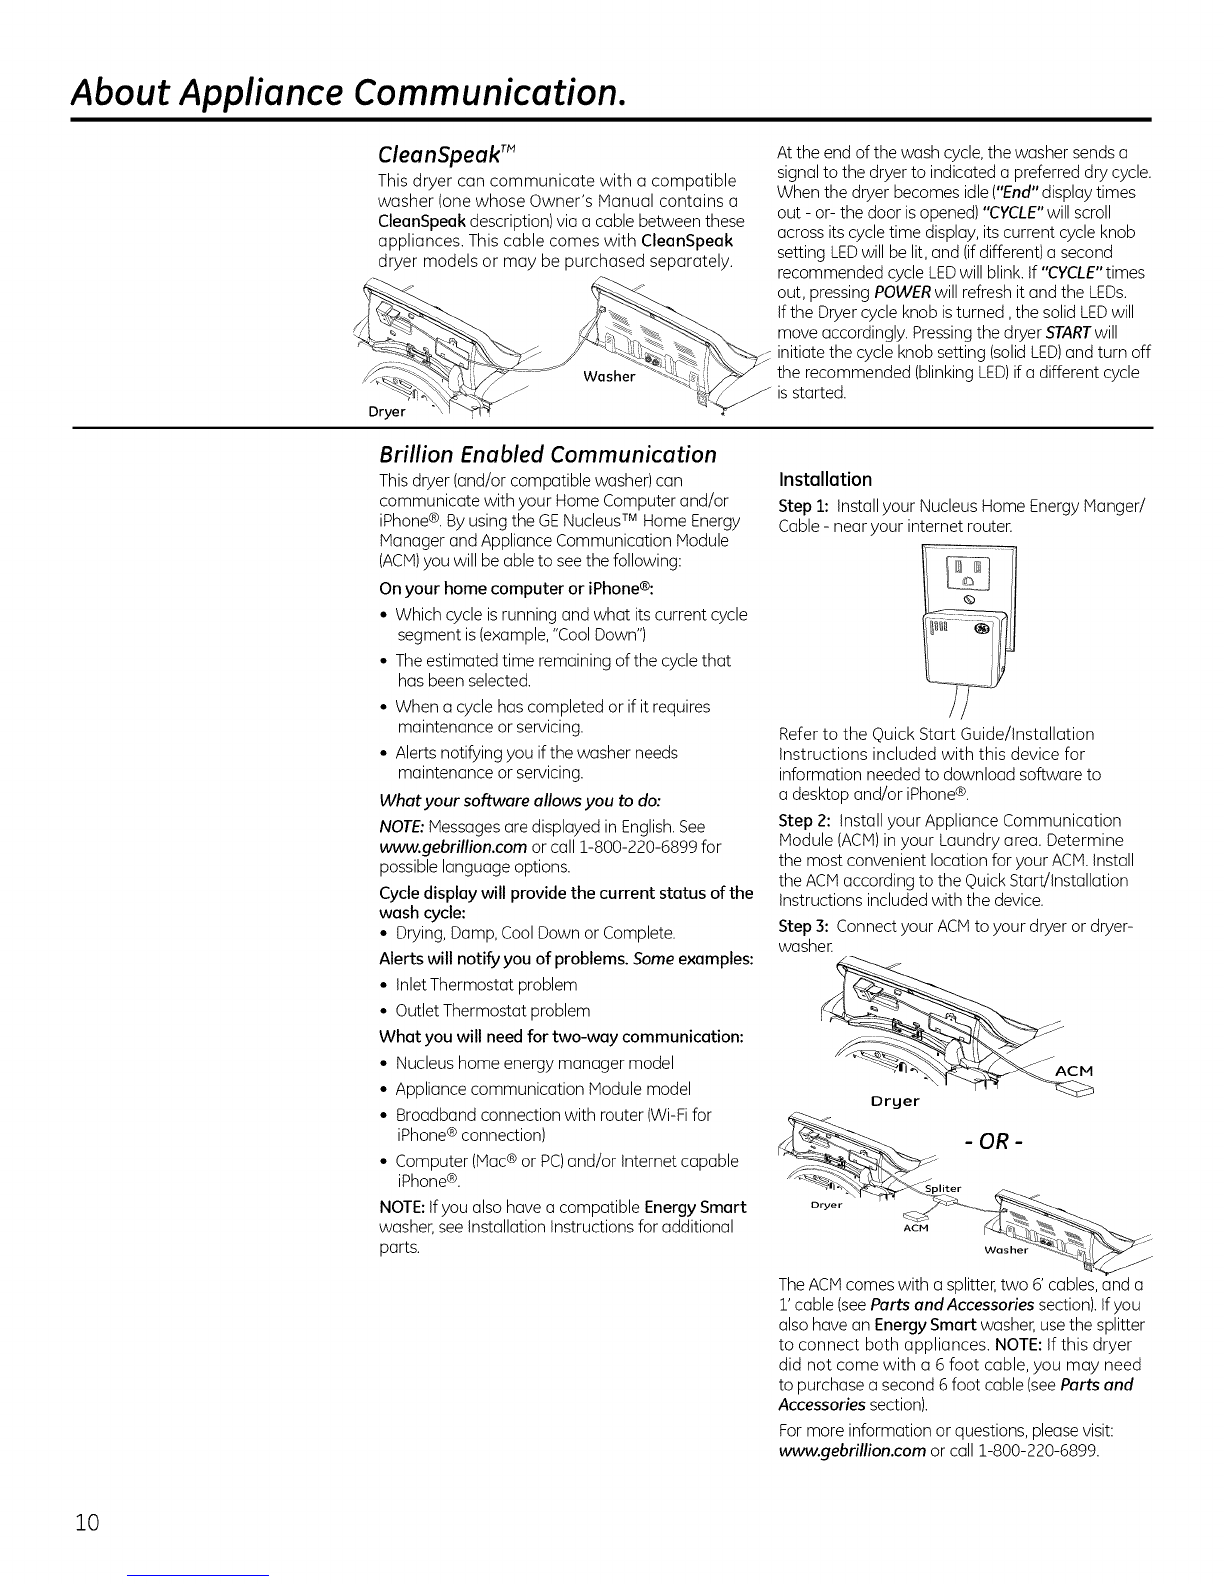
About Appliance Communication.
CleanSpeak TM
This dryer can communicate with a compatible
washer (one whose Owner's Manual contains a
CleonSpeokdescription) via a cable between these
appliances. This cable comes with CleonSpeok
dryer models or may be purchased separately.
Dryer
Washer
Atthe end of the wash cycle, the washer sends a
signal to the dryer to indicated a preferred dry cycle.
When the dryer becomes idle ("End"display times
out - or- the door isopened)"CYCLE" will scroll
across its cycle time display, its current cycle knob
setting LEDwill be lit, and (ifdifferent) a second
recommended cycle LEDwill blink. If "CYCLE"times
out, pressing POWERwill refresh it and the LEDs.
Ifthe Dryer cycle knob isturned, the solid LEDwill
move accordingly. Pressingthe dryer STARTwill
initiate the cycle knob setting (solidLED)and turn off
the recommended (blinking LED)if a different cycle
is started.
Brillion Enabled Communication
This dryer (and/or compatible washer) can
communicate with your Home Computer and/or
iPhone®.By using the GENucleusTM Home Energy
Manager and Appliance Communication Module
(ACM)you will be ableto seethe following:
On your home computer or iPhone®:
• Which cycle is running and what its current cycle
segment is (example,"Cool Down")
• The estimated time remaining of the cycle that
has been selected.
• When a cycle has completed or if it requires
maintenance or servicing.
• Alerts notifying you ifthe washer needs
maintenance or servicing.
What your software allows you to do:
NOTE:Messages aredisplayed in English.See
www.gebrillion.com or call 1-800-220-6899 for
possiblelanguage options.
Cycle display will provide the current status of the
wosh cycle:
• Drying, Damp,Cool Down orComplete.
Alerts will notify you of problems. Some examples:
• Inlet Thermostat problem
• Outlet Thermostat problem
What you will need for two-way communication:
• Nucleus home energy manager model
• Appliance communication Module model
• Broadband connection with router (Wi-Fifor
iPhone®connection)
• Computer (Mac®or PC)and/or Internet capable
iPhone®.
NOTE:Ifyou also have a compatible EnergySmart
washer, see Installation Instructions for additional
parts.
Installation
Step 1: Installyour Nucleus Home Energy Manger/
Cable- near your internet router.
Refer to the Quick Start Guide/Installation
Instructions included with this device for
information needed to download software to
a desktop and/or iPhone®.
Step 2: Install your Appliance Communication
Module (ACM)in your Laundry area. Determine
the most convenient location for your ACM.Install
the ACMaccording to the Quick Start/Installation
Instructions included with the device.
Step3: Connect your ACiVtto your dryer or dryer-
washer
ACM
Drger
'- - OR-
_pliter 2
s-
TheACMcomes with a splitter,two 6'cables,and a
1' cable (seeParts and Accessories section).Ifyou
also have an EnergySmort washer,use the splitter
to connect both appliances. NOTE:If this dryer
did not come with a 6 foot cable, you may need
to purchase asecond 6 foot cable (seeParts and
Accessories section).
For more information or questions, pleasevisit:
wvwv.gebrillion.com or call 1-800-220-6899.
10