Geca Nota User manual

Morsetto N.C. (Normalmente chiuso)
Nota
TERMOSTATOELETTRONICO CON DISPLAY
Modello Colore
Descrizione
35551047 Termostato con
display BIANCO
CONDIZIONI GENERALI DI GARANZIA
IL PRESENTE CERTIFICATO E' L' UNICO DOCUMENTO CHE DA' DIRITTO ALLA
RIPARAZIONE DEL PRODOTTO IN GARANZIA
- Il prodotto é GARANTITO per un periodo di 24 mesi dalla data di acquisto.
- Non sono coperti da GARANZIA eventuali danni derivati da manomissioni,uso ed installazione errati
o impropri.
- La GARANZIA è valida solo se debitamente compilata.
- In caso di difetti coperti da GARANZIA, il produttore riparerà o sostituirà il prodotto gratuitamente.
PRESTAZIONI FUORI GARANZIA:
Trascorsi i termini o la durata della GARANZIA le eventuali riparazioni verranno addebitate in funzione
alle parti sostituite e al costo della manodopera
DESCRIZIONE GENERALE
Nota è un Termostato elettronico con display che Vi
permette di impostare a piacimento le temperature “Giorno”
() e “Notte” (
) della Vostra casa e di modificarle con
estrema facilità.
IL TERMOSTATO Nota
Nota va alimentato con due comuni pile Alcaline mini stilo
da 1,5V che ne garantiscono il funzionamento per almeno 1
anno. Per l’inserimento delle pile far scorrere il copribatterie
e posizionare le pile facendo attenzione alla polarità indicata
sul coperchio (Fig.1).
COLLEGAMENTI ELETTRICI
Per aprire il termostato Nota occorre esercitare tramite un
cacciavite una pressione nelle due fessure poste nella parte
sottostante del prodotto (Fig.2).
Fig.1
PERNI
SUPERIORI
Fig.2
Attenzione: per richiudere il termostato Nota inserire
prima i due “PERNI SUPERIORI” del frontale per evitare
il danneggiarsi della connessione che unisce le due
schede.
Morsetto N.A. (Normalmente aperto)
Morsetto C (Comune)
Collegamento con bruciato-
re, caldaia murale, impian-
to di condizionamento, val-
vola di zona con ritorno a
molla.
Collegamento con valvola
di zona
INSTALLAZIONE
Nota deve essere installato mediante i tasselli in dotazione,
direttamente sulla parete (Fig.3). L’altezza consigliata è di
1,5m dal pavimento, in luogo asciutto, esente da correnti
d’aria e lontano da fonti di calore.
Fig.3
Nel caso di collegamento a forti carichi induttivi (pompe o
motori) si consiglia di collegare un filtro RC in parallelo al
carico.

FUNZIONAMENTO
Il Termostato Nota è disponibile nel solo funzionamento
manuale che lo rende di facile utilizzo.
Il frontale del Termostato presenta, oltre ad un grande display
circolare, anche due tasti con i quali si possono impostare
due valori di temperatura:
la prima temperatura chiamata “Giorno ” e la seconda
temperatura chiamata “Notte
”.
Sul display verranno visualizzate le seguenti informazioni:
-la temperatura ambiente.
-il tipo di temperatura impostata (Giorno ) o (Notte
).
-lo stato del carico: attivo ( ) o disattivo.
Per entrare nelle due temperature Giorno e Notte basta
premere una volta i rispettivi tasti:
Modalità Notte (
) Modalità Giorno ( )
Una volta premuto uno dei due tasti il termostato Nota
visualizzerà la temperatura impostata in quella modalità
facendo lampeggiare il simbolo della luna “
“ se in modalità
“Notte” o il simbolo del sole “ “ se in modalità “Giorno”.
Durante il lampeggìo del simbolo,Nota permette all’utente
di modificare a piacimento la temperatura tramite i tasti di
“incremento”(+) e “decremento” (-) che rispecchiano i tasti
delle due temperature “Giorno” e “Notte” (Fig.4).
Decremento (-) Incremento (+)
Ad ogni pressione dei tasti la temperatura aumenta o
diminuisce di 0,5°C.
Stabilita la temperatura, per memorizzare i gradi, basta
semplicemente non agire più sui tasti del termostato per
almeno 8 sec.
Superati gli 8 sec. il simbolo di modalità “
“ o “ “ smette
di lampeggiare e sul display apparirà la temperatura presente
nell’ambiente.
Il termostato Nota così facendo memorizza i cambiamenti
di temperatura impostati dall’utente.
Se si volesse passare da una modalità all’altra occorre
premere rispettivamente il tasto “Giorno” o “Notte” e aspettare
8 secondi per far si che il termostato si stabilizzi sui nuovi
valori di temperatura della nuova modalità.
ON/OFF
Premendo contemporaneamente per due secondi
questi due tasti il termostatoNota entra nella funzione
OFF /ON.
Nella funzione OFF,(termostato spento) sul display
apparirà la scritta OFF alternativamente ai gradi
misurati in ambiente. Per uscire dalla funzioneOFF ripremere
contemporaneamente i due tasti per due secondi.
GECA Srl Via E. Fermi n°98 25064 Gussago (Brescia) Italy
Tel. +39 030 3730218 - Fax +39 030 3730228
http://www.gecasrl.it - E-mail:[email protected]
La GECA s.r.l. si riserva il diritto di apportare qualsiasi modifica, estetica o funzionale, senza preavviso
alcuno ed in qualsiasi momento.
CERTIFICATO DI GARANZIA
DA COMPILARE E SPEDIRE IN CASO DI GUASTO
APPARECCHIO : Termostato con display Nota
Numero di serie (s.n.) ______________________________________________
RIVENDITORE
Timbro: Data di acquisto:
_____/_____/_____
UTILIZZATORE
Cognome e nome _________________________________________________
Via _______________________________________________ n° ___________
C.A.P. ________________ Città _____________________________________
Telefono ________________________________________________________
CARATTERISTICHE TECNICHE
TERMOSTATO Nota
- Alimentazione: 2 pile mini stilo 1,5V tipo AAA
-Autonomia pile: maggiore di 1 anno;
- Uscita: uscita relè in scambio 5(2)A 230Vac ;
contatti puliti.
- Campo di regolazione: 5 ; 35°C.
- Differenziale termico: +0,3C.
- Protezione : IP20
- Installazione: a parete
- Dimensioni: 70x70x30mm
- Peso: termostato 100gr pile incluse
- Colore: bianco (cod.555)
-
ãã
ãã
ã
+
-
ãã
ãã
ã
+
tasto RESET
tasto
DECREMENTO
e modalità
NOTTE
tasto
INCREMENTO
e modalità
GIORNO
Modalità
GIORNO
Modalità
NOTTE
CARICO
Attivo
RESET
Per resettare le due temperature impostate basta
semplicemente premere con un oggetto appuntito nell’apposito
foro situato a fianco del tasto di modalità “Notte”
.
Una volta resettato il termostato Nota imposta
automaticamente le due temperature di modalità “Giorno” a
20°C e “Notte” a 16°C.
Fig.4
tasto ON/OFF
ãã
ãã
ã
+
-

Nota
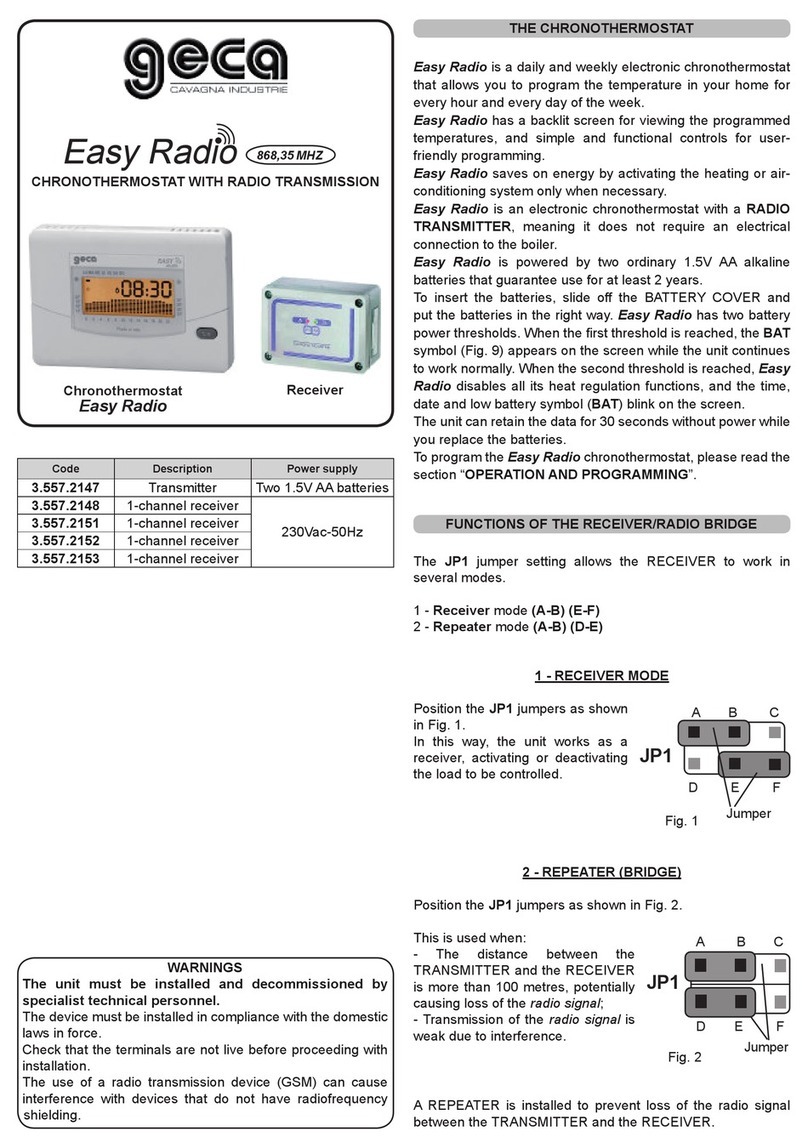
ELECTRONIC THERMOSTAT WITH DISPLAY
UPPER
PIVOTS
GENERAL DESCRIPTION
Nota is an electronic Thermostat with display which allows
you to set the “Day” ( ) and “Night” ( ) temperatures into
your home as you like and to modify them in an extremely
easy way.
THERMOSTAT Nota
Nota is powered with two common alkaline little penlight
1,5V batteries which guarantee its functioning for minimum
one year. To insert batteries, make the batteries cover slide
and place the batteries paying attention to the polarity
indicated into the batteries housing (Fig.1).
Fig.1
ELECTRIC CONNECTIONS
To open the thermostatNota you need, with a screw driver,
to exert pressure in the two clefts placed on the bottom side
of the product (Fig.2).
Fig.2
Pay attention: to close the thermostat Nota insert
before the two “UPPER PIVOTS” of the front panel to
avoid damages to connection between the two boards.
Model Colore
Description
35551047 Thermostat
with display WHITE
Terminal N.A. (Normally Open)
Terminal N.C. (Normally Closed)
Terminal C (Common)
Connection with burner,
domestic boiler, air
conditioned system,
zone valve with spring
return.
connection to a zone
valve
In case of connection to big inductive loads (pumps or
motors) we suggest to connect an RC filter in parallel
to the load.
INSTALLATION
Nota must be installed by using the nogs you find into the
box directly on the wall (Fig.3). The suggested high is 1,5
meters from the floor, in a dry ambient, far from draught and
heating sources.
Fig.3
GENERAL WARRANTY CONDITIONS
THE PRESENT CERTIFICATE IS THE ONLYDOCUMENT WHICH GIVES YOU THE RIGHT
TO THE PRODUCT REPAIR UNDER WARRANTY
- The product is GUARANTEE for a period of 24 months from the buying date.
- Evenctual damages originated from tampering, illegal opening, inappropriate or wrong use or installation
are not covered by the WARRANTY.
- GUARANTEE is valid only if properly filled in.
- In case of faults covered by the WARRANTY, the producer will repair or replace the product free of
charge.
OUT OF WARRANTY PERFORMANCES:
Elapsed the terms or the period of WARRANTY, evenctual repair activities will be charged in relation
to the replaced parts and to the labour costs.
.

WARRANTY CERTIFICATE
TO FILL IN AND SEND BACK IN CASE OF FAULTY PRODUCT
DEVICE : Nota Thermostat with display
Serial Number (s.n.) _______________________________________________________________
RISELLER
Stamp: Buying date:
_____/_____/_____
USER
Surname and Name ________________________________________________________________
Address __________________________________________________________________________
Z.I.P. CODE ________________ City __________________________________________________
Telephone number _________________________________________________________________
FUNCTIONING
The Thermostat Nota is available only in manual function to
be easy to use.
The front panel of the thermostat is composed by a big circular
display and two keys which allow you to set two temperature
values:
the first temperature called “Day ” and the second
temperature called “Night
”.
On the display the following information will be showed:
-Ambient temperature.
-type of temperature choosen (Day ) or (Night
).
-Status of the load: activated ( ) or deactivated.
To enter into the setting of the two temperatures (Day and
Night) you just need to press once the relative keys:
Night Mode (
) Day Mode ( )
Once pressed one of the two keys, the thermostatNota will
show the programmed temperature for that mode making
the relative symbol flashing: the moon “
“ for “Night” mode
or the sun “ “ for “Day” mode.
During the flashing period of the symbol,Nota allows you to
change the temperature as you like by pressing the
“increasing” key (+) and the “decreasing” key (-) which reflects
the two temperatures keys “Day” and “Night” (Fig.4).
Decreasing (-) Increasing (+)
At each pressure of the keys the temperature will increase
or decrease of 0,5°C.
Once the desired temperature has been set, simply stop
pressing the keys for at least 8 seconds to memorize the
temperature.
After 8 seconds the mode symbol “
“ or “ “ stops flashing
and the ambient temperature will be showed on the display.
The ThermostatNota in this way memorizes the temperature
changes set by the user.
If you want to switch from one mode to the other, you need to
press respectively the key “Day” or “Night” and wait 8 seconds
time so that the thermostat stabilize itself on the new
temperature values.
ON/OFF
Pressing together the two keys for two seconds, the
thermostat Nota goes into the function ON/OFF.
In function OFF (the thermostat is switched off) on the
display will appearOFF alternately to the degrees
measure in the environment.
To go out function OFF press again together the two key for
two seconds.
-
ãã
ãã
ã
+
-
ãã
ãã
ã
+
RESET button
TEMP.
DECREASE
and NIGHT
mode key
TEMP.
INCREASE and
DAYmode key
Fig.4
DAY
mode
NIGHT
mode
active
LOAD
GECA Srl Via E. Fermi n°98 25064 Gussago (Brescia) Italy
Tel. +39 030 3730218 - Fax +39 030 3730228
http://www.gecasrl.it - E-mail:[email protected]
GECA s.r.l. reserves the right to make any aesthetic or functional modification to
the without prior notice at any time.
Dis.1834018a Cod. 2.710.1681
TECHNICAL CHARACTERISTICS
THERMOSTAT Nota
- Power Supply: 2 little penlight batteries 1,5V type AAA
- Batteries life: more than 1 year;
- Output: exchange relay output 5(2)A 230Vac ; clean
contacts.
-Temperature range: 5 ; 35°C.
- Thermal Differential: +0,3C.
- Protection range : IP20
- Installation : wall mount
- Dimensions: 70x70x30mm
- Weight: thermostat 100gr batteries included
- Colour: white (code555)
RESET
To reset the two temperatures you just need to press the
dedicated reset button placed on the side of the “Night” mode
(
) key with a pointed tool.
Once reset, the thermostat Nota will automatically set the
two temperaturesto the default values: “Day” temperature at
20°C and “Night” temperature at 16°C.
ãã
ãã
ã
+
-
ON/OFF key
This manual suits for next models
1
Table of contents
Languages:
Other Geca Thermostat manuals

Geca
Geca Easy Radio User manual

Geca
Geca Roma Wi-Fi User manual

Geca
Geca LIRICO User manual

Geca
Geca Polo User manual

Geca
Geca Tecno Control Unico Installation manual

Geca
Geca Simply User manual

Geca
Geca Roma User manual

Geca
Geca T-Touch 503 User manual

Geca
Geca Tecno Control T-Touch TE401 User manual

Geca
Geca Easy 503 User manual