Geca Roma Wi-Fi User manual

GECA HAS DEVELOPED AN APP FOR MOBILE DEVICES, TO SIMPLY AND EASILY CON-
TROL YOUR THERMOSTAT.
YOU CAN CHECK THE TEMPERATURE AND CHANGE THE SETTINGS AT ANY TIME.
Download the app
DOWNLOAD THE
APP!
Available on
AVAILABLE ON
BY
Roma Wi-Fi
semi-recessed Wi-Fi touch-screen programmable thermostat
COMPLETE MANUAL

2

3
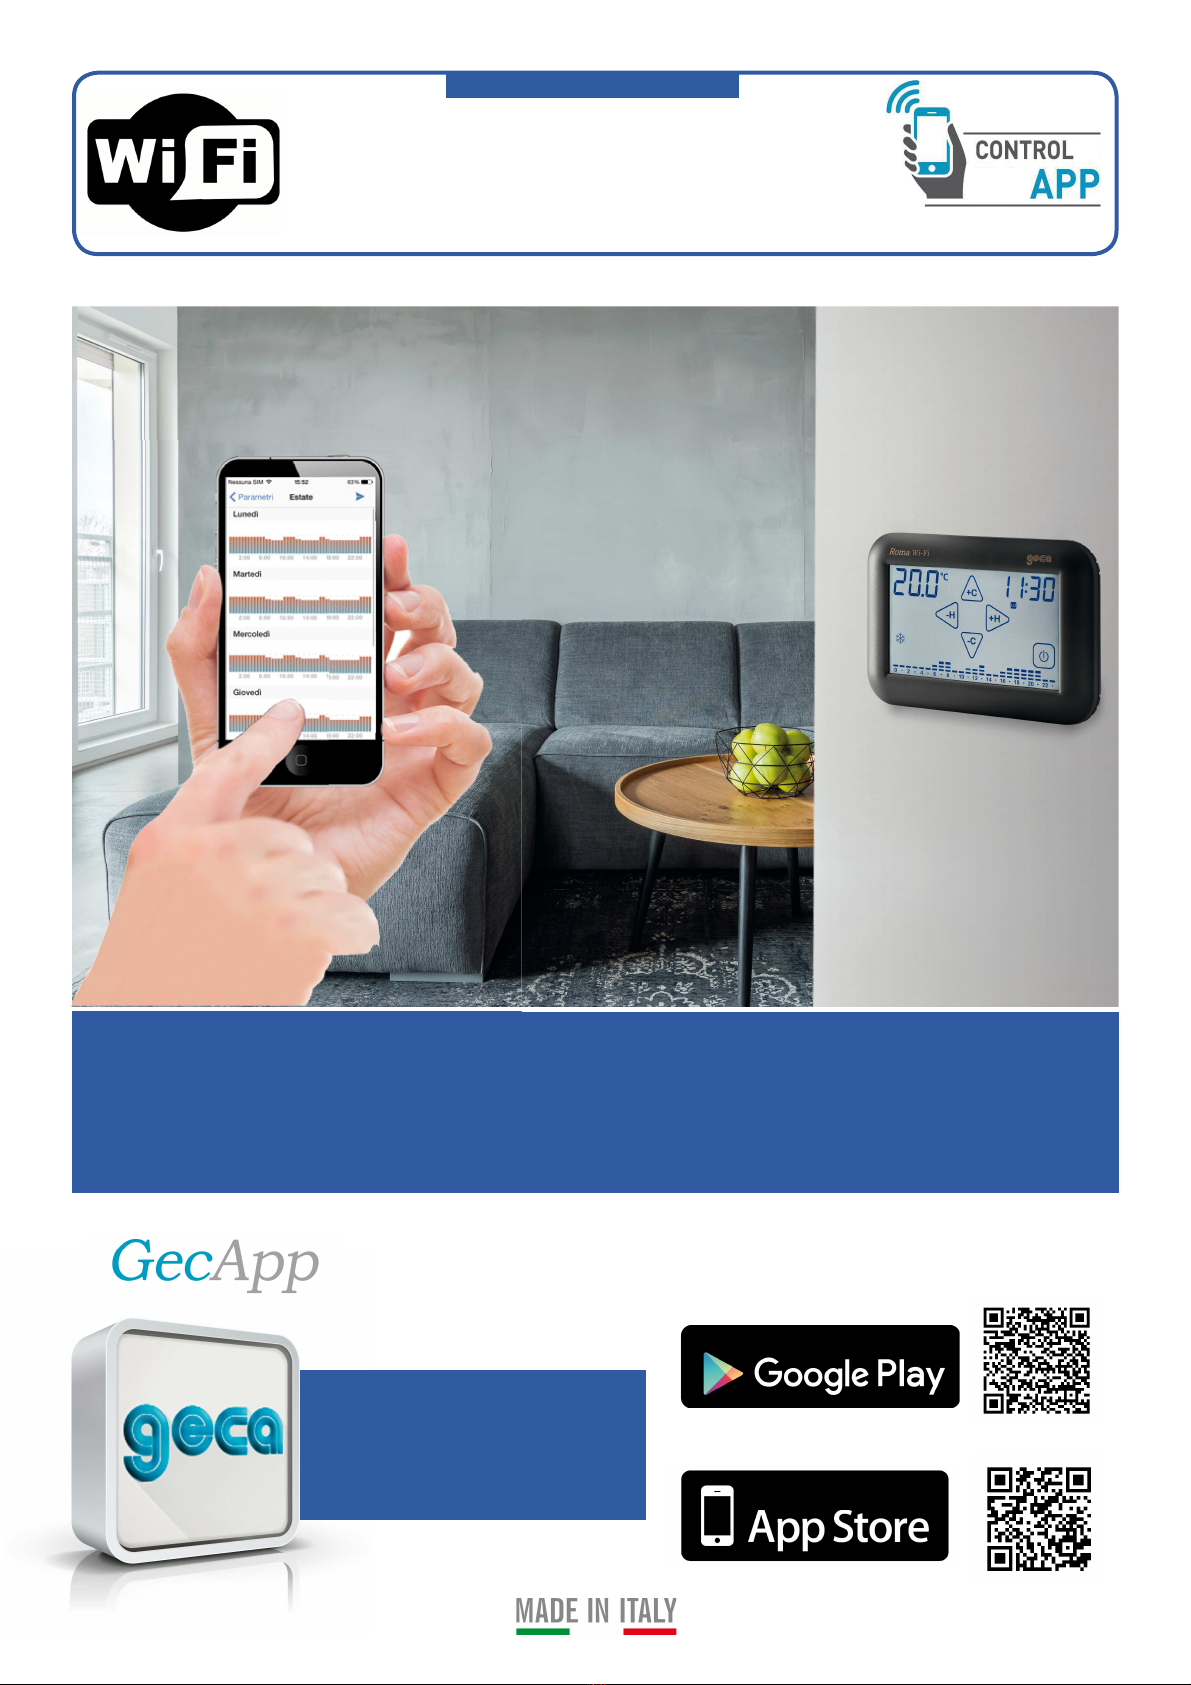
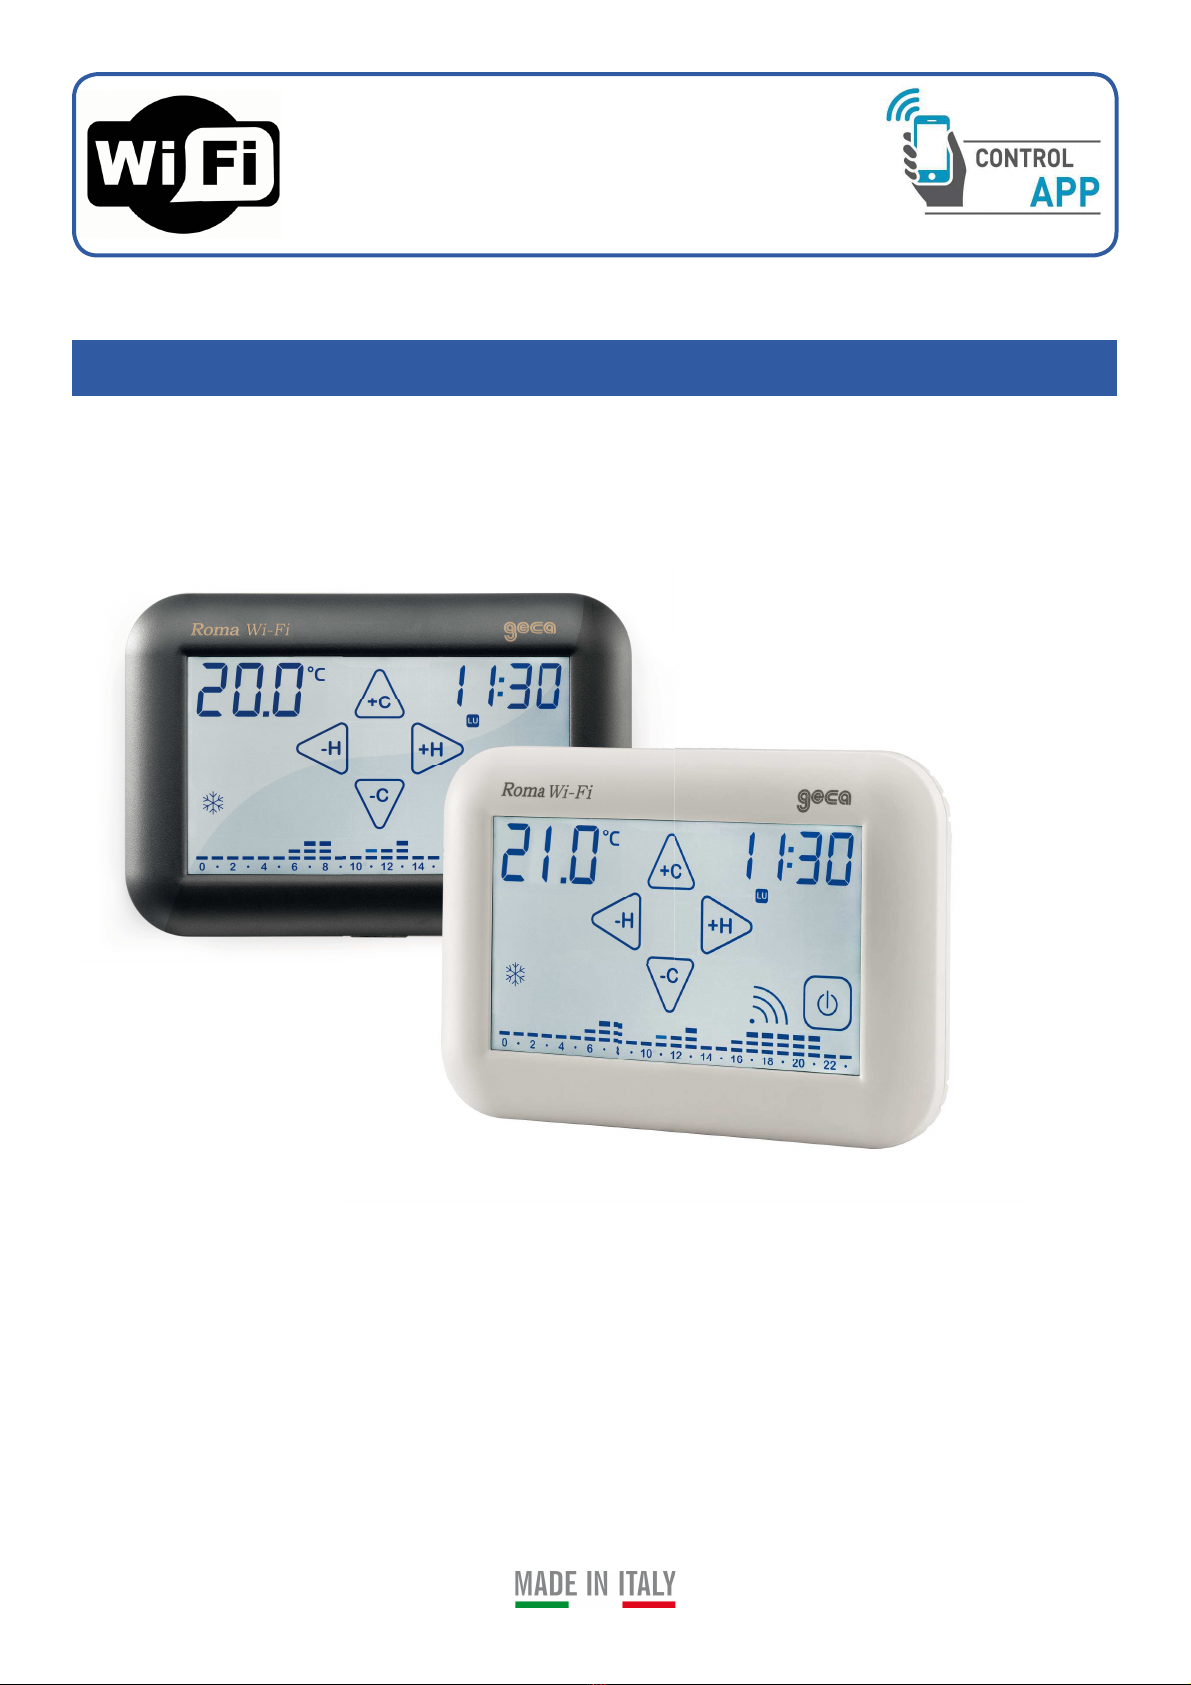
PAGE 5 - The Roma Wi Fi Programmable Thermostat
PAGE 6 - General Description
Power 230 V AC - 50/60 Hz
Electrical Connection
PAGE 7 - Wallplate Installation
Roma Wi Fi Programmable Thermostat Installation
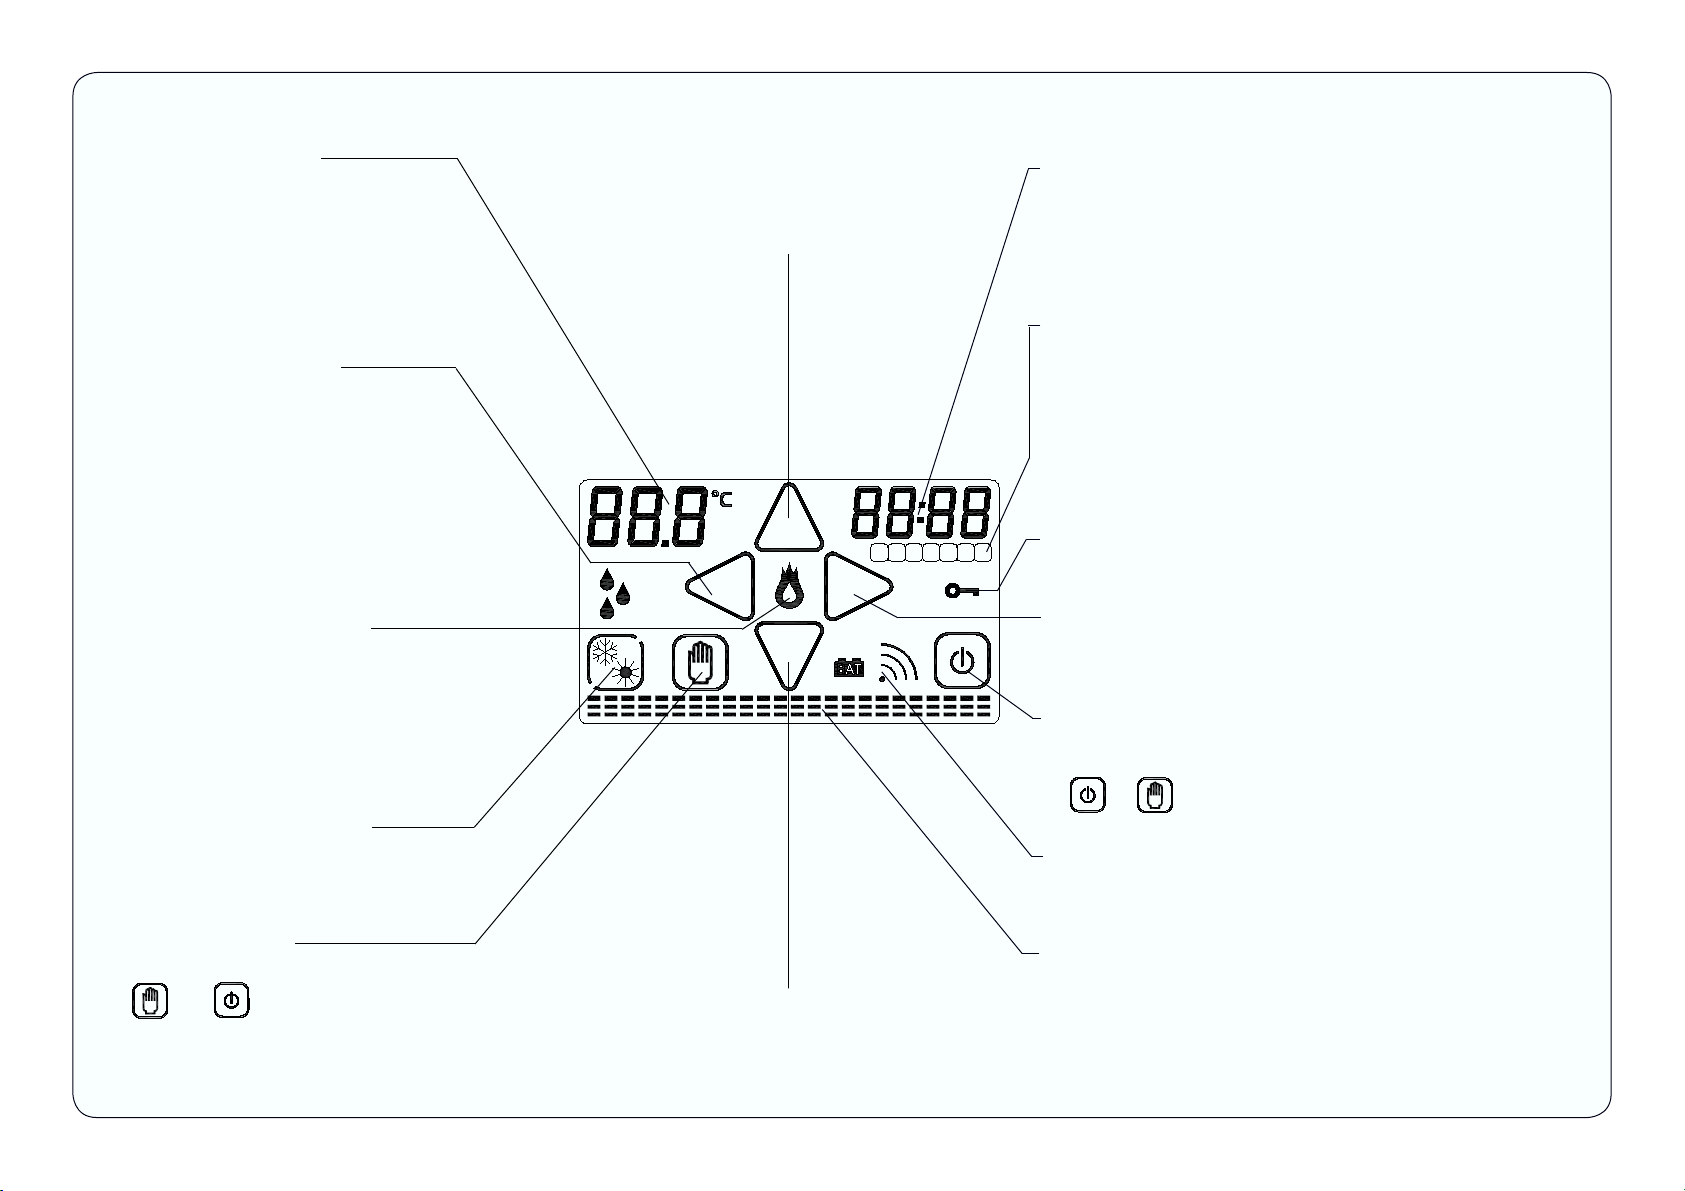
PAGE 9 - Icons on the Display
PAGE 10- First Power-Up
Temperature Chart on the Display
PAGE 11 - System Control Contact
Setup Menu
PAGE 12- Setup Menu Flow Chart
PAGE 13- Signal Quality
PAGE 14- Wi-Fi Submenu
Wi-Fi Module ON
Wi-Fi Module OFF
PAGE 15- Wi-Fi Configuration (First Power-Up)
PAGE 16- Wi-Fi Module Reset
Hour
PAGE 17- Measured Temperature Correction (Cort.)
PAGE 18- Programmable Thermostat Reset (RST)
Exit.
PAGE 19- Weekly Program
PAGE 20- COPY Function
DATE and TIME Setup
PAGE 21- Manual Program
PAGE 22- Manual Program Scheduling
PAGE 23- Summer/Winter Mode
ON/OFF.
PAGE 24- Password-protected Locking
PAGE 25- Maintenance Range
PAGE 26- Proper Use and Maintenance
PAGE 27- Product size
Technical Specifications
PAGE App Mode for iOS Operating System
PAGE 30- Configuring a New Device
PAGE 32- Interface of the App’s Home Screen
PAGE 33- Possible Errors
Add Mobile Device
Add/Delete Device
PAGE 34- Sending Settings Using the App
Turning the Programmable Thermostat ON/OFF
PAGE 35- Automatic Winter Mode
PAGE 36- Weekly Program
PAGE 38- Automatic Winter Mode
PAGE 39- Manual Time-Limited Operation
PAGE 40- Advanced Parameters
Maximum/minimum temperature exceeded.
Anti-freeze temperature.
Manual time-limited mode timing.
PAGE 43- Problems/Solutions
PAGE 45 App Mode for Android Operating System
PAGE 30- Configuring a New Device
PAGE 32- Interface of the App’s Home Screen
PAGE 49- Possible Errors
Add Mobile Device
Add/Delete Device
PAGE 34- Sending Settings Using the App
Turning the Programmable Thermostat ON/OFF
PAGE 35- Automatic Winter Mode
PAGE 36- Weekly Program
PAGE 54- Automatic Winter Mode
PAGE 55- Manual Time-Limited Operation
PAGE 56- Advanced Parameters
Maximum/minimum temperature exceeded.
Anti-freeze temperature.
Manual time-limited mode timing.
PAGE 59- Problems/Solutions
TABLE OF CONTENTS

4

5
THE PROGRAMMABLE THERMOSTAT
Roma Wi-Fi
semi-recessed Wi-Fi touch-screen programmable thermostat
BY

Roma Wi-Fi is a semi-recessed Wi-Fi touch-screen programmable thermostat with an APP to
control the temperature of your home simply and easily, using your smartphone or tablet.
Roma Wi-Fi
has a backlit display to graphically display temperatures, which can be changed using
simple and practical commands that make setting it up it very easy.
Roma Wi-Fi
can control heating and cooling systems.
It avoids energy waste by running the heating or air conditioning system only when needed.
N.B. TURN OFF ELECTRICAL POWER BEFORE CONNECTING THE
Roma Wi-Fi
PROGRAM-
MABLE THERMOSTAT.
Warning: Electrical connections must be made using subsurface ducted wiring.
N.B. Connect the electrical load before connecting the mains (Fig. 1).
The electrical connection terminals are located behind the Wallplate.
The
Roma Wi-Fi
programmable thermostat must be powered by 230Vac - 50/60 Hz on terminals 1
and 2 (Fig. 1).
6
(Fig. 1).
GENERAL DESCRIPTION
POWER
Connection with a burner, wall-mounted
boiler, air conditioning system, or spring-re-
turn zone valve:
Connection with a zone valve:
ELECTRICAL CONNECTION
The output is controlled by a potential-free switchover relay rated 6 A, 250 Vac.
The following devices (for heating/cooling) can be connected to the
Roma Wi-Fi
semi-recessed
programmable thermostat using the following electrical diagrams:
5 4 3 2 1
U
230 Vac - 50/60 Hz
C NC NA
CLOSES
OPENS
5 4 3 2 1
230 Vac - 50/60 Hz
C NC NA

INSTALLATION OF WALLPLATE
7
Roma Wi-Fi
can be installed both in recessed 2-module junction boxes (502 type) and in recessed
3-module junction boxes (503 type). In both cases, the recommended height is 1,5m above the
floor, in a dry, draught-free place, away from heat sources. After making the electrical connections,
fasten the Wallplate to the recessed junction box using the included screws, making sure that the
Wallplate’s Locking Clip is on the bottom side (Fig. 2).
PROGRAMMABLE THERMOSTAT INSTALLATION
(Fig. 2).
Wallplate Tabs
Locking Clip Recessed boxes
Wallplate
Latch the
Roma Wi-Fi
programmable thermostat to the Wallplate Tabs and rotate it downwards
until the Locking Clip locks it in place (Fig. 3).
Conversely, to remove the
Roma Wi-Fi
programmable thermostat from the Wallplate, release the
Locking Clip and rotate it upwards (Fig. 4).
(Fig. 3). (Fig. 4).
Wallplate Tabs
Locking Clip
Wallplate
Locking Clip

8

9
-MEASURED TEMPERATURE
SET MAINTENANCE RANGE (PRESS)
-COPY TARGET TEMPERATURE (TOUCH)
-SETUP MENU (PRESS)
-DECREMENT HOURS/MINUTES
(Only TOUCH or PRESS)
-ACCESS WEEKLY PROGRAMMING (TOUCH)
(TOCCO)
-HEATING SYSTEM/ COOLING
RUNNING
-SUMMER/WINTER MODE
-ENABLE CHANGE SEASON (PRESS)
-CHANGE SEASON (TOUCH)
-MANUAL MODE
-ENTER/EXIT MANUAL MODE (PRESS)
- “ ”+“ ” PASSWORD (PREMUTO)
-TIME of DAY.
-ENABLE COPY DAILY PROGRAM (PRESS)
-COPY DAILY PROGRAM (TOUCH)
-SAVE: DISPLAY PROGRAM SAVE (PRESS)
-SETUP MENU (PRESS)
-DAYS of WEEK.
LUnedì = Monday
MArtedì = Tuesday
MErcoledì = Wednesday
GIovedì = Thursday
VEnerdì = Friday
SAbato = Saturday
DOmenica = Sunday
-UNLOCK FUNCTION (PRESS)
-INCREMENT HOURS/MINUTES
-ACCESS WEEKLY PROGRAMMING (TOUCH)
-ON/OFF.
-ON/OFF (PRESS)
EXIT FUNCTION/PROGRAM (TOUCH)
- “ ”+“ ” PASSWORD (PRESS)
-WI-FI NETWORK SIGNAL SYMBOL
-DAILY/WEEKLY CHART OF TARGET TEMPERATURES
PROGRAMMATE.
DECREASE TARGET TEMPERATURE AND
MAINTENANCE RANGE
-ACCESS WEEKLY PROGRAMMING (TOUCH)
-SLOW DECREMENT TEMPERATURE (TOUCH)
-FAST DECREMENT TEMPERATURE (PRESS)
%
GI VE SADO
MEMALU
+H
-H
-C
+C
INCREASE TARGET TEMPERATURE AND MAIN-
TENANCE RANGE
-ACCESS WEEKLY PROGRAMMING (TOUCH)
-SLOW DECREMENT TEMPERATURE (TOUCH)
-FAST INCREMENT TEMPERATURE (PRESS)

10
FIRST POWER-UP
When you power up your
Roma Wi-Fi
programmable thermostat, it performs a check-up by turning
on all the parts of its display and turning on the load for a few seconds (Fig. 5).
Then the
Roma Wi-Fi
programmable thermostat shows the Home Screen (Fig. 6).
After about ten seconds it shows the STAND-BY screen (Fig. 7).
When powered up for the first time, Wi-Fi is off. N.B. After configuring the Wi-Fi module, every
time mains power resumes, the programmable thermostat will send your mobile device a push-
notification reporting: "Mains power present.”
Fig.5 Fig.6 Fig.7
Roma Wi-Fi
is pre-programmed with a weekly temperature program, which can be modified at
will (Fig. 6).
%
GI VE SADO
MEMALU
+H
-H
-C
+C
+H
-H
-C
+C
LU
LU
TEMPERATURE CHART ON THE PROGRAMMABLE
THERMOSTAT’S DISPLAY
The
Roma Wi-Fi
programmable thermostat can display a temperature chart that shows 24 col-
umns, to represent the 24 HOURS of the day.
Two temperatures can be programmed for each HOUR:
- the temperature of the FIRST HALF HOUR (e.g. from 00:00 to 00:29)
- the temperature of the SECOND HALF HOUR (e.g. from 00:30 to 00:59)
The heights of the columns change only when setting the temperatures for the FIRST HALF
HOURS of each hour.
-Each COLUMN is made up of three temperature CURSORS (Fig. 8):
In WINTER mode “ ” :
The 3rd CURSOR includes temperatures from 20.0°C to 30.0°C.
The 2nd CURSOR includes temperatures from 16.1°C to 19.9°C.
The 1st CURSOR includes temperatures from 5.0°C to 16.0°C
In SUMMER MODE “ ” :
The 3rd CURSOR includes temperatures from 29.0°C to 35.0°C.
The 2nd CURSOR includes temperatures from 27.0°C to 28.9°C.
The 1st CURSOR includes temperatures from 15.0°C to 26.9°C
Let’s assume you want to set the temperature of the "0" hour:
By setting the temperature to 18°C for the FIRST HALF HOUR, the column of HOUR 0 will change
its height with respect to the pre-set program (Fig. 9).
If you set the temperature to 25°C in the SECOND HALF HOUR, the 0 HOURS column will not
change (Fig. 10).
(Fig. 8).

11
Therefore: Setting the temperature of the SECOND HALF HOUR of each HOUR does not make
the corresponding HOUR column change, even you set it to a different temperature with respect
to the temperature of the FIRST HALF HOUR of that HOUR. The display will show the trend of
the target temperatures throughout the day. The temperature CURSOR of the currently selected
HOUR flashes.
SYSTEM CONTROL CONTACT
The heating/cooling system is turned on or off when the target
temperature is reached by switching the relay contact.
The “ ” symbol shows that the heating/cooling system is on (Fig. 11).
LU
(Fig. 11).
(Fig. 9). (Fig. 10).
SETUP MENU
+H
-C
+C
(Fig. 12).
To access the programmable thermostat’s Setup Menu, press the measured TEMPERATURE
area and the TIME area, together (Fig. 12).
Use the “
-H
” or “
+H
” buttons to scroll through the Setup Menu.
The Setup Menu has the following submenus:
-WIFI,
-Hour,
-Conf,
-rSt,
- Exit.
To access a submenu (WIFI, Hour, Cort, rSt, Exit), press its name for 2 seconds.
The following page shows a flow chart of the Setup Menu.

12
+H
-H
-C
+C
+H
-H
+H
-H
+H
-H
+H
-H
WI-FI
Use the WI-FI Submenu to set
up the Wi-Fi module:
Turn Wi-Fi module on (On)
Turn Wi-Fi module off (OFF)
Configure it (Conf)
- Resettare (rSt)
la rete WI-FI.
Cort
Use the Cort Submenu to
set the measured tempera-
ture compensation between
-5°C and +5°C.
+H
-H
-H
+H
-H
-H
+H
-H
+H
-H
+H
-H
+H
-H
+H
-H
Hour
Use the Hour Submenu to
set the time:
Enable automatic time
server synchronization
(Auto).
Disable automatic time
server synchronization
(Man).
+H
-H
SETUP MENU

13
+H
-H
+H
-H
rSt
Press rStfor about 2 sec-
onds to reset all the set-
tings, except those of the
Wi-Fi network.
Exit
Press Exit for about 2
seconds to return to the
Home Screen.
+H
-H
+H
-H
SIGNAL QUALITY
Roma Wi-Fi
shows a Signal Quality symbol on its display.
It shows the quality of the signal between the Roma Wi-Fi programmable thermostat and your
home Wi-Fi network.
The signal quality is shown as:
=Signal quality LOW
=Signal quality FAIR
=Signal quality GOOD
=Signal quality VERY GOOD
WARNING: When the Signal quality symbol flashes it is searching for the Wi-Fi network.

+H
-H
14
WI-FI SUBMENU
Press the TEMPERATURE area and the TIME area together for 2 seconds to access the Setup
Menu from the Home Screen (Fig. 13).
Press WIFI for about 2 seconds (Fig. 14) to access the WIFI Submenu.
Use the “
-H
” o “
+H
” buttons to scroll through the On, OFF , ConF and rSt modes.
Use the WIFI submenu to: - TURN ON THE WI-FI MODULE (On),
- TURN OFF THE WI-FI MODULE (OFF) ,
- CONFIGURE THE WI-FI CONNECTION (ConF),
- RESET THE WI-FI CONNECTION (rSt).
- WI-FI MODULE ON
- Press On for about 2 seconds (Fig. 15) to TURN ON the programmable thermostat’s Wi-Fi module.
On and the Signal quality symbol “ ” will start to flash (Fig. 16).
If configured, Roma Wi-Fi will connect to the selected Wi-Fi network.
After 5 seconds, Roma Wi-Fi will return to the Home Screen.
If there is no electrical power, the thermostat will display ER1.
- WI-FI MODULE OFF
- Press OFF for about 2 seconds (Fig. 17) to TURN OFF the programmable thermostat’s Wi-Fi
module. OFF will flash for 2 seconds and the Signal quality symbol “ ” will no longer be shown
(Fig. 18). After 5 seconds, Roma Wi-Fi will return to the Home Screen.
-H
-H
+H
-H
+H
-H
+H
-H
-C
+C
(Fig. 13). (Fig. 14).
Fig.17 Fig.18
Fig.15 Fig.16

WI-FI CONFIGURATION (First Power-Up)
Wake the display by touching it (backlight on).
Press the TEMPERATURE area and the TIME area together for 2 seconds to access the Setup
Menu from the Home Screen (Fig. 13).
Press WIFI for about 2 seconds (Fig. 14) to access the WIFI Submenu.
Use the “
-H
” or “
+H
” buttons to scroll to the “ConF” mode.
Press ConF for about 2 seconds (Fig. 19) to CONFIGURE Roma Wi-Fi’s WIFI connection ConF
and the Signal quality symbol “ ” will start to flash (Fig. 20).
Wait for the flashing to stop.
EXIT will be shown when the flashing stops (Fig. 21):
At this point, the Roma Wi-Fi programmable thermostatis in Configuration mode.
The configuration procedure continues on your mobile device.
1- Connect your mobile device to the “Roma Wi-Fi ” Wi-Fi network.
N.B. If your mobile device cannot connect to the “Roma Wi-Fi ” Wi-Fi network, see the Errors/
Problems section or exit the "Configuration" mode and perform a “Wi-Fi module RESET” (see
complete Instruction Manual).
2 - Read the “NEW Roma Wi-Fi DEVICE CONFIGURATION” section in the APP instructions on
page 30 for the iOS operating system and on page 46 for the Android operating system.
15
+H
-H
-H
+H
-H
Fig.19 Fig.20
(Fig. 21).

RESET (WI-FI MODULE)
Access the WIFI submenu from the Home Screen and select rSt .
- Press rSt for about 2 seconds to RESET the Wi-Fi network connection (Fig. 22).
The display will show “In It ” (Fig. 23), to show that the Wi-Fi network connection "RESET" pro-
cedure is initializing.
N.B. The RESET function can be turned on only when the Wi-Fi module is ON.
Immediately after the Rome Wi-Fi programmable thermostat is placed in the Home Screen.
To restore connection to the Wi-Fi network, repeat the CONFIGURATION procedure.
This function resets the Wi-Fi module to its factory settings.
Therefore it deletes the entire configuration of the Wi-Fi connection.
16
-H
Fig.22 Fig.23
+H
-H
Hour
Access the Setup Menu from the Home Screen by pressing the measured TEMPERATURE area
and the TIME area together, for 2 seconds.
-Press the “
-H
” or “
+H
” buttons to access the Hour item (Fig. 24).
-Press Hour for about 2 seconds, until "AUto” is shown. (Fig. 25). 25).
Press AUto for about 2 seconds, until it flashes to TURN ON automatic time synchronization. (Fig.
25).
In AUTo mode, the programmable thermostat automatically updates the time via a time server.
Press “MAn” for about 2 seconds, until it flashes to TURN OFF automatic time synchronisation.
(Fig. 26).
In “MAn” mode, you must manually set the the programmable chronothermostat’s time using the
app or directly on the device. Press the “
+H
” button to access the EXIt item to exit the menu
Press “EXIt” to return to the Home Screen.
+H
-H
+H
-H
+H
-H
Fig.24 Fig.25 Fig.26

17
CORT
(Measured Temperature Correction)
Use the "Cort" Temperature Correction function if the room temperature is incorrectly measured
due to disturbing elements such as heaters, coolers, etc.
On Roma Wi-Fi, you can compensate the temperature measured by the programmable thermo-
stat in a range from -5°C to +5°C.
Example:
Let’s suppose you set the "Cort” “Temperature Correction” to: -2.0°C.
If Roma Wi-Fi displays a temperature of 20.0 °C while the real temperature is 22,5°C,
you can use the "Temperature Correction” function to set +2.5°C so that: 20°C+2,5°C =22,5°C
Access the Setup Menu from the Home Screen by pressing the measured TEMPERATURE area
and the TIME area together, for 2 seconds.
-Press the “
-H
” or “
+H
” buttons to access the Cort item (Fig. 27).
-Press Cort for about 2 seconds (Fig. 28).
Fig. 27 Fig. 28
Use the “
+C
” o “
-C
” buttons to set the desired Temperature correction (Fig. 29).
Confirm by pressing “Cort” (Fig. 30).
Roma Wi-Fi will return to the Home Screen.
Fig. 29 Fig. 30
-C
+C
-C
+C
-H
-C
+C

18
RST (Reset Programmable thermostat)
The “rSt” function resets your Roma Wi-Fi.
The “rSt” function resets all the programmable thermostat’s parameters except those of the Wi-Fi
network.
Access the Setup Menu from the Home Screen by pressing the measured TEMPERATURE area
and the TIME area together, for 2 seconds.
- Press the “
-H
” or “
+H
” buttons to access the “rSt” item.
- To reset Roma Wi-Fi, press rSt for about 2 seconds (Fig. 31).
When you select the RESET function, the programmable thermostat performs a checkup by turn-
ing on all parts of the display, activating the load for a few seconds (Fig. 32), disabling the Wi-Fi
network connection and resetting the temperature program.
After a few seconds, the programmable thermostat shows the Home Screen (Fig. 33).
To reactivate the Wi-Fi module, access the programmable thermostat’s Wi-Fi Submenu and set
it to ON.
Fig. 31 Fig. 32 Fig. 33
+H
%
GI VE SADO
MEMALU
+H
-H
-C
+C
+H
-H
-C
+C
LU
EXIT (Exit Setup Menu)
Press “Exit” for about 2 seconds to exit the Setup Menu and return to the Home Screen (Fig.34).
Fig. 34
-H

19
WEEKLY PROGRAMMING
It is advisable to set the weekly programming before setting DATE and TIME.
You can access the Home Screen (Fig. 36) from STAND-BY ON mode (Fig. 35) by simply touch-
ing the display.
Fig. 35 Fig. 36 Fig. 37
Press one of the “
+C
” , “
-C
”, “
-H
” or “
+H
” buttons (Fig. 37) to access the WEEKLY PRO-
GRAMMING (Fig. 38). In WEEKLY PROGRAMMING you set the temperatures for every half
HOUR of the day and for every day of the WEEK.
Fig. 38 Fig. 39
Tou ch “
+C
” or “
-C
” to increase or decrease the TEMPERATURE by 0.2°C (Fig. 39). Press “
+C
” or “
-C
” to change the temperature by 1.0°C.
Tou ch “
-H
” or “
+H
” to set the temperature in the previous or next half hour.
To copy the target temperature from one half hour to the next half hour
press the temperature area (Fig. 19). Each press will make a copy (Fig. 41).
Tou ch the TIME area to move on to the next PROGRAMMING day (Fig. 42).
After programming, touch the ON/OFF “ ” button to confirm the programming. SAVE will re-
place TIME for a few seconds (Fig. 44).
Fig. 42 Fig. 43 Fig. 44
LU
+H
-H
-C
+C
LU
LU
+H
-H
-C
+C
LU
-H
-C
+C
+H
-H
-C
+C
+H
-H
LU
+H
-H
-C
+C
MA
Fig. 40 Fig.41
+H
-H
-C
+C
MA

20
COPY FUNCTION
The COPY FUNCTION lets you copy the program set for one day to the other days of the week.
While setting the weekly program (temperature flashing), press the TIME area (Fig. 45) for about
2 seconds, until COPY is shown (Fig. 46).
Fig. 45 Fig. 46 Fig. 47
The DAY to be copied (e.g. Monday MO ), will not flash while the day to which the program will be
copied will flash (e.g. Tuesday TU ) Fig. 46.
-Use the “
-H
” or “
+H
” buttons to scroll through the days of the week and press COPY to confirm
the DAY to copy onto.
-Press COPY repeatedly to copy the day to the entire week (Fig. 47).
Tou ch the TEMPERATURE area at any time to exit the COPY function.
The display will return to the WEEKLY PROGRAMMING screen.
-H
+C
+H
-H
LUMALU
-H
DATE and TIME SETUP
You can access the programmable thermostat’s Home Screen (Fig. 49) from STAND-BY ON mode
(Fig. 48) by simply touching the display. Press the TIME area for 2 seconds (Fig. 50), until the
HOURS start flashing (Fig. 51).
Fig. 48 Fig. 49 Fig. 50
TIME: use the “
-H
” and “
+H
” buttons (Fig. 51) to set the TIME.
Fig. 51
LULU
LU
+H
-H
-C
+C
LU
+H
-H
-C
+C
LU
+H
-H
Table of contents
Other Geca Thermostat manuals

Geca
Geca Polo User manual

Geca
Geca Nota User manual

Geca
Geca LIRICO User manual

Geca
Geca Simply User manual

Geca
Geca Roma User manual

Geca
Geca Easy 503 User manual

Geca
Geca Simply User manual

Geca
Geca Tecno Control Unico Installation manual

Geca
Geca Tecno Control T-Touch TE401 User manual

Geca
Geca Easy Radio User manual
Popular Thermostat manuals by other brands

iQe
iQe RT322 User and installation instructions

Honeywell
Honeywell VisionPRO Series installation guide

Elko
Elko 16 A user guide

Braeburn
Braeburn 140404 installation manual

Aube Technologies
Aube Technologies TH144 Installation instructions and user guide

Aprilaire
Aprilaire 8920W Safety & installation instructions