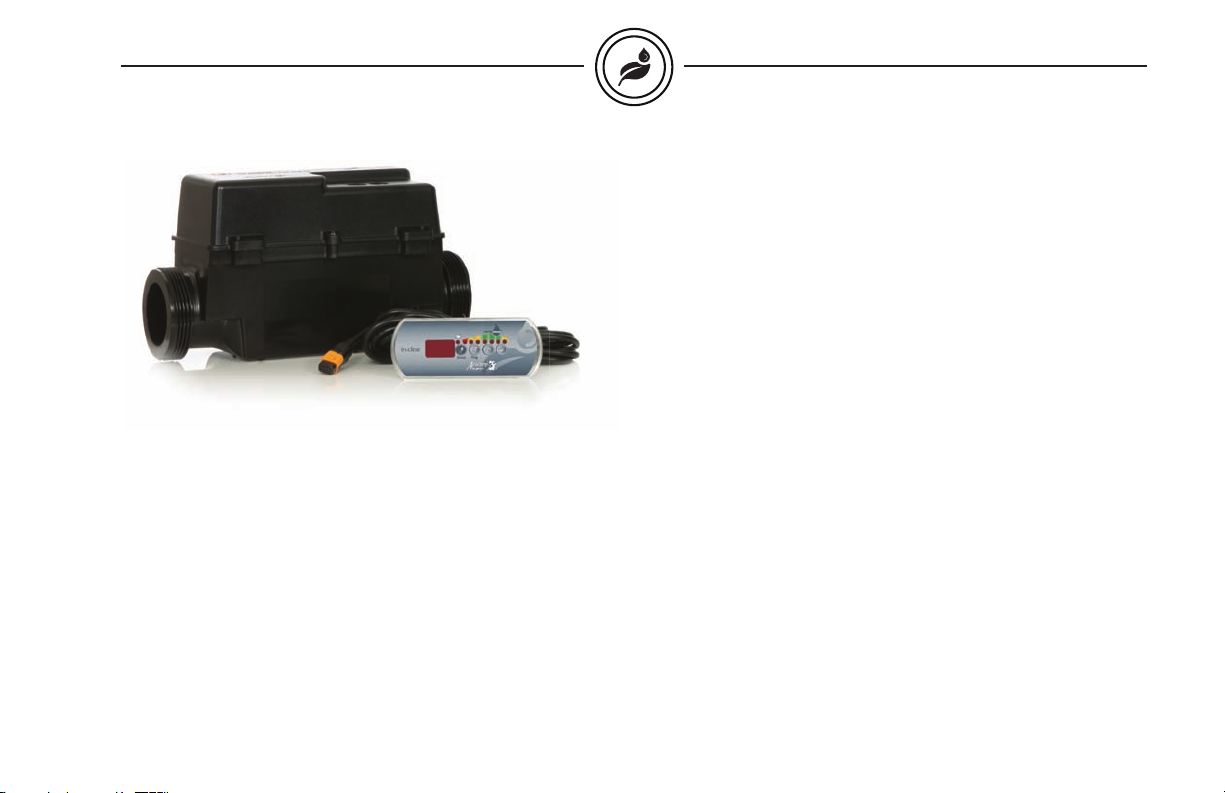
Gecko in.clear 0605-500002 User manual

Developed and Designed in Sweden by
IQue Sweden AB Grustagsgatan 13
254 64 Helsingborg Sweden
Here is your manual, please read and follow the instructions carefully
In.Clear Manual

in.clear™
Bromine based water sanitization system for spas
TechBook
Water so clear !
You‘ll want to touch it ! You’ll need to feel it !

1
in.clear ™
In.Clear™ Model No. 0605-500002
Bromine based water sanitization system for spas
Automatic Bromine Generator
For Spa Sanitizing
Domestic
A maximum of 2000 Litres of water can be treated with one In.Clear
Automatic Bromine Generator unit.
Maximum output of Hypobromus Acid equivalent to 0.04 kg of free
available bromine per day.
For spas, a range of 3 – 5 ppm of free available bromine must be maintained.
READ THE LABEL AND OPERATION/INSTALLATION MANUAL BEFORE
USING THIS DEVICE
KEEP OUT OF REACH OF CHILDREN
REGISTRATION No. 29628 PEST CONTROL PRODUCT ACT
WARNING: Operating the In.Clear Automatic Bromine Generator without
water flow through the cell can cause a build up of flammable gases which
can result in FIRE or EXPLOSION.
Gecko Alliance Group Inc.
450, Des Canetons, Québec (Québec)
Canada G2E 5W6
800-784-3256 ext. 350
418-872-4411 ext. 350

3
in.clear ™
Table of contents
in.clear™
introduction ...........................................................................................5
warnings ................................................................................................ 6
bromine benefi ts - how in.clear™ works ...........................................8
keypad installation ...............................................................................9
- installing the in.k200™ .........................................................9
- skirt mount installation ........................................................10
- connecting the in.k200™ to in.clear™
...............................12
in.clear™ installation ...........................................................................13
operating modes ................................................................................18
getting started ......................................................................................19
keypad operations .............................................................................24
troubleshooting .................................................................................29
F.A.Q........ ............................................................................................ 32
glossary ................................................................................................ 33
cell cleaning ........................................................................................ 35
specifi cations ......................................................................................38
Annex
- BromiCharge™ user guide ..................................................41
table of contents

5
in.clear ™introduction
in.clear™
Water sanitation systems for spas
With its waterproof enclosure, its sturdy design, the new in.clear™ is the
most effi cient water sanitation system offered to the spa and hot tub
industry today.
In.clear™ is a system that generates and releases bromine into the spa
water to rapidly control and destroy any microbiological contaminants
such as waterborne bacteria, algaes, body chemicals, organic matter
given off by spa bathers and other organisms known to be linked to
recreational water illnesses.
The new in.clear™ system eliminates the need to add extra chemicals
in the water to destroy unsightly pollutants and achieves impeccable
results. The in.clear™ system does not produce any offensive odors, it
reduces eye irritation and it's easy to handle, making the in.clear™ the
best choice for hot tub sanitation.
Spas using the new in.clear™ system need very little maintenance, and
in.clear™ can be easily installed on new or existing spas.

6
in.clear ™
Warnings!
Important safety instructions
• In.clear™ must be used only with BromiCharge™ Sodium Bromine
Salt that is registered or scheduled under Registration No. 29628 Pest
Control Product Act - Canada.
• Read and follow this manual carefully and make sure to save it
for later.
• This manual contains important information on in.clear's installation,
use and safety recommendations. It is your responsibility to install
and use your in.clear™ unit safely.
• In.clear™ must be connected to a circuit protected by a ground fault
interrupter device (GFCI) in North America or residual current divice
(RCD) having a rated residual operating current not exceeding 30
mA in Europe.
• Make sure all electrical power is off before installing the in.clear™
unit. If the supply cord is damaged, it must be replaced by the
manufacturer, its service agent or similarly qualified persons in order
to avoid a hazard.
• Use only an electrical cord in good conditions to power in.clear™.
• Always clean or replace your filter cartridges at regular intervals,
otherwise part of the bromine generated by in.clear™ will only serve
to oxidize the dirt accumulated in the filter.
warnings
• Do NOT add any other sanitation chemicals in the spa other than
BromiCharge™.
• Operating the in.clear™ at reduced BromiCharge™ levels will shorten
the life of the cell.
• Do not open the in.clear™ unit; there are no serviceable parts inside.
• Disposal of the product: the in.clear™ unit must be disposed
of separately in accordance with the local waste disposal
legislation in force.
• This appliance is not intended for use by persons (including children)
with reduced physical, sensory or mental capabilities, or lack of
experience and knowledge, unless they have been given supervision
or instruction concerning use of the appliance by a person
responsible for their safety.
• Children should be supervised to ensure that they do not play with
the appliance.

7
in.clear ™
• The appliance must be installed in a location that is inaccessible to
a person in the bath or spa and must be located or fixed so that it
cannot fall into the bath or spa.
• The appliance is not intended for submersion but may be installed
within the spa zone.
• A means for disconnection must be incorporated in the fixed wiring
in accordance with the wiring rules.
• To reduce the risk of injury, do not allow children to operate
this device.
• It is the responsibility of the user to test the spa water regularly to
ensure that adequate amounts of bromine are generated to achieve
proper sanitizer levels.
• Heavy spa usage may require higher bromine output to maintain
proper free available bromine residuals.
• Maintaining overly high BromiCharge™ and bromine levels above
recommended range can contribute to corrosion of spa equipment
and may damage components of the spa.
• Do NOT add any other sanitation chemicals in the spa other than
BromiCharge™.
Warnings!
• Disconnect all UV sanitation devices.
• Check the expiry date of the test kit as test results may be inaccurate
if used after that date.
• Follow all aspects of the local and National Electrical Code(s) when
installing the in.clear™ Automatic Bromine Generator.
• People with a medical condition should consult a physician before
entering spa water.
• Women who are pregnant should NOT enter the spa.
• Maximum spa water usage temperature is 40°C. Bathing in spa water
at 40°C should not exceed 15 minutes.
• For proper sanitation, Spas must be completely drained periodically.
The number of days between COMPLETE SPA DRAINAGE is equal
to the volume of the Spas water in liters, divided by 10 times the
maximun number of daily spa users. Refill spa with water and repeat
DIRECTION FOR USE of the device.
• In.clear™ is meant for a covered spa NOT swimming pools.
• Users should always shower before entering a spa.
warnings

8
in.clear ™
bromine benefits
Bromine in a spa!
Bacteria requires a certain period of time before forming into micro
colonies and becoming attached to a surface. Rapid elimination
of bacteria is a key element in the proper maintenance of the spa
water. In.clear™ achieves this while oxidizing odors and reducing
eye irritation. In.clear™ enhances the clarity and quality of spa water.
For bathers this translates into a more enjoyable warm water therapy
experience.
How in.clear™ works!
When BromiCharge™ is added to the water, it separates into sodium
ions and bromide ions. As the water passes through the in.clear™
bromine generator, a low-voltage source supplies a current that
electrolytically reduces the bromine ions into bromine which reacts
with the water molecules to form free bromine. Bromine is known to
be a highly effective bactericide and algaecide. This process releases
bromide ions back into the water for continuous recycling until the
the spa is emptied. It is important to note that the amount of bromine
needed will vary in direct proportion to the number of bathers in the
spa (bather load).
Effects of bromine
• Bromine destroys waterborne bacteria.
• Bromine destroys algae in water (e.g. Black, Green, Mustard).
• Bromine swiftly eliminates the presence of organic matter left
behind by spa users (oil, sweat, dead skin cells).
• Because bromine doesn’t contain calcium, it can be used to
sanitize hard water without increasing the calcium hardness.
• Bromamines are much less likely than chlorine to cause skin
irritation. This makes them more suitable for use in the higher
temperatures of spa baths.

9
in.clear ™keypad installation
Installing the in.k200™
The keypad should be installed directly onto the spa (or very
close to it) so that it is easily accessible to the user.
• To install the in.k200™, drill two 25 mm (1”) diameter holes at
67 mm (2 5/8”) from center to center as illustrated.
• Cut out the material between the two holes (see illustration).
• Clean the installation surface and peel the adhesive gasket from the
back of the keypad.
• Insert keypad and align it correctly, then ensure it's properly glued by
gently pressing evenly on the entire surface.
If the keypad is equipped with an optional holder plate remove the
two wing nuts in the back of the keypad and remove the mounting
bracket.
Insert the keypad into opening you have cut out. Put the mounting
bracket and the wing nuts back on their respective bolts and fix the
keypad securely in place (see illustration above).
Note: It is the installer’s responsibility to ensure that no obstructions
(cables, piping, etc.) are present below the deck at the drill hole
location.
Note: If the installation location is not perfectly even (e.g. wood
surface), make a silicone joint between the installation location and the
back of the unit to ensure a proper seal around it.
∅ 25 mm
(1")
Gasket with adhesive
2 5/8"
67 mm
∅ 25 mm
(1") ∅ 25 mm
(1")
25 mm
(1") dia. drill
25 mm
(1")
92 mm
(3
5/8
")

10
in.clear ™
67 mm
(2 5/8")
25 mm (1") dia.
drill
Skirt mount installation
For a skirt mount installation the keypad should be installed directly
on a spa panel so that it is easily accessible to the user.Insure that
the keypad control is located accordingly.
Drill from the finished side of the spa to prevent chipping
of the surface. Start by pilot drilling the hole centers using a 3 mm
(1/8”) drill bit. Using the appropriate hole saw slowly drill two
25 mm (1”) diameter holes at 67 mm (2 5/8”) from center to center
as illustrated.
Cut out the material between the two holes (see illustration above).
Clean the installation surface and route the keypad cable from the wall
cutout to the in.clear™ unit. (continues on next page).
keypad installation
∅ 25 mm
(1") ∅ 25 mm
(1")

11
in.clear ™
Skirt mount installation
Peel the adhesive gasket from the
back of the keypad, insert it in
the cutout and align it correctly,
then ensure it's properly glued
by gently pressing evenly on the
entire surface.
∅ 25 mm
(1")
Gasket with
adhesive
∅ 25 mm
(1")
Note: It is the installer’s responsibility to ensure that no obstructions
(cables, piping, etc.) are present below the deck at the drill hole
location.
Note: If the installation location is not perfectly even (e.g. wood
surface), make a silicone joint between the installation location and the
back of the unit to ensure a proper seal around it.
If the keypad is equipped with
an optional holder plate remove
the two wing nuts in the back
of the keypad and remove the
mounting bracket.
Insert the keypad into opening
you have cut out. Put the
mounting bracket and the wing
nuts back on their respective
bolts and fix the keypad securely
in place (see illustration above).
keypad installation

12
in.clear ™
Connecting in.k200™ main keypad to in.clear™
in.k200™
Connect the main keypad
in.k200™ as indicated here.
The in.k200™ comes with a
3.3 m (10 ft) cable and an in.link
connector.
To connect the in.k200™, simply
insert its in.link connector into the
appropriate keypad connector "C"
(as illustrated).
keypad installation

13
in.clear ™
in.clear™ installation scheme with circulation pump
spa filter
circulation pump
11 to 150 liters/min
(3 to 40 US GPM)
water jet
heater
spa
in.clear™
installation
Fig. A

14
in.clear ™
installation
in.clear™ installation scheme with dual speed pump
water manifold
dual speed
jet pump 113 to 757 liters/min
(30 to 200 US GPM)
water jet
heater
in.clear™
spa filter
to water jets
flow
spa
Fig.B
Flow must be between 11 and 150 liters/min
(3 and 40 US GPM)

15
in.clear ™installation
in.clear™ installation scheme with venturi
water manifold
dual speed
jet pump 113 to 757 liters/min
(30 to 200 US GPM)
water jet
heater
in.clear™
spa filter
to water jets
flow
spa
Fig.C
Flow must be between 11 and 150 liters/min
(3 and 40 US GPM)
Venturi

16
in.clear ™
installation
Installation
Empty water from the spa.
in.clear™ unit must be installed
before the spa is filled with water.
The in.clear™ unit must be
installed on the pressure side
of the main pump. It should be
installed after the heater. If your
spa is equipped with a circulation
pump refer to Fig. A. For a spa
equipped with a dual-speed
pump refer to Fig B or C.
The in.clear™ system can be
installed in an upright position or
horizontally.
Installing valves on both sides
of the in.clear™ may help for
maintenance purposes
The in.clear™ system
should be installed at the
pressure side on a 11,4 to
151 liters/min (3 to 40 US
GPM) flow line. It's im-
portant not to exceed
151 liters/min (40 US GPM)
to prevent excessive elec-
trode wear and damage to
the in.clear™ unit.
If in.clear™ is installed
vertically: Make sure the
hose has an elbow near the
outlet
Water flow must run from
bottom to top
The exact location and the method
of installation of the in.clear™ may
vary depending on the plumbing
design of the spa.
Use adapters to connect the
in.clear™ system to 3/4" tubing or
directly to 2" tubing.
Water flow

17
in.clear ™
in.clear™ must be pro-
tected by the same
ground fault interrupter
(GFCI) circuit as the spa
system
A blinking “AC” message
on the keypad means that
the input signal is not
240 VAC, probably 120 VAC.
Please check connection.
installation
For an optimal connection to
spa plumbing, please note that
we recommend the above
compression fi ttings & nuts.
Slide the two plastic union nuts
over the in.clear™ unit's threaded
ends and tighten the nuts.
Hand tighten!
Do not use tools!
If your spa is not equipped
with a circulation pump,
install the unit on a
11,4 to 151 liters/min (3 to 40
US GPM) line, for example
the ozone jet return line
(see Fig. B). Connect the
power cord to a 240 VAC;
90mA terminal inside the spa
controller.
Power cable
Connect the in.k200™ keypad to
the unit (see keypad installation
section of this manual for more
details).
Gecko
# 52202000
www.geckodepot.com

18
in.clear ™
The in.clear™ system operates in two modes:
Maintenance Mode and Boost Mode
Maintenance Mode:
The primary function of the Maintenance Mode is to keep the
bromine bank levels at a stable and acceptable range when the spa
is not being used. Maintenance Mode is the “everyday” mode and
is automatically on when the system is activated.
To maintain the residual bromine level within a normal range,
the user has to set the bromine Generation Level of the in.clear™
system by adjusting the value of the maintenance mode.
The higher the value, the more bromine generated.
The recommended bromine level is between 3 and 5 PPM.
The goal is to maintain bromine at a constant level, and within the
recommended range, when the spa is not being used or left unused
for an extended period of time. Once the proper maintenance
level is determined, keep the same setting unless the spa usage
changes.
Finding the right bromine generation level is a crucial step for the
in.clear™ system to be stable and effective. Refer to section
“7 -Determining the proper bromine generation maintenance level
for my spa” for more information.
The spa filtration should be set at a minimum of 8hrs per day.
It is important to note that the in.clear™ system can ONLY generate
bromine when the water is circulating. If you are having problems
maintaining a stable level of bromine, or determining the proper
maintenance level for your spa, you may have to increase the daily
filtering time. Longer filtration produces a more steady level of
bromine.
Boost Mode:
The Boost Mode should be activated every time you use your
spa. Boost Mode increases the bromine generation rate to attack
pollutants in the water and helps rebuild the necessary residual
bromine in the water after each use of the spa. Pollutants are
introduced to the water by the bathers causing the bromine levels
to decrease. Activating the Boost Mode when you enter the spa
will prevent inadequate bromine levels and will regenerate your
bromine to the proper residual level.
Finding the right Boost level is another crucial step for the in.clear™
system to be stable and effective. Refer to section
“8 - Determining the proper bromine generation Boost level for my
spa” for more information.
If water quality is not good after use, only the Boost level
should be adjusted, not the Maintenance level.
operating modes

19
in.clear ™getting started
Start up procedure:
1 - Draining and cleaning the spa
It's important to completely drain and clean the spa to remove any
solid residue accumulated on the surface and inside or around the
jets area. After draining the spa, use spa cleaning products only.
Household cleaners contain additives such as phosphates which
may affect the bromine production. When the spa is clean, rinse it
off thoroughly with a garden hose.
It's extremely important to clean your filter cartridge with a
filter soaking solution or replace your filter cartridges.
2 - Refilling the spa
After the in.clear™ unit has been installed, check the TDS
(Total Dissolved Solids) of the water you'll use to refill the spa.
The TDS range should be within 50 and 400 PPM. This can be done
by your local spa dealer. When you're certain the water is within the
proper TDS range, refill your spa.
If your TDS is higher than 500 PPM, ask your spa dealer for
additionnal information to help reduce initial TDS.
DO NOT use water from a "Salt Water Softener" system.
Make sure there is adequate flow and that no airlocks are trapped
in the unit's piping. If airlocks are formed, start up the pump and
slowly loosen one of the union nuts to release the air trapped in the
plumbing. Tighten the nut again after you are done.

20
in.clear ™
getting started
3 - Adjusting water chemistry in the spa
Proper chemical maintenance of a spa is essential for the health of
bathers. Maintaining the quality of the spa water within these specified
values will enhance your enjoyment of the spa and prolong the life of
the in.clear™ system.
Test and adjust these parameters in the water prior to each use of
the spa.
Total hardness (TH): between 150 and 200 PPM
Alkalinity: between 100 and 120 PPM
pH: between 7.2 and 7.8
Water chemistry should be balanced before adding
BromiCharge™ into the water. It's essential that the water
chemistry parameters are within the proposed range to
obtain optimal system performance.
High Calcium Hardness may lead in faster calcification on
the electrolytic plates.
4 - Adding BromiCharge™
Water temperature between 32 and 38 Celcius (90 and
100 Fahrenheit) helps disolve BromiCharge™ and facilitates
maintenance level adjustment
By adding 544 grams (1.2 pounds) of BromiCharge™ per 380 liters
(100 U.S. gallons) of water, the total TDS of the water in the spa should
increase by approximately 1440 PPM. Example: if the spa water
capacity is 1140 liters (300 U.S. gallons), 1 full bottle of BromiCharge™
would need to be added to the water 1.6 Kg (3.5 lbs).
Tap water TDS : 400 PPM
BromiCharge™: 1440 PPM
Total PPM after
BromiCharge™: 1840 PPM
It's important to note that BromiCharge™ is only one of many
contributors of the TDS count in the spa water. The TDS concentration
will increase with time due to residues, chemicals, minerals and other
materials that cannot be screened by the spa filter.
Other manuals for in.clear 0605-500002
2
Table of contents
Other Gecko Accessories manuals
Popular Accessories manuals by other brands

Jenn-Air
Jenn-Air AMC6158B installation instructions

TEKTELIC Communications
TEKTELIC Communications T0004893 Technical reference manual

Honeywell
Honeywell PRO 2000 Series Product data

HYDUR
HYDUR ULTRA CYLINDER MAX user guide

SICK
SICK TiM55 Series operating instructions

Panasonic
Panasonic HL-G1 Series user manual