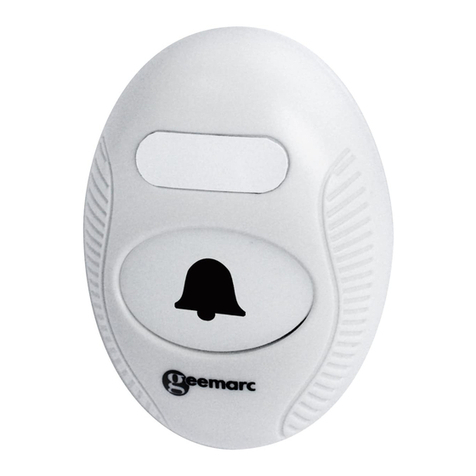
Geemarc AMPLICALL 101 User manual

0
Wireless doorbell
Sonnette sans fil
Drahtlose Türklingel
Deutsch P23
English P1
Français P12

1
!!! Please refer to our website:
www.geemarc.com for an up to date user guide,
as there may be important updates and changes
you need to be aware of !!!
PACKAGE CONTENTS
The package contains the following items:
1user’smanual
1 AMPLICALLTM101 (AC101)
2 screws and 2 fixing holes
1 wall bracket and 1 lanyard bracket.

2
DESCRIPTION
Light
Indicator
Push button
Battery
compartment
Battery cover
Mounting
holes
Mounting bracket
Lock
lever

3
INSTALLATION
Battery installation or replacement in the remote
AMPLICALLTM101

4
1. Use your finger to unlock the lock lever (fig ).
2. Rotate the mounting bracket to 90 degrees (fig ).
3. Remove the mounting bracket from the unit (fig ).
4. Rotate the battery cover using a coin (fig ).
5. Insert a CR2032 battery into the battery compartment with the
polarity + on top. (fig ).
6. Close the battery cover using a coin. (fig ).
7. Replace the mounting bracket to 90 degrees. (fig ).
8. Rotate the mounting bracket until the part locks.
Note: Low Battery Signal
When the AC101 is running low on battery, it will send a signal to
the AMPLICALLTM100 or AMPLICALLTM150 which will make the
corresponding zone icon light up. To replace the battery, you will
need to follow the 8 steps procedure described above.

5
CODE CONFLICT
If the bell press coding is the same as another transmitter you must
change the code. When you have changed the code must re-pair
the bell press.
(A) Open the battery cover.
(B) Take out the battery.
(C) Press and hold the test button, insert the battery whilst holding
the button for 5 seconds. The LED will flash 5 times when a
new code is generated.

6
Pairing with AMPLICALLTM100/AMPLICALLTM150
Enter pairing mode on the AC100 or AC150:
1. Press & hold the LEARNING button (●) for 3 seconds. The
LED in zone icon #1 will flash.
2. Press the LEARNING button (●)
again to move to the zone icon
you wish to pair the AC101 with
Press the melody selection
() button to scroll through the
melodies. Once you hear a
melody you like, do not press
any button during the melody.
3. Press once the doorbell button
of the AC101 to pair.
4. If successful, the AMPLICALL100 or 150 will generate two short
tones.
Zone
selector
Learning
button
Melody
selector

7
WALL MOUNTED INSTALLATION
Mounting with screws
Requires an electric drill to fix the AC101 on the wall using the
provided ram plug and screws.

8
Mounting with Double-sided adhesive
You can install your AMPLICALLTM101 onto a wall.
Please, follow the recommendations below.
Attach the Doorbell to the mounting bracket
1. Replace the mounting bracket to 90 degrees. (fig 1).
2. Rotate the mounting bracket until the part locks. (fig 2).
Fig1 Fig2

9
Put the bell press to the lanyard bracket
1. Place the lanyard bracket to 90 degrees.
2. Rotate the mounting bracket until the part locks.
GUARANTEE
From the moment your Geemarc AMPLICALLTM101 is purchased,
Geemarc guarantee is for the period of two years. During this time,
all repairs or replacements (at our discretion) are free of charge.
Should you experience a problem then contact our help line or visit

10
our website at www.geemarc.com.
The guarantee does not cover accidents, negligence or breakages
to any parts. The product must not be tampered with or taken apart
by anyone who is not an authorized Geemarc representative.
The Geemarc guarantee in no way limits your legal rights.
IMPORTANT: YOUR RECEIPT IS PART OF YOUR GUARANTEE
AND MUST BE RETAINED AND PRODUCED IN THE EVENT OF
A WARRANTY CLAIM.
Please note: The guarantee applies to the United Kingdom only.
DECLARATIONS:
UKCA Directives
Geemarc Telecom SA hereby declares that this AMPLICALLTM101
is in compliance with the essential requirements and other relevant
provisions of the Radio Equipment Directive 2014/53/UE.
The UKCA declaration of conformity may be consulted at
www.geemarc.com
RF power : < 250mW

11
Recycling Directives
The WEEE (Waste Electrical and Electronic Equipment) has been
put in place for the products at the end of their useful life are
recycled in the best way.
When this product is finished with, please do not put it in your
domestic waste bin. Please use one of the following disposal options:
- Remove the batteries and deposit them in an appropriate WEEE
skip. Deposit the product in an appropriate WEEE skip.
- Or, hand the old product to the retailer. If you purchase a new
one, they should accept it.
Thus if you respect these instructions you ensure human health
and environmental protection.
For product support and help visit our website at www.geemarc.com
lines are open 09h00 to 16h00 Mon to Fri
2 Rue Galilée, Parc de l’Etoile, 59791 Grande-Synthe Cedex, France
This product is made in China To Geemarc Telecom

12
!!! Veuillez consulter notre site Web:
www.geemarc.com car il peut y avoir des mises à
jour importantes et changement dont vous devez
être conscient !!!
Contenu de la boite
La boite contient les éléments suivants :
1 guide d’utilisation
1 télécommande AMPLICALLTM101 (AC101)
2 vis et 2 chevilles
1 support mural et 1 cordon tour de cou.

13
DESCRIPTION
Témoin
lumineu
x
Bouton-poussoir
Compartiment
à pile
Couvercle du
compartiment à pile
Trous de
fixation
Support de
montage
Levier de
blocage

14
INSTALLATION
Installation ou remplacement de la batterie dans l'appareil
distant
AMPLICALL
TM
101
1. Utilisez votre
doigt pour
déverrouiller le
levier de
blocage (fig ).
2. Faites pivoter
le support de
montage à 90
degrés(fig ).
3. Retirez le
support de
montage de
l'appareil
(fig ).

15
4. Faites tourner le couvercle du compartiment à pile à l'aide d'une
pièce de monnaie (fig ).
5. Insérez une pile CR2032 dans le compartiment à pile avec la
polarité + en haut (fig ).
6. Fermez le couvercle du compartiment à pile à l'aide d'une pièce
de monnaie (fig ).
7. Replacez le support de montage à 90 degrés (fig ).
8. Faites tourner le support de montage jusqu'à ce que la pièce se
verrouille.
Remarque: signal de batterie faible
Lorsque la batterie de l'AC101 est déchargée, ce dernier envoie
un signal à l'AMPLICALLTM100 ou à l'AMPLICALLTM150 qui fait
alors s'allumer l'icône de la zone correspondante. Pour remplacer
la pile, vous devez suivre la procédure en 8 étapes décrite ci-dessus.

16
CONFLIT DE CODES
Si le code de la sonnette est le même que celui d'un autre émetteur,
vous devez changer le code. Lorsque vous avez changé le code,
vous devez ré-appairer la sonnette.
(A)
Ouvrez le
couvercle du
compartiment
à pile.
(B)
Retirez la pile.
(C)
Appuyez sur le bouton de test et maintenez-le enfoncé, insérez
la pile tout en maintenant le bouton enfoncé pendant 5 secondes.
La LED clignote 5 fois lorsqu'un nouveau code est généré.

17
Enregistrement avec l'AC100 / AC150
Entrez en mode enregistrement sur l'AC100 ou l’AC150:
1. Appuyez sur le bouton Programmation (●) et maintenez-le
enfoncé pendant 3 secondes. La LED de l'icône de zone n°1
se met à clignoter.
2. Appuyez une nouvelle fois sur le bouton Programmation (●)
pour vous déplacer vers l'icône de la zone avec laquelle vous
souhaitez jumeler l’AC101.
Appuyez sur le bouton de
sélection de la mélodie ( )
pour faire défiler les mélodies.
Dès que vous entendez une
mélodie qui vous plaît, n'appuyez
sur aucun bouton tant que la
mélodie est en cours de diffusion.
3. Appuyez une fois sur le bouton
de la sonnette de l'AC101 pour
effectuer l’enregistrement.
Sélecteur de
zone
Bouton
programmation
Bouton de
selection de la
mélodie de
sonnerie

18
4. Si le résultat est positif, l'AMPLICALLTM100 ou 150 produira
deux courtes tonalités.
INSTALLATION MURALE
Montageavecvis
Une perceuse électrique est nécessaire pour fixer l'AC101 au mur
à l'aide des vis et des chevilles fournies.

19
Montage avec adhésif double face
Collez l'adhésif
double face sur le
support de montage.
Collez le support sur
le cadre de la porte.
Fixer la sonnette sur le support de montage
1. Replacez le support
de montage à 90
degrés. (fig 1).
2. Faites tourner le
support de montage
jusqu'à ce que la
pièce se verrouille.
(fig 2).
Fig1 Fig2
Table of contents
Languages:
Other Geemarc Accessories manuals

Geemarc
Geemarc Doorbell595 U.L.E. Instruction manual

Geemarc
Geemarc Doorbell595 U.L.E Instruction manual

Geemarc
Geemarc ClearSound Amplicall1 User manual
Geemarc
Geemarc Doorbell595 U.L.E Instruction manual

Geemarc
Geemarc CL2 Installation and operation manual
Geemarc
Geemarc Doorbell595 U.L.E Instruction manual