Geemarc Viso 30 User manual

123
INSTRUCTION MANUAL
!!!Please refer to our website: www.geemarc.com
for an up to date user guide, as there may be
important updates and changes you need to be
aware of !!!
Cautions:
Precautions and maintenance
zFor indoor use only
zTo avoid risk of fire or electric shock, do not expose the unit to
moisture or condensation.
zTo avoid overheating, do not block the ventilation holes on the
back of the Clock Display.
zKeep the Clock Display out of direct sunlight.
zDo not dismantle the Clock Display. There is a risk of electric
shock and there are no user-serviceable parts inside.
Dismantling the Clock Display will void your warranty.
Cleaning the LCD Screen
zTreat the screen carefully. tThe screen of the Clock Display is
made of glass and can easily be broken or scratched.
zIf fingerprints or dust accumulate on the LCD screen, we
recommend using a soft, non-abrasive cloth such as a camera
lens cloth to clean the LCD screen.
zMoisten the cleaning cloth with a cleaning solution and apply the
cloth to the screen.
Introduction:
Thank you for the purchase of the Clock Display. It is designed to
allow you to see the time quickly and easily. Please read this User
Manual carefully to learn the correct way to use the Clock Display.
Features: Days Clock
Packaging Check List:
z9 inch Clock Display
zUser manual
zBracket
zAC adapter
1. Product Diagram
1.1 Back side Buttons
1.2 Left side of the Clock Display
DC in “ ” on the left side of the Clock Display.
2. Getting Started
1. Place the Clock Display with installing bracket in a steady flat
position. Then plug one end of the AC adapter into a standard
100-240V AC electrical outlet and the other end into the DC IN
slot on the left side of the Clock Display.
2. Remove the protective film covering the Screen.
3. Hold and Press the power button on the backboard to turn
On / Off the Viso30.
3. Operating Instruction
When you power the unit on for the first time it will show the
startup logo. Then the main menu will display after a few seconds.
After this the Days Clock will display.
You can easy see the details week day, time, month and year on
the Clock Display screen, and they will change automatically.
4.Setting
Press Menu key and select the Setting icon in the main menu.
Press “ ”Button to enter the Setting interface and press or
to highlight your selection. Press “ ”Button to enter the
setting value. Then press or to set the value.
You can select Style Setup, Set Days-Clock, Calendar Setup,
System Setup, and so on.
4.1. System Setup
Language
Changes the operating language of the photo Clock Display.
Available Values: English, Nederland, Français, Deutsch, Italiano,
Espanol, Hebrew. Use the buttons or to select the language.
Grayscale
Press and buttons to select the Gray Scale level that you
require between 1 to 10.
Brightness
Press and buttons to select the Brightness level that you
require between 1 to 10.
Contrast
Press and buttons to select the Contrast level that you
require between 1 to 10.
Auto power on & off function Remarks:
1. In order to activate the auto power ON & OFF function, please
check the settings for the Auto Shut Time, Sleep timer, Auto
boot Time and Regular Boot are set correctly. If set to OFF,
the function is not activated.
2. Areminder for the Auto OFF appears 1 Minute before the frame
switches off. Press any key to cancel the Power OFF function.
3. If Power OFF is activated and the frame switches off at the
selected time, the frame goes into Sleep-mode. To switch the
frame on again, you need to press the “Power” Button on
the Remote or the rear side off the frame twice.
Auto Shut Off Time
Set the auto power off time in the format of “[Hour]: [Minute]”. In
System setup / Auto shut time. Press button to select. Use
the and buttons to switch between fields. Press or
buttons to change time field values. Press button to validate.
Keep the Sleep Timer on. Press Menu button to exit.
Auto Power On Time
Set the auto power on time in the format of “[Hour]:[Minute]” in
System setup/Auto Boot time. Press button to select. Use
the or buttons to switch between fields. Press or
buttons to change time field values. Press button to validate.
Keep the Regular Boot on. Press Menu button to exit.
Power Frequency:
You can choose to set the function auto power ON/OFF as follows:
- Workday, Week end, Once, Every day. Use the or buttons
to change mode field values.
1. Power on/off
2. Up
3. Right
4. Play / Pause / OK
5. Left
6. Down
7. Menu

456
Firmware Version:
You can check the software version of your Viso 30.
Reset Default settings:
Use this function to set your Viso 30 with the factory parameters.
Choose Reset default setting and press button to enter,
Use the or buttons to select Yes and press button“ to
validate
4.2. Calendar Setup
Adjust Date
Set the current date in the format of “[Year]: [Month]: [Day]”. Short
press the or to enter in the submenu. Short press or
buttons to switch between fields. Press or to change
Date field values and press button to validate.
Adjust Time
Set the current time in the format of “[Hour]:[Minute]”. Short press
the and to enter in the submenu. Short press the or
buttons to switch between fields. Press and to
change Time field values and press button to validate.
Time Format
Change to display the time in either 12-hour or 24-hour time
format. Press and buttons to change time format values.
4.3 Set Days Clock
Press Menu button and select Setting in the main menu. Press
button to enter the Setting interface. Press or to
choose Set days clock, and press to validate. Press or
to highlight your selection (Morning, Afternoon, Evening, Night
to setting). Press button to enter the sub-menu items. Use
the or buttons to switch between fields. Press or
buttons to set the correct hour or minute, after that, press to
save. Follow this method for the setting you require.
4.4 Style Setup
Select Setting in the main menu. Press button to enter the
Setting interface and short press or to your selection
(Style1, style2 and style3 to select). Short press Button to
complete. Press Menu button to exit.
Style 1: Day of the week, hour and date
Style 2: Day of the week, time of day, hour and minute
Style 3: The screen displays “Now it’s (day of the week and time
of day)
5. Troubleshooting Guide
If you are having problems with your Viso 30 clock or for further
assistance, please contact the Technical Support.
- No power: Please check whether the AC-Adaptor is inserted
correctly.
- Display too bright or too dark: Please adjust the brightness or
contrast in the setup menu.
- The colour is light or no color: Please adjust the color and
contrast setup.
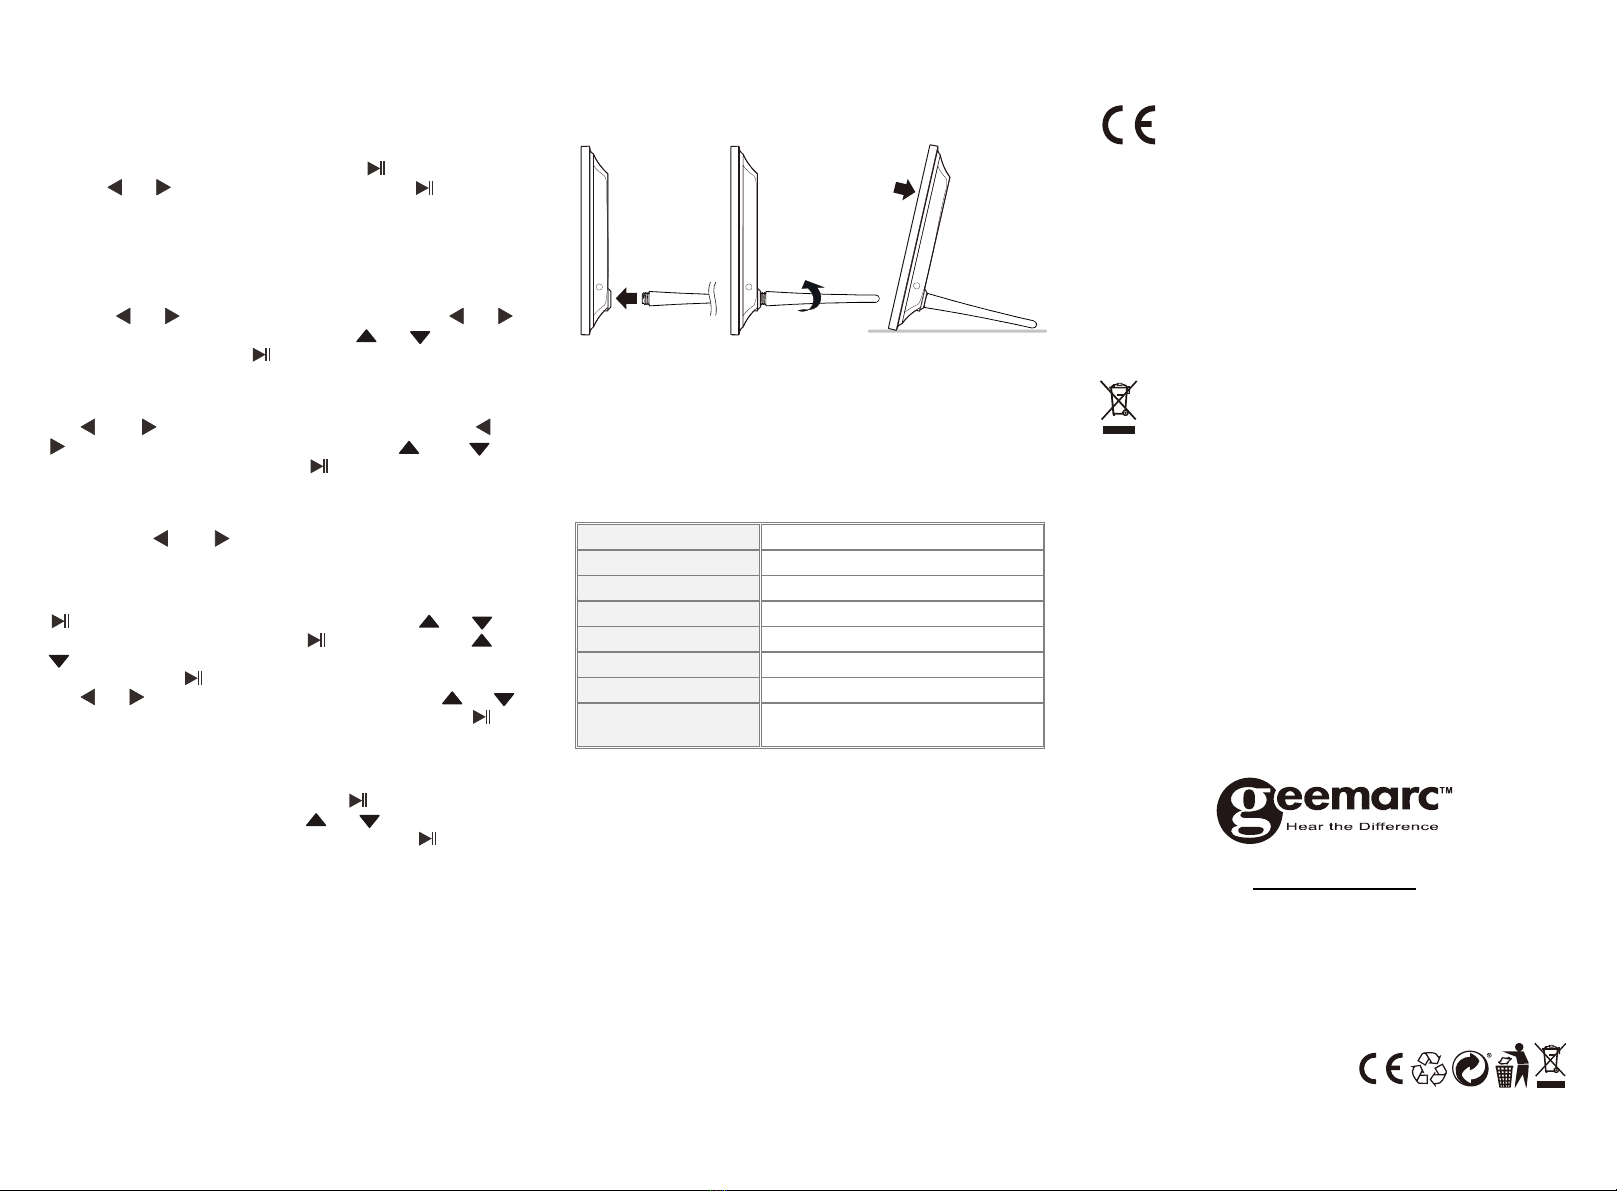
6. Stand Instruction
The bracket is connected to the back cover of the product. Please
open the bracket before you place it steadily on a flat surface, push
the bracket to the slot before you pick it up. Please refer to the
illustration above.
7. Technical Specifications
zAdapter: Input AC 100-240V 50/60HZ Output DC 5V/1.5A
zScreen Parameter:
Screen Size: 9 inch TFT
Resolution: 800*480 Pixels
Contrast: 400-500:1
Aspect Ratio: 16:9
Brightness: 300-400cd/ m
2
Response Time: 20ms
Viewing Angle: 60°(left/right/vertical), 40°(horizontal)
Working Temperature:
Humidity: 0 °C ~ 40 °C
10-85%
GUARANTEE
From the moment your Geemarc product is purchased, Geemarc
guarantee it for the period of two years. During this time, all
repairs or replacements (at our discretion) are free of charge.
Should you experience a problem then contact our help line or
visit our website at www.geemarc.com.
The guarantee does not cover accidents, negligence or breakages
to any parts. The product must not be tampered with or taken
apart by anyone who is not an authorized Geemarc
representative.
The Geemarc guarantee in no way limits your legal rights.
IMPORTANT: YOUR RECEIPT IS PART OF YOUR GUARANTEE
AND MUST BE RETAINED AND PRODUCED IN THE EVENT OF
A WARRANTY CLAIM.
Please note: The guarantee applies to the United Kingdom
only.
DECLARATIONS:
CE Directives
Geemarc Telecom SA hereby declares that this product
is in compliance with the essential CE Directive requirements..
The CE declaration of conformity may be consulted at
www.geemarc.com
Electrical connection: The apparatus is designed to operate
from a 230V 50Hz supply only. (Classified as hazardous voltage
according to EN60950 standard). The apparatus does not
incorporate an integral power on/off switch. To switch off the
apparatus, disconnect the power adaptor. When installing the
apparatus, ensure that the mains power socket is readily
accessible.
Recycling Directives
The WEEE (Waste Electrical and Electronic Equipment)
has been put in place for the products at the end of their
useful life are recycled in the best way.
When this product is finished with, please do not put it in your
domestic waste bin. Please use one of the following disposal
options:
- Remove the batteries and deposit them in an appropriate WEEE
skip.
Deposit the product in an appropriate WEEE skip.
- Or, hand the old product to the retailer. If you purchase a new
one, they should accept it.
Thus if you respect these instructions you ensure human health
and environmental protection.
For product support and help visit our website at
www.geemarc.com
telephone 01707 387602
or fax 01707 832529
QUGViso30_En_A4_V1.1
Other Geemarc Clock manuals
Popular Clock manuals by other brands

La Crosse Technology
La Crosse Technology WT-8005U manual

Oregon Scientific
Oregon Scientific RM826A user guide

Simplex
Simplex SIMPLEX 500 Operation manual

BASETech
BASETech 1563421 operating instructions

vlahova
vlahova SB203 manual

La Crosse Technology
La Crosse Technology BBB87733 Instructional manual