Vitec Videocom Inc.
Register your product online at www.litepanels.com
Litepanels®
A Vitec Group brand
SETUP
Remove all packing materials from the GEMINI.
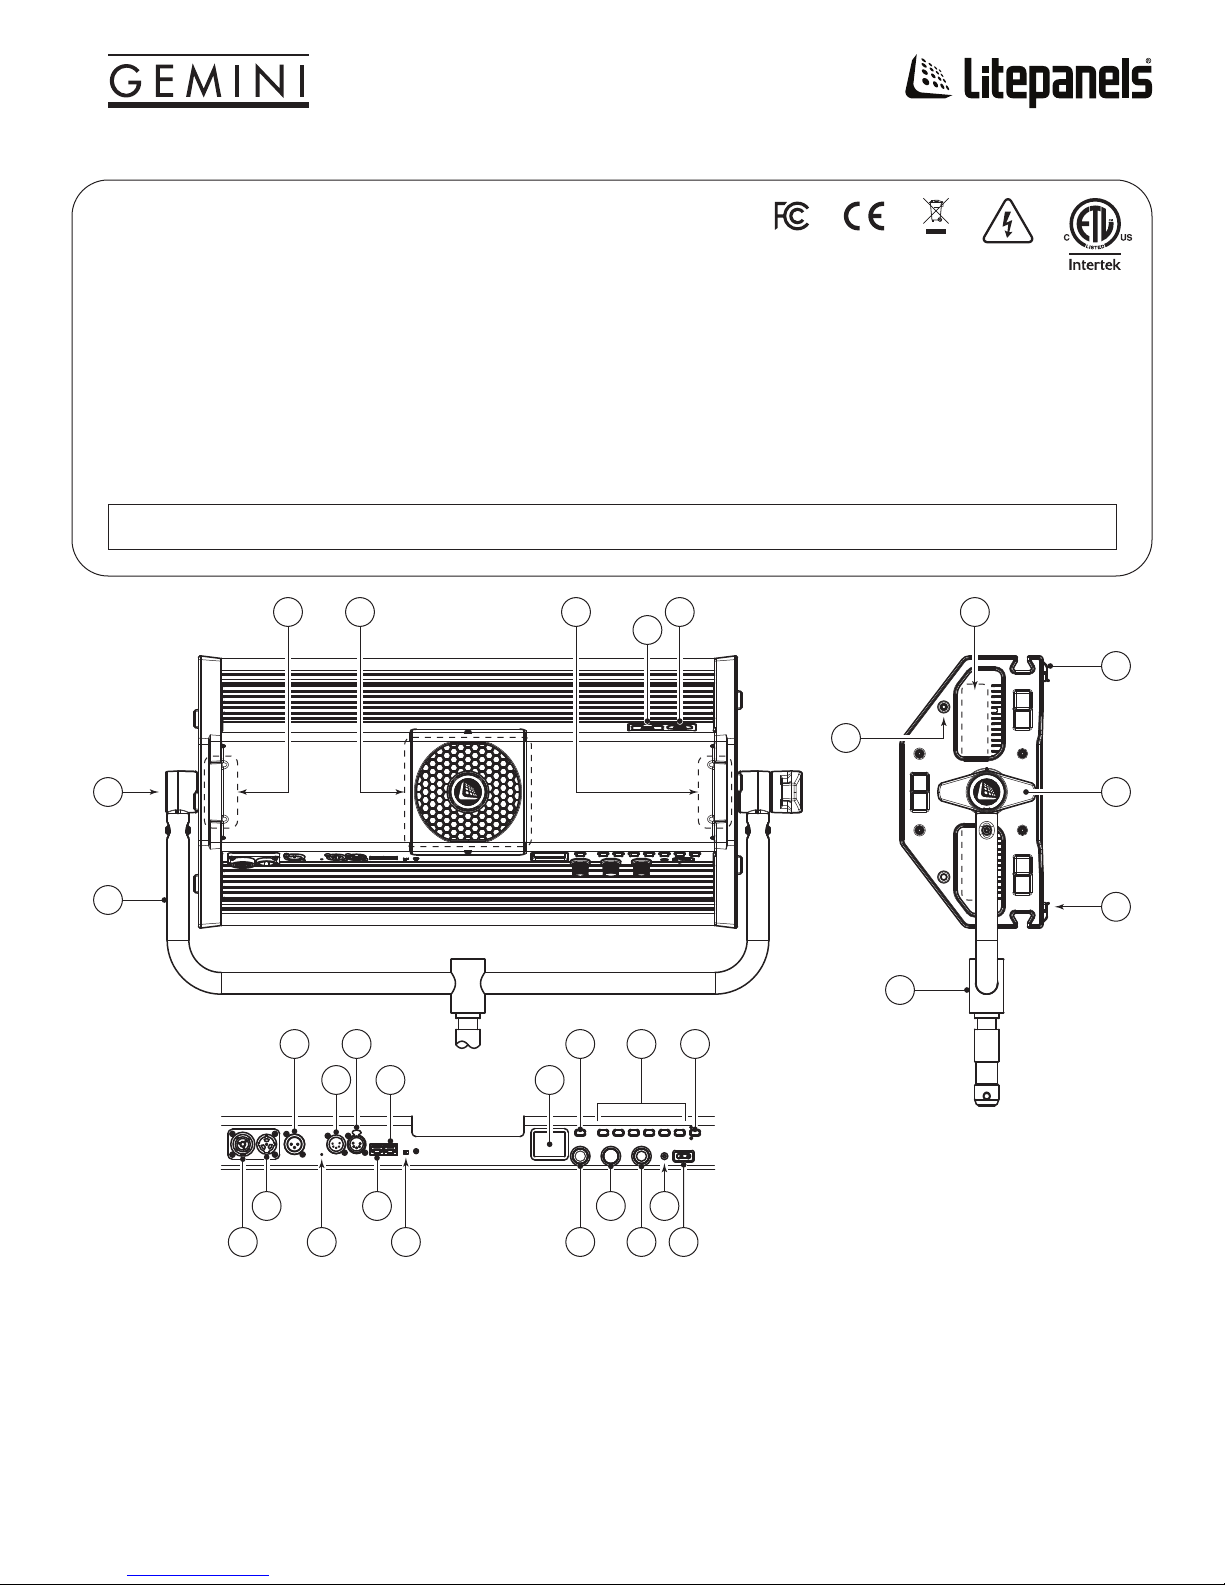
Mount the GEMINI with its included Yoke (see “T” above) and Junior Pin (”Z”) to a rigging or support system rated for the weight of the fixture and its accessories
(not included). Always comply with applicable local regulations. Use supplemental safety equipment (e.g. safety chain or cable, not included).
WARNING: Keep the air intakes (“U”) and the air exhaust space (“X”) clear of blockage. Allow more than 25 cm [10 inches] of clear air space from the rear of the
GEMINI to the nearest obstruction. Use only covers and accessories approved by Litepanels®, and ensure that they do not obstruct the air intakes or exhaust.
Plug the powerCON end of a provided AC power cable into the AC Power Input (“N”) on the fixture. Plug the other end of the power cable into a mains power
outlet. Switch the ON / OFF Power Switch (“A”) to the “ON” position. The GEMINI is ready for operation.
OPERATION
CCT MODE (Default)
The default operation mode of the GEMINI is CCT Mode. In CCT Mode, the knobs behave as follows:
Turn the DIM / INT Knob (“C”) clockwise to increase intensity (%). Turn counterclockwise to decrease intensity.
Turn the CCT / SAT Knob (”D”) clockwise to raise the Correlated Color Temperature, or CCT (Kelvin or K). Turn counterclockwise to lower CCT.
Turn the +/- GRN / HUE / MENU Knob (”E”) clockwise to add green color offset. Turn counterclockwise to subtract green color offset.
•
•
•
•
•
•
Turn the DIM / INT Knob (“C”) clockwise to increase intensity (%). Turn the knob
counterclockwise to decrease intensity.
Turn the CCT / SAT Knob (“D”) clockwise to increase color saturation (%). Turn the knob
counterclockwise to decrease color saturation.
Turn the +/- GRN / HUE / MENU Knob (“E”) clockwise to increase the color hue value (°)
(see “Figure 1: Hue Value Guide”). Turn counterclockwise to decrease the color hue value.
HSI MODE
Push the +/- GRN / HUE / MENU Knob (”E”) to access menu items,
including color mode operation options and system settings.
red flash, pause,
(repeat)
red solid on
red flashes (2X), pause,
(repeat)
red flashes (4X), pause,
(repeat)
red flashes (other)
red flash, pause,
red flashes (3X), pause,
(repeat)
Note the red flashes pattern and contact
service at litepanels.com/support
Fixture is operating normally.green solid on
TROUBLESHOOTING
There is no light output.
Light turns off.
Adjust dimmer knob to change brightness.
Turn the dimmer down to 0% and allow
fixture to cool. Check fan and vents.
Turn the dimmer down to 0% and allow
fixture to cool. Check fan and vents.
Change fan settings, if desired.
Change power source.
Turn fixture off; change power source.
Turn fixture off; change power source.
Condition
Power/Status Indicator
Behavior Recommended Action
Input Over Voltage Fault
green flashesPower/Status Indicator flashes
green when fixture is powered on.
Take no action. The green flashing stops
shortly after the fixture has been powered on.
Fixture is operating normally.
red solid onLight turns off.
Light turns off.
Input Under Voltage Fault
Input Under Voltage Warning
The light is not operating
normally.
Light intensity is
decreased by 50%.
Light is on.
Light is on.
Over Temperature Fault
Over Temperature Warning
Fan is OFF or under DMX
control.
green solid on
Check the fan for stoppage or blockage.
Replace fan module if fan is permanently
disabled.
Light intensity is
decreased by 50%.
Fan is malfunctioning.
Fixture is malfunctioning.
60˚120˚
RED
YELLOWGREEN
CYAN
BLUE
0˚180˚
240˚ 300˚
MAGENTA
Figure 1: Hue Value Guide