Gemini TT-900 User manual

TT-900
MODERN BLUETOOTH TURNTABLE SYSTEM
USER MANUAL
Int roduction
Thank you for purchasing our TT-900 Modern Bluetooth Turntable
System. With proper care and maintenanc e, your unit will likely
provide years of reliable, uninterrupted servic e. The TT-900 is
backed by a 1-year limited wa rranty*.

2TT-900
MODERN BLUETOOTH TURNTABLE SYSTEM
What’s Included
Caution
Precautions
TT-900 Features
Getting Started
Listening To A Record
Bluetooth Playback
Line Out Connection
How To Replace The Needle
Tips For Better Turntable
Performance
2
3
3
5
5
6
6
7
7
8
What’s Included
included with your TT-900 Modern Bluetooth
Turntable System:
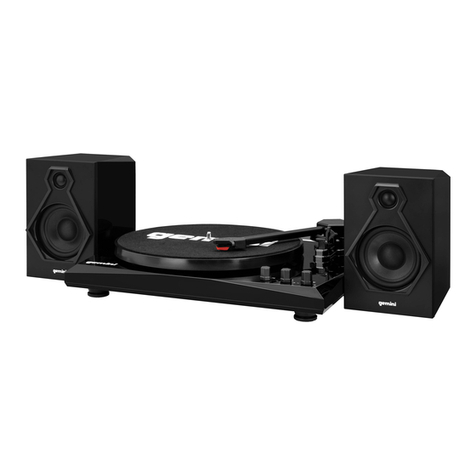
(1) TT-900 Modern Bluetooth Turntable System
(1) Power Supply
(1) 45 RPM Adapter
(2) Bookshelf Speaker and Cables
(1) User Manual and Warranty
Index

3
TT-900
MODERN BLUETOOTH TURNTABLE SYSTEM
Caution
• All operating instructions should be read
before using this equipment.
• To reduce the risk of electrical shock,
do not open the unit. There are no user
replaceable parts inside. Please refer
service technician. Do not attempt to
return this equipment to your dealer.
Do not expose this unit to direct sunlight
or to a heat source such as radiator or
stove.
• Do not attempt to clean the unit with
chemical solvents as this might damage
only with a damp cloth.
• When moving this equipment, it should
be placed in its original carton and
packaging. This will reduce the risk of
damage during transit.
• Do not expose this unit to water or heat.
• Do not use cleaning products or
lubricants on the controls or switches.
Precautions
• Read Instructions: All the safety and
operating instructions should be read before the
product is operated.
• Retain Instructions: All the safety and
operating instructions should be read before the
product is operated.
• Heed Warnings: All warnings on the product
and in the operating instructions should be
adhered to.
• Follow Instructions: All operating and use
instructions should be followed.
• Cleaning: The product should be cleaned only
with a polishing cloth or a soft dry cloth. Never
clean with furniture wax, benzene, insecticides or
other volatile liquids since they may corrode the
cabinet.
• Water and Moisture: Do not use this
product near water, for example, near
a bathtub, wash bowl, kitchen sink, or
laundry tub; in a wet basement; or near a
swimming pool; and the like.
· Agua y humedad: no utilice este producto cerca
del agua, por ejemplo, cerca de una bañera,
lavabo, fregadero o lavadero; en un sótano
húmedo; o cerca de una piscina; y similares.
• Do Not Open: Do not open the device or
attempt to disassemble the internal parts
or modify them in any way. The device
contains no user-serviceable parts. If it
appears to be malfunctioning, discontinue
use immediately and have it inspected by
· No abrir: no abra el dispositivo ni intente
de ninguna manera. El dispositivo no contiene
partes reparables por el usuario. Si parece que no
funciona bien, descontinúe el uso de inmediato
y haga que sea inspeccionado por personal de
Please read carefully before proceeding
Always follow the basic precautions listed below
to avoid the possibility of serious injury or
even death from electrical shock, short-circuits,
Por favor, lea cuidadosamente antes de
continuar
Siempre siga las precauciones básicas que se
enumeran a continuación para evitar la posibilidad
de lesiones graves o incluso la muerte por descargas
eléctricas, cortocircuitos, daños, incendios u otros
peligros.

4TT-900
MODERN BLUETOOTH TURNTABLE SYSTEM
• Replacement Parts: When replacement
parts are required, be sure the service
technician has used replacement parts
same characteristics as the original part.
Unauthorized substitutions may result in
· Piezas de repuesto: cuando se requieren piezas
de repuesto, asegúrese de que el técnico de
servicio haya utilizado las piezas de repuesto
mismas características que la pieza original. Las
sustituciones no autorizadas pueden provocar
incendios, descargas eléctricas u otros peligros.
Location: To avoid toppling the device
or causing damage to the internal
components, be sure to keep the following
cautions:
When transporting the device, always use
the original carton.
Before moving the device, remove all
connected cables.
Do not expose the device to excessive
dust or vibrations, or extreme cold or
heat (such as in direct sunlight or near a
heater) to prevent the possibility of panel
components.
Do not place the device in an unstable
position where it many accidentally fall
over.
Ubicación: para evitar volcar el dispositivo o
dañar los componentes internos, asegúrese de
cumplir las siguientes precauciones:
Cuando transporte el dispositivo, siempre use la
caja original.
Antes de mover el dispositivo, retire todos los
cables conectados.
No exponga el dispositivo a polvo o vibraciones
excesivas, ni a frío extremo o calor (como a la
luz solar directa o cerca de un calentador) para
daños a los componentes internos.
No coloque el dispositivo en una posición
inestable donde accidentalmente se caiga.

5
TT-900
MODERN BLUETOOTH TURNTABLE SYSTEM
TT-900 Features
Turntable - Top View
1 – Tone-arm Stand
2 – Lift Lever
3 – Tone Arm Clip/Reset
4 – Stylus(Needle) Cartridge
5 – Power Indicator
6 – Volume Control Knob
7 – Pitch Control Knob
8 – Speed Control Selection Knob
9 – Turntable Shaft
10 – Turntable Platter
Turntable - Rear View
11 – Auto Stop ON/OFF Switch
12 – L/R RCA Output Jack
13 – External Speaker Jacks
(Turntable)
14 – Function Mode Switch
15 – DC IN Power Jack
16 – Power ON/OFF Switch
Speaker - Rear View
17 – External Speaker Input
(External Bookshelf Speakers)
Getting Started
• Connect the External Speaker Cable to the
External Speaker Jack at the rear of the unit
and speakers.
· Conecte el cable de altavoz externo al conector de
altavoz externo enla parte posterior de la unidad y
losaltavoces.
• Insert the DC plug of the adaptor to the DC
IN Jack on the back of the unit.
· Inserte la clavija de CC del adaptador en la toma
DC INenla parte posterior de la unidad.
• Plug the adaptor’s AC plug into the power
outlet and switch ON the power button at
the back of the unit.
· Enchufe el enchufe de CA del adaptador en la toma
de corriente y encienda el botón de encendido en la
parte posterior de la unidad.
Listening to a Record
• Switch the function mode to PH. Turn on
the power switch at the rear of the turntable
player. The indicator will become red color.
· Levante la cubierta antipolvo y cambie la perilla de
función al modo Phono. Encienda el interruptor de
encendido en la parte posterior del reproductor de
tornamesas. El indicador se pondrá rojo.
· Levante la cubierta anti-polvo y cambie el mando
de función al modo “Phono”.
• Place a record on the turntable platter and
select the desired speed (33/45/78) according
to the record. NOTE: when playing a 45RPM
record, use the included 45RPM adapter
located inside the accessories bag..
· Coloque un registro en el plato de la bandeja
giratoria y configure la velocidad del reproductor
(33/45/78) según el registro.
Note: when playing a 45RPM record with a
large center hole, use the 45RPM adapter.
Nota: cuando reproduzca un disco de 45 RPM con
un orificio central grande, use el adaptador de 45
RPM.
ON OFF
AUTO STOP

6TT-900
MODERN BLUETOOTH TURNTABLE SYSTEM
• Remove the stylus protector. Open the
tone-arm clip to release
the tone-arm. Push the lift
lever backward to raise the
tone-arm and gently move
the tone-arm to the desired
position over the record.
The turntable will begin to spin when the
arm is moved toward the record. Push the lift
lever forward to lower the tone-arm slowly
onto the desired position on the record to
begin playing the record. Please note: The
record will begin to spin only when the tone-
arm is moved toward the record if the Auto
Stop is turned on.
· Retire el protector de lápiz. Abra el clip del
brazo de tono para soltar el brazo de tono.
Empuje la palanca de elevación hacia atrás para
levantar el brazo de tono y mueva suavemente
el brazo de tono a la posición deseada sobre el
registro. El plato giratorio
comenzará a girar cuando
el brazo se mueva hacia el
disco. Empuje la palanca de
elevación hacia adelante para
bajar el brazo de tono lentamente a la posición
deseada en la grabación para comenzar a
reproducirla. Tenga en cuenta que: la grabación
comenzará a girar solo cuando el brazo de
tono se mueva hacia la grabación si la Parada
automática está activada.
• If the Auto Stop switch is turned ON, the
If the Auto Stop switch is turned OFF,
the record will not stop automatically
manually.
· Si el interruptor de parada
automática está activado, el registro
se detendrá automáticamente
cuando termine. Si el interruptor de
parada automática se desactiva, el registro no se
detenerlo manualmente.
Notes: Auto Stop function applies to most
33RPM vinyl records. However, for some
vinyl records, it will stop before it reaches the
end, or it will not stop when it comes to the
end, even if Auto Stop is on.
Notas: La función de parada automática se aplica
a la mayoría de los discos de vinilo de 33RPM.
Sin embargo, para algunos discos de vinilo, se
Stop está activado.
• Turn the Power & Volume control knob
clockwise.
· Gire el boton “ON/OFF/Volume” en sentido
de la aguja del reloj para encender el dispositivo.
speed.
•
Gire la perilla de control de tono para ajustar la
velocidad.
During use in Phono mode, please make sure
that an audio cable is not plugged into the
Aux In jack.
Durante el uso en el modo Phono, asegúrese de
que no haya un cable de audio enchufado en la
entrada Aux In.
Bluetooth Playback
• Switch the function mode to BT. The
indicator will become blue color with
· Cambie el modo de función a BT. los
El indicador se convertirá en color azul con
parpadeo.
• Turn on your Bluetooth function on your
mobile phone or tablet
PC and then search the
turntable player with
its name GEMINI TT-900. T
After pairing and
connection, the indicator
will become blue color
you can play your music of your
mobile phone or tablet PC on this turntable
player.
· Active su función Bluetooth en su teléfono
móvil o tableta PC y luego busque el reproductor
de giradiscos con su nombre GEMINI TT-900.
BLUETOOTH OFF ON
DEVICES
GEMINI TT-900
35 45 78
VOLUME
VOLUME

7
TT-900
MODERN BLUETOOTH TURNTABLE SYSTEM
Después del emparejamiento y la conexión, el
indicador se volverá de color azul sin parpadear,
y podrá reproducir la música de su teléfono
móvil o tableta PC en este reproductor giratorio.
• Turn the VOLUME CONTROL KNOB to
adjust the volume.
·Gire la perilla de control de volumen para
ajustar el volumen.
Line Out Connection
• You can connect this unit to an external
Hi-Fi / AMPLIFIER system by connecting
the RCA LINE OUT JACKS to the auxiliary
input jacks on your Hi-Fi / AMPLIFIER
system with RCA cable (not included).
Please disconnect the audio cable on the
external speaker jacks[13].
· Puede conectar esta unidad a un sistema Hi-Fi
/ AMPLIFICADOR externo conectando los
ENTRADAS DE SALIDA DE LÍNEA RCA a
las tomas de entrada auxiliar de su sistema de
AMPLIFICADOR / Hi-Fi con cable RCA (no
incluido). Desconecte el cable de audio en las
tomas de los altavoces externos [13].
• Once connected, make sure that the
volume on your external device is turned
up. Device audio will come out of the built-
in speaker, and can be controlled with the
Volume Control Knob.
· Una vez conectado, asegúrese de que el
El volumen de su dispositivo externo está alto.
El audio del dispositivo saldrá por el altavoz
incorporado y se puede controlar con la perilla de
control de volumen.
How to Replace the Needle
To replace the needle, please refer to the
instructions below.
Removing the needle from the cartridge
Para reemplazar la aguja, consulte las
instrucciones a continuación.
Retirar la aguja del cartucho.
1. Place a screwdriver at the tip of the
stylus and push downward as shown in
direction “A”.
1. Coloque un destornillador en la punta del
estilete y empuje hacia abajo como se muestra en
la imagen “A”.
2. Remove the stylus by pulling the stylus
forward and pushing downward.
Installing the Stylus
2. Retire la aguja tirando de él hacia adelante y
empujándolo hacia abajo.
Installing the Stylus
Instalación de la aguja
1. Hold the tip of the stylus and insert the
stylus by pressing as shown in direction “B”.
Sostenga la punta del lápiz óptico e inserte
el lápiz pulsando como se muestra en la
dirección “B”.
2. Push the stylus upward as in direction
“C” until the stylus locks into the tip
position.
Empuje el lápiz hacia arriba como en la
dirección “C” hasta que el lápiz quede en la
posición de la punta.
Notes: We advise you to clean your records
with an anti-static cloth to gain maximum
enjoyment from them.
We would also point out that for the same
reason your stylus should be replaced
periodically (approximately every 250
playback hours).
Notas: Le recomendamos que limpie sus registros
con un paño antiestático para disfrutar al
máximo de ellos.
También señalamos que, por el mismo motivo,
su lápiz debe reemplazarse periódicamente
(aproximadamente cada 250 horas de
reproducción).

8TT-900
MODERN BLUETOOTH TURNTABLE SYSTEM
Tips for Better Performance
• Do not touch the needle tip with your
the turntable platter or record edge.
No toque la punta de la aguja con los dedos;
Evite golpear la aguja contra la bandeja giratoria
o el borde de grabación.
• Frequently clean the needle tip-use a soft
brush in a “back-to-front’ motion only.
Limpie con frecuencia la punta de la aguja; use
un cepillo suave en un movimiento de “atrás
hacia adelante” solamente.
use sparingly.
Si debe usar un líquido de limpieza de agujas,
úselo con moderación.
• Gently wipe the anti-dust cover and
turntable housing with a soft cloth. Never
apply harsh chemicals or solvents to any
part of the turntable system.
Limpie suavemente la cubierta antipolvo y la
carcasa del plato giratorio con un paño suave.
Nunca aplique productos químicos o disolventes
agresivos a ninguna parte del sistema de la
plataforma giratoria.

9
TT-900
MODERN BLUETOOTH TURNTABLE SYSTEM
Notes

10 TT-900
MODERN BLUETOOTH TURNTABLE SYSTEM
Notes

11
TT-900
MODERN BLUETOOTH TURNTABLE SYSTEM
Notes

12 TT-900
MODERN BLUETOOTH TURNTABLE SYSTEM
Limited Warranty
A.
B.
C.
R etur n/R epair
Warranty and R epair
GEMINI guarantees its p roducts to be f ree from defects in m aterials and workmanship for one (1) year from the original pu rchase
date.
This limited wa rranty does not c over damage or failu re caused by abuse, misuse, abnormal us e, faulty install ation, improper mainte
nance or any repairs other than those p rovided by GEMINI.
There are no obligations o f liability on the part o f GEMINI for consequential damages arising out o f or in connection with the
install ation, or reinstall ation. All implied wa rranties for GEMINI,
one (1) year from the original d ate of purchase, unless otherwisemandated by local st atutes.
In the U.S.A., please call our helpful Customer Service Represent atives at (888) 436-4649, and they will be hap py to give you a Return
Authorization Number (RA#) and the add ress of an authori zed service center closest to you.
After receiving an RA#, include a copy of the original sales receipt, with defecti ve product and a description o f the defect. Send by
insured freight to: GEMINI and use the add ress provided by your customer service represent ative. Your RA# must be written on the
Service covered under wa rranty will be paid for by GEMINI and returned to you. For non-warrantied products, GEMINI will
repair your unit after p ayment is received. Repair charges do not include return freight. Freight charges will be added to the repair
charges.
On warranty servic e, you pay for shipping to GEMINI, we pay for return shipping within the continental United St ates. Alaska,
Hawaii, Puerto Rico, Canada, Bahamas, and the Virgin Islands will be charged for freight.
Please all ow 2-3 weeks for return of your product. Under normal circumstances your product will spend no mo re than 10 working
days at GEMINI. We are not responsi ble for shipping time s.
Parts of the design o f this p roduct may be protected by worldwide patents. Information in this ma nual is subject to change without notice
and does not represent a commitment on the part o f the vendor. GEMINI shall not be lia ble for any loss or damage whatsoever aris
ing from the use o f information or any error contained in this ma nual. No part of this ma nual may be reproduced, sto red in a retrieval
system or transmitted, in a ny form or by any means, electronic, electrical, me chanical, optical, chemical, including photoco pying and
recording, for any purpose without the express written pe rmission o f GEMINI. It is recommended th at all maintenance and service
on this p roduct is per formed by GEMINI or its authori zed agents. GEMINI will not acc ept liability for loss or damage caused by
maintenance or repair performed by unauthorized personnel.
© 2020 Inovative Concepts and Design, LLC. All rights reserved. Gemini; related logos are registered trademarks of Inovative Concepts and
Design; Bluetooth logo is a registered trademark of Bluetooth SIG;The N-Mark is a trademark or registered trademark of NFC Forum, Inc.
in the United States and in other countries; The Bluetooth range is affected by walls, obstructions, and movement. For optimal performance,
place the product in the center of the room so it is unobstructed by walls, furniture, etc; This device complies with Part 15 of the FCC rules.
An operation is subject to the following two conditions: (1) this device may not cause harmful interference. and (2) this device must accept any
interference received, including interference that may cause undesired operation.
All GEMINI p roducts are designed and ma nufactu red to the highest standa rds in the indust ry. With proper care and mainte nance,
your product will p rovide years of reliable servic e.
Other manuals for TT-900
1
Table of contents
Other Gemini Turntable manuals

Gemini
Gemini SA-2400 User manual

Gemini
Gemini XL-200 User manual

Gemini
Gemini TT-03 User manual

Gemini
Gemini PT-2400 User manual

Gemini
Gemini PT-1000 II User manual

Gemini
Gemini TT-04 User manual

Gemini
Gemini XL-300 User manual

Gemini
Gemini TT-4000 User manual

Gemini
Gemini DJ Q1300 User manual

Gemini
Gemini XL 500 II XL-500II XL-500II User manual

Gemini
Gemini XL-500 User manual

Gemini
Gemini TT-1000 User manual

Gemini
Gemini XL-DD50 IV E User manual

Gemini
Gemini TT-01mkii User manual

Gemini
Gemini PT-2000 III User manual

Gemini
Gemini SA-600 User manual

Gemini
Gemini XL-1800Q IV User manual

Gemini
Gemini PT-2000 User manual

Gemini
Gemini XL-100 User manual

Gemini
Gemini XL-20 User manual