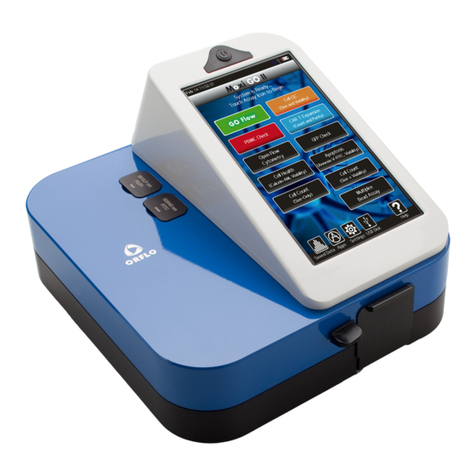
GeminiBio ORFLO Moxi V User manual

For Research Use Only. Not For Use In Diagnostic or Therapeutic Procedures.
a subsidiary of
USER GUIDE

This document is provided to customers who have purchased Orflo Technologies, LLC (“Orflo”, a subsidiary of
Gemini BioProducts, LLC) equipment, software, reagents and consumables to use in the operation of such Orflo
equipment, software, reagents, and consumables. This document is copyright protected and any reproduction of this
document in whole or any part is strictly prohibited, except as Orflo may authorize in writing.
Limitations: The Moxi V™ is intended for research use only. NOT for use in diagnostic procedures. It is not
intended for use in medical diagnostic or therapeutic procedures, and it has not been approved or cleared by the
Unites States Food and Drug Administration for such uses.
Restrictions of Use: Software that may be described in this document is furnished under a license grant. Customer
shall not, nor shall it permit any third party to: (i) use, copy, modify, translate or adapt the Software or Documentation
other than as expressly permitted by the Terms of Sale, which can be found here
(http://www.orflo.com/v/vspfiles/pages/resources.html); (ii) rent, lease, share, disclose or transfer the Software,
provide it on a subscription basis, or use it in connection with a service bureau or other configuration whereby any
third party may use the Software, (iii) create any derivative works of or based on the Software or Documentation; (iv)
reverse-engineer, decompile, disassemble or otherwise attempt to discern the source code of the Software; (v)
remove, relocate, alter or obscure any trademark, copyright or other proprietary or restrictive marking or legend on
the Software or Documentation or any copies thereof; or (vi) use, provide or disclose the Software in violation of any
applicable laws, orders or regulations.
Disclaimer: The information in this document is subject to change without notice and should not be construed as a
commitment by Orflo. Neither Orflo nor any of its affiliated corporations assumes responsibility for any errors that
may appear in this document. This manual is believed to be complete and accurate at the time of publication. In no
event shall Orflo or any of its affiliated corporations be liable for incidental or consequential damages in connection
with or arising from the use of this manual.
Trademarks: Portions of this document may make reference to other manufacturers and/or their products, which
may contain parts whose names are registered as trademarks and/or function as trademarks of their respective
owners. Any such usage is intended only to designate those manufacturer’s products as supplied by Orflo for
incorporation into its equipment and does not imply any right or license to use or permit others to use such
manufacturer’ and or their product names as trademarks.
© 2020 Gemini BioProducts, LLC All rights reserved.
Rev. 2.10, 02/2020
Orflo Technologies and Moxi V™ are trademarks of Gemini BioProducts, LLC, registered in the U.S. and other
countries.
Windows, Windows XP, Windows Vista, Windows 7, and Windows 8, Windows 10 are trademarks of Microsoft
Corporation, registered in the U.S. and other countries.
Mac and Mac OS are trademarks of Apple Corporation, registered in the U.S. and other countries.
FlowJo is a trademark of Treestar, Inc.
Flowmi™ is a trademark of Bel-Art.
Bluetooth® and the Bluetooth logos are registered trademarks of Bluetooth SIG, Inc., registered in the U.S. and other
countries.
Accutase® and Accumax® are registered trademarks of Innovative Cell Technologies.
TÜV SÜD and the TÜV SÜD symbol are registered trademarks of TÜV SÜD Aktiengesellschaft.

Contents
INTRODUCTION .................................................................................................................................................... 1
ABOUT THE USER GUIDE ...................................................................................................................................... 1
CONVENTIONS USED IN THE USER GUIDE ............................................................................................................. 2
SAFETY PRECAUTIONS .......................................................................................................................................... 2
ELECTRICAL SAFETY ........................................................................................................................................................ 2
LASER SAFETY ............................................................................................................................................................... 2
BIOLOGICAL SAFETY ....................................................................................................................................................... 3
MOXI V™ SYSTEM OVERVIEW .............................................................................................................................. 4
MOXI VTM ACCESSORIES ....................................................................................................................................... 5
GETTING STARTED ................................................................................................................................................ 6
GENERAL GUIDELINES .......................................................................................................................................... 6
ADDITIONAL MATERIALS REQUIRED ..................................................................................................................... 7
USING THE MOXI VTM ........................................................................................................................................... 8
HOME (START) SCREEN .................................................................................................................................................. 8
SETTINGS ..................................................................................................................................................................... 9
Date and Time ...................................................................................................................................................... 9
Passcode Lock ....................................................................................................................................................... 9
Fluorescence Gain .............................................................................................................................................. 10
Auto Noise-Find .................................................................................................................................................. 10
Auto Gate settings .............................................................................................................................................. 10
SAMPLE PREPARATION CONSIDERATIONS ......................................................................................................................... 10
RUNNING A TEST ......................................................................................................................................................... 12
Instructions – Cell Count (Size + Viability), PBMC Check, CAR T Expansion Tests ............................................... 12
• Inserting a Cassette: ................................................................................................................................................ 12
• System Calibration: ................................................................................................................................................. 12
• Loading a sample: .................................................................................................................................................... 13
“Cell QC” Test ..................................................................................................................................................... 14
Cell QC – Single Run .......................................................................................................................................................... 15
Cell QC – Start Batch ......................................................................................................................................................... 16
Cell QC – Initial Test Output (both Single Run and Batch) ................................................................................................ 17
Cell QC – Test Output – Continuing Batch Testing ............................................................................................................ 18
Cell QC – Batch Run – Saved Data and .CSV Summary File ............................................................................................... 19
Cell QC – “Add to Existing Batch” ...................................................................................................................................... 20
TEST RESULTS ............................................................................................................................................................. 20
Recorded Channels ............................................................................................................................................. 20
Data Display Formats – General Output Types .................................................................................................. 20
Fluorescence vs Size Scatter Plot ...................................................................................................................................... 22
Histograms ........................................................................................................................................................................ 23
Reading Raw Data Output (Conc., Size, MFI, and %) ......................................................................................... 24
Fluorescence vs. size scatter (dot) plot ............................................................................................................................. 24
Single Channel Histogram Plot .......................................................................................................................................... 24

Simplified Output and Auto-Gating Overview .................................................................................................................. 25
“PBMC Check" Output ........................................................................................................................................ 26
“CAR-T Expansion" Output ................................................................................................................................. 27
“Cell QC” – Output (both Single Run and Batch) ................................................................................................ 29
ANALYZING/GATING THE DATA ...................................................................................................................................... 30
(General) Recommended Post-Test Workflow ................................................................................................... 31
Re-scaling the X axis (size range) ....................................................................................................................... 31
Gating the data .................................................................................................................................................. 32
Overview ........................................................................................................................................................................... 32
Size Gating of Scatter (Dot) Plots ...................................................................................................................................... 33
Fluorescent Gating of Scatter (Dot) Plots ......................................................................................................................... 34
Noise Gating of Scatter (Dot) Plots ................................................................................................................................... 35
Store and Recall of Gate Settings ...................................................................................................................................... 36
Histogram Overlays on Fluorescence vs Size Scatter Plots ............................................................................................... 36
“Size Histogram” Assay ..................................................................................................................................................... 37
Changing Display Axis for Tests (Fluorescence vs Size, Histogram Only Views) ................................................. 39
FILE/TEST OPERATIONS ................................................................................................................................................ 41
Test Naming and Renaming Tests ...................................................................................................................... 41
Saving and Deleting Data/Tests ......................................................................................................................... 41
Exporting Data Screenshots ............................................................................................................................... 42
Editing Saved Tests ............................................................................................................................................. 42
Compare/Overlay Saved Tests ........................................................................................................................... 44
EXPORTING DATA – CONNECTING VIA USB (USB ON-THE-GO) ............................................................................................ 46
Connect the Moxi VTM to a Computer ................................................................................................................. 46
Put the Moxi VTM in USB Connect mode ............................................................................................................. 47
Safely disconnect Moxi VTM from the Computer ................................................................................................. 48
MOXI VTM HELP AND SYSTEM INFORMATION .................................................................................................................... 48
MOXI VTM APPS .......................................................................................................................................................... 49
INSTRUMENT FIRMWARE AND SOFTWARE UPGRADES ...................................................................................... 50
MOXI V – TRAY INSERT REPLACEMENT PROCEDURE ........................................................................................... 52
BACKGROUND ............................................................................................................................................................. 52
ORDERING INFORMATION ............................................................................................................................................. 52
REMOVING AN EXISTING INSERT ...................................................................................................................................... 52
INSTALLING AN INSERT .................................................................................................................................................. 53
TROUBLESHOOTING ........................................................................................................................................... 55
MAINTENANCE AND STORAGE ........................................................................................................................... 59
SPECIFICATIONS FOR THE MOXI V™ AND CASSETTES ........................................................................................... 62
ORDERING INFORMATION ................................................................................................................................. 63
TECHNICAL AND CUSTOMER SERVICE ................................................................................................................. 64
WARRANTY ........................................................................................................................................................ 64
APPLICABLE PATENTS ......................................................................................................................................... 65

Moxi V™ User Guide
Page 1
Introduction
The Moxi V™ from Orflo Technologies (a subsidiary of Gemini BioProducts, LLC) is a benchtop
instrument that utilizes a disposable thin-film cassette and a combination of a 532 nm laser, one
PIN diode (with a 561nm/LP filter), Coulter Principle-based cell measurements, and on-board
software to provide easy-to-run applications and data analysis. The instrument relies on
disposable cassettes for sample handling, which alleviates the need for flow cell cleaning and
fluidics maintenance. The instrument is small enough to be portable between the lab bench and
the hood. A touchscreen interface and simplified GUI allows for ease of operation without
extensive training.
The Moxi V enables highly accurate cell counts, cell sizing, quantitative assessments of cell
viability. Data acquisition occurs within approximately 5-10 seconds per test. The instrument
can store up to 4Gb of data. Data is provided in the industry-standard Flow Cytometry Standard
(FCS v3.1) format as well as user-generated bitmap screenshots. Data can be downloaded to a
PC or Mac via USB connectivity.
IMPORTANT NOTE:
The Moxi V™ is intended for research use only. Not for use in diagnostic procedures. It
is not intended for use in medical diagnostic or therapeutic procedures, and it has not been
approved or cleared by the United States Food and Drug Administration for such uses.
About the User Guide
The Moxi V™ User Guide provides detailed information for operating, maintaining, and
troubleshooting the Moxi V, including the system, the cassettes, and application workflows.
This includes information on how to analyze test results using the onboard analysis features of
the software.
The user guide does not include instructions for analyzing the provided/output flow cytometry
standard (FCS, version 3.1) files offline in third party software.
Similarly, the user guide does not include detailed protocols for preparing samples prior to
running them on the instrument. The results of the assays are dependent upon the proper use
of reagents and the instrument. Please refer the Protocols section
(http://www.orflo.com/v/vspfiles/pages/protocols.html) of the Orflo website for more details on
sample preparation.
To update the Moxi V firmware to the latest version, please visit http://www.orflo.com, and
register your instrument by entering a valid email address and serial number. The registration
key provided after registering will allow users access future firmware updates.

Moxi V™ User Guide
Page 2
Conventions Used in the User Guide
Within this manual, the following conventions are used to call out certain points, and also to
reminder users of areas of precaution for safety reasons.
WARNING Alerts you to a situation that may cause injury to the user.
CAUTION Alerts you to a situation that may cause damage to the system, loss of
data, or incorrect results.
NOTE Indicates additional related information that may be helpful to the user.
Safety Precautions
The Moxi V™ has integrated safety features that are designed for the protection of the user. THE
INSTRUMENT SHOULD BE USED ONLY BY PROPERLY QUALIFIED AND TRAINED
LABORATORY PERSONNEL. IT SHOULD BE USED ONLY AS DIRECTED IN THIS GUIDE.
PLEASE REVIEW AND UNDERSTAND ALL SAFETY INSTRUCTIONS BELOW, AND AS
INDICATED THROUGHOUT THE USER GUIDE, BEFORE OPERATING THE SYSTEM.
Electrical Safety
WARNING To avoid the danger of electric shock, including the possibility of permanent
injury or death:
• Prior to use, verify that the USB cable and USB charging adapter are plugged
securely into a properly grounded AC power outlet. Verify that the connection
between the USB cable and the instrument is secure and the AC power in your
location is within the specifications for the instrument.
• Do not immerse the instrument, USB cable, or USB power adapter in liquid or allow
liquid to enter the instrument.
• Do not attempt to disassemble or service the Moxi V. Aside from swapping of filters
and replacement of cassette tray inserts, the instrument has no user serviceable
parts. All service must be performed by ORFLO, or an approved ORFLO
vendor.
Laser Safety
WARNING The Moxi V is a Class 1 laser product in accordance with IEC 60825-1:2007.
The system contains a Class IIIb laser that operates at 532 nm with a

Moxi V™ User Guide
Page 3
maximum output power of 50 mW. Direct exposure to laser radiation, even
for a fraction of a second, can be harmful to skin, eyes, or other body parts,
including posing a risk of burns and permanent vision impairment or
blindness. The following guidelines should be followed to avoid exposure:
• An interlock on the door prevents the laser from operating when the door is open.
Do not attempt to defeat the interlock and run a test with the door open.
• Do not operate the Moxi V if there is any damage to the instrument’s enclosure.
• Do not attempt to disassemble or service the Moxi V to service or adjust the laser.
The instrument has no user serviceable parts, and attempts to adjust or service the
laser may result in hazardous radiation exposure. All service must be performed
by ORFLO, or an approved ORFLO vendor.
Biological Safety
WARNING Biological samples have the potential to transmit harmful or fatal disease.
The following guidelines should be followed to minimize the risk of exposure
to biohazardous materials.
• Handle all biological samples as if they are capable of transmitting harmful or fatal
infections.
• Wear appropriate personal protective equipment (PPE) including clothing, eyewear,
and gloves.
• Do not pipette by mouth.
• Dispose of biological waste in accordance with all applicable local, state, and
federal regulations.

Moxi V™ User Guide
Page 4
Moxi V™ System Overview
The Moxi V™ Kit includes the Moxi V system, USB Cable (mini USB B to USB A 2.0), USB
Power Adapter, one pack of 25 Type S+ (MXC030) Cassettes, a spare cassette tray insert, and
a Quick Start Reference Guide. The following figure shows the main visible components of the
Moxi V and the table provides a description of each component.
Power/Reset
Button
TouchScreen
Display
Cassette Tray
Door
USB Cable Port
(on back surface)
Disposable Cassette

Moxi V™ User Guide
Page 5
Component Function
Touch Screen Display Allows user to interface with the instrument by pressing
icons and targets. Displays all information needed for
operation and analysis of results.
Power/Reset Button Turns instrument on and off and resets the unit when
pressed and held for ~10 seconds.
Cassette Tray Door The door is manually opened and closed by user to allow
insertion of a cassette into cassette tray. Door must be
closed prior to running a test.
USB Cable Port Connects instrument to USB cable.
Cassette Disposable cassette used for loading samples. Each
cassette contains two fill ports, one at each end, thereby
allowing for two tests to be run per cassette.
Moxi VTM Accessories
The Moxi V™ uses a USB Cable and Power Adapter for power source. The Moxi V Kit will come
with the power adapter required for your local region. For more information on the approved
regional power adapters, please see Section 14, Ordering Information. Additional adapter types
may be available for other regions, please contact technical support at ORFLO for more
information.
Power Adapter (US style) USB Cable Replacement Cassette Tray Insert
Part
Function
Power Adapter, US Style
Connects USB cable to a 110 VAC outlet
USB Cable
Connects instrument to Personal computer
(PC or Mac) or power adapter
Cassette Tray Insert
Extra tray insert can be user-installed in
cassette tray when adhesive build-up
interferes with insertion/removal of cassettes.

Moxi V™ User Guide
Page 6
Getting Started
The Moxi V™ is shipped in a condition ready for initial use; though we recommend checking for
software updates and updating the Moxi V with the most current software version upon receipt.
To begin, plug the USB Cable into the instrument at one end (mini-USB). Plug the opposite end
of the USB Cable (standard USB) into the Power Adapter. Plug the Power Adapter into an AC
outlet that matches the rating of the Power Adapter.
CAUTION Use only an ORFLO supplied USB Cable and Power Adapter. Use of
other products may result in inaccurate test results or damage to the
instrument, and will void warranty.
NOTES Tests should only be performed with the instrument powered by an AC
source.
The device will power on and users can access files without attaching to a
power outlet but for data collection the device must be plugged into an
electrical outlet.
General Guidelines
The Moxi V is used with Type S+ or MF-M Cassettes. Refer to the Specifications section for
information on the operating size and concentration ranges for the system.
The sample volume for a test should be 60µL.
Cells should be suspended in 0.9% salt solution (e.g. PBS or equivalent) to ensure proper
conductivity for unit operation and to ensure proper particle sizing. Water, hypotonic, or
hypertonic solutions are not acceptable diluents.
Cells need to be prepared as single-cell suspensions. Clusters/aggregates should be broken
apart with mechanical trituration (e.g. pipetting vigorously) and/or protease dissociation (e.g.,
Accutase® or Accumax®). For stubbornly aggregated samples, pre-filtration with a 40µm cell
strainer is recommended.
As the Moxi V™ uses a 532nm laser with a 561nm/LP filtered PIN diode for detection.
Dye/fluorophore selection should be based accordingly. As the system is intended as a cell
viability system, the main recommended fluophore is Propidium Iodide (PI, recommended
2µg/ml final PI concentration). Please refer to the Orflo Viability Staining Protocol for the
staining protocol for viability assessments.

Moxi V™ User Guide
Page 7
For cell counting application, cells can be run without fluorochromes using any of the assays.
Additional Materials Required
• Cell or bead sample (diluted and dissociated, if necessary); 60 µL minimum.
• Type S+ (MXC030, recommended for almost all assay) or MF-M (MXC010) Cassettes
• Pipette (typically P100 or P200) and appropriately sized pipette tips
• Cell staining/labeling reagents (test specific, see guidelines in “Sample Preparation”)

Moxi V™ User Guide
Page 8
Using the Moxi VTM
Press the Power Button to turn on the instrument. The Home Screen will become available.
The image below identifies the key items on the Home Screen.
Home (Start) Screen
NOTE: The home page appearance may change as additional applications are launched and
new GUIs (graphical user interface buttons) are added to the Moxi V software program.
Assays
/Applications
Help
Instructions
System
Settings
System
Applications
Battery/
Charging
Indicator
USB
Indicator
Saved
Data/Tests
Date/
Time
USB Disk Mount
(for data
transfer)

Moxi V™ User Guide
Page 9
Settings
!"#$%"&'%()*$%
Set the date and time by pressing the Settings icon on the main menu of the instrument. Then
touch the Date or Time field. Use the up/down arrow keys to change the values.
+",,-.'$%/.-0%
The Moxi V can be setup to require a password login to use the instrument and access stored
data. To set the Password lock, select the Settings icon and then touch the “Off” entry to toggle

Moxi V™ User Guide
Page 10
it on (See images below). Select Done. The system will present a keyboard to enter the four-
digit numeric passcode.
On entering the passcode, the user will be required to “Re-enter Passcode” to prevent
accidental entry of a wrong code.
Upon successful re-entry of the passcode, the system will display a “lock enabled” message.
The system will now require a passcode for access on initial startup and after entering sleep
mode.
NOTE: In order to turn the Passcode Lock off, the user will be required to enter the
correct passcode. If you forget this passcode, the entire system will have to be reset and
data could be lost. Keep the passcode recorded in a safe place to prevent loss of data.
123.4$,-$&-$%5")&%
The “Fluorescence Gain” field sets the level of fluorescence gain for all the assays. Five
possible values (Very Low, Low, Default, Medium, High) can be entered here and will set the
values used for all assays. The fluorescence gain is used to control the positioning of the data
within the range of the scatter plot. “Default” gain should be used for most applications. If the
data is extending to the top of the scatter plot and “compressing” or “piling” up there, then the
fluorescent gain should be lowered. Alternatively, if the fluorescence signal is compressed
towards the bottom of the plot, a higher gain setting can be used to help increase the separation
between the fluorescence positive and negative clusters.
63#.%7.),$81)&'%
This field sets the behavior of the system with respect to identifying system noise during tests.
There are two possible settings: Yes or No. If set to Yes, the system applies an algorithm to
each test, after acquisition, to try to identify the noise (and small-particle “debris”) in the sample.
If set to No, the system will use a hard-coded values for the noise location for each test, capping
the noise area to a region defined by events <2.9µm AND fluorescence levels <10mV. With the
v2.10 (or later) release of the firmware, it is recommend that this setting is left in the “Off”
setting.
63#.%5"#$%,$##)&9,%
The user is given control in setting the system auto-gating to one of three settings:
1. Off – the system will not auto-gate any tests.
2. ON – the system will auto-gate all tests.
To toggle the auto-gate value, simply tap on the current setting for that field.
Sample Preparation Considerations
There are several key considerations for preparing a sample for analysis with the Moxi V™:

Moxi V™ User Guide
Page 11
1. Solution Conductivity – As the system utilizes an electrical measurement for counting
cells, sizing cells, and metering the fluid volume, cells need to be suspended in a
conductive media. The target solution conductivity would be 0.9% salt solution (e.g.
PBS or equivalent). Deviations of +/- ~50% conductivity can be tolerated by the system.
Most medias that are isotonic to PBS will work.
2. Particle Size and Concentration – For best results tests must be run within the size
and concentration range specifications of the cassette, as specified below.
a. Size Range:
i. Type S+ cassette: 3 - 27 μm diameter (14 – 10,306 fL volume)
ii. MF-M cassette: 4 - 35 μm diameter (14 – 22,449 fL volume)
b. Concentration range:
i. Type S+ Cassettes:
1. Counts: 1 x 10⁴ – 1.75 x 10⁶ total particles/ml
2. Optimum Fluorescence Sensitivity: < 5 x 10⁵ particles/ml
ii. MF-M Cassettes:
1. Counts: 1 x 10⁴ – 7.5 x 10⁵ total particles/ml
2. Optimum Fluorescence Sensitivity: < 3 x 10⁵ particles/ml
Optimal concentration ranges up may vary slightly depending upon your cell
or bead type.
3. Single Cell Suspensions – While the Type S+ and MF-M Cassettes do have a pre-filter
for removing sporadic large particles, cell samples should be prepared as single cell
suspensions to avoid clogging of cassettes. Clusters/aggregates can be broken apart
with mechanical trituration and/or protease dissociation (e.g. Accutase® or Accumax®).
Larger particles or stubbornly aggregated clusters can be removed with a 40 µm cell
strainer. Standard centrifuge tube strainers can be used for larger volumes or a pipette-
tip FlowMi™ strainer can be used for smaller volume filtering.
4. As the Moxi V™ uses a 532nm laser with a 561nm/LP filtered PIN diode for detection.
Dye/fluorophore selection should be based accordingly. As the system is intended as a
cell viability system, the main recommended fluophore is Propidium Iodide (PI,
recommended 2µg/ml final PI concentration). Please refer to the Orflo Viability Staining
Protocol for the staining protocol for viability assessments. For cell counting application,
cells can be run without fluorochromes using any of the assays.
5. Red Blood Cell (RBC) containing samples – For samples with high levels of RBC’s
(e.g. peripheral blood), it is necessary to eliminate/reduce the level of RBC’s in order to
prevent those cells from “masking” the cells of interest. The preferred approaches to
purification of a sample are density-gradient centrifugation (e.g. Ficoll-Paque®), magnetic
bead separation, or “pre-plating” (culturing of adherent cells). RBC lysis approaches can
be applied but users should be aware that those approaches have limited efficiency and
can still leave a significant number of intact RBC’s behind.

Moxi V™ User Guide
Page 12
Running a Test
:&,#43-#).&,%;%<$22%<.3&#%=>)?$%@%A)"B)2)#CDE%+FG<%<H$-0E%<6I%(%JKL"&,).&%($,#,%
• Please follow sample preparation guidelines above (“Sample Preparation
Considerations”) in preparing the sample. Note: The minimum volume required for a
test is 60 µL.
• Turn the instrument on by pressing the power button and the Home screen will be
displayed. Select a test type by pressing one of the icons displayed on the screen.
o NOTE: The instrument must be plugged in to an AC source to run a test. Tests
CAN NOT be run on internal battery power alone or computer USB power.
• Basic test instructions are presented for all tests (example for “Viability Test” shown
below).
• !"#$%&'"()*)+*##$&&$, Open the Front Door all the way and slide a test cassette, with
ORFLO lettering-side up into the cassette tray (either end 1 or 2). Close the Door.
Note: If the cassette had been previously used, the system will generate a “Used or
Invalid Cassette” error message.
• -.#&$/)+*0'1%*&'2", The system will automatically perform a calibration step as outlined
in the images below.
The automated sequence aligns the laser to the cassette flow cell (“Aligning the laser”)
and prompts the user to open the door. Notes:
a. System status messages are displayed in the black bar at the top of the
screen.
b. For the first test-run on the unit, following power up, an initial laser “cam
align” is performed (see image below/left). Following that initial test, only the
standard laser alignment (images below/middle and below/right) are
performed.
c. Should the alignment result in an error make sure that your cassette is
pushed into the sled. And, make sure the cassette is not inserted at an
angle.

Moxi V™ User Guide
Page 13
• 32*4'"()*)#*/50$, System messages at the top of the screen prompt the user to “Open
the Door” (image below/left) and pipette a 60 – 75 µL sample (“Enter the Sample”, image
below/middle) into the fill port of the cassette (either test 1 or test 2, depending on which
end of the cassette was inserted into the instrument) and close the Door. Note: Open
the door only to the first stop (first point of resistance) when loading the sample.
Don’t open the door all the way to the flat position.
Notes:
• To load the sample, place the pipette tip directly in the loading oval (touching the
cassette with the tip is perfectly fine and recommended).

Moxi V™ User Guide
Page 14
• It is best to place the pipette facing straight into the system (not angled left or right)
and a ~45 degree angle (up/down, see image below)
• Dispense the fluid in one, smooth motion as you would normally during pipetting.
The system does apply a slight vacuum to pull the fluid in, but it is not recommended
to try to “time the load” to the draw of the fluid. It is normal/expected to have a bead
of fluid form over the entry well. That fluid will get pulled in eventually.
• The system provides the user a 60 second window to complete each step (opening
the door, loading the sample, waiting for the fluid to reach the start electrode). If the
time limit for any of the steps is exceeded, the test will automatically cancel and the
user will be returned to the Home screen.
• The instrument will begin the test. While the system waits for sample/fluid detection an
“Analyzing…” message is indicated in top left of the screen a countdown until the test is
auto-cancelled (auto cancel occurs after 60 seconds if no fluid is detected). Once the
fluid is detected, the system message changes to “Counting…” and the results are
dynamically populated on the scatter/dot plot. Results for most samples will be complete
in approximately 10 seconds but may be longer for higher concentration, sticky, or
aggregated samples. Please refer to the “Test Results – Analyzing/Gating Data”
section for details on gating and interpreting the data output for all tests.
%M<$22%N<O%($,#%%
The “Cell QC” app is designed to provide simplified analysis of cell viability samples either one
test at a time or in batch mode (rapid acquisition of multiple samples of the same cell type, using
consistent gating). The initial display output of the Cell QC app is a simplified, list of the sample
statistics, based on the system’s auto-gating of the sample. The batch mode, in-addition to
providing for rapid acquisition of data, provides the same simplified output for each test, along
with a final summary .csv (e.g. Excel) output file with the summary data for all tests.
Touching the “Cell QC” icon on the Home screen brings up the Cell QC “Enter Sample Info”
screen. The first selection option is the “File Option”. There are three file options: 1.) “Single
Run” (run a single test). 2.). “Start a Batch” (run a series of samples of the same type in rapid
succession) 3.) “Add to Existing Batch” (continue running a series of samples in batch mode,

Moxi V™ User Guide
Page 15
appending to an existing batch run). The selected option is display in orange. The other
options in green.
+$00)6+)7)-'"(0$)89")
By default, the system sets the “File Option” as a “Single Run” (single test, see image
above/middle). Below the file option selection, there are three test parameters that the user can
set: 1.) “File Name” 2.) “Sample ID” and 3.) “Dilution Factor”. The system defaults the test to
have a name of “QC-XXX” where XXX is a sequential number starting at “000” and incrementing
with each test run. The system will auto-enumerate that number with the lowest available
number (not already used by a saved test on the disk). This value also provides the test file
name (with an .fcs extension, e.g. “QC-004.fcs”). This file name field can be changed by
touching in the box and using the keyboard below to type a new name. Notes: 1.) Capital
letters can be typed by hitting the “CAPS” key to change the keyboard to capital letters. 2.)
Additional punctuation/symbols are available by touching “Punc”. The “Sample ID” field can be
used as general text description of the sample being run. This field can be changed by touching
in the box and using the keyboard below to type a description. The “Dilution Factor” field is a
drop-down list with the options of entering “1:1” (no dilution), “1:2” (2x dilution), “1:5” (5x
dilution), and “1:10” (10x dilution). Note: the value selected here will automatically be
applied to the test count output to adjust the measured counts for the dilution level,
providing the true (dilution adjusted) initial starting concentration. The value is set by
touching the box (image below/right) and touching one of the dropdown entries. The “Enter”
button can then be touched to start the test.

Moxi V™ User Guide
Page 16
+$00)6+)7)-&*%&):*&;<)
Selecting the “Start Batch” file option will prompt a warning that this mode is only meant for
samples of the same cell type (see image above/middle). The reason for this is that, following
the first test (which will be auto-gated by the system, with the option to manually adjust the
gates), the subsequent tests will be run with the same gate settings as the first. This is
intentionally implemented for consistency in running sample batches. With batch testing, there
are three test parameters that the user can set: 1.) “Batch Name” 2.) “Sample ID” and 3.)
“Dilution Factor”. The system defaults the batch name to have the format of “QC-YYYYMMDD-
HHMMSS” (where YYYY is the year, MM is the numeric month, DD is the day, and HHMMSS is
the time). This naming is implemented to capture both the acquisition time and date, as well as
to ensure uniqueness in the naming. When running a batch, a sub-folder with the “Batch Name”
is created in the “Test-Files” data directory on disk. The individual tests in the batch will be
saved to that sub-folder with the naming format of “QC-XXX.fcs” where XXX is a sequential
number starting at “000” and incrementing with each test run in the batch. The “Sample ID” field
can be used as general text description of the sample/test being run. This field can be changed
by touching in the box and using the keyboard below to type a description. The Sample ID field
can be changed for each/any test in the batch. Notes: 1.) Capital letters can be typed by hitting
the “CAPS” key to change the keyboard to capital letters. 2.) Additional punctuation/symbols
are available by touching “Punc”. The “Dilution Factor” field is a drop-down list with the options
of entering “1:1” (no dilution), “1:2” (2x dilution), “1:5” (5x dilution), and “1:10” (10x dilution).
Note: the value selected here will automatically be applied to all tests’ count outputs to
adjust the measured counts for the dilution level, providing the true (dilution adjusted)
initial starting concentration. The value is set by touching the box (image below/right) and
touching one of the dropdown entries. The “Enter” button can then be touched to start the
test/batch. For the first test after the system is powered-up, the system will perform the laser-
homing routine (as described in the laser/cassette alignment section). For every subsequent
Other manuals for ORFLO Moxi V
1
Table of contents
Other GeminiBio Laboratory Equipment manuals
Popular Laboratory Equipment manuals by other brands

Cole Parmer
Cole Parmer RS-250 Series instruction manual

Horizon Technology
Horizon Technology SPE-DEX 4790 Service manual

Thermo Scientific
Thermo Scientific Jewett PRF17 Installation & operation

Vitlab
Vitlab micropipette manual

Thermoline Scientific
Thermoline Scientific TO Series User manual & setup guide

AGS
AGS AGS8830-8 manual