Vitlab micropipette User manual

Standard Operating Procedure (SOP)
VITLAB®
micropipette
VITLAB GmbH
Linus-Pauling-Str.1
63762 Grossostheim
Germany
tel: +496026 97799-0
fax: +496026 97799-30
info@vitlab.com
www.vitlab.com

2
Table of contents
1. Introduction 3
2. Preparation of the pipette for testing 4
3. Test instruments and environment 6
4. Functional testing 7
5. Calibration - Checking the volume 8
6. Evaluation 9
7. Tables 11

3
The standard DIN EN ISO 8655 describes both the design and the testing of piston operated pipettes
such as the VITLAB micropipette. The following testing instructions describe how to apply the ISO
standard in practice.
We recommend a testing of the piston operated pipette every 3 - 12 months. This interval may be
adjusted to individual requirements. For example, when working very frequently or when using ag-
1. Introduction
®
gressive media, the instrument should be tested more frequently.
These instructions may be used as a basis for the supervision of testing devices according to DIN EN
ISO 9001, DIN EN ISO 10012 and DIN EN ISO / IEC 17025.
Owing to its 8 respectively 12 channels, the VITLAB micropipette -8 / -12 can carry out 8 resp. 12
pipettings in one action. However, this advantage results in an increased effort in testing because acc.
®
to ISO 8655, each channel has to be tested seperately. Therefore, 240 weighings are necessary for
the VITLAB micropipette -8 and even 360 weighings have to be carried out for the 12-channel pipette.
®
This results in a high expenditure of time for the testing of multichannel pipettes.
For the regular examinations required by DIN EN ISO 9001, DIN EN ISO 10012 and DIN EN ISO / IEC
17025 and the GLP guidelines, VITLAB additionally provides an optimised calibration service acc. to
ISO 8655. For more detailed information, please contact us or your labware supplier.

4
2. Preparation of the pipette for testing
2.1 Instrument identification
Read instrument type and nominal capacity
Read serial number (located behind tip ejection
Read customers identification, if present
►Enter in test record
Enter number in test record
Enter identification in test record
►
►
2.2 Minimum configuration for VITLAB micropipette
Have the operating manual ready
VITLAB micropipette
®Use only manufacturerer‘s original parts
►
Pipette tips ►Use only appropriate tips.
Optimum results can only be obtained with
VITLAB pipette tips.
®
2.3 Cleaning
Clean pipette shaft Wipe off with a soft cloth, so that no media
►
residues remain
Clean the exterior sufficiently Use a damp cloth (Water or diluted soap
►
Any liquid residues inside the device? Disassemble and clean the instrument (see
►
operating manual)
For multichannel pipettes:
V- resp. O-rings damaged?
No media residues! V- and O-rings can be
►
replaced (see operating manual)
button)
®
solution)

5
2.4 Visual examination for damage or leakage
Housing and tip ejector
Piston
►General damage?
Scratches or soilings on the surface?
Enter results in the test record
►
►
Possible errors and the resulting measures
(For other measures and more troubleshooting advice, please check the operating manual)
Error Possible cause Measures
Pipette tip is no longer
tight
Scratches on the pipette shaft
tip
►
Obtain spare parts
(see operating manual)
Device is stiff and / or
leaking
Seal / Piston soiled or damaged
►
Seal Scratches or soilings on the surface?
►
For multichannel pipettes:
V- resp. O-rings damaged? Scratches on the surface? Deformation?
►
Visual damage?
V- resp. O-rings damaged Mechanical damage
Wear
►
Replace V- resp. O-rings
(see operating manual)
Obtain spare parts
(see operating manual)

6
Test room
The calibration should be performed in a draught-free room with constant temperature and
The test pipette and the test liquid must be at equilibrium with the room temperature. For this,
Temperature
humidity.
leave the pipette (without the packaging) and the test liquid for at least 2 hours in the test room.
Try to avoid temperature changes (e.g.from sun radiation). Then carry out a comparison of the
temperature from pipette, liquid and room.
Test liquid
Distilled or deionised water of a minimum quality 3 according to ISO 3969. The maximum difference
of room and water temperature should be 0.5 °C.
Thermometer
Use only thermometers with a maximum measurement error of 0.2 °C.
Hygrometer
Considering the measuring tolerance of the hygrometer a relative atmospheric humidity of 40
- 60% should be reached.
Balance
Recommended specifications, see table:
Selected volume* of the
device to be tested
Resolution of the
Balance display
Repeatability
and linearity
1
µl
< V ≤10 µl 0.001
Vmg
Standard
uncertainty
mg µl
0.002 0.002
10
µl
< V ≤100 µl 0.01 0.02 0.02
100
µl
< V≤1000 µl 0.1 0.2 0.2
1 m
l
< V ≤10 ml 0.1 0.2 0.2
*For practical purposes, the nominal volume may be used to choose the balance.
Recipient vessel
Vessel (e.g. Erlenmeyer flask) filled with test liquid. Prevent a cooling of the water in the recipient
vessel through evaporation.
Weighing vessel
Vessel (e.g. Erlenmeyer flask) filled with water to a level that the bottom is completely covered.
Provide an evaporation protection for testing volumes
< 100
µl.
3. Test instruments and environment

7
4. Functional testing
Mount new pipette tip and
set the nominal volume
Take up the test liquid ►Aspiration of the liquid not possible or very slow:
If a drop forms:
The pipetting button must move smoothly and
►
►
See notes in the table below
Leak test: Hold the filled pipette
vertically for approx. 10 seconds and
observe if a drop forms at the tip
See notes in the table below
Release the test liquid. Hold pipette tip
against wall of the vessel and wipe off
against the wall
jerk-free
Eject the tip Enter results in the test record
►
Possible errors and the resulting measures
(For other measures and more troubleshooting advice, please check the operating manual)
Error Possible cause Measures
Aspiration not possible
or very slow
Pipette shaft or pipette shaft
tip blocked
►
Clean the instrument
(see operating manual)
Drop forming at the
pipette tip
Pipette tip not properly attached
Seal or piston damaged
►
Attach new pipette tip
►
Clean or replace seal and / or
piston
(see operating manual)
►
Replace V- resp. O-ring
(see operating manual)
V- resp. O-ring damaged

8
With pipettes of a nominal volume ≤ 50 µl, the error limits are usually smaller than 0.5
µl
. Due to
this small error limit, the evaporation of water during the test procedure has a relatively large influ-
ence on the result. Therefore, the testing of pipettes of this size requires a test procedure which
largely prevents evaporation. To provide a sufficient evaporation protection, special pipette calibration
balances including an evaporation trap can be used.
Pipettes with nominal volume ≤ 50 µl
Through the use of calibrated testing devices (balance and thermometer), the requirement of DIN EN
ISO 9001, DIN EN ISO 10012 and DIN EN ISO / IEC 17025 to refer the test to national standards is ful-
filled. The calibration of the balance e.g. can be carried out either by DAkkS calibration or official cert-
ification of the balance, or by calibrating the balance with appropriate weights that are traced to the
national standard. The calibration of the thermometer, hygrometer and barometer can also be carried
out by DAkkS calibration or official certification, or by a comparison with thermometers that are traced
Traceability of test results to national standards
to the national standard (under defined conditions).
5. Calibration - Checking the volume
1. Set the nominal volume at 10% or 20%.
Enter temperature into test record.
►
2. Determine temperature of the test liquid.
3. Place the weighing vessel filled with test liquid on the balance and tare balance.
Note: For multichannel pipettes, each channel has to be tested seperately!
4. Attach new pipette tip. For multichannel pipettes, attach a new pipette tip only to one channel.
Perform conditioning of the pipette. Therefore, aspirate and release test liquid 5 times.
The conditioning increases the accuracy of the test.
►
5. Aspirate test liquid from the recipient vessel. Push the pipetting button to the first stop. Immerse
the pipette tip vertically 2 - 4 mm into the test liquid. For 5 ml and 10 ml pipettes, immerse the
tip 3 - 6 mm. Then release the pipetting button steadily and smoothly.
Observe waiting time: Remain approx. 1 second in the test liquid. For 5 ml and 10 ml pipettes,
►
wait approx. 10 seconds.
6. Release the test liquid into the weighing vessel. Lean pipette tip in an angle of 30° - 45° against the
wall of vessel. Push the pipetting button to the first stop and hold. Push to the second stop to empty
the pipette tip completely. Wipe off pipette tip against the wall of the vessel over a distance of
approx. 10 mm. Then release the pipetting button smoothly.

9
Enter value into test record.
►
7. Place weighing vessel on the balance and record weighing value.
8. Tare balance again.
9. Repeat steps 5 - 8 ten times (for multichannel pipettes ten times per channel).
Enter weighing values into test record.This results in a minimum of 24 (8-channel) resp.
►
36 (12-channel) weighing values.
10. Afterwards, repeat the same procedure for 50% and 100% of the nominal volume. Always start
with step 4.
Enter the weighing values into the test record. This results in 30 values for the singlechannel
pipette, in 72 values for the 8-channel pipette and 108 values for the 12-channel pipette.
►
6. Evaluation
The obtained weighing values from the gravimetric test are only the mass values of the pipetted
volume without the correction of the air buoyancy. To obtain the actual volume, a correction calc-
ulation taking into account the water density and the air buoyancy has to be carried out.
For multichannel pipettes, the following calculations have to be carried out for each channel seperately.
Mean weighing value (of one channel for multichannel pipettes)
x =x + x + x ... + x
1
10
Example for 10 weighing values:
210
3
Mean volume (of one channel)
V = x · Z Factor Z; see table
Enter value into the test record
►
►
Standard deviation volume (of one channel)
Factor Z; see table
Enter value into the test record
►
►
(x1
– x) 2
9
s = Z · + (x2
– x) 2
+ (x3
– x) 2
+ ... (x10
– x) 2
+

10
Accuracy (of one channel)
Enter value into the test record
►
Coefficient of variation (for one channel)
Enter value into the test record
►
V – V0
V0
A [%] = · 100
100 s
V
CV [%] =
Comparison actual values - nominal values (per channel)
Error limits: see tables 7.2.1 and 7.2.2 (for multichannel pipettes see tables 7.3.1 and 7.3.2)
Result
If the calculated values for A [%] and CV [%] are (for multichannel pipettes per channel) smaller than
or equal to the error limits, the pipette is in good working order.
If the calculated values are larger than the error limits:
Verify, if all above instructions have been carefully followed step by step
►
Observe notes from the „Troubleshooting“ section in the operating manual
►
►Recalibrate the VITLAB micropipette according to the steps in the operating manual
®
If these measures are not successful, we recommend you to make use of the VITLAB calibration service.
Possible volume errors and the resulting measures:
Error Possible causes Measures
Volume too small Pipette tip not properly
attached
►
Use a new pipette tip and attach
it tightly
Volume too large Pushed pipetting button too
►
Be very vigilant to not press be-
Seal or piston damaged
►
Clean or replace seal resp. piston
(see operating manual)
V- / O-rings damaged Replace V- / O-rings
►
Other influences Pipette is not correctly calibrated
►
Recalibrate pipette
yond the first stop
Multichannel pipettes:
Temperature adjustment of the
►
Carry out temperature adjust-
device, room and water temper-
ature was not completed
or definition of individual error limits.
far
ment

11
7. Tables
15
15.5
7.1 Factor z - Excerpt from DIN EN ISO 8655, Part 6.
Table refers to 1013 hPa. Valid from 950 hPa to 1040 hPa.
Temperature Factor z
°C ml / g
Factor z
ml / g
Temperature
°C
1.0020
1.0020
23
23.5
1.0035
1.0036
16
16.5
1.0021
1.0022
24
24.5
1.0038
1.0039
17
17.5
1.0023
1.0024
25
25.5
1.0040
1.0041
18
18.5
1.0025
1.0026
26
26.5
1.0043
1.0044
19
19.5
1.0027
1.0028
27
27.5
1.0045
1.0047
20
20.5
1.0029
1.0030
28
28.5
1.0048
1.0050
21
21.5
1.0031
1.0032
29
29.5
1.0051
1.0052
22
22.5
1.0033
1.0034
30 1.0054

12
7.2 Volume error limits for piston operated pipettes
Table 7.2.1: Excerpt from DIN EN ISO
Nominal volume
µl
A
≤± %
CV*
≤%
10
20
100
200
1000
5000
10000
Nominal volume
µl
A
≤± %
CV*
≤%
8655, Part 2
Table 7.2.2: Values from operating manual
VITLAB micropipette
®
The stated volume error limits for the VITLAB micropipette (Table 7.2.2) are final test values relative
to the nominal capacity. These error limits refer to new instruments under optimised test conditions
(qualified operators and standardised ambience conditions). Typically these error limits are two times
®
better under ideal testing conditions (experience of the manufacturer). For partial volumes the absolute
value (µl) corresponding to the nominal volume is applied.
1
1.6
7
0,5
1
4
0.8
1.2
5
0.4
0.7
2
0.6
0.8
3
0.2
0.4
1
0.6
0.8
3
0.2
0.3
0.6
0.6
0.8
3
0.2
0.3
0.6
0.6
0.8
3
0.2
0.3
0.6
0.6
0.8
3
0.2
0.3
0.6
10
5
1
20
10
2
100
50
10
200
100
20
1000
500
100
5000
2500
500
10000
5000
1000
1.2 0.8
1.0 0.5
0.8 0.3
0.8 0.3
0.8 0.3
0.8 0.3
0.6 0.3
For calibration, the error limits to be observed by the operator must individually defined by the user.
For this purpose, the following methods can be applied:
If required by the application and if the optimised conditions for measuring are present, the stated
►
In correspondence to the German regulations for official testing, it is also admissible to apply limits
►
►The user may also define his own individual tolerance limits corresponding to his particular applicat-
error limits can also be expected in the case of used volumetric instruments are in good working
order.
which are typical for practice. These practice limits correspond to double the limits for official testing.
In this case, the values in table 7.2.2. should be doubled!
ion, and apply these error limits for the calibration of the instrument.
The above procedures fulfil the requirements of DIN EN ISO 9001, DIN EN ISO 10012 and DIN EN
ISO / IEC 17025.

13
7.3 Volume error limits for multichannel piston operated pipettes
Table 7.3.1: Excerpt from DIN EN ISO
Nominal volume
µl
A
≤± %
CV*
≤%
10
50
100
200
300
Nominal volume
µl
A
≤± %
CV*
≤%
8655, Part 2
Table 7.3.2: Values from operating manual
VITLAB micropipette -8/-12
®
The stated volume error limits for the VITLAB micropipette -8/-12 (Table 7.3.2) are final test values
relative to the nominal capacity. These error limits refer to new instruments under optimised test con-
ditions (qualified operators and standardised ambience conditions). Typically these error limits are two
®
times better under ideal testing conditions (experience of the manufacturer). For partial volumes the
absolute value (µl) corresponding to the nominal volume is applied.
1.6
2.0
8.0
1.0
2.0
6.0
0.8
1.4
6.0
0.4
0.8
3.0
0.8
1.4
4.0
0.3
0.6
2.0
0.8
1.4
4.0
0.3
0.6
1.5
0.6
1.2
3.0
0.3
0.6
1.5
10
5
1
50
25
5
100
50
10
200
100
20
300
150
30
2.4 1.6
2.0 0.8
1.6 0.6
1.6 0.6
1.6 0.6
For calibration, the error limits to be observed by the operator must individually defined by the user.
For this purpose, the following methods can be applied:
If required by the application and if the optimised conditions for measuring are present, the stated
►
In correspondence to the German regulations for official testing, it is also admissible to apply limits
►
►The user may also define his own individual tolerance limits corresponding to his particular applicat-
error limits can also be expected in the case of used volumetric instruments are in good working
order.
which are typical for practice. These practice limits correspond to double the limits for official testing.
In this case, the values in table 7.3.2. should be doubled!
ion, and apply these error limits for the calibration of the instrument.
The above procedures fulfil the requirements of DIN EN ISO 9001, DIN EN ISO 10012 and DIN EN
ISO / IEC 17025.

14
Test Record for Volumetric Instruments (EX)
2. Damage:None
Type of damage
............................................
............................................
............................................
Damage repaired
3. Functional defects:None
Type of functional defect:
............................................
............................................
............................................
Functional defect repaired
4. Water temperature:......................................................°C
Balance:............................................................................
Thermometer:..................................................................
Air pressure:........................................................................
Relative humidity (at least 35%):......................................
Correction factor z:.........................................................
1. Instrument:
Nominal volume:
Serial number:
Customers identification:
5. Weighing values and results of the gravimetric test:
VITLAB continuous E / RS
®
VITLAB genius
VITLAB simplex
VITLAB TA
VITLAB micropipette
®
®
®
®
Weighing value No. 10 % (resp. 20%)50 % Nominal volume
x1
x2
x3
x4
x5
x6
x7
x8
x9
x10
6. Evaluation of the gravimetric test:
Calculated values 10 % (resp. 20%)50 %Nominal volume
a V
_
b s
cA [%] Found
dCV [%] Found
eA [%] Nominal
fCV [%] Nominal
gResult
The testing was carried out according to DIN ENISO 8655.
Date Signature

15
Test Record for Volumetric Instruments (EX)
2. Damage:None
Type of damage:
............................................
............................................
............................................
Damage repaired
3. Functional defect:None
Type of functional defect:
............................................
............................................
............................................
Functional defect repaired
4. Water temperature:......................................................°C
Balance:............................................................................
Thermometer:..................................................................
Air pressure:........................................................................
Relative Humidity (at least 35%):......................................
Correction factor Z:............................................................
1. Instrument: Type:
VITLAB micropipette
®-8/-12 8-channel
12-channel
Nominal volume:
Serial number:
Customers identification:
Channel No.
Weighing value 1 2 3 4 5 6 7 8 9 10 11 12
X1(mg)
X2(mg)
X3(mg)
X4(mg)
X5(mg)
X6(mg)
X7(mg)
X8(mg)
X9(mg)
X10 (mg)
X mean (mg)
V mean (µl)
A(%)found
VK(%)found
A(%)nominal
CV(%)nominal
Result A
Result CV
5. Weighing values and results of the gravimetric test:
Testing volume: 10 %:..........................µl
Nominal volume: (mg) A(%) (nominal) CV(%) (nominal)

16
Testing volume: 50 %:.......................... µl
Nominal volume: (mg) A(%) (nominal) CV(%) (nominal)
Channel No.
Weighing values 123456789101112
X1(mg)
X2(mg)
X3(mg)
X4(mg)
X5(mg)
X6(mg)
X7(mg)
X8(mg)
X9(mg)
X10 (mg)
X mean (mg)
V mean (µl)
A(%)found
CV(%)found
A(%)nominal
CV(%)nominal
Result A
Result CV

17
Test volume: Nominal volume: ............... µl
Nominal volume: (mg) A(%) (nominal) CV(%) (nominal)
Channel No.
Weighing values 123456789101112
X1(mg)
X2(mg)
X3(mg)
X4(mg)
X5(mg)
X6(mg)
X7(mg)
X8(mg)
X9(mg)
X10 (mg)
X mean (mg)
V mean (µl)
A(%)found
CV(%)found
A(%)nominal
CV(%)nominal
Result A
Result CV
The testing was carried out according to DIN ENISO 8655.
Date Signature

18
Declaration on the Abscence of Health Hazards
To be sent together with the instrument or via mail (if urgent with fax in advance).
VITLAB GmbH
Linus-Pauling-Str. 1
63762 Grossostheim
Fax: +49 (0) 6026 9 77 99 - 30
We intend to give our staff a maximum of protection from health hazards caused by contaminated
instruments. We therefore ask for your understanding that we cannot carry out any calibration
or repair unless this declaration is submitted completed and signed.
For consignment dd. ........................................ / for delivery note No. ............................................. :
The undersigned hereby declares:
That the instruments have been carefully cleaned and decontaminated before shipment.
That the instruments pose no danger through bacteriological, chemical, radiological or
viral contamination
That she / he is aware that shipment of contaminated instruments is a violation of the law, and
she / he personally and the Institution represented may be held liable for any damages caused
For calibration service only: minor repairs of a value up to € 50,- + VAT shall be carried out
and invoiced without further queries. (Cross out if not applicable).
........................................................................
Name
........................................................................
Position
........................................................................
Date, Signature
Company / Laboratory (Stamp)
Tel./Fax/E-Mail:
►
►
►
►
In case of return for repair, please provide us with the following supplementary information:
►
Detected defect:
..........................................................................................................
Media which the instrument has been used with:
.......................................................
Germany
contaminated instruments.
Other manuals for micropipette
2
Table of contents
Other Vitlab Laboratory Equipment manuals
Vitlab
Vitlab Buret Continuous User manual

Vitlab
Vitlab micropipette -8 User manual
Vitlab
Vitlab piccolo 1 User manual
Vitlab
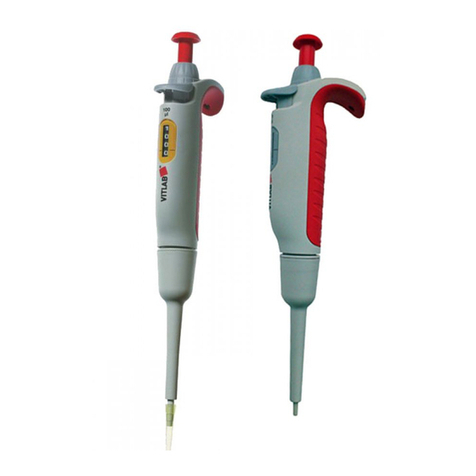
Vitlab micropipette User manual
Vitlab
Vitlab pipeo User manual
Vitlab
Vitlab continuous E User manual
Vitlab
Vitlab pipeo User manual
Vitlab
Vitlab maneus User manual
Vitlab
Vitlab TA2 User manual

Vitlab
Vitlab continuous RS User manual
