General Hearing Simplicity Pro User manual

General Hearing Instruments, Inc.
175 Brookhollow • Harahan, LA 70123
www.generalhearing.com
Revision No. SP-V001-170621
MADE in USA
Physician Direct Hearing Aid
OWNER’S MANUAL
Simplicity ProTM

Device Information
Left serial no.
Right serial no.
Purchase date:
Purchase location

26
Simplicity Pro Warranty Policy
This “Limited Warranty” as dened in the Consumer Product Warranty
and Federal Trade Commission Improvement Act gives you specic legal
rights. You may have additional rights which vary from state to state.
Service Labor:
For a period of 2 years from the consumer’s original purchase date,
General Hearing will service your hearing device at no charge as a
result of defective parts or workmanship.
This warranty does not cover: damage related to customer neglect
which includes but is not limited to: damage by water or pets, damage
by home repairs (opening device casing), accidental damage (sit or
step on device). Loss of product is not covered by this warranty, a
separate Loss & Damage policy must be purchased.
Device components:
Defective parts will be replaced at no charge with new or equivalent
parts for 2 years from the consumer’s original purchase date.
Any replacement parts are warranted for the remaining portion of the
original warranty period.
Welcome to
General Hearing...
A growing family of thousands of satised customers currently
using quality hearing aids made in the USA by General Hearing
Instruments!
The Simplicity Pro is a mini digital OTE device that is specically
designed for those who need help with a high frequency hearing
loss and still enjoy an active lifestyle.
Please review the Quick-start Guide and Owner’s manual.
They contain valuable information that will help you achieve the
full benet from your new hearing aid and how to properly care for
it. As a valued customer of General Hearing, you are entitled to free
lifetime Customer Service Support. See Support Services on page
25 for complete details.
And most importantly... be patient with your new hearing device.
Learning to use it will require a period of adjustment. It may take
some time to become totally familiar with the operation of the
device and hearing certain sounds again.

25
TABLE OF CONTENTS
Device Reference ................................1
Battery Information ............................2
Battery Installation..............................3
Battery Check .......................................4
Device Color Code .............................5
Device Insertion ..................................6
Device Insertion ..................................7
Device Operation ................................8
Volume Control....................................9
Using the Multi-tool ...........................10
Wax Blockage........................................11
Polytube Care .......................................12
Polytube Care .......................................13
Device FAQ’s..........................................14
Troubleshooting .................................15
Device Feedback..................................16
Precautions............................................17
Important Notice.................................18
Important Notice con’t......................19
Warning to Dispensers ......................20
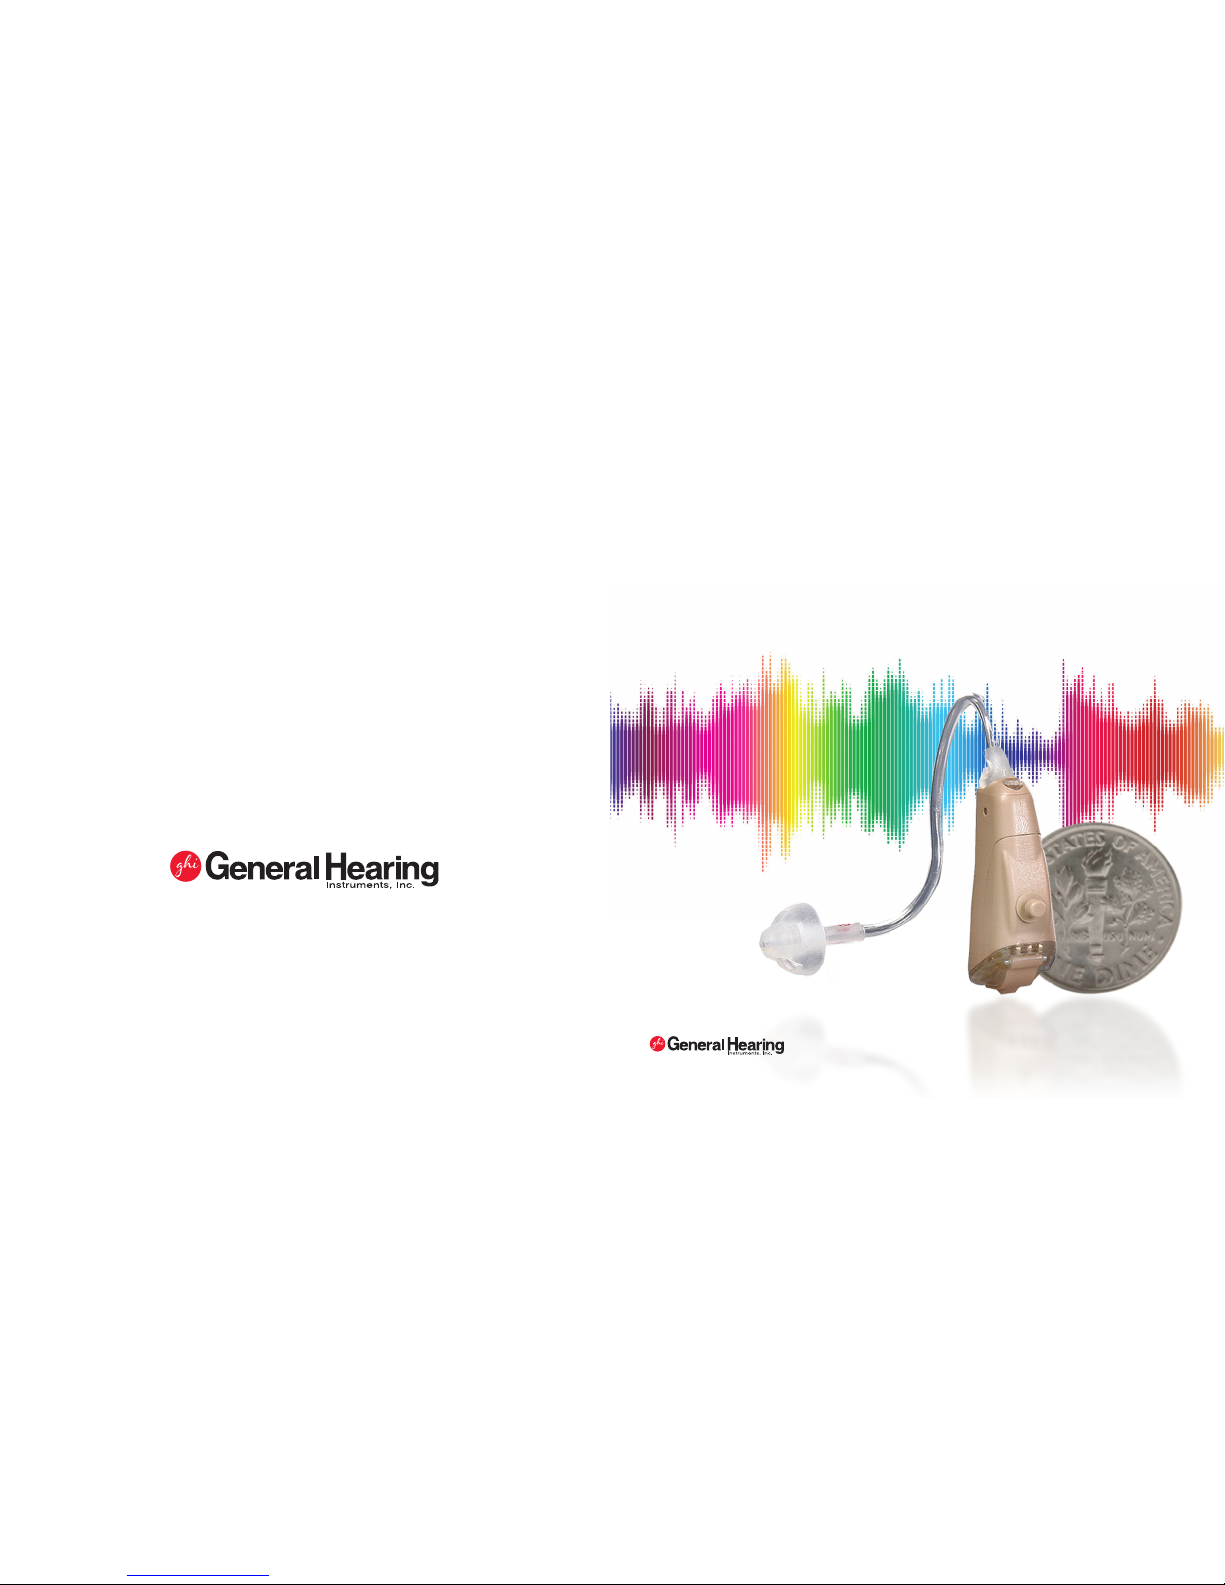
About Your Hearing Device .............21
Performance Data ...............................22
Performance Data con’t......................23
Performance Data con’t......................24
Repair Service .......................................25
Warranty Coverage ............................26
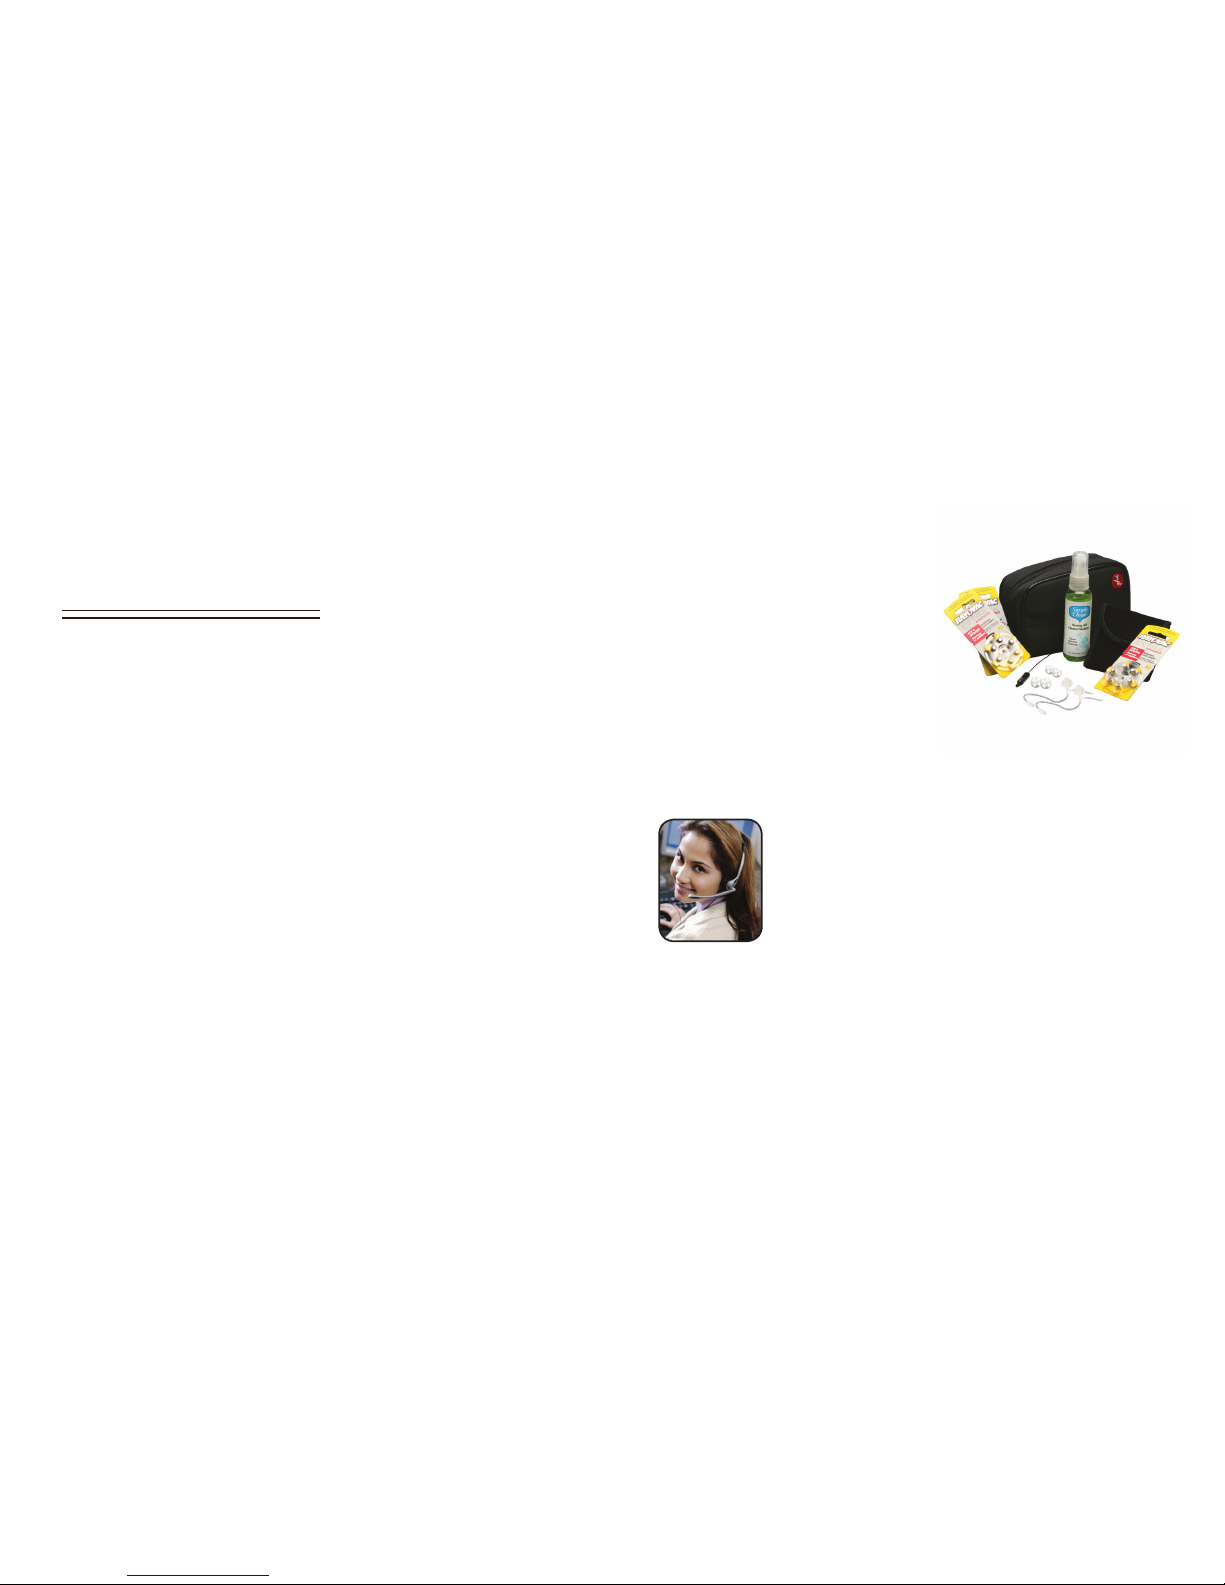
Help with your new device is just a phone call away!
Our Service Center will quickly assist you with device
service needs. Our caring support team can personally
answer questions you may have regarding the use or
repair of your device. Our service center also oers a
complete line of accessories and original replacement
Customer support call toll-free!
(877) 763-8327
• Product Assistance
• Device Repairs
• Accessories
Call: (877) 763-8327 (customer service)
Website: www.generalhearing.com/direct
Simplicity ProTM
Device Accessories &
Customer Support
We carry a complete line of replacement
parts, cleaning supplies, and batteries for
Simplicity Pro hearing devices.

24 1
* Color of actual device may
vary. A beige product is used in
this manual for demonstration
purposes.
DEVICE COMPONENTS
1. Micro Polytube Ear hook
2. Left/Right Color Code
3. Sound Port
4. Dome Flex Tip
5. Retention cord
6. Battery Compartment
7. Volume Select Button
8. Microphone Port
100
90
80
70
60
5060708090
(dbSPL)
MAX OSPL90 : 106.3 dB
AT 800 Hz.
HF AVG 100.6 dB
HF AVF F.O.G. 10.1 dB
Reference Test Gain
Target: 23.6 dB
Measured: 18.2 dB
Response Limit: 45.3 dB
F1 = 200 Hz
F2 = 7,500 Hz
Averaging Frequencies
1000 Hz
1,600 Hz
2,500 Hz
THD FREQ SRC
0.2% 500 Hz. 70 dB
0.1% 800 Hz 70 dB
0.3% 1,600 Hz65 dB
Freq. 2000 Hz
Attack 52 mS
Release 90 mS
1
2
3
4
5
6
7
8
6
Eq. Input Noise 25.7 dB
Battery (1.3V) 0.82 mA
DEVICE REFERENCE
DEVICE DATA

223
120
110
100
90
80
70
60
50
(dB)
OSPL 90 Curve RESP Curve
Multi-curve Graph
The graph shown on the right
reects typical Smart Touch
performance at each of the four
volume levels. The data were
gathered using a standard 2cc
coupler. Note that the curves were
obtained with an input signal of
composite noise with an intensity
of 65 dBSPL.
The curve with the least amount of
overall gain (Composite Curve)
represents Memory 1. Curve 3, with
the most amount of overall gain,
represents Memory 4. The overall
frequency response remains
constant across memories, and that
gain is the only variable.
Your Simplicity Pro device uses a size #10
hearing aid battery (yellow tab).
Do not remove the pull-tab o the back of the
battery until you are ready to install it in the
device. This will provide the longest possible
operating life.
+
To install a zinc-air battery:
1. Peel o the paper activation tab
2. Allow the battery to “breathe”for two
minutes before installing into your hearing
device. See page 3 for installation.
Positive side
of battery
Save battery life! Be sure to fully open the battery door when the device
is not in use. This will turn the device “o” and extend the battery life.
BATTERY INFO DEVICE DATA
Low Battery Alert
Your Simplicity device is equipped with a Low Battery Warning
system. The device will emit a beeping sound “beep, beep, beep...
beep, beep, beep”when the battery is low on power. If the battery
is not changed within a short period of time after hearing the
warning beep, the device will automatically shut o.

22 3
To install a battery
Be sure battery activation tab is removed
(page 2). Open the battery door by placing
your thumbnail under the lip of the door
and gently pull the door out. The battery has
two distinct sides. The positive side (+) is at
and the negative side (-) is slightly rounded.
Insert the round side rst into the battery
door.
If properly installed, the at side should be
ush with the top of the battery door. The
battery door should easily snap shut. Do not
force the door to close, damage to the
device may result.
To remove the battery
open the battery door, turn the device over
to dump the battery in your other hand. Use
the magnetic end of the utility brush to
easily remove the battery without risk of
dropping it.
50
40
30
20
10
0
-10
-20
(dB)
Composite Curve 1
Curve 2 Curve 3
Composite (memory 1)
Source...........................65.0 dB
Peak...............................12.9 dB
Peak Frequency...... 3,100 Hz
RMS Out.......................72.5 dB
Noise Reduction..........0.0 dB
Curve 1 (memory 2)
Source............................ 65 dB
Peak.............................16.7 dB
Peak Frequency.....3,100 Hz
RMS Out.....................75.7 dB
Noise Reduction........ 0.0 dB
Curve 2 (memory 3)
Source............................65 dB
Peak............................ 20.6 dB
Peak Frequency.3,100.0 Hz
RMS Out.................... 79.8 dB
Noise Reduction........0.0 dB
Curve 3 (memory 4)
Source.......................... 65.0 dB
Peak..............................24.8 dB
Peak Frequency.. 3,100.0 Hz
RMS Out...................... 83.8 dB
Noise Reduction..........0.0 dB
DEVICE DATA INSTALL A BATTERY

421
To ensure your hearing device has a good
battery, perform a quick sound test...
1. Insert a fresh battery into device and close the
door. The device will always start in volume
level one (one beep), the lowest volume level.
2. Cup the device in your hand and hold it close
to your ear. You should hear a high-pitched
sound called feedback.
3. If you do not hear anything, check to ensure
the battery is correctly installed and the door is fully closed. You may
need to press the Volume Select button to change the volume to a
higher volume level.
If you still don’t hear any whistling, then try a fresh battery. You may
need to try more than one battery from the battery pack.
If there is no sound coming from the device, free customer support is
available to you (see page 25 for contact information).
Try to wear your hearing aid every day!
Occasional use will not allow you to attain
full benet from your hearing aid. Allow for
a period of adjustment in your routine
listening environment. It may take a period
of time to become fully adjusted to hearing
certain sounds again.
If you have purchased a single aid, we
suggest that you consider purchasing a
device for your other ear. Amplication for both ears provides a sense of
hearing balance and allows you to reduce the amount of volume needed by
a single device.
Hearing aids will not restore normal hearing and will not prevent or
improve a hearing impairment. Use of a hearing aid is only part of hearing
habilitation and may need to be supplemented by auditory training and
instruction in lip reading.
Discontinue use of your aids(s) and consult with your physician if you
notice any of the following symptoms: skin irritation, increased production
of earwax, and any pain associated with the ear.
BATTERY CHECK ABOUT YOUR DEVICE

20 5
A hearing aid dispenser should advise a prospective hearing aid user to
consult promptly with a licensed (preferably an ear specialist) before
dispensing a hearing aid if the hearing aid dispenser determines through
inquiry, actual observation, or review of any other available information
concerning the prospective user, that the prospective user has any of the
following conditions:
• Visible congenital or traumatic deformity of the ear.
• History of active drainage from the ear within the previous 90 days.
• History of sudden or rapidly progressive hearing loss within 90 days.
• Acute or chronic dizziness.
• Unilateral hearing loss of sudden or recent onset within the previous 90 days.
• Audio metric air-bone gap equal to or greater than 15 decibels at 500 hertz (Hz),
1,000 Hz, and 2,000 Hz.
• Visible evidence of signicant cerumen accumulation in the ear canal.
• Pain or discomfort in the ear.
How to identify a left or right device.
Simplicity devices have been color coded
to help distinguish a left ear device from a
right one. Look closely at the base of the
Sound Port Dome. It will be imprinted with
either red or blue stamp. The red color
indicates the right ear and blue is for the
left.
It is recommended that you change the
poly-tube approximately every three
months or sooner if they crack or become
clogged.
Refer to pages 12 and 13 for proper
cleaning and replacement instructions.
Red or Blue
color stamp
DEVICE COLOR CODE
Look at base
of sound
dome
FOR DISPENSERS

619
Federal law restricts the sale of hearing aids to those individuals
who have obtained a medical evaluation from a licensed physician.
Federal law permits a fully informed adult to sign a waiver statement
declining the medical evaluation for religious or personal beliefs that
preclude consultation with a physician. The exercise of such a waiver
is not in your best health interest and its use is strongly discouraged.
Children with a hearing loss. In addition to seeing a physician for a
medical evaluation, a child with a hearing loss should be directed
to an audiologist for evaluation and rehabilitation since hearing
loss may cause problems in language development and the
educational and social growth of a child. An audiologist is qualied
by training and experience to assist in the evaluation and rehabilitation
of a child with a hearing loss.
1. Ensure that you have the correct de-
vice for your ear: red is for right and
blue for left. Slip the Simplicity behind
the top of the ear with the tubing
hanging down in front of the ear. The
soft dome ex tip should point toward
the opening of the ear canal (Fig. 1).
2. Gently push in the dome ex tip into
your ear canal until the polytube is
ush with the outer ear (Fig. 2). You
may need to pull the top of the ear
with your other hand to allow for
easy insertion into the ear canal. If
the sound dome feels too large for
your ear canal, call customer service
to exchange for a smaller size dome.
DEVICE INSERTION
Fig. 1
Fig. 2
IMPORTANT NOTICE

718
Good health practice requires that a person with a hearing loss have a
medical evaluation by a licensed physician (preferably a physician who
specializes in diseases of the ear) before purchasing a hearing aid.
Licensed physicians who specialize in diseases of the ear are often referred
to as Otolaryngologists, Otologists, or Otorhinolaryngologists. The purpose
of a medical evaluation is to assure that all medically treatable conditions
that may aect hearing are identied and treated before the hearing aid is
purchased.
Following the medical evaluation, the physician will give you a written
statement that states that your hearing loss has been evaluated medically
and that you may be considered a candidate for a hearing aid. The
physician may refer you to an audiologist or a hearing aid dispenser, as
appropriate, for a hearing aid evaluation.
The audiologist or hearing aid dispenser will conduct a hearing aid
evaluation to assess your ability to hear with and without a hearing aid.
The hearing aid evaluation will enable the audiologist or dispenser to
select and t a hearing aid to your individual needs.
DEVICE INSERTION
3. After inserting the dome ex tip into
the ear, push the retention cord up
and over the edge of the lower part
of the ear. It should lie inside the
bottom portion of outer ear (Fig. 3).
The retention cord gently pushes on
the sound dome to ensure it will stay
in position during use.
4. Ensure the device is comfortably seat-
ed behind the upper portion of the
ear. Photo (g. 4) shows a Simplicity
device correctly placed on the ear
with the polytube in place.
Fig. 3
Fig. 4
IMPORTANT NOTICE

817
Device Precautions
1. Do not drop or throw your device. Internal damage may result.
2. Keep your device away from excessive heat (stove tops, hair dryers,
microwave ovens, heat lamps) or in the glove compartment of your car.
3. Do not get your device wet while bathing, showering or swimming.
4. Do not pry open the case of your device or attempt to repair it. This will
void your warranty and possibly cause further damage to the device.
5. Keep all hearing devices out of reach of children and animals.
Battery Warning
• Discard batteries properly, never place in res or near ames
• Never allow children to play with batteries
• Never put batteries in your mouth for any reason
• Check medication before swallowing, batteries could be mistaken for tablets
If a hearing battery has been swallowed...
Call the National Button Battery Ingestion Hot line at:
(202) 625-3333 for counseling on treatment!
DEVICE OPERATION PRECAUTIONS
To turn your device on:
The device is“ON”anytime the battery is installed and the door is fully
closed. The device will always start in volume level 1 (the lowest volume
level). The device will use battery power any time the battery door is
closed with a battery in the device. Read page 9 for volume adjustment
instructions.
To turn your device o:
Open the battery door so that the battery is no longer making contact
with the device. It is now in the “OFF”position. Do not force the door to
open beyond its normal position, damage to the door could result.
Note: If you detect a high pitched whistling sound (feedback) coming
from the device, check to ensure the sound dome is fully inserted into
your ear.
Extend your battery life!
Open the battery door
when device is not in use
to extend battery life.
Device in “OFF” position

9
Your device has four (4) preprogrammed volume
settings. Each time you push down on the volume
select button the volume will increase or decrease.
Simply push in and release the volume button with
the tip of your nger. You will hear one to four
“beeps” each time you press the volume button (see
chart below).
If you start to hear “beeps” several minutes after
making a volume selection, this may be the Low
Battery Alert System. Refer to page 2 for details.
“1 – beep”
“2 – beep, beep”
“3 – beep, beep, beep”
“4 – beep, beep, beep, beep”
Push the button“in”
towards the device
VOLUME CONTROL
DEVICE FEEDBACK
16
What is that squealing sound?
If you hear a constant squealing sound coming from your device, that is
called “feedback”. This caused by the amplied sounds from the sound
port being reected back into the device microphone. Inserting the
device with the volume too high or having your hand too close will
cause this eect. This is normal occurrence with amplication devices.
If your are experiencing any feedback problems, try one or more of
the following suggestions:
• check to ensure dome tip is fully inserted into your ear canal
• make sure left device (blue) is in left ear and (red) for the right
• change the volume level
• inspect the sound port for ear wax blockage
Using the telephone
Your hearing device allows you to use the telephone in a completely
normal manner. Place the receiver to your ear as usual. If you hear a
high-pitched whistling noise (feedback) tilt the receiver slightly away
from your ear until the noise stops.
If you hear...
One “beep”indicates the
lowest volume setting.
Four“beeps” is the highest
volume setting.

15
MULTI-TOOL USE
Problem Cause Remedy
No sound ...................Battery dead Replace battery
Blocked opening Clean tubing (page 13)
Battery upside down Check battery installation
Not loud enough ........Volume too low Select higher volume level
Battery weak Replace battery
Blocked sound port Clean tubing (page 13)
Sound dome not in ear Push sound dome into ear
Intermittent sound ......Defective battery Replace battery
Static..........................Battery contact dirty Open and close battery door
4-5 times to clean contacts
Ear wax is the #1 problem for any hearing device.
The Simplicity Pro device is made with professional quality components.
If your device is not functioning properly, it is almost always due to wax
blockage or a dead battery. Ear wax can quickly block the sound port of a
new hearing device. This can cause the device to sound weak or dead. If
you experience problems with earwax, consider having your ears cleaned
by a health professional.
TROUBLESHOOTING
The multi-function cleaning tool can assist
you with daily device maintenance and easy
battery installation. Use the brush to“sweep”
away debris away from the microphone port
and other areas of the device. The magnet
provides quick and easy battery insertion and
removal.
Smaller hearing aid batteries can be dicult
to handle and can often roll away when
dropped. Use the lament line to clear
blockage in the polytube. Be sure to remove
the tubing from the device before cleaning
the polytube.
10
Polytube cleaning la-
ment
Magnet
Brush

14 11
Inspect for wax blockage daily.
Wax blockage is number one cause for device
problems. Wax in the sound port or tubing
can cause the device to sound weak or appear
to be dead. Inspect the opening of the sound
port dome and polytube for any wax block-
age every night.
The tubing should be clear. If you see any wax
blockage, remove the tubing and clean with
the multi-cleaning tool included in device
package.
Do not use the lament end of the multi tool to clear blockage in the
polytube until the tubing has been removed from the device. This can
cause wax to be pushed inside the device resulting in permanent damage.
To use the cleaning tool
See page 10 for the multi-tool description. Page 12 and 13 describes the
cleaning procedures.
WAX BLOCKAGE
Common Device FAQ’s
What’s that constant“beeping noise”?
Your Simplicity Pro device is equipped with a Low Battery Warning system.
The device will emit a beep (unrelated to a volume change beep) when the
battery is low on power. If the battery is not changed soon after the warning
beep, the device will shut o.
How long will a battery last?
Depending on the amount of daily use, a battery should last approximately
80 hours. Be sure to open the battery door each night after use.
DEVICE FAQ’S
Where can I get replacement parts?
Any internet retailer selling General Hearing brand
devices should oer a complete line of accessories
on their website. Sound domes and polytubes are
available in dierent sizes for added comfort.
Accessories can also ordered by phone, see page
25 for information.

12 13
Removing the polytube
Hold the device in one hand while holding
the polytube (at connector base) in the
other. Pull the polytube and device apart
with a slight twisting motion (g. 1).
Be sure to pull at the base of the tube where
it inserts in to the device, otherwise damage
to the tubing could occur.
Cleaning the poly-tube
Slowly insert the cleaning lament end of
the multi-tool into the base of the polytube
(g. 3). Push the lament through the
dome completely to ensure all debris has
been pushed out. If you are unable to clear
the blockage, contact customer support
(see page 21).
Reinserting the poly-tube
Reinsert the ex dome on to the poly-
tube, then insert tubing connector into
opening of the device with a slight back
and forth twisting motion and push into
place. Rotate the poly-tube back to its
original position (g. 4). View the DVD
included with this device for demonstration
of these procedures.
Replace the polytube if it is bent, cracked,
or discolored.
The polytube base should“pop out”if it is
removed correctly (g.2).
If needed, remove the dome ex-tip from
the poly-tube by gently twisting the
poly-tube and pulling the dome tip. Do not
pull the dome by the outer edge, hold the
dome at the base where it connects to the
tubing.
Fig. 1
Fig. 2
Fig. 3
Fig. 4
POLYTUBE CARE POLYTUBE CARE
Other manuals for Simplicity Pro
1
Table of contents
Other General Hearing Hearing Aid manuals