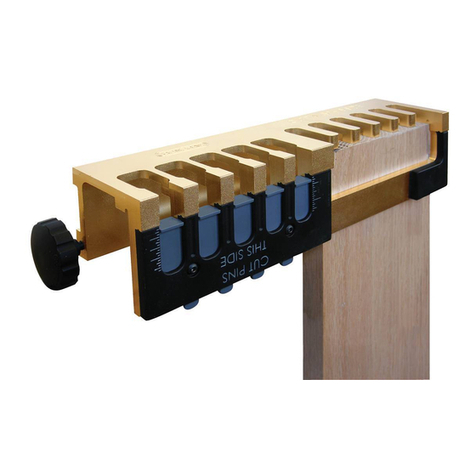
General DOVETAILER 860 User manual

Users ManUal
No. 860
Please reaD THese InsTrUCTIOns FUllY BeFOre UsInG THIs JIG
FOr MOre InFOrMaTIOn anD vIDeO InsTrUCTIOns vIsIT
www.GeneralTOOls.COM/DOveTaIler2
THE
DOVETAIL JIG
860 Dovetailer Manual R4-120811_a b 12/8/11 3:07 PM Page 1

"!'!'&
:@>;0A/@5;:
-<-/5@E-:0&<1/525/-@5;:?
*4-@O?5:@41535@
:-@;9E;2@41")'% 53
;B1@-58%;A@1>5@-:01->5:3?
#>1<->5:3@41%;A@1> N
&-21@E"B1>B51C
(?5:3@41A58@:1<@4-A31
%;A@1>&1@(< N
A@@5:3;5:@? N
A@@5:3--8285:0;B1@-58;5:@ N
A@@5:3;5:@?;:31>'4-:@4153"<1:5:3
A@@5:3-A88'4>;A34;B1@-58;5:@
031@;031;5:@5:3
A@@5:3-;D;5:@ N
A?@;91>&A<<;>@
*->>-:@E:2;>9-@5;:
%1@A>:2;>%1<-5>#;85/E
(?1>O? -:A-85:&<-:5?4 -:A-818(?A->5; N
(?1>O? -:A-85:>1:/4A501OA@585?-@5;: N
860 Dovetailer Manual R4-120811_a b 12/8/11 3:07 PM Page 2

!'%"('"!
Thank you for purchasing General Tools & Instruments’ DOVETAILER Dovetail Jig. A simple and
easy way to make professional dovetail joints, the DOVETAILER enables you to cut half blind, full
through and box joints as well as edge to edge joining. The DOVETAILER can be used on a router
table (Fig. 1 or free hand with a hand-held router (Fig. 2).
FULL THROUGH HALF BLIND
BOX JOINT EDGE JOINT
FIG. 2
FIG. 1
860 Dovetailer Manual R4-120811_a b 12/8/11 3:07 PM Page 3

#',!&#'"!&
Accommodates stock from 1/2 in. to 1 in. thick.
*'O&!''
The fully assembled jig
One 14° x 1/2 in. dovetail router bit
with guide bearings (1/4 in. shank)
One alignment tool
One allen wrench
Face Clamp
Thumb Screws (4)
Face Clamps (4)
It is highly recommended
that you familiarize
yourself with the
nomenclature in Fig. 3
before proceeding.
FIG. 3
DOveTaIl JIG asseMBlY
1. Remove all components from hardware bag and ensure that all are present and undamaged.
2. Install thumb screws into tapped holes as shown. Screw locations may be adjusted as
needed. (FIG. A)
3. Press non-marring ends onto thumbscrews. (FIG. B)
FIG. A FIG. B
860 Dovetailer Manual R4-120811_a b 12/8/11 3:07 PM Page 4

!'" ,"'")'%
")'&& ,
NOTE: Your jig comes fully assembled for use. The addition of the router control knobs aids in the
use of this jig on router tables.
DOveTaIl rOUTer BIT anD BearInGs
Included bearings are 1/2 in. outside diameter (OD) and 1/4 in. inner diameter (ID). Router sleeves
or bushings can be used in place of the guide bearings as long as they are also 1/2 in. OD.
Included router bit is 14˚ x 1/2 in. Other bits can be substituted provided they have a 1/4 in.
diameter shank and have no greater diameter than 17/32 in.
Caution: eep fingers on control knobs only when using the jig on a router table.
FIG.4
– Jig Assembly
– Depth Plate
– Template Position Rules
–
Depth Adjuster Plate
– Depth Measuring Working Surface
– Edge Alignment Teeth
– Template Lock Screws
– Face Clamp
– Face Clamp Thumb Screws (4)
2A
3A
3B
860 Dovetailer Manual R4-120811_a b 12/8/11 3:07 PM Page 5

#%#%!'%"('%
saFeTY OvervIew
1. KNOW YOUR ROUTER. Read the owner’s manual that came with your router before
you use it. Understand the machine’s applications and limitations, as well as the
specific potential hazards inherent in its use. Before using the router, check that none
of its moving parts are broken, loose or misaligned.
NOTE: General Tools & Instruments is not responsible for router misuse or the disregard of
standard safety precautions associated with using a router.
UsInG THe BUIlT-In DePTH GaUGe
The built-in Depth Gauge is used to set both the depth of the Dovetail Cutter during router setup
as well as to control the length of the pins during cutting. (FIG. 5).
1. Loosen the Template Lock Screws
on the face of the Depth Plate
.
2. Align the Depth Measuring Working Surface with the desired measurement on the
Template Position Rule .Make sure both sides are at the same measurement.
3. Tighten the Template Lock Screws
to lock the Depth Adjuster Plate in position
.
rOUTer seTUP
1. Insert the dovetail cutter with
its guide bearings fully into the
router.
2. Set the height of the Dovetail
Cutter Bit using the Depth
Measuring Working Surface .
(FIG.6)
For nstruct ons on sett ng the
depth gauge see USING THE
DEPTH GAUGE above.
3A
2A
3A
FIG. 6
FIG. 5
860 Dovetailer Manual R4-120811_a b 12/8/11 3:07 PM Page 6

OUT IDE FACE
FIG. 7
3. FIG.7 shows the dimension of the
dovetail joint affected by the
cutter height.
NOTE: Setting this height affects
the length of the Tails and the depth
of the Pins.
4. Now that the router is set up,
you need to reset the Depth
Adjuster Plate
for the length
of the pins. (FIG. 8) Set the
depth gauge for the length of
the “PINS”. This should be
equal to the thickness of the
wood used for the “TAILS”
board. (FIG. 9)
(''!"!'&
Note: Always cut the “TAILS” side of the joint first.
CUTTInG a HalF BlInD DOveTaIl JOInT
1. When cutting a half-blind dovetail joint, using the included
dovetail cutter, start with a bit height setting equal to the
depth of the joint you desire. (FIG. 7)
2. Cut a test joint with scrap wood to confirm the fit of the
joint. If the boards do not fit together easily, the joint
may be too tight. The joint can be made looser or
tighter by setting the cutter depth shallower or deeper
as shown in FIG. 8.
3. Mark the center of your board, then center the mark on
any one of the guide teeth in the “TAILS” portion of the jig.
4. Make sure the outside face of the board faces inwards
towards the clamp.
5. Tighten.
FIG. 9
TAIL
PIN
FIG. 8
860 Dovetailer Manual R4-120811_a b 12/8/11 3:07 PM Page 7

6. Clamp the board to a workbench or
secure it in a vice as shown (FIG. 10)
or if using a router table, make sure
the face saying “cut tails this side” is
faced to the router table (FIG. 11).
7. Cut the “TAILS” portion of the joint
always keeping the guide bearings
against the template edges. When
finished, remove “TAILS” board from
the jig.
8. Then to cut the “PINS”, loosely
clamp the “PINS” board into
the jig with the outside face
pointing inward.
9. To align the edges, insert the
tails of the “TAILS” board
into the Edge Alignment
Teeth on the top of the
Adjuster plate
with the
rounded side in (inside face),
and slide the loosely
clamped “PINS” board to
align its edges with the
edges of the “TAILS” board.
Now securely tighten the
clamps and remove the
“TAILS” board
(FIG. 12).
FIG. 11
FIG. 12
3B
FIG. 10
860 Dovetailer Manual R4-120811_a b 12/8/11 3:07 PM Page 8

10. Make all cuts to the pins board. For those cuts, the router should ride on the surface
marked “cut pins this side” shown in FIG. 13 & 14. Be sure to follow the jig profile.
11. Dry fit the two sections together. If problems arise, file or trim the joint as needed.
FIG. 13
FIG. 14
860 Dovetailer Manual R4-120811_a b 12/8/11 3:07 PM Page 9

CUTTInG JOInTs lOnGer THan THe JIG OPenInG
Joints longer than the opening must be cut in multiple continuous segments. To align the jig with
the previous cut, the aligning tool provided must be used.
1. Move the previously cut wood in the jig and position the last slot from the previous cut in
the last channel of the jig, either going to the right or to the left.
2. Loosely clamp the wood in the jig.
3. Insert the aligning tool into the slot to properly align the wood with the jig. (FIG. 15)
4. Tighten the clamps securely and continue cutting.
5. Repeat as necessary.
CUTTInG a FUll THrOUGH DOveTaIl JOInT
Th s requ res a doveta l cutter b t w th a depth equal to or
greater than the wood th ckness you are cutt ng.
Note: Do not use router bit with m ximum di meter
gre ter th n 17/32 in.
The steps required to cut a full through joint (FIG. 16) are the
same as to those described in the previous section CUTTING A
HALF BLIND DOVETAIL JOINT, with the following exceptions:
When cutting the “PINS” portion of the joint, set the depth
gauge equal to the thickness of the “TAILS” board.
TAIL PIN
FIG. 15
FIG. 16
FIG. 15
860 Dovetailer Manual R4-120811_a b 12/8/11 3:07 PM Page 10

eDGe TO eDGe JOInTInG
1. When cutting an edge joint, the round-over
created by the dovetail jig must be eliminated in
order to join the two pieces of wood using a
Dovetail-Joint. (FIG.17)
2. Insert the first board into the “TAILS” section of
the Dovetail Jig along with 1/4 in. thick shim to
offset the board away from the rounded postion
of the template in the jig. (FIG. 18)
3. Align one edge of the board to be cut with the
outside edge of the jig. (FIG. 18)
4. Tighten the clamps securely and make all cuts.
5. Insert the second board into the jig along with the same shim and offset one edge of the
board 1/2 in. in from the outside edge of the jig. FIG. 19. This spacing will offset the
“TAILS” of the second board so that they align with the slots cut into the first board.
FIG. 17
FIG. 18
860 Dovetailer Manual R4-120811_a b 12/8/11 3:07 PM Page 11

CUTTInG a BOx JOInT
• When cutting a box joint, only use the “TAILS” portion of the jig for all cuts.
• For box jointing, use a 1/2 in. diameter straight bit with a 1/4 in. shank with either a 1/2 in.
O.D. guide bearing or a 1/2 in. O.D. guide sleeve insert in your router. Set the depth of the
cutter to equal, or slightly greater than the thickness of the wood you are joining.
T p: Always make sure that the gu de bear ng or the gu de sleeve tracks n the gu de slot.
• To avoid the “round-over” part of the jig’s guide finger, use a 1/4 in. thick shim between
the wood and the inner surface of the jig to offset the board from the “round-over”.
T p: If you’re do ng more than one jo nt, you can use a p ece of double-face tape to hold
the sh m n place.
860 Dovetailer Manual R4-120811_a b 12/8/11 3:07 PM Page 12

• Cut the slots in the first board with the board edge set flush with the right hand edge of the
jig. (FIG. 20). Make the entry and exit cuts using the left side of the guide slot only (FIG. 20)
• For the joining board, clamp it in the jig with its edge offset 3/8 in. in from the right hand
edge of the jig. Make entry and exit cuts using the right side of the guide slot only (FIG. 21).
• Dry fit the joint before gluing to be sure it is tight. If necessary, use a wood mallet to bring
the two parts together.
FIG. 20
FIG. 21
860 Dovetailer Manual R4-120811_a b 12/8/11 3:07 PM Page 13

(&'" %&(##"%'
Please visit our website at www.generaltools.com/dovetailer2 to obtain additional woodworking
information, instructional videos and product manual.
*%%!',!"% '"!
The No. 861 Dovet iler
II
Dovet il Jig Kit from General Tools & Instruments is warranted to the
original purchaser to be free from defects in material and workmanship for a period of one year.
Subject to certain restrictions, General will repair or replace this product, if, after examination,
it is determined by General to be defective in material or workmanship.
%'(%!"%%#%#",
Every effort has been made to provide you with a reliable product of superior quality. However, in
the event your instrument requires repair, please contact our Customer Service to obtain an RGA
(Return Goods Authorization) number before forwarding the unit via prepaid freight to the
attention of our Service Center at this address:
General Tools & Instruments
80 White Street
New York, NY 10013
212-431-6100
Remember to include a copy of your proof of purchase, your return address, and your phone
number and/or e-mail address.
860 Dovetailer Manual R4-120811_a b 12/8/11 3:07 PM Page 14

No. 860
lea COMPleTaMenTe las InsTrUCCIOnes anTes
De UTIlIZar esTa PlanTIlla
Para MÁs InFOrMaCIÓn Y vIDeOs InsTrUCTIvOs vIsITe
www.GeneralTOOls.COM/DOveTaIler2
THE
DOVETAIL JIG
ManUal Del UsUarIO
860 Dovetailer Manual R4-120811_a b 12/8/11 3:07 PM Page 15

Q!
:@>;0A//5L:
-<-/50-0E1?<1/525/-/5;:1?
;:@1:50;0186A13;018-<8-:@588-
:-@;9J-018-<8-:@588-")'%
;65:1@1?E2>1?-<->-/;8-?01958-:;
#>1<->-/5L:018-2>1?-0;>- N
1050-?31:1>-81?01?13A>50-0
(?;01891050;>01<>;2A:050-05:/;><;>-0;
6A?@1018-2>1?-0;>- N
;>@101A:5;:1? N
;>@101A:-A:5L:/;8-01958-:;5:B5?5.81 N
;>@101A:5;:1?=A11D/101:8--.1>@A>-018-<8-:@588-
;>@101A:-A:5L:/;8-01958-:;<-?-:@1
(:5L:.;>01/;:.;>01
;>@101/-6- N
?5?@1:/5--8/851:@1
:2;>9-/5L:013->-:@J-
#;8J@5/-0101B;8A/5L:<->->1<->-/5;:1?
860 Dovetailer Manual R4-120811_a b 12/8/11 3:07 PM Page 16

!'%"(R!
Gracias por adquirir la Plantilla para colas de milano DOVETAILER de General Tools & Instruments.
El DOVETAILER, una solución sencilla y fácil para hacer uniones de cola de milano, le permite cortar
uniones invisibles, pasantes y de caja, así como uniones de borde con borde. El DOVETAILER puede ser
utilizado en una mesa fresadora (Fig. 1) o con una fresadora manual (Fig. 2).
PA ANTE INVI IBLE
CAJA UNIÓN DE BORDE
FIG. 2
FIG. 1
860 Dovetailer Manual R4-120811_a b 12/8/11 3:07 PM Page 17

#,&#"!&
Acomoda piezas desde 1/2 pulg. hasta 1 pulg. de grueso y de cualquier medida de largo.
"!'!"("#!'
La plantilla completamente armada
Una fresa de 14° x 1/2 pulg. con cojinetes
de guía (vástago de 1/4 pulg.)
Una herramienta de alineación
Una llave Allen
Tornillos de mano
para las tenazas (4)
Tenazas (4)
Es recomendable que antes
de continuar se familiarice
con la nomenclatura que
aparece en la Fig. 3.
COnJUnTO De COla De MIlanO
1. Saque todos los componentes de la bolsa y verifique que no falte nada y que no estén dañados.
2. Instale los tornillos de ajuste manual en los orificios roscados como se indica. Se puede cambiar la
ubicación de los tornillos si es necesario. (Fig. A)
3. Presione los extremos sin marcas con los tornillos de ajuste manual. (Fig. B)
FIG. 3
FIG. A FIG. B
860 Dovetailer Manual R4-120811_a b 12/8/11 3:07 PM Page 18

2A
3A
FIG. 4
!'" Q#!'")'%
"!(!'"#!'"& !"
NOTA: Su plantilla viene completamente armada para usarse. La adición de las perillas de control para la
fresadora facilita el uso de esta plantilla en mesas fresadoras.
COJIneTes Y Fresa Para COlas De MIlanO
Los cojinetes que se incluyen son de 1/2 pulg. de diámetro externo (DE) y 1/4 pulg. de diámetro interno
(DI). En lugar de los cojinetes de guía se pueden utilizar mangos o casquillos fresadores siempre y cuando
tengan también 1/2 pulg. de DE.
La fresa que se incluye es de 14° x 1/2 pulg. Puede ser reemplazada por otras fresas siempre y cuando
tengan un vástago de 1/4 de pulg. de diámetro y un diámetro no mayor que 17/32 pulg.
Atención: Mantenga los dedos en las perillas de guía únicamente cuando esté utilizando la plantilla en
una mesa fresadora.
– Ensamblaje de la plantilla
– Placa de profundidad
– Reglas de posicionamiento del patrón
– Placa de ajuste de profundidad
– Superficie de trabajo para medición de
profundidad
– Dientes de alineación de borde
–
Tornillos de cierre
–
Tenazas
–
Tornillos de mano para las tenazas (4)
3B
860 Dovetailer Manual R4-120811_a b 12/8/11 3:07 PM Page 19

#%#%R!%&"%
MeDIDas Generales De seGUrIDaD
1. CONOZCA SU FRESADORA. Antes de usar su fresadora, lea el manual del usuario que acompaña a la
misma. Familiarícese a fondo con las aplicaciones y limitaciones de la máquina, y con los peligros
potenciales específicos asociados a su uso. Antes de utilizar la fresadora, verifique que ninguna de
sus partes móviles esté rota, floja ni desalineada.
NOTA: General Tools & Instruments no se responsabiliza por el uso incorrecto de la fresadora ni por
negligencias en la aplicación de las medidas de seguridad estándar para el uso de una fresadora.
UsO Del MeDIDOr De PrOFUnDIDaD InCOrPOraDO
El medidor de profundidad incorporado se utiliza tanto para establecer la profundidad de la cuchilla de
corte de colas de milano durante la preparación de la fresadora, como para controlar la longitud de las
clavijas durante el corte. (FIG. 5).
1. Afloje los tornillos de cierre en la superficie de la placa de profundidad .
2. Alinee la superficie de trabajo de medición de profundidad con la medida deseada en la regla de
posicionamiento del patrón . Asegúrese de que ambos lados tengan la misma medida.
3. Apriete los tornillos de cierre para sujetar la placa de ajuste de profundidad en esa posición .
aJUsTe De la FresaDOra
1. Inserte completamente la
cuchilla de corte de colas de
milano con sus cojinetes de guía
en la fresadora.
2. Establezca la altura de la fresa
de corte de colas de milano
utilizando la superfice de
trabajo de medición de
profundidad . (FIG. 6)
Para conocer las nstrucc ones
acerca del ajuste del med dor
de profund dad consulte la
secc ón anter or USO DEL
MEDIDOR DE PROFUNDIDAD.
3A
2A
3A
FIG. 6
FIG. 5
860 Dovetailer Manual R4-120811_a b 12/8/11 3:07 PM Page 20
Other manuals for DOVETAILER 860
1
Table of contents
Languages:
Other General Tools manuals

General
General E Z Pro User manual

General
General DOVETAILER 860 User manual

General
General F-36 T-28 User manual

General
General DOVETAILER II User manual

General
General P18HPART User manual

General
General MDF15 User manual

General
General 854 User manual

General
General 240H User manual

General
General 210 User manual