OPERATING INSTRUCTIONS
For general guidelines on using the probe as an inspection tool, refer to the
Operating Instructions section of your DCS1800 or DCS1800ART user’s manual.
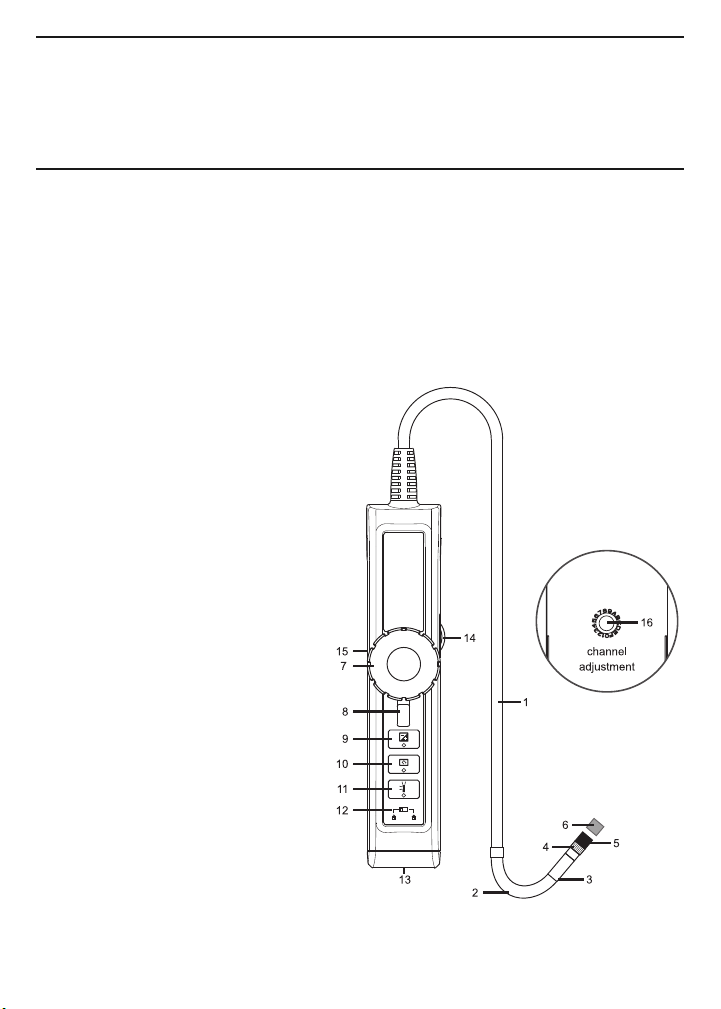
Before attempting to articulate the probe,
make sure that the lever below the
articulation angle control wheel
(Fig. 1, Callout 8) is pointing downward.
To bend the probe neck (Fig. 1, Callout 2)
and t p to the left, turn the wheel clockwise.
To bend the probe neck and tip to the right,
turn the wheel counterclockwise.
To lock the wheel and the probe’s
art culat on angle, move the lever below
the wheel to the left (see figure above).
To adjust the ntens ty of the LEDs at the tip of the P18HPART, roll the
thumbwheel on the side of the probe controller forward or back.
Remember to remove the red rubber lens cap from the tip of the probe before
using it.
USING THE THREE CONTROL BUTTONS
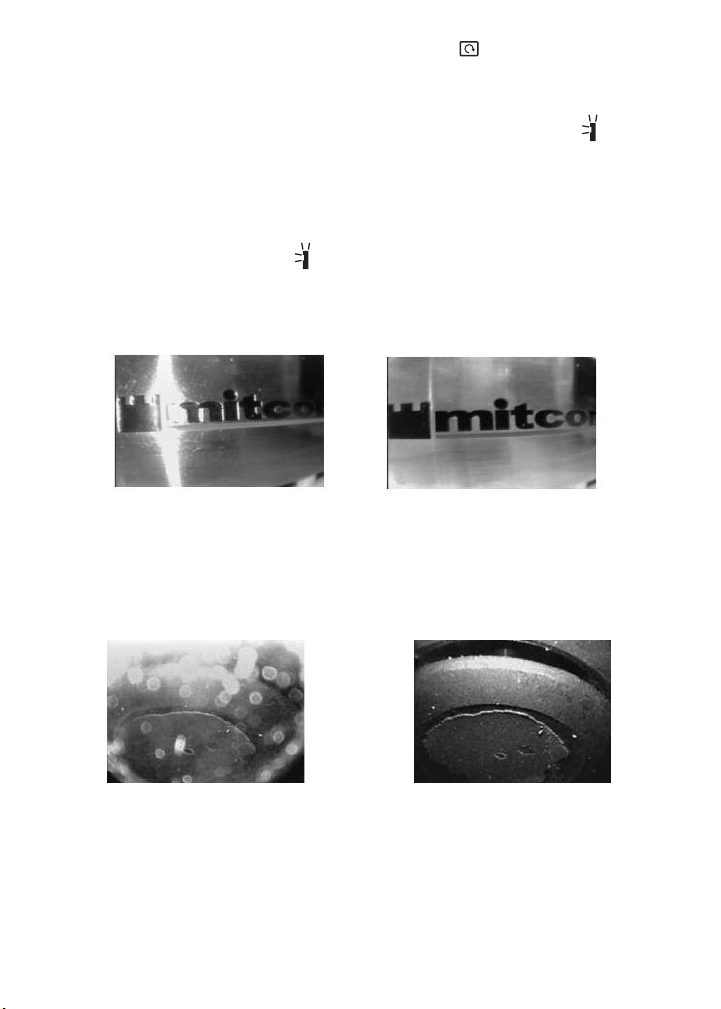
To boost the ntens ty of the three LEDs normally providing camera lighting,
press the button. Doing so lights a red LED behind the button and improves
the brightness of video and images, as shown below.
BEFO E BOOST AFTE BOOST
This feature can help you cope with very low-light conditions. When recording
with the boost feature activated, you must hold the probe very steady or your
videos and images will be blurred.
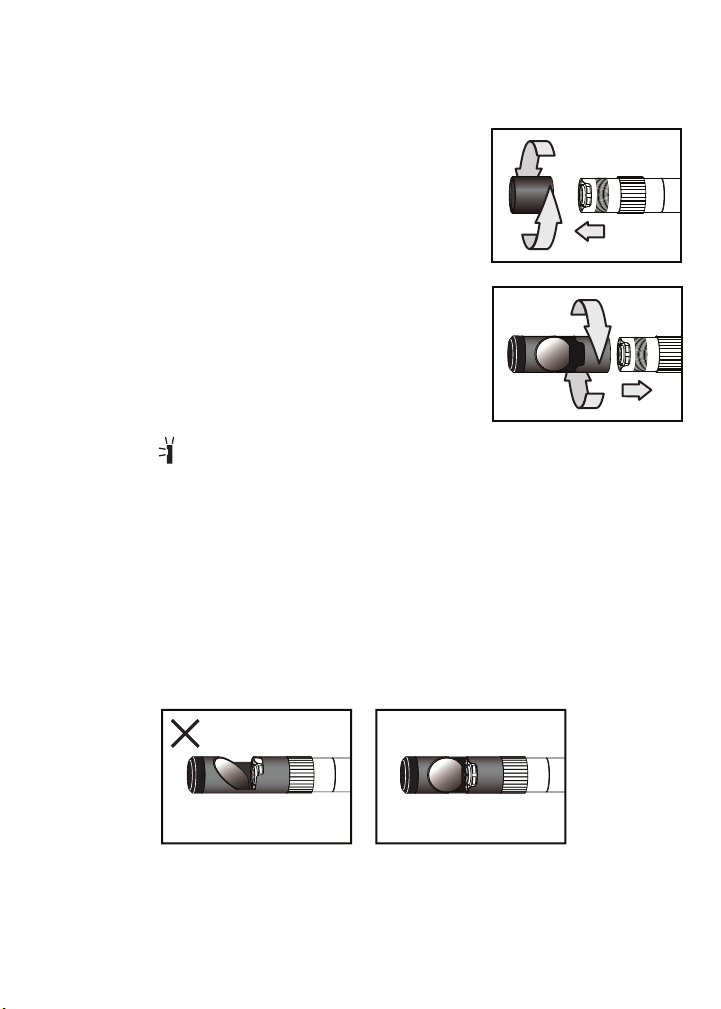
To rotate the probe’s f eld of v ew, use the button. Pressing the button
once backlights the button red and rotates the frame clockwise by 90°.
Pressing it a second time rotates the frame by an additional 90°, in effect
6