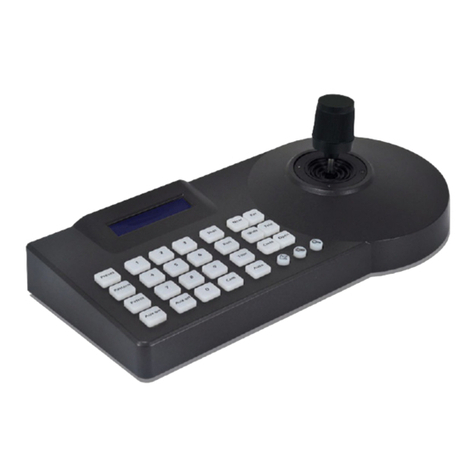
Genie KB-200/IP User manual

User Manual
Please read these instructions carefully before operating the unit
and keep for further reference.
IP and RS485 Joystick
Keyboard Controller
KB-200/IP

2
Please read this instruction carefully before operating the product and keep it for further
reference. All examples and pictures used here are for reference only.
The contents of this manual are subject to change without notice.
The Genie KB-200/IP is an IP keyboard designed to work IP PTZ cameras.
1.1 Product Features
• Supports Onvif protocol
• Supports auto-search on Onvif devices with LAN
• Supports offline search & add on devices
• Supports RS485 cameras (Legacy Mode)
• Support Max 253pcs front-end equipments in one LAN
• Presets, Zoom, Focus, Iris, Wiper and Tour functions
• 160×32(mm) Blue LED PTZ Status display
• Easy camera adding via built in LED browser
1.2 Package Contents
• 1x Network keyboard main frame
• 1x Power adapter
• 1x CD-ROM
• 1x User manual
1.0 Introduction
1.3 Specification
Main Chip Grain GM8126
RS485 1pc 3.81 Pin, TA, TB
RS232 1pc DB9 male pin
Ethernet 1pc Ethernet, IEEE 802.11 b/g/n
Protocols Onvif 2.4
IE Browser Internet Explorer, Firefox, Chrome, Safari
Working Temperature 0°C~55°C
Working Humidity 20% -80%
Storage Temperature -10°C~60°C
Storage Humidity ≤90%RH
Power Supply DC 12V/1A
Certificate CE, FCC, RoHS
Dimensions 320 × 180 × 110 mm
Weight 3Kg

User Manual Point to Point / Multi-Point 3km IP Bridge
3
110mm
180mm
320mm
1.4 Dimensions
1.5 Interface Introduction
No. Description
1Power indicator light
2Network indicator light
3RS232 interface
4RJ45 Network interface
5RS485 interface
6DC12V
7Grounding loop

4
2.1 Keyboard
2.2 LAN
2.0 Connections
Connected to a router or
switch.
Network cable DC12V Power Supply
Router
Switch

5
3.1 Run
1. Connect the keyboard with a 12VDC power supply, connect the network cable into
RJ45 interface on the keyboard and into a network point or network switch.
2. Wait for around 45s for the keyboard to perform startup procedure.
3.2 Search and Add
1. By default the IP keyboard will try and obtain an IP address from a DHCP device on the
network. (If no DHCP server is available a manual IP address will need to be assigned to
the KB-200/IP).
2. After obtaining an IP address, press “Search” button, the device will search for all the
devices on the LAN that support the ONVIF protocol.
3. After the ONVIF search has completed, scroll through the page(s) by pressing the
joystick up and down.
4. Press the “Add” button when the device required with the corresponding IP is
highlighted.
5. Input user name and password for the selected ONVIF device, click the “ENTER” button
to save.
6. After selection the keyboard display automatically returns to previous search list.
7. Users can add other devices as above, and press the “Exit” button if all required
devices have been added.
3.3 Query and Control
1. Press “Query” button to confirm the device which’s been added in the main interface,
scroll through the page by moving the joystick up and down.
2. Scroll the page to the corresponding device’s IP address, press “enter” to connect to
the ONVIF device.
3. The screen should display “Destination IP: 192.168.x.xxx”, indicating a successful
connection. At the same time, the Green LED (on the back of the keyboard) should be
illuminated.
4. If the screen displays “Equipment offline”, Please ensure the keyboard is connect to the
LAN.
5. If the screen displays” Username or Password Error”, Please confirm the added device’s
user name and password are correct.
3.4 Switch
1. When multiple devices have been added to the KB-200/IP, the user can press the
“previous”, “next” buttons to allow quick switching between the ONVIF devices.
2. Once selected you should gain camera control.
3.0 Keyboard Operation

6
4.1 Run
1. Connect the keyboard with a 12VDC power supply, connect the network cable into
RJ45 interface on the keyboard and into a network point or network switch.
2. Wait for around 45s for the keyboard to perform startup procedure.
3. Depending on the LAN address structure the screen will display the Local IP address of
keyboard once assigned by the DHCP server or set manually :192.168.x.xxx”
4. Open an Internet browser page (Microsoft Edge, Internet Explorer, Chrome etc.) Enter
the corresponding Keyboards IP address in the web browser’s address bar. If successful
a login page should be displayed. If no page is displayed ensure your PC’s IP address is
within the same ranges as the KB-200/IP.
5. The default user name is: admin; No Password has been set by default although its
highly recommended at this point to set up a password and keep a note of it for future
reference.
4.2 Search and Add
1. Enter the main page of device, there are four lists: Search Equipment List (Green frame);
Added Device List (Blue frame); Equipment details (Orange frame); Manual add (Yellow
frame).
2. Click the “Search” button to search the LAN, any ONVIF devices found will be displayed
automatically in the green framed box.
3. Select the device you want to add in the “search list”, then click the “Add” button.
To add multiple devices press and hold the “Ctrl” button on the PC’s keyboard while
making your selection.
4. After adding the device(s), click the IP of the device in the “Add Device List”, and edit
information such as username/ password details and associated IP ports.
5. If after adding devices you want to delete them, select the device you want to delete
in the “Add Device List”, and click delete. To delete multiple devices press and hold the
“Ctrl” button on the PC’s keyboard while making your selection.
6. Please click on “Save” after adding, deleting and modifying. If you don’t click the save
button then your selections will be lost.
4.3 Setting
1. The default IP operating mode of the KB-200/IP is DHCP, if “NO” DHCP server is
operating in the LAN, you’ll need to assign the KB-200/IP with static IP address, the IP
address must be within the range of the products you want to control. Please modify
static IP mode in the “Settings” – “LAN Settings” page of the KB-200/IP’s web settings
page, save the settings after editing. The keyboard will re-start after any IP setting
changes.
2. If you need to upgrade the firmware on the KB220-IP, browse to the upgrade file
location, select the correct upgrade file. Once the firmware has updated the device will
re-start automatically once completed.
3. If you need to restart the KB-200/IP for maintenance purposes, you can select “reset”
to restart the device in the page setup or simply power cycle the keyboard’s external
power.
4. The KB-200/IP can also be used as a legacy RS485 keyboard. To select RS485 mode
you’ll need access to the keyboard setting and change the mode from IP – RS485.
Please note this will force the keyboard to restart each time the mode is changed.
4.0 Web Operation

7
1. Please use a standard 12VDC power supply.
2. Please operate in the following temperature/ humidity range.
3. Working Temperature: 0°C-55°C / 14°F- 131°F
4. Working Humidity: 20%- 80% (frostless)
5. Storage Temperature: -10°C- 60°C / 14°F- 140°F Storage humidity: 0–90%(frost-
less).
5.0 Precautions
Table of contents
Other Genie Controllers manuals