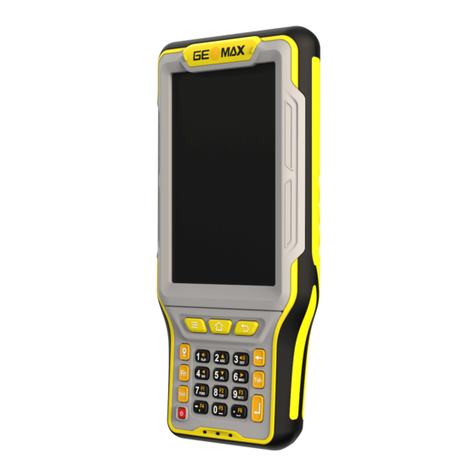
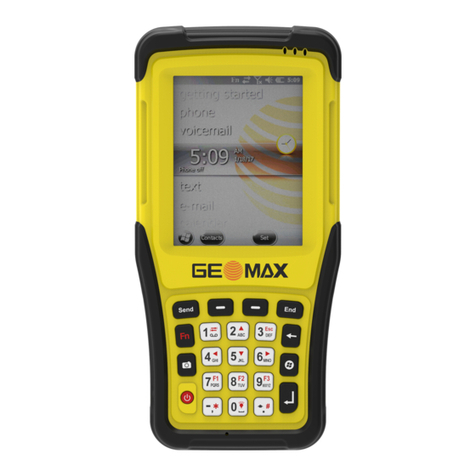
GeoMax Zenius5 Series User manual

GeoMax Zenius5 Series
User Manual
Version 1.0
English

Zenius5 | 2Introduction
Introduction
Purchase Congratulations on the purchase of a GeoMax Zenius5.
This manual contains important safety directions as well as instructions for setting up the product and
operating it. Refer to "1 Safety Directions" for further information.
Read carefully through the User Manual before you switch on the product.
Product Identification The model and serial number of your product are indicated on the type plate.
Always refer to this information when you need to contact your agency or GeoMax authorised service
centre.
Trademarks • Windows is a registered trademark of Microsoft Corporation in the United States and other countries
• CompactFlash and CF are trademarks of SanDisk Corporation
•Bluetooth®is a registered trademark of Bluetooth SIG, Inc.
• SD Logo is a trademark of SD-3C, LLC.
All other trademarks are the property of their respective owners.
Validity of this manual This manual applies to the Zenius5 instruments. Differences between the models are marked and
described.
Available
documentation
Refer to the GeoMax website for all Zenius5 documentation/software.
Name Description/Format
Zenius5 Quick
Guide
Provides an overview of the product. Intended as a quick reference
guide.
Zenius5 User
Manual
All instructions required in order to operate the product to a basic level
are contained in the User Manual. Provides an overview of the product
together with technical data and safety directions.
-

Table of Contents Zenius5 | 3
Table of Contents
In this manual Chapter Page
1 Safety Directions 5
1.1 General Introduction 5
1.2 Definition of Use 5
1.3 Limits of Use 6
1.4 Responsibilities 6
1.5 Hazards of Use 6
1.6 Electromagnetic Compatibility EMC 8
1.7 FCC Statement, Applicable in U.S. 9
1.8 ICES-003 Statement, Applicable in Canada 9
2 Description of the System 11
2.1 Overview 11
2.2 System Concept 11
2.2.1 Power Concept 11
2.2.2 Data Storage Concept 11
2.3 System Components 11
2.4 Components 12
3 User Interface 13
3.1 Keyboard 13
3.2 Operating Principles 14
3.3 LED Indicators on Zenius5 15
4 Operation 17
4.1 Batteries 17
4.1.1 Operating Principles 17
4.1.2 Changing the Battery 17
4.1.3 Charging the Battery 18
4.2 Inserting and Removing a SIM Card and SD Card 19
4.3 Working with a USB Memory Stick 20
5 Connecting and Synchronising with a Computer 21
6 Operating System and Software 23
6.1 System Main Interface 23
6.2 Interacting with the Zenius5 24
6.3 Zenius5 Camera 25
6.4 Software 26
6.5 Personal Settings 27
7 Communication 31
7.1 Phone and Text Messages 31
7.1.1 Phone 31
7.1.2 Text Messages 33
7.2 GPRS Network Setting 33
7.3 Bluetooth Connection 34
7.4 Wi-Fi Connection 35
8 Troubleshooting 37
9 Care and Transport 38
9.1 Transport 38
9.2 Storage 38
9.3 Cleaning and Drying 38
10 Technical Data 39
10.1 Conformity to National Regulations 40
10.2 Dangerous Goods Regulations 40
11 Software Licence Agreement 41

Zenius5 | 4Safety Directions
1 Safety Directions
1.1 General Introduction
Description The following directions enable the person responsible for the product, and the person who actually uses
the equipment, to anticipate and avoid operational hazards.
The person responsible for the product must ensure that all users understand these directions and adhere
to them.
About Warning
Messages
Warning messages are an essential part of the safety concept of the instrument. They appear wherever
hazards or hazardous situations can occur.
Warning messages...
• make the user alert about direct and indirect hazards concerning the use of the product.
• contain general rules of behaviour.
For the users‘ safety, all safety instructions and safety messages shall be strictly observed and followed!
Therefore, the manual must always be available to all persons performing any tasks described here.
DANGER, WARNING, CAUTION and NOTICE are standardised signal words for identifying levels of
hazards and risks related to personal injury and property damage. For your safety, it is important to read
and fully understand the following table with the different signal words and their definitions! Supplemen-
tary safety information symbols may be placed within a warning message as well as supplementary text.
1.2 Definition of Use
Intended use • Remote control of product.
• Data communication with external appliances.
Additional advice • The Zenius5 is essentially an enhanced PDA (personal digital assistant) used in geospatial applications.
This device is to be used for data logging and data communication for industrial applications only and
not for domestic consumer applications.
• This device does not have held-to-ear voice operations.
• This device does not have body-worn accessories.
• This device is designed to be used only in the hand or in fixed installations by mounting it on a pole or
a vehicle. When the device is not mounted on a pole or a vehicle, you may use it in handheld mode
only and should keep it away from your body. Do not place the device on your lap or any part of the
body.
Type Description
DANGER Indicates an imminently hazardous situation which, if not avoided, will result
in death or serious injury.
WARNING Indicates a potentially hazardous situation or an unintended use which, if not
avoided, could result in death or serious injury.
CAUTION Indicates a potentially hazardous situation or an unintended use which, if not
avoided, may result in minor or moderate injury.
NOTICE Indicates a potentially hazardous situation or an unintended use which, if not
avoided, may result in appreciable material, financial and environmental
damage.
Important paragraphs which must be adhered to in practice as they enable the
product to be used in a technically correct and efficient manner.

Safety Directions Zenius5 | 5
Reasonably foreseeable
misuse
• Use of the product without instruction.
• Use outside of the intended use and limits.
• Disabling safety systems.
• Removal of hazard notices.
• Opening the product using tools, for example screwdriver, unless this is permitted for certain functions.
• Modification or conversion of the product.
• Use after misappropriation.
• Use of products with recognizable damages or defects.
• Use with accessories from other manufacturers without the prior explicit approval of GeoMax.
• Inadequate safeguards at the working site.
• Controlling of machines, moving objects or similar monitoring application without additional control
and safety installations.
1.3 Limits of Use
Environment Suitable for use in an atmosphere appropriate for permanent human habitation: not suitable for use in
aggressive or explosive environments.
DANGER Local safety authorities and safety experts must be contacted before working in hazardous areas, or close
to electrical installations or similar situations by the person in charge of the product.
The following advice is only valid for battery charger, power adapter and car adapter.
Environment Suitable for use in dry environments only and not under adverse conditions.
1.4 Responsibilities
Manufacturer of the
product
GeoMax AG, CH-9443 Widnau, hereinafter referred to as GeoMax, is responsible for supplying the product,
including the user manual and original accessories, in a safe condition.
Person responsible for
the product
The person responsible for the product has the following duties:
• To understand the safety instructions on the product and the instructions in the user manual.
• To ensure that it is used in accordance with the instructions.
• To be familiar with local regulations relating to safety and accident prevention.
• To inform GeoMax immediately if the product and the application becomes unsafe.
• To ensure that the national laws, regulations and conditions for the operation of the product are
respected.
1.5 Hazards of Use
DANGER Because of the risk of electrocution, it is dangerous to use poles, levelling staffs and extensions in the
vicinity of electrical installations such as power cables or electrical railways.
Precautions:
Keep at a safe distance from electrical installations. If it is essential to work in this environment, first
contact the safety authorities responsible for the electrical installations and follow their instructions.
WARNING During dynamic applications, for example stakeout procedures there is a danger of accidents occurring if
the user does not pay attention to the environmental conditions around, for example obstacles, excava-
tions or traffic.
Precautions:
The person responsible for the product must make all users fully aware of the existing dangers.

Zenius5 | 6Safety Directions
WARNING Inadequate securing of the working site can lead to dangerous situations, for example in traffic, on building
sites and at industrial installations.
Precautions:
Always ensure that the working site is adequately secured. Adhere to the regulations governing safety,
accident prevention and road traffic.
CAUTION If the accessories used with the product are not properly secured and the product is subjected to mechan-
ical shock, for example blows or falling, the product may be damaged or people can sustain injury.
Precautions:
When setting up the product, make sure that the accessories are correctly adapted, fitted, secured, and
locked in position.
Avoid subjecting the product to mechanical stress.
WARNING If the product is used with accessories, for example masts, staffs, poles, you may increase the risk of being
struck by lightning.
Precautions:
Do not use the product in a thunderstorm.
CAUTION Keeping the device too close to the human body during operation may pose a health risk.
This device has been tested for typical operations near the human body, for example handheld mode, with
the device kept at 10 mm from the user’s body.
Precautions:
Use the device at least 10 mm apart from the human body.
CAUTION During the transport, shipping or disposal of batteries it is possible for inappropriate mechanical influences
to constitute a fire hazard.
Precautions:
Before shipping the product or disposing of it, discharge the batteries by running the product until they
are flat.
When transporting or shipping batteries, the person in charge of the product must ensure that the appli-
cable national and international rules and regulations are observed. Before transportation or shipping
contact your local passenger or freight transport company.
WARNING High mechanical stress, high ambient temperatures or immersion into fluids can cause leakage, fire or
explosions of the batteries.
Precautions:
Protect the batteries from mechanical influences and high ambient temperatures. Do not drop or immerse
batteries into fluids.
WARNING If battery terminals are short circuited e.g. by coming in contact with jewellery, keys, metallised paper or
other metals, the battery can overheat and cause injury or fire, for example by storing or transporting in
pockets.
Precautions:
Make sure that the battery terminals do not come into contact with metallic objects.
WARNING Only GeoMax authorised service centres are entitled to repair these products.
The following advice is only valid for battery charger, power adapter and car adapter.
WARNING If you open the product, either of the following actions may cause you to receive an electric shock.
• Touching live components
• Using the product after incorrect attempts were made to carry out repairs
Precautions:
Do not open the product. Only GeoMax authorised service centres are entitled to repair these products.
The following advice is only valid for batteries, power adapter or docking station.

Safety Directions Zenius5 | 7
WARNING If the product is improperly disposed of, the following can happen:
• If polymer parts are burnt, poisonous gases are produced which may impair health.
• If batteries are damaged or are heated strongly, they can explode and cause poisoning, burning, corro-
sion or environmental contamination.
• By disposing of the product irresponsibly you may enable unauthorised persons to use it in contraven-
tion of the regulations, exposing themselves and third parties to the risk of severe injury and rendering
the environment liable to contamination.
Precautions:
Product-specific treatment and waste management information can be received from your GeoMax distrib-
utor.
1.6 Electromagnetic Compatibility EMC
Description The term Electromagnetic Compatibility is taken to mean the capability of the product to function smoothly
in an environment where electromagnetic radiation and electrostatic discharges are present, and without
causing electromagnetic disturbances to other equipment.
WARNING Electromagnetic radiation can cause disturbances in other equipment.
Although the product meets the strict regulations and standards which are in force in this respect, GeoMax
cannot completely exclude the possibility that other equipment may be disturbed.
The product is a class A product when operated with the internal batteries. In a domestic environment this
product may cause radio interference in which case the user may be required to take adequate measures.
CAUTION There is a risk that disturbances may be caused in other equipment if the product is used with accessories
from other manufacturers, for example field computers, personal computers or other electronic equip-
ment, non-standard cables or external batteries.
Precautions:
Use only the equipment and accessories recommended by GeoMax. When combined with the product, they
meet the strict requirements stipulated by the guidelines and standards. When using computers or other
electronic equipment, pay attention to the information about electromagnetic compatibility provided by
the manufacturer.
CAUTION Disturbances caused by electromagnetic radiation can result in erroneous measurements.
Although the product meets the strict regulations and standards which are in force in this respect, GeoMax
cannot completely exclude the possibility that the product may be disturbed by intense electromagnetic
radiation, for example, near radio transmitters, two-way radios or diesel generators.
Precautions:
Check the plausibility of results obtained under these conditions.
CAUTION If the product is operated with connecting cables attached at only one of their two ends, for example
external supply cables, interface cables, the permitted level of electromagnetic radiation may be exceeded
and the correct functioning of other products may be impaired.
Precautions:
While the product is in use, connecting cables, for example product to external battery, product to
computer, must be connected at both ends.
The product must not be disposed with household waste.
Dispose of the product appropriately in accordance with the national regulations in
force in your country.
Always prevent access to the product by unauthorised personnel.

Zenius5 | 8Safety Directions
Radios or Digital
Cellular Phones
Use of product with radio or digital cellular phone devices:
WARNING Electromagnetic fields can cause disturbances in other equipment, in installations, in medical devices, for
example pacemakers or hearing aids and in aircraft. It can also affect humans and animals.
Precautions:
Although the product meets the strict regulations and standards which are in force in this respect, GeoMax
cannot completely exclude the possibility that other equipment can be disturbed or that humans or animals
can be affected.
• Do not operate the product with radio or digital cellular phone devices in the vicinity of filling stations
or chemical installations, or in other areas where an explosion hazard exists.
• Do not operate the product with radio or digital cellular phone devices near to medical equipment.
• Do not operate the product with radio or digital cellular phone devices in aircraft.
1.7 FCC Statement, Applicable in U.S.
WARNING
WARNING Changes or modifications not expressly approved by GeoMax for compliance could void the user's authority
to operate the equipment.
Labelling Zenius5
This device complies with part 15 of the FCC Rules. Operation is subject to the following two conditions:
1) This device may not cause harmful interference, and
2) This device must accept any interference received, including interference that may cause undesired
operation.
This equipment has been tested and found to comply with the limits for a Class B digital device, pursuant
to part 15 of the FCC rules.
These limits are designed to provide reasonable protection against harmful interference in a residential
installation.
This equipment generates, uses and can radiate radio frequency energy and, if not installed and used in
accordance with the instructions, may cause harmful interference to radio communications. However,
there is no guarantee that interference will not occur in a particular installation.
If this equipment does cause harmful interference to radio or television reception, which can be deter-
mined by turning the equipment off and on, the user is encouraged to try to correct the interference by
one or more of the following measures:
• Reorient or relocate the receiving antenna.
• Increase the separation between the equipment and the receiver.
• Connect the equipment into an outlet on a circuit different from that to which the receiver is connected.
• Consult the dealer or an experienced radio/TV technician for help.
0014000_001

Safety Directions Zenius5 | 9
1.8 ICES-003 Statement, Applicable in Canada
WARNING This Class (B) digital apparatus complies with Canadian ICES-003.
Cet appareil numérique de la classe (B) est conforme à la norme NMB-003 du Canada.
Exposure to radio
frequency (RF) signals
The wireless device is a radio transmitter and receiver. It is designed and manufactured not to exceed the
emission limit for exposure to radio frequency (RF) energy set by the OET Bulletin 65 Supplement C /
Ministry of Health (Canada), Safety Code 6. These limits are part of comprehensive guidelines and estab-
lished permitted levels of RF energy for the general population. These guidelines are based on the safety
standards previously set by international standard bodies. These standards include a substantial safety
margin designed to assure the safety of all persons, regardless of age and health.
This device and its antenna must not be co-located or operating in conjunction with any other antenna or
transmitter.
This device has been shown to be capable of compliance for localised specific absorption rate (SAR) for
uncontrolled environment / general public exposure limits specific in ANSI/IEEE C95.1-1992 and had been
tested in accordance with the measurement procedures specified in IEEE Std. 1528-2003.
IC Canadian Compliance This radio transmitter has been approved by Industry Canada to operate with the antenna types listed
below with the maximum permissible gain and required antenna impedance for each antenna type indi-
cated. Antenna types not included in this list, having a gain greater than the maximum gain indicated for
that type, are strictly prohibited for use with this device.
Under Industry Canada regulations, this radio transmitter may only operate using an antenna of a type
and maximum (or lesser) gain approved for the transmitter by Industry Canada. To reduce potential radio
interference to other users, the antenna type and its gain should be so chosen that the equivalent isotrop-
ically radiated power (e.i.r.p) is not more than that necessary for successful communication.This device
complies with Industry Canada license-exempt RSS standard(s).
Operation is subject to the following two conditions:(1) This device may not cause interference. (2) This
device must accept any interference, including interference that may cause undesired operation of the
device.
Le présent émetteur radio a été approuvé par Industrie Canada pour fonctionner avec les types d'antenne
énumérés ci-dessous et ayant un gain admissible maximal et l'impédance requise pour chaque type
d'antenne. Les types d'antenne non inclus dans cette liste, ou dont le gain est supérieur au gain maximal
indiqué, sont strictement interdits pour l'exploitation de l'émetteur.Conformément à la réglementation
d'Industrie Canada, le présent émetteur radio peut fonctionner avec une antenne d'un type et d'un gain
maximal (ou inférieur) approuvé pour l'émetteur par Industrie Canada. Dans le but de réduire les risques
de brouillage radioélectrique à l'intention des autres utilisateurs, il faut choisir le type d'antenne et son
gain de sorte que la puissance isotrope rayonnée équivalente (p.i.r.e.) ne dépasse pas l'intensité néces-
saire à l'établissement d'une communication satisfaisante.Le présent appareil est conforme aux CNR
d'Industrie Canada applicables aux appareils radio exempts de licence.L'exploitation est autorisée aux
deux conditions suivantes :(1) Ll'appareil ne doit pas produire de brouillage.
(2) L'utilisateur de l'appareil doit accepter tout brouillage radioélectrique subi, même si le brouillage est
susceptible d'en compromettre le fonctionnement.

Zenius5 | 10Description of the System
2 Description of the System
2.1 Overview
Zenius5 General
Description
The Zenius5 is a compact, high performance, low weight device with an integrated high accuracy GNSS,
designed for outdoor & fieldwork usage. The Zenius5 can withstand severe environmental conditions
including vibration, shock, moisture and temperature variations. The Zenius5 is suitable for use in harsh
environments such as construction sites, warehouses, military, manufacturing and field service.
2.2 System Concept
2.2.1 Power Concept
General Use the batteries, chargers and accessories recommended by GeoMax to ensure the correct functionality
of the instrument.
Power options Power for the instrument can be supplied either internally or externally.
2.2.2 Data Storage Concept
Description Data can be recorded on the SD card.
Memory device The instrument has a SD card slot fitted as standard. A SD card can be inserted and removed. Refer to
Inserting and Removing a SIM Card and SD Card.
2.3 System Components
Zenius5 package The Zenius5 package includes the following components:
Internal power supply: One battery fitting into the instrument.
External power supply: 10.5 V to 28 V DC power supply via cable.
a) Zenius5
b) ZBA700 rechargeable battery
c) Capacitive stylus
d) Hand strap
e) Switching power supply
f) Mini USB cable
g) USB OTG cable
h) ZCH700 battery charger (optional)
i) Quick guide
j) Glass protection
0014001_001
a
b
c
d
f
g
e
h
i
j
e

Description of the System Zenius5 | 11
2.4 Components
Front side of the
Zenius5
Back side of the Zenius5
Bottom panel of the
Zenius5
Battery compartment
a) Communication LED
b) GPS LED
c) Power LED
d) Screen
e) Keypad
f) Power key
g) Microphone
013752_001
g
f
e
d
c
b
a
a) Camera
b) Speaker
c) Holder for hand strap
d) Release lever for battery compart-
ment
e) Compartment with slots for battery,
SIM card and SD card
f) Hand strap fixation
013762_001
c
d
a
b
e
f
a) USB port
b) Hand strap holder
c) Serial connector
d) Power connector
ab dc
013764_001
a) SD card slot
b) SIM card slot
c) Battery connectors
0014014_001
a
c
b

Zenius5 | 12User Interface
3 User Interface
3.1 Keyboard
Keypad
Functions of the keys
a) Left softkey
b) Send key
c) Function key
d) Camera key
e) Power key
f) Numeric keys and alternative func-
tion keys
g) Right softkey
h) End key
i) Backspace key
j) Start key
k) Enter key
l) Collect key
013753_001
a
b
c
d
h
i
j
e
f
g
k
l
Key Function
Left softkey
Performs the command shown on the bottom left
corner of the screen.
Send key
Dials or answers a call.
Function key
Switches the alterative functions of the numeric
keys on or off. If the alternative functions are
switched on, the icon Fn appears in the navigation
bar.
Camera key
Press to open camera app. If camera app is opened:
Press to take a picture.
Power key
Turns the Zenius5 on or off.
Numeric keys
To enter numbers.
Right softkey
Performs the command shown on the bottom right
corner of the screen.
End key
Ends or rejects a call. Returns to the start screen.
Backspace key
Press to backspace over one character in a text edit-
able field.
Windows key
Press to open the start menu.
Enter key
Press to confirm selections.
Collect key
Press to record data during measurements.
Depending on 3rd party software implementation.

User Interface Zenius5 | 13
3.2 Operating Principles
Touch screen The user interface is operated through the capacitive touch screen. You can either use the supplied stylus
or touch the screen with the finger.
Turning on the Zenius5
step-by-step
Turning off the Zenius5
step-by-step
Operation Description
To select an item Tap on the item.
To start the edit mode in editable fields Tap on the editable field.
To highlight an item or parts of it for editing Drag the supplied stylus from the left to the right.
To accept data entered into an editable field and
exit the edit mode
Tap on the screen outside of the editable field.
To open a context-sensitive menu Tap on the item and hold for 2 s.
Step Description
1. Place the Zenius5 on a flat and stable surface or hold the device in your hand.
2. Ensure that either the device is connected with the AC power adapter or the batteries are
charged up.
3. Press and hold Power key until the LED power indicator turns from red colour to green
colour.
The operating system needs usually about 30-40 seconds for booting up. When the main
screen is displayed, the Zenius5 is ready to use.
0013770_001
Step Description
1. Press the Power key for at least 3 seconds to open the Power Off menu.
Within the menu, the following options are available:
•OK: The operating system shuts down and the device is turned off.
•Cancel: Close the Power Off menu and return to the main screen.
2. To turn off the device, select the option OK.
After turning off the Zenius5, wait for at least 5 seconds before turning on the device again.

Zenius5 | 14User Interface
Resetting the Zenius5
step-by-step
If the Zenius5 stops responding to the stylus or does not respond when you press any key, it is necessary
to start a hard reset. To start a hard reset, do the following:
Sleep mode activation
step-by-step
To activate the sleep mode of Zenius5 do the following:
The LED communication indicator stays green during sleep mode. Any incoming call ends the
sleep mode.
Using the stylus Use the stylus for navigating and selecting objects by tapping on the screen.
Store the stylus in the slot, if it is not in use.
Fitting the hand strap
step-by-step
Step Description
1. Press and hold the Send key and the End key.
The Zenius5 resets.
2. Press and hold the Power key until the LED power indicator turns from red colour to green
colour to turn on the Zenius5 again.
Step Description
The Zenius5 must be switched on.
1. Press and hold the Power key for 1 second.
The Zenius5 enters the sleep mode. The LED power indicator turns to green.
2. Press the Power key again to resume operation.
Step Description
1. Align the upper hand strap bracket with the two mounting holes at the back side of the
Zenius5.
2. Tighten the screws.
The other side of the hand strap is fixed at the bottom of the Zenius5.
0013809_001

User Interface Zenius5 | 15
3.3 LED Indicators on Zenius5
LED indicators
Status of the LED Indi-
cators
The Zenius5 device has Light Emitting Diode indicators. They indicate the basic status of the device.
a) Communication LED
b) GPS LED
c) Power LED
013776_001
abc
LED Status of LED Description
Communication
LED
off No communication function is active.
blue Bluetooth function is switched on.
green Phone function is switched on.
GPS LED off No connection.
green GPS function is switched on.
Power LED off Zenius5 is switched off.
green Battery is charging or Zenius5 is in sleep mode.
red Zenius5 is ready for operation.

Zenius5 | 16Operation
4 Operation
4.1 Batteries
Battery Power System The Zenius5 device is designed to work with one removable battery placed inside the battery compart-
ment. The fully charged battery provides several hours of battery life.
4.1.1 Operating Principles
First-time Use/Charging
Batteries
• The battery must be charged before using it for the first time because it is delivered with an energy
content as low as possible.
• The permissible temperature range for charging is from 0 °C to +40 °C/+32 °F to +104 °F. For
optimal charging, we recommend charging the batteries at a low ambient temperature of
+10 °C to +20 °C/+50 °F to +68 °F if possible.
• It is normal for the battery to become warm during charging. Using the chargers recommended by
GeoMax, it is not possible to charge the battery once the temperature is too high.
• For new batteries or batteries that have been stored for a long time (> three months), it is effectual
to make only one charge/discharge cycle.
• For Li-Ion batteries, a single discharging and charging cycle is sufficient. We recommend carrying out
the process when the battery capacity indicated on the charger or on a GeoMax product deviates signif-
icantly from the actual battery capacity available.
Operation / Discharging • The batteries can be operated from -30°C to +60°C/-22°F to +140°F.
• Low operating temperatures reduce the capacity that can be drawn; high operating temperatures
reduce the service life of the battery.
4.1.2 Changing the Battery
Remove the battery
step-by-step
Step Description
Ensure that the handheld is put into stand-by mode.
1. Place the Zenius5 on a stable surface, with the back side facing up.
2. Lift the latch handle of the cover and turn it counterclockwise to the vertical unlock position.
3. Remove the cover of the battery compartment.
4. To release the battery from the compartment, lift the upper side of the battery and remove it
from compartment.
2
2
4
4
3
014015_001

Operation Zenius5 | 17
Insert the battery
step-by-step
4.1.3 Charging the Battery
The following advice is only valid for battery charger, power adapter and car adapter.
WARNING If you open the product, either of the following actions may cause you to receive an electric shock.
• Touching live components
• Using the product after incorrect attempts were made to carry out repairs
Precautions:
Do not open the product. Only GeoMax authorised service centres are entitled to repair these products.
The following advice is only valid for batteries, power adapter or docking station.
WARNING The product is not designed for use under wet and severe conditions. If unit becomes wet it may cause
you to receive an electric shock.
Precautions:
Use the product only in dry environments, for example in buildings or vehicles. Protect the product against
humidity. If the product becomes humid, it must not be used!
Charge battery
step-by-step
Step Description
To open the battery compartment, follow the instructions of the previous paragraph.
1. To insert the battery to the compartment, attach the bottom side of the battery to the compart-
ment at an angle and then lower the upper side to engage the connector.
2. Reattach the compartment cover by inserting it bottom first. Fit the latch handle into place.
Secure the latch by turning it clockwise to the horizontal lock position.
The IP rating is only ensured if the battery compartment is attached correctly!
1b
1a
2b
2b
Step Description
Only use the charger delivered with the Zenius5.
1. Connect the AC power adapter to the Zenius5 and to an A/C plug.
Alternative:
• Connect the Zenius5 to a computer using the data transfer cable. Note: The data transfer
cable has a lower charging capability than the AC power adapter.
2. The battery starts charging. The Power LED flashes green to indicate the charging.
USB100-240 V
0014019_001

Zenius5 | 18Operation
4.2 Inserting and Removing a SIM Card and SD Card
• Keep the card dry.
• Use it only within the specified temperature range.
• Do not bend the card.
• Protect the card from direct impacts.
Failure to follow these instructions could result in data loss and/or permanent damage to the card.
CAUTION Always ground yourself to remove any static charge before touching the circuit board. The electronic
devices are sensitive to static electricity.
Precautions:
1) Only experienced personnel should open the mechanical housing of the device.
2) Use a grounding wrist strap all the time.
3) Place all the electronic components in a static-dissipative surface or static-shielded bag when they are
not in the chassis.
Apply general practice for working with static-sensitive devices when you open the device, insert the SIM
or SD card and closing the device:
• Discharge any static charge before opening the device and working with the SIM or SD card.
• The device must not be subject to high electrostatic potentials when it is open.
• Minimise contact with internal components of the device.
• Avoid any discharges of static electricity near the device when inserting the SIM or SD card.
Insert and remove a
SIM Card or a SD Card
step-by-step
Step Description
The slots for the SIM card and the SD card are inside the battery compartment of the Zenius5.
1. Turn off the Zenius5 and place it on a stable surface, with the back side facing up.
2. Lift the latch handle of the cover and turn it counterclockwise to the vertical unlock position.
Remove the cover of the battery compartment.
3. Remove the battery.
4. a) Slide the SD card firmly into the upper slot.
b) Slide the SIM card with the chip facing down firmly into the bottom slot.
Do not force the card into the slot. The card should be held with the contacts facing
the slot.
5. Insert the battery back into the battery compartment.
6. Reattach the compartment cover by inserting it bottom first. Fit the latch handle into place.
Secure the latch by turning it clockwise to the horizontal lock position.
2a
2a
2a
2b
3
5s
=OFF
1
5
5
6
6
4b
4a
0014004_001

Operation Zenius5 | 19
4.3 Working with a USB Memory Stick
Working with a USB
memory stick
step-by-step
Step Description
The USB port is located at the bottom panel of the Zenius5, refer to Bottom panel of the
Zenius5.
1. Connect the USB OTG cable with the Zenius5.
2. Slide the USB stick firmly into the USB host port of the USB OTG cable.
Do not force the USB stick into the port.
3. To remove the USB stick, slide the USB stick out of the port and disconnect the USB OTG cable
from the Zenius5
0014093_001
1
2
3

Zenius5 | 20Connecting and Synchronising with a Computer
5 Connecting and Synchronising with a Computer
Microsoft ActiveSync (for PCs with Windows XP operating system) or Windows Mobile Device Center (for
PCs with Windows Vista or Windows 7/Windows 8 operating system) is the synchronisation software for
Windows mobile-based pocket PCs. Microsoft ActiveSync or Windows Mobile Device Center enables a PC
and a Windows mobile-based pocket PC to communicate.
If Microsoft ActiveSync or Windows Mobile Device Center is not installed on your PC, download it from
http://www.microsoft.com/download/en/windows.aspx?q=windows.
Connecting the Zenius5
to a computer
step-by-step
If a SD card is inserted into the Zenius5 and the device is connected to a computer, you can also
access the data stored on the SD card.
Ensure that a Connection Management Software is installed on the computer.
1. Turn on the Zenius5 and the computer.
2. Connect the device to the computer using the USB cable or use the integrated Bluetooth radio
of the Zenius5 to establish a wireless link to a Bluetooth-enabled computer.
If the connection management software is installed on the computer, the software starts auto-
matically.
3. After synchronisation, you can access the data stored on the Zenius5 directly from the
computer.
ON
1
0013777_001
2a
2b
Other manuals for Zenius5 Series
2
Table of contents
Other GeoMax Controllers manuals
Popular Controllers manuals by other brands

Numatics
Numatics SentronicD installation manual

Siemens
Siemens SQK34.00S Mounting instructions

Servomech
Servomech ILA 15 A Installation, operation and maintenance manual

LMI Technologies
LMI Technologies Liquitron DC4000 Series instruction manual

Siemens
Siemens GDA Series Mounting instructions

Alcor
Alcor AU9440 Technical reference manual