Geometrics MagArrow User manual

User Guide
For
MagArrow
UAS Deployable Magnetometer
P/N 770-00110-01
Volume 1 - Rev. F
March 2023
COPYRIGHT © 2023

Table of Contents
Table of Contents .....................................................................................................................................2
1.0 The MagArrow.............................................................................................................................. 1
2.0 The MagArrow II ..........................................................................................................................2
3.0 Unpacking the MagArrow .........................................................................................................3
4.0 Recommended Non-Magnetic Lithium Polymer Batteries...............................................4
5.0 Batteries ........................................................................................................................................5
5.1 Installing the Battery .................................................................................................................. 5
5.2 Hot Swapping the Battery .......................................................................................................... 7
6.0 Powering On/Off..........................................................................................................................8
6.1 Restarting the System................................................................................................................9
7.0 LED-Status.................................................................................................................................. 10
8.0 SD Memory Card.........................................................................................................................11
9.0 USB Flash Drive ......................................................................................................................... 12
10.0 Wi-Fi.............................................................................................................................................. 12
11.0 GPS ............................................................................................................................................... 13
12.0 Controlling the MagArrow via Wi-Fi ..................................................................................... 13
12.1 Home Page............................................................................................................................... 14
12.2 Status Page .............................................................................................................................. 16
12.3 Data Page.................................................................................................................................20
12.4 Admin Page.............................................................................................................................. 23
12.5 Help Page.................................................................................................................................24
13.0 Survey Manager –Decimating & Converting Data Files ..................................................25
14.0 Data Format................................................................................................................................26
15.0 Tips on Running a MagArrow Survey ...................................................................................30
15.1 Flight Planning and Preparation ............................................................................................... 30
15.2 Flight Execution........................................................................................................................ 30
16.0 Troubleshooting ........................................................................................................................32
16.1 Magnetometer ......................................................................................................................... 32
16.2 Wi-Fi......................................................................................................................................... 32
16.3 GPS .......................................................................................................................................... 32
16.4 LEDs......................................................................................................................................... 33
16.5 System Boot Internal Light Indicators ...................................................................................... 34
APPENDIX A: MagArrow Specifications...........................................................................................35
APPENDIX B: Embedded Software Updates...................................................................................37
APPENDIX C: Terminology Used with MFAM Based Magnetometers......................................38
APPENDIX D: NTRIP Base Station Correction for RTK Surveys ................................................. 41

rev. 03/23
1
1.0 The MagArrow
The MagArrow is a laser-pumped, cesium vapor (Cs133 non-radioactive) total field scalar
magnetometer. The MagArrow’s light weight of 1 kg makes it ideal for use with unmanned aerial
systems (UAS) that can support 2kg+ payloads. Within its aerodynamic carbon fiber housing,
the MagArrow contains:
•MFAM miniature magnetometer
•GPS
•Wireless Connection Point
•SD Memory Card
•USB Drive
•Gyro, Compass, and Accelerometer
•Battery Compartment
The MFAM miniature magnetometer comprises two high-performance cesium sensors attached
to one sensor driver module. The two sensors are used together to eliminate the dead zone and
reduce heading error. Its small weight, low power, and 1000Hz sampling rate make the MFAM a
revolutionary sensor in the geophysical market. See Appendix A for a complete list of product
specifications.

2
One MFAM Sensor
The pulse per second (PPS) signal from the GPS synchronizes the sampling rate to ensure 1000
samples are recorded per second. (See Appendix C for a detailed definition of PPS.) Data is saved
to the 32 GB SD memory card, and accessed via Wi-Fi, so the card never needs to be removed.
The USB drive holds the latest MagArrow firmware and can be used for fast field upgrades. The
MagArrow uses non-magnetic lithium polymer batteries for power, which the user must source
locally.
During survey operations, the MagArrow gathers and stores the data in a binary format onto the
SD card (*.magdata). This binary data can then be downloaded onto a PC, tablet, or cell phone
via the system’s on-board Wireless access point. It is recommended to use Chrome Web Browser
and an Android OS (6.1 or newer) device. The MagArrow is not compatible with iOS devices.
Survey Manager Software is provided for converting the binary data into a CSV file for use in
Surfer, Geosoft Oasis Montaj, Quinsy, and other magnetic data processing programs.
2.0 The MagArrow II
The main difference between the MagArrow I and II is the GPS. The MagArrow II uses an upgraded GPS
module with about 50% improvement in the positioning accuracy. It also comes with the external helical
antenna option. The helical antenna is capable of multipath rejection, which improves the GPS accuracy
especially in a crowded environment. We suggest that the helical antenna to be used when the MagArrow
flies < 10m from the ground with 10m line spacing. If the line spacing is > 20m, the internal antenna is
sufficient. A general rule of thumb: Line spacing should be 1-2 times the distance between the
ground and the MagArrow. Anything less won’t reveal more information and anything more will
likely lead to loss of some small features. An external power switch is also added to the MagArrow II. As
a result, the MagArrow II is about 300g heavier (total weight ~1.15kg without the battery) than the
MagArrow I.

3
To achieve the real time kinematic (RTK) positioning accuracy, NTRIP is needed (we may offer
RTK base station in the future). See Appendix D for more details.
3.0 Unpacking the MagArrow
Your MagArrow is shipped in a rugged black case with safety latches that require you to first
push the button on the latch before raising the latch and opening the lid. To close the latches,
simply push down on them.
To repack for transit, place the MagArrow upside down so it sits securely in the foam. Close all
latches.
The case should also contain:
A. AC Power Adapter
B. USB Drive with User Manual and Survey Manager Software
C. Screwdriver & Drill Bit (JIS#1)
D. Set of 4 Suspension Cords
D
B
C
A

4
4.0 Recommended Non-Magnetic Lithium Polymer Batteries
Please note that batteries have not shipped with your MagArrow. You must source the
recommended batteries and battery charger locally. Note that your batteries must have the
XT60 connector.
Geometrics recommends 1800 mAh and 2200 mAh lithium polymer batteries. The Turnigy
batteries listed below have been verified by Geometrics to be non-magnetic, and therefore, the
best option for MagArrow surveys. It is important to do independent testing of the batteries for
abnormal magnetic signatures before use. The batteries should be available from various online
vendors.
https://hobbyking.com/en_us/turnigy-nano-tech-1800mah-3s-65-130c-lipo-pack.html (Turnigy nano-
tech 1800mah 3S 65~130C Lipo Pack)
https://hobbyking.com/en_us/turnigy-nano-tech-2200mah-3s-45-90c-lipo-pack.html (Turnigy
nano-tech 2200mah 3S 45~90C Lipo Pack)
A single 1800 mAh battery will run the MagArrow for about 2 hours; the 2200 mAh, about 2.5
hours. It is recommended to have at least two spare batteries so that one may be charging while
the other is in use.
We recommend a similar battery charger and discharger for use with the MagArrow as below:
https://hobbyking.com/en_us/turnigy-accucell-c150-ac-dc-10a-150w-touch-button-smart-
balance-charger-us-plug.html?___store=en_us

5
This is a balanced charger that charges one lithium battery cell at a time. It has a discharge mode
to automatically lower the battery charge state to 30%. IMPORTANT: It is required by law to
reduce the battery charge state of these lithium polymer batteries to 30% before shipment.
5.0 Batteries
5.1 Installing the Battery
On the bottom of the MagArrow, there is a door to the battery compartment where the batteries
will be stored.
A. Remove the battery compartment cover with the provided JIS#1 screwdriver. It is very important
to only use the provided JIS#1 screwdriver or drill bit to tighten or loosen the battery door screws (see
red circles below). Do not use a Phillips Screwdriver.
Battery Compartment Door Removed
B. Proper battery placement inside the battery compartment is as shown in the figure below. The
battery leads must be housed as shown, towards the pointed front of the MagArrow.

6
C. Proper Placement of Battery Pack
D. There are two yellow battery connectors and one white cell voltage monitoring connector within
the battery compartment. Locate one of the yellow battery connectors and the white cell voltage
monitoring connector. Plug the lithium battery connector (yellow) into the yellow connector. Note: The
second yellow connector is used when hot swapping batteries. This will allow you to disconnect the
discharged battery without losing power to the magnetometer.
E. After making the power connection, plug the white connector into the white lithium battery
connector. This connection is for monitoring the voltage of the three internal cells of the battery. Be
careful not to connect the white connectors backwards.

7
F. Slide the battery into the compartment and carefully tuck the wires alongside the battery.
5.2 Hot Swapping the Battery
For quick battery changes, the new battery pack can be plugged into the second (unused) yellow
battery connector before disconnecting the depleted battery. This method of swapping
batteries does not require shutting the system down, which will save time. See the instructions
below on how to hot swap the battery.
1. Loosen the screws on the battery cover with the JIS#1 screwdriver and remove the cover.

8
2. Grasp the sides of the battery, and then lift up as shown in the figure above.
3. Locate the spare yellow connector and plug in the new battery pack while the depleted battery
is still connected.
4. Unplug the depleted battery pack from the yellow and white connectors.
5. Plug the white voltage monitoring connector to the connector on the new battery pack.
6. Put battery and connectors into the space provided.
7. Replace battery cover.
*Note: The MagArrow is equipped with internal electronics so that the unit automatically draws
power from whichever battery is more fully charged. The MagArrow will automatically shut
down when the battery voltage gets too low for proper operation, about ~9.7 volts.
6.0 Powering On/Off
There is a black Power button located inside the battery compartment. The button has a smooth
round top about 5mm in diameter and requires little force. It is used to Power On, Power Off,
and Reset the system.

9
•To Turn On –With the battery compartment door off, fully press, and then release the black
Power button. The LED lights on the underside of the system will immediately flash twice when the
power button is pressed.
•To Turn Off –Press and hold the Power button for 3 seconds. The LED lights will flash rapidly for
the 3 seconds before the system completely shuts down.
•Replace the battery compartment door. To prevent side stress, place the three screws in each of
the three holes and tighten them just to the point of resistance. After the three screws are placed, do a
second pass to torque them to a comfortable, secure tightness.
Update: Users may also Turn Off or Restart the system from within the Wireless control
software by selecting Admin page.
6.1 Restarting the System
It may be necessary, on occasion, to restart the MagArrow. For example, the system may require
restart in the event of a glitch with the Web Browser Interface. There are two options when this
happens:
•Turn the system OFF and then back ON, or
•Restart the system –Press the Power button once.
While the unit is operating, a quick push of the Power button signals to the processor used for
logging and Wi-Fi connectivity that the user wishes for it to restart without disturbing the
magnetometer operation. The rapidly flashing LEDs indicate that the button press has been
registered.
Powering On/Off reboots both the system software and the magnetometer physics package.

10
Restarting only reboots the system software, and therefore reduces the startup time
significantly.
Try using the restart function first, and if that does not fix the error, then cycle the power.
7.0 LED-Status
When the system is powered on, the two bright LEDs on the underside of the MagArrow will
flash. The pattern of flashing will depend on the system status.
These LEDs visually provide some status information when the MagArrow is out of range for Wi-
Fi communication. If the wireless system does not start correctly, you won’t be able to
communicate with the system, and you should contact Geometrics for assistance.
Table 1 - LED Patterns
Pattern
Meaning
Single Flash -4 second pause
Starting Sequence - No Wi-Fi Connection
Double Flash - 4 second pause
Connected to Wi-Fi - GPS not Locked
Single Flash - 1 second pause
Standby - No Wi-Fi Connection
Double Flash - 1 second pause
Connected to Wi-Fi - GPS Locked
5 Flashes - 1 second pause
Needs User Attention. See Troubleshooting section
Rapid Flashing
Shutting Down

11
Note: The bottom of the MagArrow is dark and shaded, which allows the operator to see the
LEDs from a considerable distance. At extreme distances, binoculars may help the observer.
There are two lights inside the battery compartment that can also be used for troubleshooting.
Please see the Troubleshooting section below for more details.
8.0 SD Memory Card
The MagArrow stores data on the 32 GB Micro SD memory card which is located inside the
battery compartment and next to the power button. This SD card is U3 speed class.
In case of a Wi-Fi failure, you may remove the SD card and read it using an SD card reader.
However, under normal circumstances, the user should not need to remove the SD card. If
removal is required, first power off the unit and remove the battery.
The SD card holder uses a spring latch. To remove the cad, first push the card inward and then
release. The card should pop out. Use caution to ensure that the SD card is not lost when
ejected.
Note: Because the SD card is hard to grasp, use a piece of scotch or masking tape placed sticky
side up on your forefinger. Press the sticky side of the tape up onto the end of the SD card and
withdraw the card.

12
9.0 USB Flash Drive
The MagArrow contains a USB Flash Drive inside the battery compartment. The primary
purpose of this USB is to allow for upgrading the software quickly and easily. The USB drive
contains a binary file with the most recent software. When the system turns on, this file is
automatically read and loaded. For system upgrades, Geometrics will provide the most recent
software binary file for upload onto the USB.
This USB Flash Drive has been verified to be non-magnetic. It is highly recommended that you
do NOT install any other USB Drive into the MagArrow because many USB flash drives are
magnetic. A flash drive that is magnetic would bring unwanted noise into the magnetic field
measurements.
The USB drive normally is not removed from the MagArrow except for updating the firmware. If
the USB drive needs to be removed, first unplug and remove the battery, then remove the flash
drive.
For information on updating the firmware version see Appendix B.
10.0 Wi-Fi
Any Androidtm device with a web browser and Wi-Fi capability (smart phone, computer, tablet,
etc.) can control the MagArrow, including logging starts and stops as well as data downloading.
The Wi-Fi firmware inside of the MagArrow stores data to the Micro SD card, controlled through
a Wi-Fi interface via any standard internet browser (such as Google Chrome or Firefox). It is

13
recommended to use Chrome Web Browser and an Android OS (6.1 or newer) device. The
MagArrow is not compatible with iOS devices.
The FCC ID for the Wi-Fi module built into the MagArrow system is: Z64-CC3100MODR1
If required, the Certification can be found here:
https://apps.fcc.gov/oetcf/tcb/reports/Tcb731GrantForm.cfm?mode=COPY&RequestTimeout=500&tcb
_code=&application_id=05I87jydzWxU5bDoI51sfg%3D%3D&fcc_id=Z64-CC3100MODR1
11.0 GPS
The GPS inside the MagArrow has two functions. The first function is to provide the location at
which measurements are made. The GPS will provide roughly 2.5-meter positional accuracy
under good conditions. The second function utilizes the 1PPS to synchronize the sampling rate,
ensuring that 1000 samples are recorded per second.
After turning the system on, it will take approximately 2-3 minutes to get a good satellite fix and
for the PPS to begin synchronizing the measurement. The GPS requires signal from several
satellites before it can generate the 1PPS pulse.
If you select Start Logging before there is a GPS fix, magnetic data will still be saved without
position data.
The GPS antenna is approximately 18.5 inches from the sensor.
12.0 Controlling the MagArrow via Wi-Fi
The MagArrow creates a wireless access point with a unique name like “Blue Sky” or “Green
Pond.” A password is required to connect. The password will be shown on the MagArrow body
near the battery compartment.
To connect, go to the settings of your Android* phone, tablet, or PC, turn on Wi-Fi, and connect
to the MagArrow’s wireless access point. It may take about 15 seconds for the device to find the
access point. Enter the password. Only one device can be connected to the MagArrow’s wireless
access point at a time. *The MagArrow is not compatible with iOS devices.
When the device is successfully connected to the Wi-Fi and GPS Sync is Locked, the LEDs will
flash twice followed by a 1 second pause. See LED Status section above for more information.
Open a browser on the logging device and type the following IP address into the web browser
bar: magarrow.net. This will take you to the Home Page of the MagArrow’s wireless control

14
software. The sections below describe the features on each of the pages in the MagArrow web-
based control program. In order, you will find Home, Status, Data, Admin, and Help.
Please note that when the MagArrow is not within Wi-Fi range of the phone, tablet, or PC, the
functions described below will not be available. Please wait until the MagArrow is back at the
landing site, and within range to refresh the web browser pages.
12.1 Home Page
On the Homepage, there is information about the status of the magnetometer sensors, the GPS,
and the battery.
From top to bottom, here is what each item on the Home Page represents:
Recording: Yes/No -This indicates whether the system is currently saving data to the SD card.

15
Magnetometer
Mode: Running/Starting -This displays the current mode of the magnetometer.
Starting -The magnetometer sensors are warming up. It is very likely that you will not see
‘Starting’since it only takes one to two minutes for the sensors to warm up.
Running -The sensors are currently running and operating normally.
Field: 42618.5234 -This is the magnetic field reading reported when the page was last
refreshed. You may also see the term ‘Invalid’.
Press Home to refresh the page. The Field value should update, indicating that the system is
recording changes in the magnetic field. If the field reading continues to say ‘Invalid,’it means
that the magnetometer is near a very high magnetic field.
Instrument Time: 2022-01-26 23:40:42 -This shows UTC date and time from the GPS,
respectively. The time will be incorrect until the GPS Quality is OK.
GPS Quality: Unavailable; OK; Low Precision - This displays the status of the GPS.
Unavailable -The GPS is not outputting position information.
OK - The Horizontal Dilution of Precision is less than 1.5. See Appendix C for more information
about the Horizontal Dilution of Precision (HDOP).
Low Precision - The Horizontal Dilution of Precision is greater than 1.5.
GPS Synch to Magnetometer: Locked; Available/Not Locked; Not Found -This indicates that
the PPS pulse is fixed and synchronizing the timing of the measurement.
Locked - The measurement timing is phase locked to the PPS.
Available/Not Locked -The GPS data is coming in, but the measurement is not phase locked to
the PPS.
Not Found - There is no GPS fix. It is rare to see Not Locked and Not Found displayed here. If
these are displayed, try moving to an area with open sky.
Status: OK; Low; Download Only; Critical -This shows the current status of the battery.
OK - The reported state of the battery when it has more than 30% charge remaining.

16
Low -The reported state when the battery has less than 30% charge remaining.
Download Only - The battery charge is too low to run the sensors, but still has enough charge
to download data files. The Wi-Fi will continue to function for a limited time in this condition. It
is highly recommended to change the battery when the percentage drops to 30%. Hot swap the
batteries to avoid shutting the system down.
Critical - The reported state when the system is near shut off. You are unlikely to see the critical
state on the screen as the system may have already shut off. To prevent unexpected power loss,
replace the depleted battery with one that is fully charged when the reported state is low. Hot
swap.
Percentage -The approximate percentage of battery charge remaining.
12.2 Status Page
Clicking Status on the top menu bar will bring you to the Status page. On this page, you will see
more detailed instrument and sensor status information, some similar to the Home page.
Refresh the page by clicking Status again. This will update the status information on the page.

17
From top to bottom, here is what each item on the Status Page represents:
Instrument Status
Recording: Yes/No - This indicates whether the system is currently saving data to the SD card.
Time Since Boot: 279 Seconds - This conveys how long the system has been running, in
seconds.
Maximum Storage Write Time: 26 mS - This shows the maximum time it takes to write
information to storage, in milliseconds.
This will have no practical use during survey operations and should only be used for
troubleshooting or receiving support from Geometrics.
Other manuals for MagArrow
1
This manual suits for next models
2
Table of contents
Other Geometrics Measuring Instrument manuals

Geometrics
Geometrics G-864 User manual

Geometrics
Geometrics GemPen User manual

Geometrics
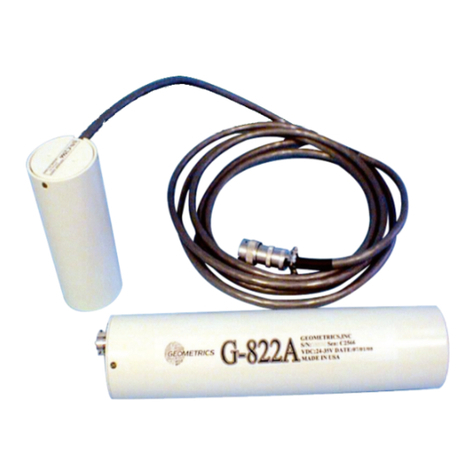
Geometrics G-822A User manual

Geometrics
Geometrics SmartSeis User manual

Geometrics
Geometrics G-858BP User manual

Geometrics
Geometrics MagArrow User manual

Geometrics
Geometrics G-824A User manual

Geometrics
Geometrics Memory-Mag G-857 User manual

Geometrics
Geometrics MetalMapper 2x2 User manual

Geometrics
Geometrics G-877 User manual