manuals.online logo
Brands
  1. Home
  2. •
  3. Brands
  4. •
  5. HEIDENHAIN
  6. •
  7. Measuring Instrument
  8. •
  9. HEIDENHAIN SE 661 User manual

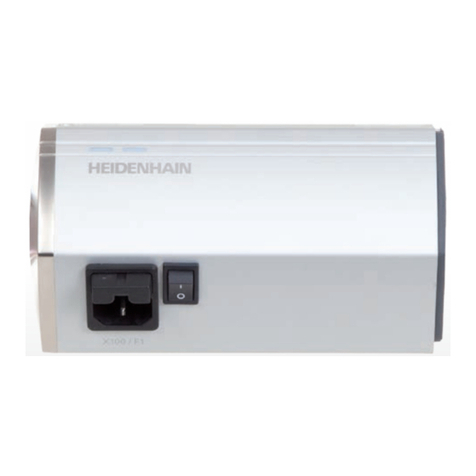
HEIDENHAIN SE 661 User manual

Other manuals for SE 661

1

Other HEIDENHAIN Measuring Instrument manuals

HEIDENHAIN ND 1200R Radial User manual

HEIDENHAIN

HEIDENHAIN ND 1200R Radial User manual

HEIDENHAIN LB 302 User manual

HEIDENHAIN

HEIDENHAIN LB 302 User manual

HEIDENHAIN ND 282 User manual

HEIDENHAIN

HEIDENHAIN ND 282 User manual

HEIDENHAIN ND 231B User manual

HEIDENHAIN

HEIDENHAIN ND 231B User manual

HEIDENHAIN LIF 471R User manual

HEIDENHAIN

HEIDENHAIN LIF 471R User manual

HEIDENHAIN TT 460 User manual

HEIDENHAIN

HEIDENHAIN TT 460 User manual

HEIDENHAIN TT 460 User manual

HEIDENHAIN

HEIDENHAIN TT 460 User manual

HEIDENHAIN SE 660 User manual

HEIDENHAIN

HEIDENHAIN SE 660 User manual

HEIDENHAIN ERA 4201 User manual

HEIDENHAIN

HEIDENHAIN ERA 4201 User manual

HEIDENHAIN ERN 1381.020 User manual

HEIDENHAIN

HEIDENHAIN ERN 1381.020 User manual

HEIDENHAIN ID 737748-01 User manual

HEIDENHAIN

HEIDENHAIN ID 737748-01 User manual

HEIDENHAIN RON 255 User manual

HEIDENHAIN

HEIDENHAIN RON 255 User manual

HEIDENHAIN ND 221 User manual

HEIDENHAIN

HEIDENHAIN ND 221 User manual

HEIDENHAIN VRZ 780 User manual

HEIDENHAIN

HEIDENHAIN VRZ 780 User manual

HEIDENHAIN HR 550 FS User manual

HEIDENHAIN

HEIDENHAIN HR 550 FS User manual

HEIDENHAIN TS 760 User manual

HEIDENHAIN

HEIDENHAIN TS 760 User manual

HEIDENHAIN LC 181 EnDat User manual

HEIDENHAIN

HEIDENHAIN LC 181 EnDat User manual

HEIDENHAIN ECN 1324 S User manual

HEIDENHAIN

HEIDENHAIN ECN 1324 S User manual

HEIDENHAIN VRZ 450B Instruction sheet

HEIDENHAIN

HEIDENHAIN VRZ 450B Instruction sheet

HEIDENHAIN ND 1300 User manual

HEIDENHAIN

HEIDENHAIN ND 1300 User manual

HEIDENHAIN LIF 48R User manual

HEIDENHAIN

HEIDENHAIN LIF 48R User manual

HEIDENHAIN MSE 1350 User manual

HEIDENHAIN

HEIDENHAIN MSE 1350 User manual

HEIDENHAIN ND 221B User manual

HEIDENHAIN

HEIDENHAIN ND 221B User manual

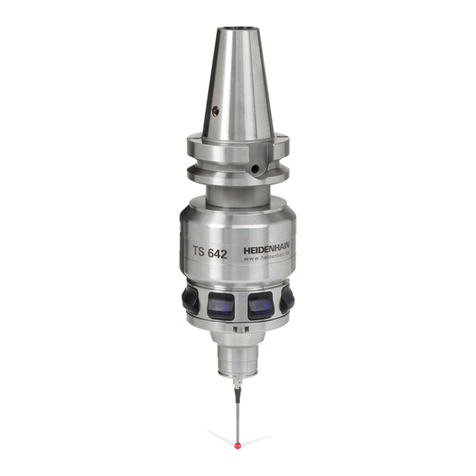
HEIDENHAIN TS 642 User manual

HEIDENHAIN

HEIDENHAIN TS 642 User manual

Popular Measuring Instrument manuals by other brands

Powerfix Profi 278296 Operation and safety notes

Powerfix Profi

Powerfix Profi 278296 Operation and safety notes

Test Equipment Depot GVT-427B user manual

Test Equipment Depot

Test Equipment Depot GVT-427B user manual

Fieldpiece ACH Operator's manual

Fieldpiece

Fieldpiece ACH Operator's manual

FLYSURFER VIRON3 user manual

FLYSURFER

FLYSURFER VIRON3 user manual

GMW TG uni 1 operating manual

GMW

GMW TG uni 1 operating manual

Downeaster Wind & Weather Medallion Series instruction manual

Downeaster

Downeaster Wind & Weather Medallion Series instruction manual

Hanna Instruments HI96725C instruction manual

Hanna Instruments

Hanna Instruments HI96725C instruction manual

Nokeval KMR260 quick guide

Nokeval

Nokeval KMR260 quick guide

HOKUYO AUTOMATIC UBG-05LN instruction manual

HOKUYO AUTOMATIC

HOKUYO AUTOMATIC UBG-05LN instruction manual

Fluke 96000 Series Operator's manual

Fluke

Fluke 96000 Series Operator's manual

Test Products International SP565 user manual

Test Products International

Test Products International SP565 user manual

General Sleep Zmachine Insight+ DT-200 Service manual

General Sleep

General Sleep Zmachine Insight+ DT-200 Service manual

Sensa Core Lacto Spark user manual

Sensa Core

Sensa Core Lacto Spark user manual

VOLTCRAFT UTS-1980 operating instructions

VOLTCRAFT

VOLTCRAFT UTS-1980 operating instructions

EBCHQ 94915 Operation manual

EBCHQ

EBCHQ 94915 Operation manual

Balluff BIP LD2-T017-01-EP-S4 Series user guide

Balluff

Balluff BIP LD2-T017-01-EP-S4 Series user guide

Pulsar IMP Lite Series instruction manual

Pulsar

Pulsar IMP Lite Series instruction manual

ETCR 6800 user manual

ETCR

ETCR 6800 user manual

manuals.online logo
manuals.online logoBrands
  • About & Mission
  • Contact us
  • Privacy Policy
  • Terms and Conditions

Copyright 2025 Manuals.Online. All Rights Reserved.

2/2016
SE 661 EnDat
Mounting Instructions
Montageanleitung
Instructions de montage
Istruzioni di montaggio
Instrucciones de montaje
取付説明書
安装说明
安裝指導手冊
설치 지침
Índice
Indice
Página
4Notas de aviso
8Manejo
10 Permiso para la transmisión por radio
13 Dimensiones
14 Montaje
16 Tensión de alimentación
18 Visualizar
26 Configuración del modo de
funcionamiento
30 Rango de transmisión
32 Distribución del conector
34 Información técnica
Pagina
4Avvertenze
8Utilizzo
10 Approvazione per trasmissione radio
13 Dimensioni
14 Montaggio
16 Tensione di alimentazione
18 Visualizzazioni
26 Accoppiamento in modalità radio
30 Campo di trasmissione
32 Piedinatura
34 Dati tecnici
Page
4Avertissement
8Utilisation
10 Autorisation pour transmission radio
13 Dimensions
14 Montage
16 Tension d’alimentation
18 Témoins lumineux
26 Couplage en mode Radio
30 Plage de transmission
32 Raccordements
34 Caractéristiques techniques
Page
4Warnings
8Operation
10 Approval for radio transmission
13 Dimensions
14 Mounting
16 Power supply
18 Displays
26 Pairing during radio operation
30 Transmission area
32 Pin Layout
34 Specifications
Seite
4Warnhinweise
8Bedienung
10 Funkerlaubnis
13 Abmessungen
14 Montage
16 Spannungsversorgung
18 Anzeigen
26 Paaren im Funkbetrieb
30 Übertragungsbereich
32 Anschlussbelegung
34 Technische Kennwerte
Sommaire
Inhalt
2
Contents
페이지
6 경고
9 작동
10 라디오 신호 전송을 위한 규격승인
13 규격
15 설치
17 전원 공급
22 표시
28 라디오 가동모드 중 페어링
31 전송영역
33 핀 레이아웃
35 사양
頁碼
6 警告
9 操作
10 無線電傳輸的核准
13 尺寸
15 安裝
17 供應電壓
22 顯示
28 無線電操作過程中配對
31 傳輸區域
33 接腳配置
35 規格
页
6警示
9 操作
10 无线电信号传输许可
13 尺寸
15 安装
17 电源
22 显示
28 无线电操作的配对
31 传输范围
33 针脚编号
35 技术参数
ページ
6 注意事項
9 操作
10 無線通信の認証
13 寸法
15 取付け
17 電源
22 表示
28 無線操作時のペアリング
31 伝送範囲
33 ピン配列
35 仕様
3
목차
目錄
目录
目次
Contents Page
6Warnings
9Operation
10 Approval for radio transmission
13 Dimensions
15 Mounting
17 Power supply
22 Displays
28 Pairing during radio operation
31 Transmission area
33 Pin Layout
35 Specifications
Notas de aviso
Atención: El montaje y la puesta en marcha deben ser realizados por un especialista cualificado,
observando las prescripciones locales de seguridad.
No dejar caer la SE.
Avvertenze
Attenzione: Il montaggio e la messa in funzione devono essere eseguite da personale qualificato
nel rispetto delle norme di sicurezza locali.
Non far cadere le SE.
Avertissement
Attention: le montage et la mise en service doivent être assurés par un personnel qualifié dans le
respect des consignes de sécurité locales.
Ne pas laisser tomber le SE.
Warnhinweise
Achtung: Die Montage und Inbetriebnahme ist von einer qualifizierten Fachkraft unter Beachtung
der örtlichen Sicherheitsvorschriften vorzunehmen.
SE nicht fallen lassen.
4
Warnings
Note: Mounting and commissioning is to be conducted by a qualified specialist under compliance
with local safety regulations.
Do not drop the SE.
Alimentar los sistemas de medida de posición sólo desde sistemas PELV (EN 50178).
Disponer toma de tierra de baja impedancia y alta frecuencia (EN 60204-1 Kap. EMV).
Si los sistemas lineales de medida de HEIDENHAN deben funcionar según DIN EN 61 010-1, la tensión de alimentación
debe efectuarse desde un circuito secundario con limitación de potencia o corriente según DIN EN 61 010-1:2011-07,
sección 9.4 óEN 60 950-1:2011-01, sección 2.5 ó desde un circuito secundario de la clase 2.
Se i sistemi di misura HEIDENHAIN vengono azionati secondo DIN EN 61 010-1, l’alimentazione della tensione deve
avvenire da un avvolgimento secondario con limitazioni di corrente e potenza secondo DIN EN 61 010-1:2011-07,
capitolo 9 oppure DIN EN 60 950-1:2011-01, capitolo 2.5 oppure un avvolgimento secondario di classe 2 secondo
UL1310.
Alimentare i sistemi di misura di posizione sono tramite sistemi PELV (EN 50178)
Prevedere messa a terra ad alta frequenza con bassa impendenza (capitolo EMC in EN 60204-1)
Si les systèmes de mesure HEIDENHAIN doivent être alimentés selon la norme DIN EN 61 010-1, l’alimentation en
tension doit être assurée par un circuit secondaire équipé d’un limiteur de courant ou de puissance selon la norme
DIN EN 61 010-1:2011-07, sect. 9.4 ou DIN EN 60 950-1:2011-01, sect. 2.5 ou par un circuit secondaire de Classe 2
selon UL1310.
N’alimenter les systèmes de mesure de position qu’à partir de systèmes T.B.T.P. (EN 50178).
Prévoir une mise à la terre à basse impédance des hautes fréquences (EN 60204-1 Chap. EMV).
Sollen HEIDENHAIN-Messgeräte entsprechend DIN EN 61 010-1 betrieben werden, muss die Spannungs-
versorgung aus einem Sekundärkreis mit Strom- oder Leistungsbegrenzung nach DIN EN 61 010-1:2011-07,
Abschnitt 9.4 oder DIN EN 60 950-1:2011-01, Abschnitt 2.5 oder einem Sekundärkreis der Klasse 2 nach UL1310
erfolgen.
Positionsmessgeräte nur aus PELV-Systemen (EN 50178) speisen.
Hochfrequent niederohmige Erdung (EN 60204-1 Kap. EMV) vorsehen.
5
Provide power to position encoders only from PELV systems (EN 50178).
Provide high-frequency grounding with low impedance (EMC chapter in EN 60204-1).
If HEIDENHAIN encoders are to be operated in accordance with DIN EN 61 010-1, power must be supplied from a
secondary circuit with current or power limitation as per DIN EN 61 010-1:2011-07, section 9.4 or
DIN EN 60 950-1:2011-01, section 2.5 or a Class 2 secondary circuit as specified in UL1310.
경고
주의: 설치 및 조정은 한국의 안전도 규정에 의하여 작업을 수행할 수 있는 공인된 기술자에 의해
수행되어야 합니다.
SE를 떨어뜨리면 안됩니다.
警告
注意:安裝與調整要經由已認證的專業人員指導以符合當地安全規範要求。
請勿摔落SE。
提示
注意: 安装和调试时必须符合当地安全要求并由具有资质的专业人员操作
严禁使SE坠地。
注意事項
注意:取付け及び試運転は設置国の安全規格のもとで有資格の専門家により実施するようにし
てください。
SEを落とさないでください。
6
Warnings
Note: Mounting and commissioning is to be conducted by a qualified specialist under compliance
with local safety regulations.
Do not drop the SE.
PELV 시스템(EN 50178)에서 위치제어 엔코더로 전원을 공급하십시오.
낮은 임피던스를 가진 고주파 접지를 공급하십시오. (EMC chapter in EN 60204 1)
리미트를 가진 이차 회로에서부터 공급되어져야 합니다.( as per DIN EN 61 010-1:2011-07, section 9.4 or
DIN EN 60 950-1:2011-01, section 2.5 or a Class 2 secondary circuit as specied in UL1310).
如果海德漢編碼器要符合DINEN61010-1操作,電力必須從具有電流或功率限制二次的電路來供給,符合DIN
EN61010-1:2011-07,第9.4節或
DINEN60950-1:2011-01,第2.5節或UL1310中規定的2級二次電路。
只能從PELV電源系統(EN50178)提供給位置編碼器。
提供低阻抗的高頻接地(EN602041的EMC章節)。
如果海德汉编码器工作条件需符合IEC 61 010-1要求,需用符合IEC 61 010-1:2011第9.4节或IEC 60 950-1:2011第
2.5节要求的有限流或限功率的次级电路供电或用基于UL1310中要求的2类次级电路供电。
只能用PELV系统为位置编码器供电(EN 50178)。
提供低阻抗的高频接地(EN 60204204-1中EMC部分)
ハイデンハイン製エンコーダをDINEN61010-1に準拠して使用する場合、
DINEN61010-1:2011-07,section9.4もしくはDINEN60950-1:2011-01,section2.5
もしくはUL1310のClass2secondarycircuitの規格に対応した、
電流もしくは電力制限付の次段の回路から電源を供給しなければなりません。
エンコーダへの電源供給は必ずPELVシステム(EN50178)から行なってください。
低インピーダンスの高周波接地(EMCchapter,EN602041)を行なってください。
7
If HEIDENHAIN encoders are to be operated in accordance with DIN EN 61 010-1, power must be supplied from a
secondary circuit with current or power limitation as per DIN EN 61 010-1:2011-07, section 9.4 or
DIN EN 60 950-1:2011-01, section 2.5 or a Class 2 secondary circuit as specified in UL1310.
Provide power to position encoders only from PELV systems (EN 50178).
Provide high-frequency grounding with low impedance (EMC chapter in EN 60204-1).
1
2
En el modo de funcionamiento por radio, la configuración, el ajuste de los modos y canales y el emparejado tienen lugar exclusivamente en
el control. Consular el modo de empleo del control.
Pulsar: visualización de la ocupación del canal durante 10 segundos
Sin función
Manejo
Configurazione, settaggio dei modi e canali e l’accoppiamento in funzionamento radio possibili esclusivamente nel controllo numerico.
Prestare attenzione al manuale operativo del controllo numerico.
Premere leggermente: visualizzazione del canale per 10 secondi
Nessuna funzione
Utilizzo
Les étapes de configuration, de réglage des modes/canaux et de couplage en mode Radio s’effectuent exclusivement sur la commande numérique.
Se référer au manuel d’utilisation de la commande numérique.
Appuyer : Affiche l’affectation des canaux pendant 10 secondes
Aucune fonction
Konfigurieren, Einstellen der Modi und Kanäle und das Paaren im Funkbetrieb erfolgen ausschließlich an der Steuerung.
Beachten Sie das Benutzerhandbuch der Steuerung.
Antippen: Anzeige der Kanalbelegung für 10 Sekunden
Keine Funktion
Bedienung
Utilisation
8
Configuration, setting of the modes and channels, as well as pairing during radio operation may only be performed on the control.
Refer to the User’s Manual of your control.
Press this button: Channel assignment is shown for 10 seconds
No Function
Operation
1
2
이 버튼을 누르세요 : 채널분할이 10초동안 보여집니다.
기능없음
작동
모드 및 채널설정뿐만 아니라, 라디오 가동모드 중 페어링하는 구성은 사용자 컨트롤러에서 수행되어질 수 있습니다.
해당 컨트롤러의 사용설명서를 참조하세요.
無線電配置,設置操作模式和通道,以及無線電配對–由控制器上執行。
請參閱您的控制器的用戶手冊。
按下此按鈕:信號通道佔用情況顯示10秒
無功能
操作
按下该按钮:通道分配显示10秒钟
无作用
このボタンを押してください:割当てられたチャンネルが10秒間表示されます。
操作
配置,模式与通道的设置,以及无线电操作中的配对只能在控制系统上执行。参见控制系统用户手册。
操作
モードとチャンネルの設定、無線操作時のペアリングは、制御装置でしか実行できません。
制御装置のマニュアルを参照してください。
機能なし
9
Press this button: Channel assignment is shown for 10 seconds
No Function
Operation
Configuration, setting of the modes and channels, as well as pairing during radio operation may only be performed on the control.
Refer to the User’s Manual of your control.
USA
FCC User information (USA only)
acc. Section 15.19
This device complies with Part 15 of the FCC Rules. Operation is subject to the following two conditions:
(1) this device may not cause harmful interference, and
(2) this device must accept any interference received, including interference that may cause undesired operation.
acc. Section 15.21
Changes or modifications not expressly approved by the party responsible for compliance
could void the user’s authority to operate the equipment.
acc. Section 15.105
NOTE: This equipment has been tested and found to comply with the limits for a Class B digital device, pursuant to part 15 of the FCC Rules. These
limits are designed to provide reasonable protection against harmful interference in a residential installation. This equipment generates, uses and can
radiate radio frequency energy and, if not installed and used in accordance with the instructions, may cause harmful interference to radio communica-
tions. However, there is no guarantee that interference will not occur in a particular installation. If this equipment does cause harmful interference to
radio or television reception, which can be determined by turning the equipment off and on, the user is encouraged to try to correct the interference
by one or more of the following measures:
- Reorient or relocate the receiving antenna.
- Increase the separation between the equipment and receiver.
- Connect the equipment into an outlet on a circuit different from that to which the receiver is connected.
- Consult the dealer or an experienced radio/ TV technician for help.
FCC ID YJKSE6X
Permiso para la transmisión por radio
Approvazione per trasmissione radio
Autorisation pour transmission radio
Funkerlaubnis
General information
Transceiver unit characteristics:
Operation frequency: 2400-2483,5 MHz
Modulation: Q-QPSK
10
Approval for radio transmission