manuals.online logo
Brands
  1. Home
  2. •
  3. Brands
  4. •
  5. GEONAUTE
  6. •
  7. Heart Rate Monitor
  8. •
  9. GEONAUTE CW F300 User manual

GEONAUTE CW F300 User manual

Notice CW F300.qxd:NOTICE CW F300 5/04/07 17:52 Page 1
Congratulations on your purchase of the CW F300 heart rate monitor!
The CW F300 heart rate monitor will go everywhere with you, whe-
ther you work out on a regular basis or you just want to stay in
shape. The target zone featuring an out-of-zone alarm and the
double display make it easy to manage your training sessions.
This product features an exclusive principle of dynamic
heart rate measurement. This mechanism adapts to the
intensity of exertion to offer an optimal compromise bet-
ween the stability and the reactivity of the measurement. This
product is also designed to provide a comfortable fit for all body
types and to be easy to use during workouts.
Please read the owner's manual carefully before use. Keep the
owner's manual for the entire service life of the product.
LIMITED WARRANTY
Geonaute guarantees the initial purchaser of this heart rate monitor that it is free
from any faults of material or manufacture for a period of two years from the date
of purchase. Please retain your receipt as proof of purchase.
• This warrantee does not cover damage resulting from misuse, from a failure to
respect the precautions for use nor from accidents; neither does this guarantee
cover damage resulting from improper maintenance or from use of the item for
commercial purposes.
• The warrantee does not cover damage resulting from repairs carried out by per-
sons unauthorized by Geonaute.
• The warrantees contained here explicitly replace all other guarantees including
the implicit guarantee of fair and trade quality and/or adaptation to use. Geonaute
cannot under any circumstances be held responsible for any damage, be it direct
or indirect, general or specific, caused by or related to these directions for use or
the products they describe.
• During the warrantee period, the item will either be repaired free of charge by an
authorized repair service or replaced free of charge (depending on the distributor).
• The warrantee does not cover batteries or cracked or broken casings where signs
of a blow are evident.
• The warrantee does not cover the elastic strap, which is a wearing part.
NORMAL CONDITIONS OF USE
This CW F300 heart rate monitor consists of a watch and a chest belt.
The watch is designed to be worn on the wrist or on its bike mount during multi-
sport activities, carried out in a temperate climate. It displays the various items of
information and controls the functions, such as the stopwatch, with the buttons.
The chest belt must be positioned on your thorax. If correctly placed, it transmits
heart rate information to the watch. Located in the reception cone (see diagram),
the watch then displays the heart rate and offers different items of supplementary
information (target zone, intensity of exertion etc.) to guide and optimize your fit-
ness or training programs.
The chest belt does not incorporate coded transmission technology. Interference
may occur if you are too close to other heart rate monitor users (about 1 meter).
EN
14 15
S1 : start/stop stopwatch
S2 : mode/lap times
S3 : set/clear
S4 : electroluminescence
EN
Notice CW F300.qxd:NOTICE CW F300 5/04/07 17:52 Page 14
FIRST USE
Before using your CW F300 heart rate monitor, please read the owner's manual
carefully and follow the setting procedures with care.
The batteries
The battery used in the chest belt is a CR 2032.
The battery used in the watch is a CR 2032.
Watch:
We recommend that you not change the watch batteries yourself, but rather have
the job done by a specialized DECATHLON repair shop. If you change the battery
yourself, you may damage the seal and lose both the water tightness and warran-
tee on the product.
Please check the availability of the battery with your dealer before replacing it.
Chest belt:
If the heart rate indications become inconsistent or if the heart symbol does not
flash on the screen, even though the watch is in the reception cone, it may be
necessary to change the battery in the chest belt.
You can change the belt battery yourself, without using any specialized tools.
Changing procedure:
• Unscrew with a coin, then remove the cover of the battery compartment
• Remove the old battery by tapping on the opposite side of the belt
• Replace the used battery with a lithium 3V type CR2032 battery without touching
either of its 2 terminals (it may discharge), with the + terminal (printed surface) up.
• Carefully replace the cover, then screw it down again by a quarter turn to the
"close" position.
In the event of a problem, refer to the troubleshooting table.
RECYCLING
The “crossed-out wastebasket” symbol indicates that this product
and the batteries it contains cannot be disposed of with household
waste. They are subject to a specific type of sorting. Deposit the bat-
teries and your unusable electronic product in an authorized collec-
tion area for recycling. This treatment of your electronic waste will
protect the environment and your health.
RESTRICTION ON USE:
Precautions:
• Handle the device with care; do not drop it or bang it.
• Do not dismantle the watch. This will void the warranty and may cause damage
and loss of waterproofing.
• Do not subject the watch to extreme temperatures. If the watch is exposed to
direct sunlight for too long, the display may darken temporarily, but it will go back
to normal once it has cooled down again.
• Clean the watch and the belt with a soft, damp cloth only. Do not use detergents,
as they may damage the materials of your watch. Only the elastic of the belt may
be machine washed (30°).
Waterproof design:
The watch is waterproof to 5 ATM. It can therefore be use in humid conditions, in
heavy rain, in the shower or for swimming. However, avoid diving and wearing the
watch at depths below 5 meters. Do not operate the buttons underwater.
The chest belt is only "water resistant". It is therefore impermeable to sweat and
can be used in rain or under damp clothing. It must not be worn in the shower or
when swimming, however.
ICaution!!!
This device is designed for use in sports and leisure activities. This is not a medi-
cal monitoring device. The data provided by this device or in this booklet are for
informational purposes only and must not be used to monitor pathologies, except
after consultation with and consent of your physician.
Even athletes in good health must take into account that the determination of the
maximum heart rate and personal training zone is a vital element in the setting up
effective, risk-free training.
The advice of your physician or health professional is recommended for determi-
ning your maximum heart rate, your upper and lower cardiac limits and the heart
rate and duration of exercise adjusted for your age, physical condition and targe-
ted results.
Finally, due to possible disturbances generated by the radio transmission system,
we do not recommend that persons wearing pacemakers use a heart rate monitor
featuring this technology, such as the CW F300.
Not taking these precautions may result in a vital risk.
16 17
Contacts
Battery
REAR FRONT
belt
EN
Notice CW F300.qxd:NOTICE CW F300 5/04/07 17:52 Page 16
ALARM mode (ALM) : displays the times set for the alarm and whether these
alarms are on or off (ON or OFF).
To go from one mode to another, press on the S2 button. The name of the mode
(TIME, HRM etc.) is displayed on the screen for 2 seconds, and then the initial
screen of the function appears.
EXPLANATION OF THE DIFFERENT MODES
Practical information:
• During the setting process, the S1 button enables you to increase the value.
• To go faster when setting a function, you can hold S1 down and the values will
scroll more rapidly.
• If no button is pressed for a few seconds during the setting process, the watch
automatically exits setting mode.
1 - Time mode (TIME)
Setting of the time, date and 12/24h mode.
• In time mode (TIME), press S3 for 3 seconds.
• The time display will flash. Set to the desired time with S1.
• Confirm the setting by pressing on S2. The minutes display will flash.
• Set the minutes with S1. Press repeatedly on S2 to go from setting the seconds,
the year, the month, the date and the 12/24h display mode. The day of the week is
displayed automatically.
• Press on S3 to exit setting mode.
In time mode (TIME), press S1 to turn the hourly beep on or off (audible beep at
the top of every hour).
2 - Cardio mode (HRM)
Displays the heart rate monitor mode (HRM)
In HRM mode, the top line displays the heart rate in beats per minute (bpm). The
heart symbol is displayed at the bottom of the screen. This flashes when the watch
receives a signal emitted by the chest belt.
Putting the chest belt on
The chest belt functions both as a sensor and an emitter. It measures on your skin
the voltage differential caused by your heartbeat. It then sends this information to
the watch by radio signal. The quality and precision of the measurement, as well
as your comfort while working out, depend on the correct positioning of the belt. As
indicated in the diagram below, the sensors are the black rubber surfaces on either
side of the central part.
Putting the chest belt on:
1Moisten the sensors with water or a water-based
conductive gel to ensure good contact.
2Introduce one side of the elastic strap into one
of the insertion holes on the belt.
3Attach the belt around your chest, then
position the belt just below the pectoral
muscles with one of the sensors under the heart
and the other under the right pectoral.
4Adjust the length of the elastic strap so that it
holds firmly but is still comfortable. The belt
must not move around if you jump or move
your arms.
5Check the positioning of the belt by
bringing it 50 cm from the watch. The heart
symbol should flash on the display.
If it does not flash normally:
• Reduce the distance between the belt and watch
• Adjust the position of the belt and moisten the sensors well
• Check the condition of the batteries, especially in the belt
Important:
• Avoid positioning the sensors in areas that are too hairy.
• In cold and dry climates, the belt may need several minutes to begin functioning
properly. In fact, the sensors need a film of sweat to ensure contact with the skin.
• When it first begins measuring, the watch may indicate very high values for about
20 seconds. This is the algorithm initializing. The display will stabilize at correct
values after this interval of time.
• Take precautions when inserting the elastic strap into the insertion hole of the
chest belt. Hold the pin by placing your finger behind the chest belt.
NAVIGATION SYSTEM
The heart rate monitor has 4 different modes:
TIME mode: displays the time and date.
HRM mode: displays the heart rate on the top line. Displays readings from the
exercise stopwatch, time spent in the target zone and the average and maximum
heart rate on the middle line. Displays the heart symbol and out-of-target-zone
arrows.
Stopwatch mode (CHR): displays workout time and lap time.
TIME ALARM
HRM
STOPWATCH
S2
S4
S2 S2
I
18 19
Sensor
Sensor
S1 : time beep
S2 : mode
S3 : Set/clear
S4 : electroluminescence
S1 : start / stop
S2 : mode
S3 : going from one display to another
S4 : electroluminescence
Measuring sensors
EN
Notice CW F300.qxd:NOTICE CW F300 5/04/07 17:52 Page 18
3 – Stopwatch mode (CHR)
Select the stopwatch using the S2 mode button.
Displaying the stopwatch
The top line displays the total workout time.
The middle line displays the lap time.
Using the stopwatch
Press on the S1 button to start the stopwatch. Both lines will simultaneously dis-
play the workout time. The symbol in the form of a stopwatch at the bottom of the
screen will flash.
To enter a lap time, press on S3. The total time since the beginning of the workout
is displayed for 5 seconds on the top line. The lap time is displayed on the middle
line.
After this interval of time, the stopwatch returns to the normal display. The total time
since the beginning of the workout scrolls on the top line and the time since the pre-
ceding "LAP" scrolls on the middle line.
Press on S1 to stop the exercise stopwatch. The stopwatch symbol will disappear.
To clear the stopwatch, press on S3 for 3 seconds. Both lines flash, then the values
are cleared.
4 - Alarm mode (ALM)
Setting alarm mode
Go to ALM mode by pressing on S2. Keep the S3 button pressed down to set the
hours. Set the desired value with the S1 button. Confirm your setting with the S2
button. Set the minutes with S1. Confirm and exit the setting process by pressing
on S3. The alarm is automatically activated. "ON" and the.)) symbol are displayed.
Turning the alarm on and off
To turn the alarm on, press on S1. "ON" and the alarm symbol will be displayed on
the screen. The alarm symbol will also be displayed in time mode.
To turn the alarm off, press on S1. "OFF" will be displayed on the screen and the
alarm symbol will disappear.
Using the alarm
The alarm sounds at the set time.
To stop the alarm while it is sounding, press on one of the buttons.
The middle line displays 4 different pieces of information:
• the total time elapsed since the beginning of the workout
• the time spent in the target zone since the beginning of the workout
• average heart rate
• maximum heart rate
Press on S3 to go from one display to another.
Setting cardio mode
Go to HRM mode by pressing on the S2 button. To enter setting mode, press on
S3 for 6 seconds (2 beeps).
You can now set the lower limit of the target zone. "SET LO" is displayed. Set the
desired value with the S1 button.
Set the upper limit by pressing on S2. "SET HI" is displayed. Set the desired value
using the S1 button.
Next, press on S2 to set the audible out-of-zone alarm. Select "ON" or "OFF" by
pressing on S1.
Confirm and exit setting mode by pressing on S3.
Using cardio mode
When the watch is searching for the signal emitted by the belt, " ---" flashes on the
top line. When the heart signal is detected, the reception indicator in the form of a
heart will flash, and after several seconds, the heart rate will be displayed. Ignore
the first value displayed. The watch needs about twenty seconds to display a sta-
ble, reliable value (time for calculating and adjusting the data).
If you have set a target zone beforehand, the watch will display at the level of the
heart symbol:
• either an arrow pointing upwards to indicate that you are currently above the tar-
get zone,
• or an arrow pointing downwards to indicate that you have not reached the target
zone.
If you have activated the audible out-of-zone alarm, then an audible beep will alert
you when you are out of the target zone.
Press on S3 to select the desired display mode on the middle line. To start up the
stopwatch, the stopwatch has to be displayed.
Press on S1 to start the exercise stopwatch. The symbol in the form of a stopwatch
at the bottom of the screen will flash. The functions that calculate the time spent in
the zone, average heart rate and maximum heart rate are activated.
During or after your workout, you can check the time elapsed, the time spent in the
target zone, your average heart rate and your maximum heart rate by pressing on
S3.
To stop the exercise stopwatch, press on S1 again.
To clear the stopwatch and the other parameters, press for 3 seconds on S3. The
middle line will flash and then the values are cleared to 0.
20 21
S1 : start stopwatch
S2 : mode
S3 : Lap time/clear
S4 : electroluminescence
S1 : turn alarm on
S2 : alarm mode
S3 : confirm and exit setting mode
S4 : electroluminescence
EN
Notice CW F300.qxd:NOTICE CW F300 5/04/07 17:53 Page 20
22 23
Problem
1 – There is no
heart rate display.
2 – The watch display is
weak or illegible.
3 – The displayed heart rate
is erratic or is
really too high.
4 – The heart rate displayed
at the beginning of the wor-
kout is inconsistent.
5 – The product is malfunc-
tioning.
6 – When the heart function
is used, the device
beeps.
Cause
1.1 – The electrodes are not moistened properly.
1.2 – The chest belt is not positioned correctly
1.3 –The battery of the chest belt is weak or
not working.
2.1 – The battery of the heart rate watch is
weak.
3.1 – The device is receiving interference.
3.2 – You are receiving the heart rate data of
another runner.
3.3 – Friction of the chest belt
3.4 – Poor conductivity during dry
and cold weather
4.1 – The algorithm is initializing.
5.1 – The buttons are not activating the right
functions and the device seems to
be malfunctioning.
6.1 – The target-zone alarm is not
programmed properly.
Operation / Procedure
Moisten the electrodes with water or a conductive water-based gel.
Check the position of the belt on your rib cage,
as shown on the drawing in the owner's manual.
Bring the heart rate monitor watch closer to the chest belt you are wearing,
and once you have checked the two points given above, check that
transmission has been established. If necessary, change the battery of the
chest belt as indicated in the owner's manual.
To have the battery of the heart rate monitor changed, contact the appropriate
DECATHLON department.
You might be in an area with a strong magnetic field, a high-voltage line, a
catenary, radio-communications equipment etc.
In this case, keep away from this area.
The chest belt does not incorporate coded transmission technology.
Interference may occur if you are less than one meter away from other peo-
ple wearing heart monitors.
Check that the chest belt is tight enough and that the electrodes are well
moistened. Friction from the belt sends a signal that does not correspond to
the heart rate.
When the weather is dry and cold, the product may emit erroneous infor-
mation for a few minutes. This is normal, because a film of sweat is neces-
sary to ensure proper contact between the skin and the electrodes.
For a several scores of seconds, the value displayed may not correspond to
your actual heart rate. This is due to the initialization of the algorithm.
Activate the RESET function by pressing on all four S1, S2, S3 and S4 but-
tons simultaneously for 2 seconds. Then follow the setting procedure as indi-
cated in the owner's manual.
The target-zone alarm is probably activated and you are out of the zone.
Refer to the owner's manual for setting the zone or turning off the target-zone
alarm.
If you do not find the solution to your problem in this trouble-shooting table, please
contact DECATHLON customer support.
SPECIFICATIONS –
TROUBLESHOOTING TABLE
Trouble-shooting table
EN
Notice CW F300.qxd:NOTICE CW F300 5/04/07 17:53 Page 22
FCC INFORMATION
This device complies with section 15 of the FCC regulation.
Operation of this device is subject to the following two conditions:
1There is no risk of this device producing harmful interference.
2This device must accept any interference received, including interference which
may cause malfunctioning.
This equipment has been tested and recognized as meeting the limits of class B
digital devices, pursuant to section 15 of the FCC regulation. These limits aim to
ensure a reasonable level of protection from harmful interference within the frame-
work of a residential setting. This equipment generates, utilizes and emits radio fre-
quency energy and, if it is not installed according to instructions, may cause harm-
ful interference with radio communications. However, it is in no way guaranteed
that no interference will be produced in specific settings. Should this equipment
cause harmful interference for radio or television reception, which may be determi-
ned by turning the device on and off, the user is advised to remedy such interfe-
rence by implementing one or several of the following measures:
- Reorient or move the reception antenna.
- Increase the distance between the device and the receiver.
- Plug the equipment into a power outlet in a different circuit from the one in which
the receiver is plugged.
- Ask the vendor or an experienced radio/television technician for advice.
Important: Any changes or modifications not explicitly approved by Décathlon
may nullify the authorization granted to the user to utilize the
equipment.
FACTORY MODE
This device incorporates a factory troubleshooting mode. To initialize factory mode,
press down on the MODE button for 2 seconds while the system is reinitializing.
• The system automatically launches the following sequence: the model number is
displayed on the 1st line and the version is displayed on the 2nd line.
• Press on the MODE button to check the display of digits 0 to 9 on the 2 lines. The
display then goes back to the model and version.
• Press on the SET button whenever you wish, to exit factory mode and go back to
the time display.
CONTACT
So that we continue to develop improved products which meet your needs, we are
pleased to hear your feedback with regard to the quality, functionality and usage of
our products.
• In France, you can contact the customer relations centre on: 0810 080808 (price
of a local call)
• In other countries, you can leave a message on the appropriate section of our
website at www.decathlon.com.
We will reply as soon as possible.
Specifications
• Waterproof construction of watch: 5ATM
• Waterproof construction of chest belt: 1ATM (not suitable for swimming)
• Temperature: from –10°C (14°F) to +50°C (122°F)
• Radio transmission: amplitude modulation on carrier wave of 5 kHz
• Stopwatch from 0 to 99h59m59.99s:resolution 1/100 s
• Exercise stopwatch from 0 to 99h59m59.99s : resolution 1 s
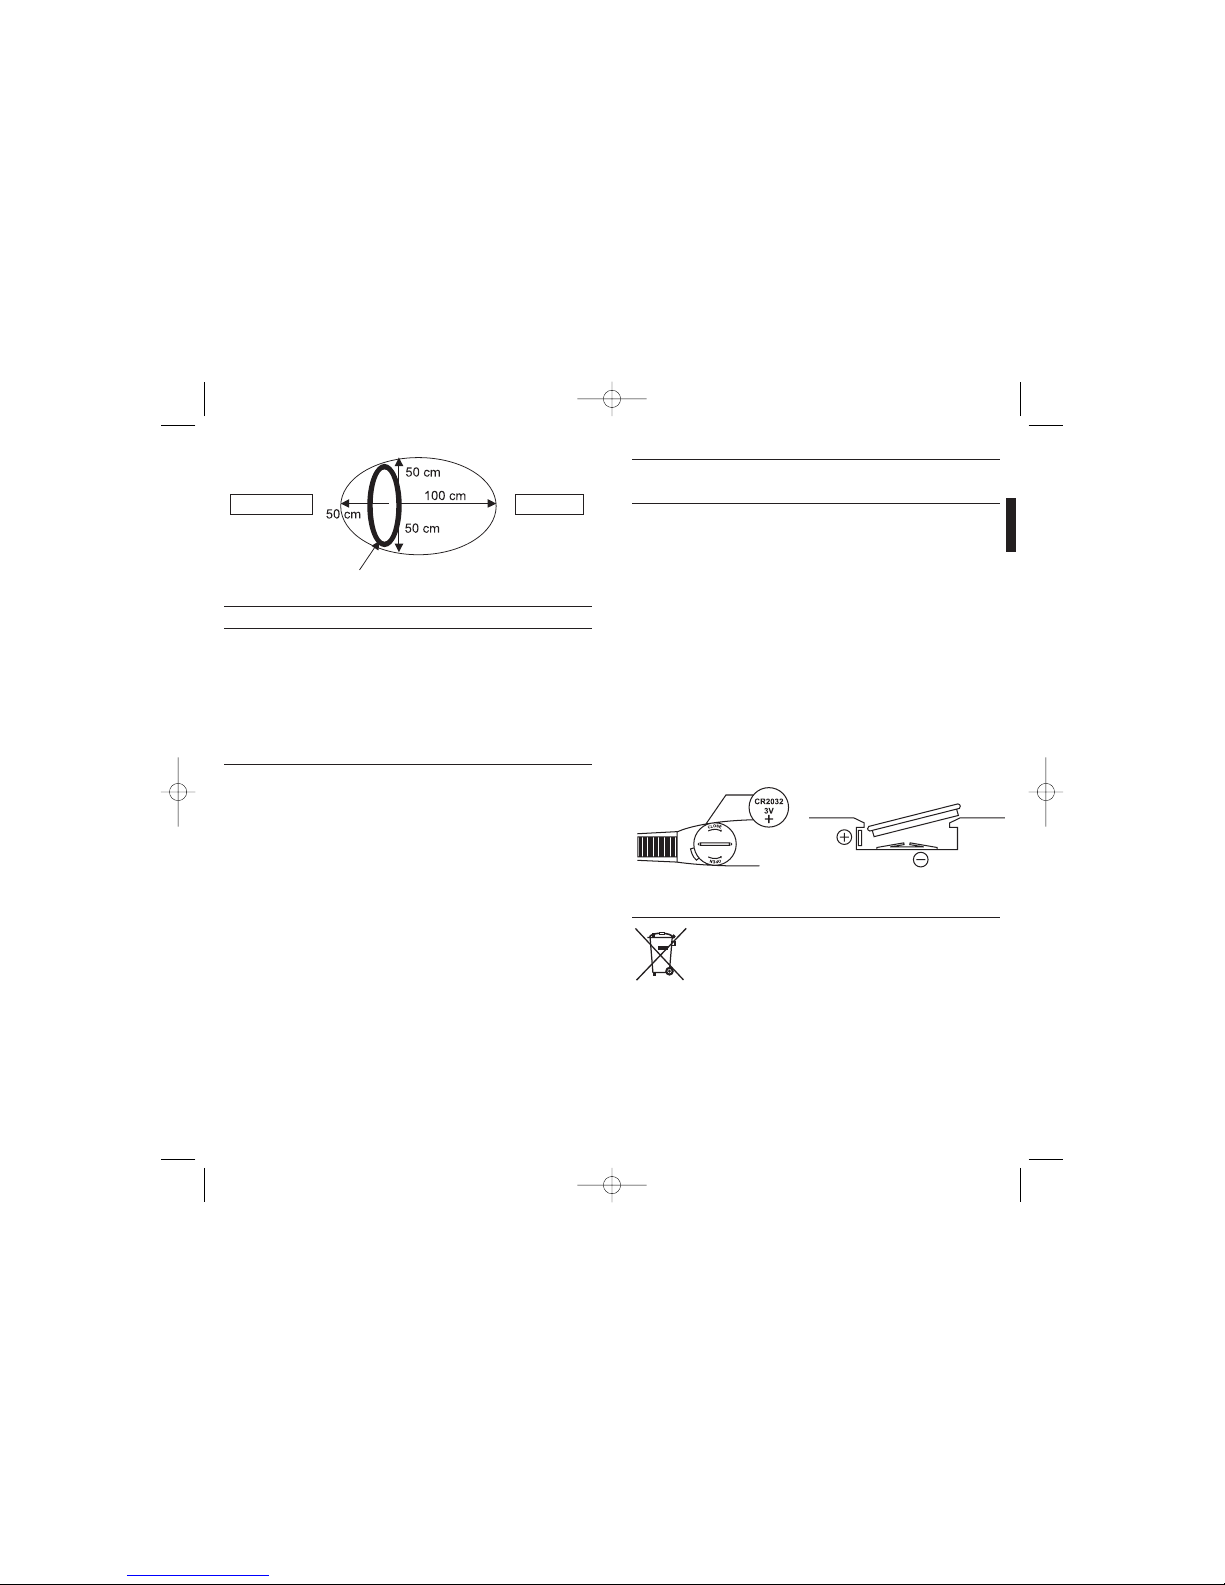
Batteries:
- Watch: CR 2032 (not to be changed by the user)
- Chest belt: CR 2032
- Approximate service life of the batteries with normal use (5 hours of use per week
in heart rate monitor mode):1.5 years for the watch and approximately 1 year for
the chest belt.
Important: The backlight feature consumes a great deal of energy (2,000
times more than the normal operation of the watch). If this function is used fre-
quently, the service life of the batteries may be very greatly reduced and the batte-
ries have to be changed after a few hours of use.
TRAINING GUIDELINES
For reasons of effectiveness and safety, you must know certain physiological para-
meters required for training. The advice that we provide here is intended for healthy,
active persons who do not present any pathologies. We strongly advise you to obtain
the advice of your physician in order to establish your training zones accurately.
For reasons of effectiveness and safety, you must know certain physiological para-
meters required for training. The advice that we provide here is intended for healthy,
active persons who do not present any pathologies. We strongly advise you to
obtain the advice of your physician in order to establish your training zones accura-
tely.
Important: Know your limits and don't go over them!
To optimize the benefits of your physical preparation, you must first know your
maximum heart rate (FCmax) expressed in beats per minute (bpm).
The FCmax can be estimated by the following formula:
FCmax=220-your age
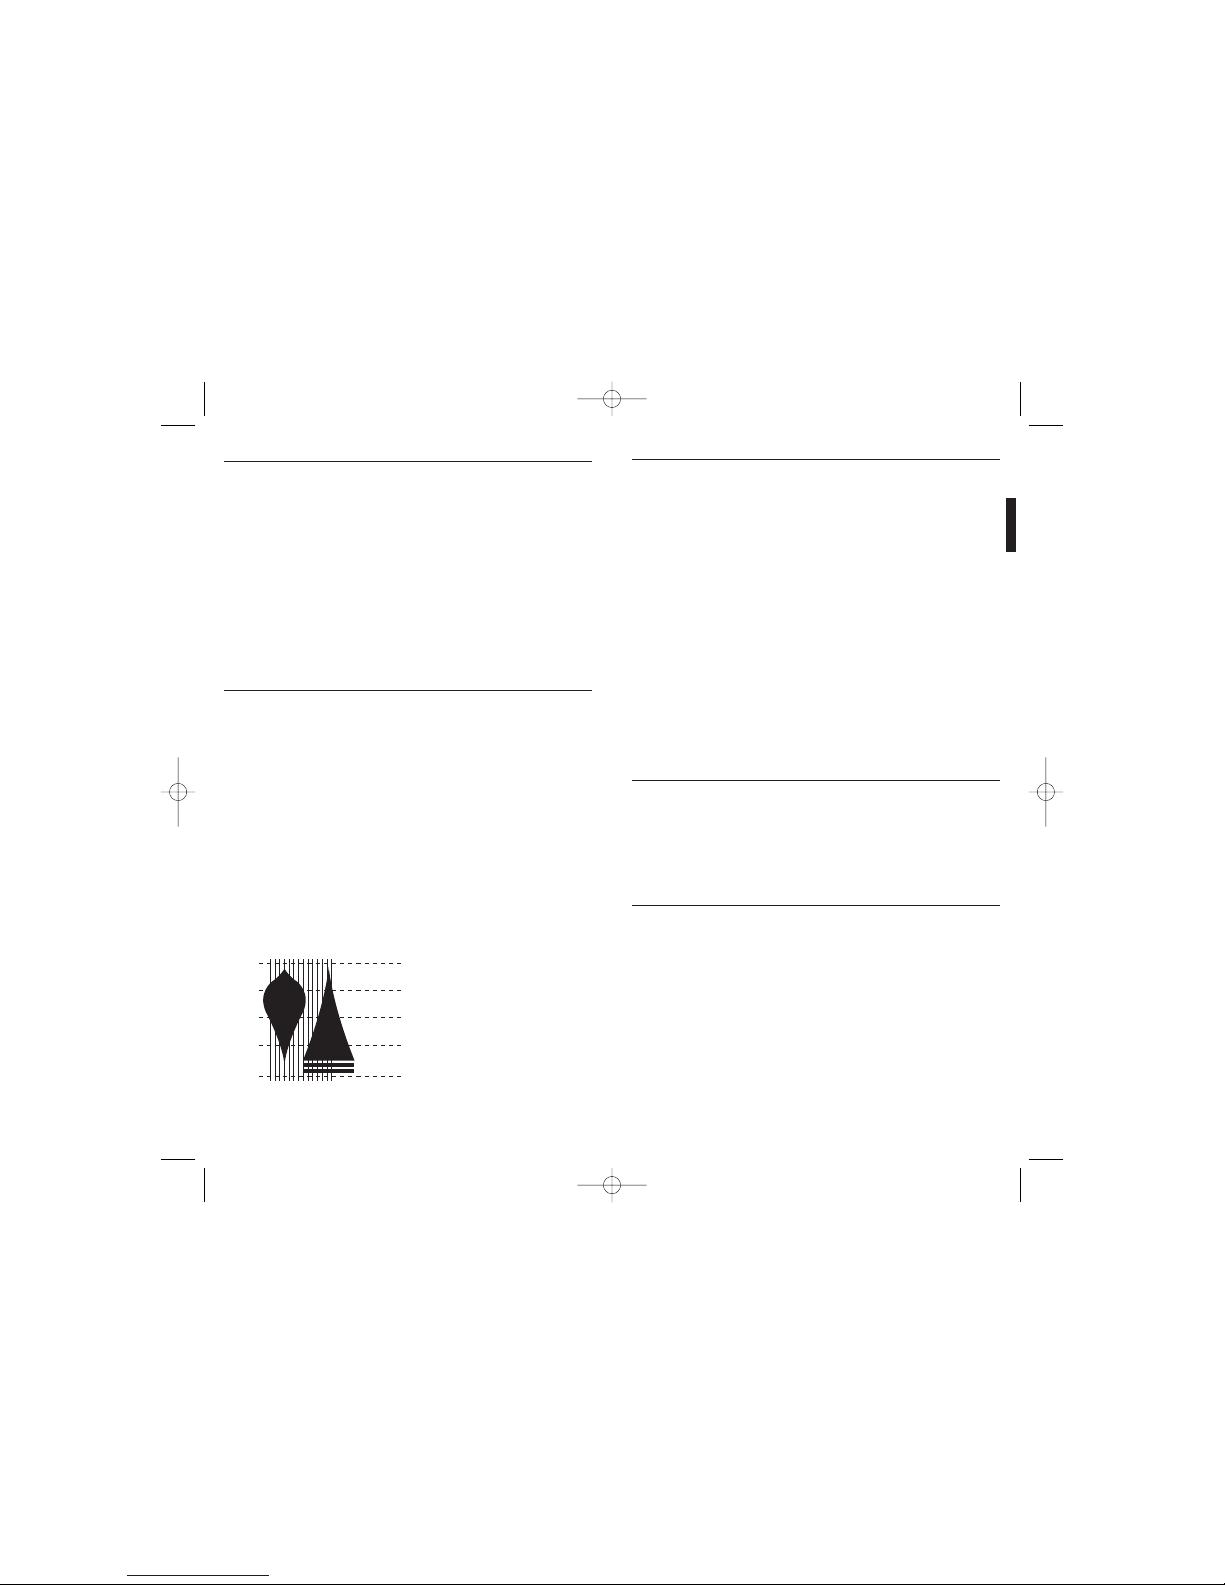
During a fitness program, several training zones will give specific results corres-
ponding to different objectives. Depending on the intensity of exertion, the percen-
tage of the energy coming from the combustion of sugar and that coming from the
combustion of fats varies.
E.g. A 30-year-old athlete who is training for aerobic endurance in order to increase
his stamina and improve his time in the 10,000-meter run. The most effective trai-
ning zone for his objective will be 80% to 90% of his maximum heart rate.
24 25
I
I
Fat Sugar % max heart rate
50% - 60%
60% - 70%
70% - 80%
80% - 90%
Moderate activity (walking, hiking etc.)
Weight management (cardio training, running, rollerblading)
Aerobic zone (endurance training, 10 km)
Speed training (400 m)
I
EN
Notice CW F300.qxd:NOTICE CW F300 5/04/07 17:53 Page 24

Other GEONAUTE Heart Rate Monitor manuals

GEONAUTE Dual Belt Bluetooth Smart / ANT+ User manual

GEONAUTE

GEONAUTE Dual Belt Bluetooth Smart / ANT+ User manual

GEONAUTE HEART RATE MONITOR CW User manual

GEONAUTE

GEONAUTE HEART RATE MONITOR CW User manual

GEONAUTE ONmove 510 User manual

GEONAUTE

GEONAUTE ONmove 510 User manual

GEONAUTE HEART RATE MONITOR CWT500 User manual

GEONAUTE

GEONAUTE HEART RATE MONITOR CWT500 User manual

GEONAUTE ONrhythm 410 User manual

GEONAUTE

GEONAUTE ONrhythm 410 User manual

GEONAUTE CW F500 User manual

GEONAUTE

GEONAUTE CW F500 User manual

GEONAUTE ONrhythm 310 Manual

GEONAUTE

GEONAUTE ONrhythm 310 Manual

GEONAUTE HEART RATE BELT User manual

GEONAUTE

GEONAUTE HEART RATE BELT User manual

GEONAUTE On Rythm 100 User manual

GEONAUTE

GEONAUTE On Rythm 100 User manual

GEONAUTE HEART RATE MONITOR CW600T User manual

GEONAUTE

GEONAUTE HEART RATE MONITOR CW600T User manual

Popular Heart Rate Monitor manuals by other brands

Omron HCG-801 instruction manual

Omron

Omron HCG-801 instruction manual

Acumen EON BASIX ES Features instruction manual

Acumen

Acumen EON BASIX ES Features instruction manual

Vernier EHR-BTA manual

Vernier

Vernier EHR-BTA manual

Actiomo Actiomo Fit user manual

Actiomo

Actiomo Actiomo Fit user manual

Jarv JRV-SBD1000 user guide

Jarv

Jarv JRV-SBD1000 user guide

Hubble Connected Roo user guide

Hubble

Hubble Connected Roo user guide

Polar Electro Equine RC3 GPS user manual

Polar Electro

Polar Electro Equine RC3 GPS user manual

ImpactSports Technologies ePulse2 user manual

ImpactSports Technologies

ImpactSports Technologies ePulse2 user manual

Yasun YS-MBE01 Use instruction

Yasun

Yasun YS-MBE01 Use instruction

AUDAR EMBi user manual

AUDAR

AUDAR EMBi user manual

Tmed i37 instruction manual

Tmed

Tmed i37 instruction manual

AED CR-T quick start guide

AED

AED CR-T quick start guide

SmartHF SmartHRM user guide

SmartHF

SmartHF SmartHRM user guide

Crane au5-pf-20ga user manual

Crane

Crane au5-pf-20ga user manual

Garmin HRM-Run instructions

Garmin

Garmin HRM-Run instructions

Polar Electro F6 user manual

Polar Electro

Polar Electro F6 user manual

Vetta HR409 user manual

Vetta

Vetta HR409 user manual

Crivit 1-LD3945 Usage and safety instructions

Crivit

Crivit 1-LD3945 Usage and safety instructions

manuals.online logo
manuals.online logoBrands
  • About & Mission
  • Contact us
  • Privacy Policy
  • Terms and Conditions

Copyright 2025 Manuals.Online. All Rights Reserved.