GEONAUTE ONrhythm 410 User manual

ONrhythm 410
EN
1/24
2
SCHEMA 1
SCHEMA 2
*29,50 inchs
*19.68 inchs
50 cm*
75 cm* 75 cm*
75 cm*

2/24
3
SCHEMA 3
D : LIGHT
C : MODE
A: STR/STP
B : VIEW

3/24
4
3 sec

4/24
5
SCHEMA 4

5/24
6
EN
The ONrhythm 410 progress is an all-in, easy-to-use heart rate
monitor that helps you manage your exertion better when
exercising. You can use it to achieve your aims easily (weight
loss, endurance etc.) working in the appropriate target zone.
Lastly, you will make swifter progress by using timer mode to
program the splitting of your training sessions.
1/ Device and navigation overview
A: START/STOP : Start/stop the stopwatch.Activate or
deactivate a function.
B: LAP/RESET: Taking lap times (LAP).Scroll through
the values of a parameter; reset the
stopwatch to 0.
C: MODE
BUTTON:
Navigate between modes (time,
cardio, calories, data, settings).
D: LIGHT: Activate backlighting.
Navigation system: The navigation diagram is at the beginning of the manual (diagram 3).
5 main modes: press MODE to change between modes .
- TIME : permanently displays the time and date.
- CARDIO : training mode with heart rate as the main data item.
- TIMER : training mode using a double repetitive countdown.
- DATA : training reports for the 5 most recent training sessions.
- SETTINGS : all the device's settings: height, weight, target zone, etc.
2/ Use/ Precautions for use
This heart rate monitor is made up of a watch and a chest strap.The watch is designed to be
worn on the wrist or placed on a bicycle holder during various sporting, physical activities in a
temperate climate. The chest strap has a 32 channel coded transmitter.
User limitations/ precautions for use:
All precautions for use and restrictions are listed on page 3 of these instructions.
WARNING!!!
This equipment is designed for sports and leisure use. It is not a medical monitoring device.
The information provided by this equipment or manual are only used by way of example and
must only be used to monitor a medical disorder after consulting and obtaining agreement
from your doctor.
A
B
D
C

6/24
7
Similarly, athletes in good health must take into account the fact that determining your
maximum heart rate and personal training zones are vital elements in designing an effective
and risk-free training programme.
Advice from your doctor or health professional is recommended in order to set your maximum
heart rate, your higher and lower heart rate limits and the frequency and duration suitable for
your age, physical condition and target results.
Finally, as a result of possible disturbance caused by the radio transmission system, we do not
recommend that users of heart stimulators use a heart rate monitor which uses this form of
technology.
Not observing these precautions may put your life at risk.
3/ The chest strap
3.1/ Fitting the chest strap
The installation process for the strap is explained at the start of these instructions (diagram
1). The chest strap serves as a sensor and transmitter. It measures the differences of potential
created by the heartbeat on the surface of the skin. It transmits this information
to the watch by radio signal. The quality and
accuracy of its measurements and comfort
during use depend on it being correctly
positioned.As shown in the diagram,the sensors
are black rubber surfaces either side of the
central part.
When correctly placed, the strap sends heart rate information to the watch. Located within the
reception area (diagram 2), the watch displays the heart rate and offers different information
to manage and optimise your weight loss or training programme.
Avoid positioning the sensors in overly hairy areas. In cold and dry
climates, the strap may need several minutes to work properly. This is
perfectly normal as the sensors need a film of sweat to ensure contact
with the skin. When measurements start, the watch may indicate very
high values for around 20 seconds.This is due to the initialisation of the
algorithm. It will display correct values following initialisation.

7/24
8
4/ Time mode ( TIME )
- Using time mode
The time is displayed on the main line and the date is displayed on the
second line in the format selected in SETTINGS mode.
- Setting the time, date and 12/24 hour mode.
Changes are made in the SETTINGS mode.
5/ Cardio mode (CARDIO)
Training
stopwatch
Training
stopwatch
Taking
lap
times
Taking
lap
times
Display of readings as beats per minute (BPM):
The default display for your heart rate values is in beats per minute (BPM is visible on the
screen).They can also be displayed as a percentage of the maximum heart rate (%). BPM is
no longer visible on the screen..This display selection is made within the SETTINGS mode via
the HR Units parameter
Display readings as a percentage of maximum heart rate (%):
5.1/ Using cardio mode and main information
The main information in this mode is the heart rate.
IMPORTANT:
• To get heart rate information, you must be wearing your strap. (Don't forget to moisten it
beforehand). If it is correctly fitted it will automatically emit the heart rate signal. For more
information on fitting the strap, see diagram 1 or paragraph 3.
• Before using cardio mode, we also advise you to check that you have set the correct values
for yourself (height, weight, target zone) within mode (see the corresponding chapter). If not,
the values given by the watch may be incorrect. .
When entering CARDIO mode, the watch will search for the signal

8/24
9
3 sec
3 sec
If the signal has not been found, the watch displays "NO SIGNAL".
If the connection is broken for more than five minutes, the display changes
to ---.
To reactivate the signal search, press down MODE for 3 seconds
5.2/ Secondary information display
The secondary information on the second line can be changed by pressing down LAP/RESET
5.2.1/ Training stopwatch
This is the standard display when entering CARDIO mode. Press START/STOP to start the
stopwatch.Then press START/STOP again to stop it. Hold down LAP/RESET for 3 seconds
to put it back to 0.
It will automatically receive the signal if it is within range of the strap.
In this case, the symbol (heart) at the top left of the screen flashes and the heart rate is
displayed on the main line.
NB: 1.The stopwatch can only be started or stopped when it is displayed on the screen.
2. When the user changes mode while the stopwatch is running, a symbol is displayed
in all other modes.
3.The stopwatch can measure a duration of time from 0 to 23h 59min 59s.
5.2.2/ Lap information (LAP)
During your workout, you have the option of taking and saving your “lap time” (LAP) .
To do this, simply press down the button when the stopwatch is activated .
The watch displays the “lap time" to you for 5 seconds.You will be able to consult these "lap

9/24
10
6/ Timer Mode
6.1/ Principle of the TIMER mode
The double timer function enables a two value repetitive countdown that provides the option
to programme a training session that includes a workout period and a rest period which are
different from each other.
6.2 Utilisation of the Timer mode
If you want to use the timer, press down the Mode button until TIMERappears on the screen.The
watch will spend a few moments searching for your heart rate (see chapter 5.1); once it has
done this you will be be able to use the double timer using the following steps:
Press down START/STOP to start the first timer (RUN), your watch will emit a noise signal
when this has reached zero and the second timer (REST) will start up straight after.
RUN workout time
REST rest time.
Moreover, these two timers will start up one after the other for as many times as you have
programmed the repetition without taking any additional steps. However the number of
repetitions cannot exceed 25.
The timer is set within the SETTINGS mode (see chapter 8)
E.G.: you programme an exercise with the following values: RUN 3 mins and REST 1 min and
2 repetitions.To stop the Timer at any time during the session, press down the START/STOP
button . Press it a second time to resume the training.
times" within the DATA mode, when your sessions are being displayed.You can take as many
laps as you wish, but only the 50 most recent will be stored.
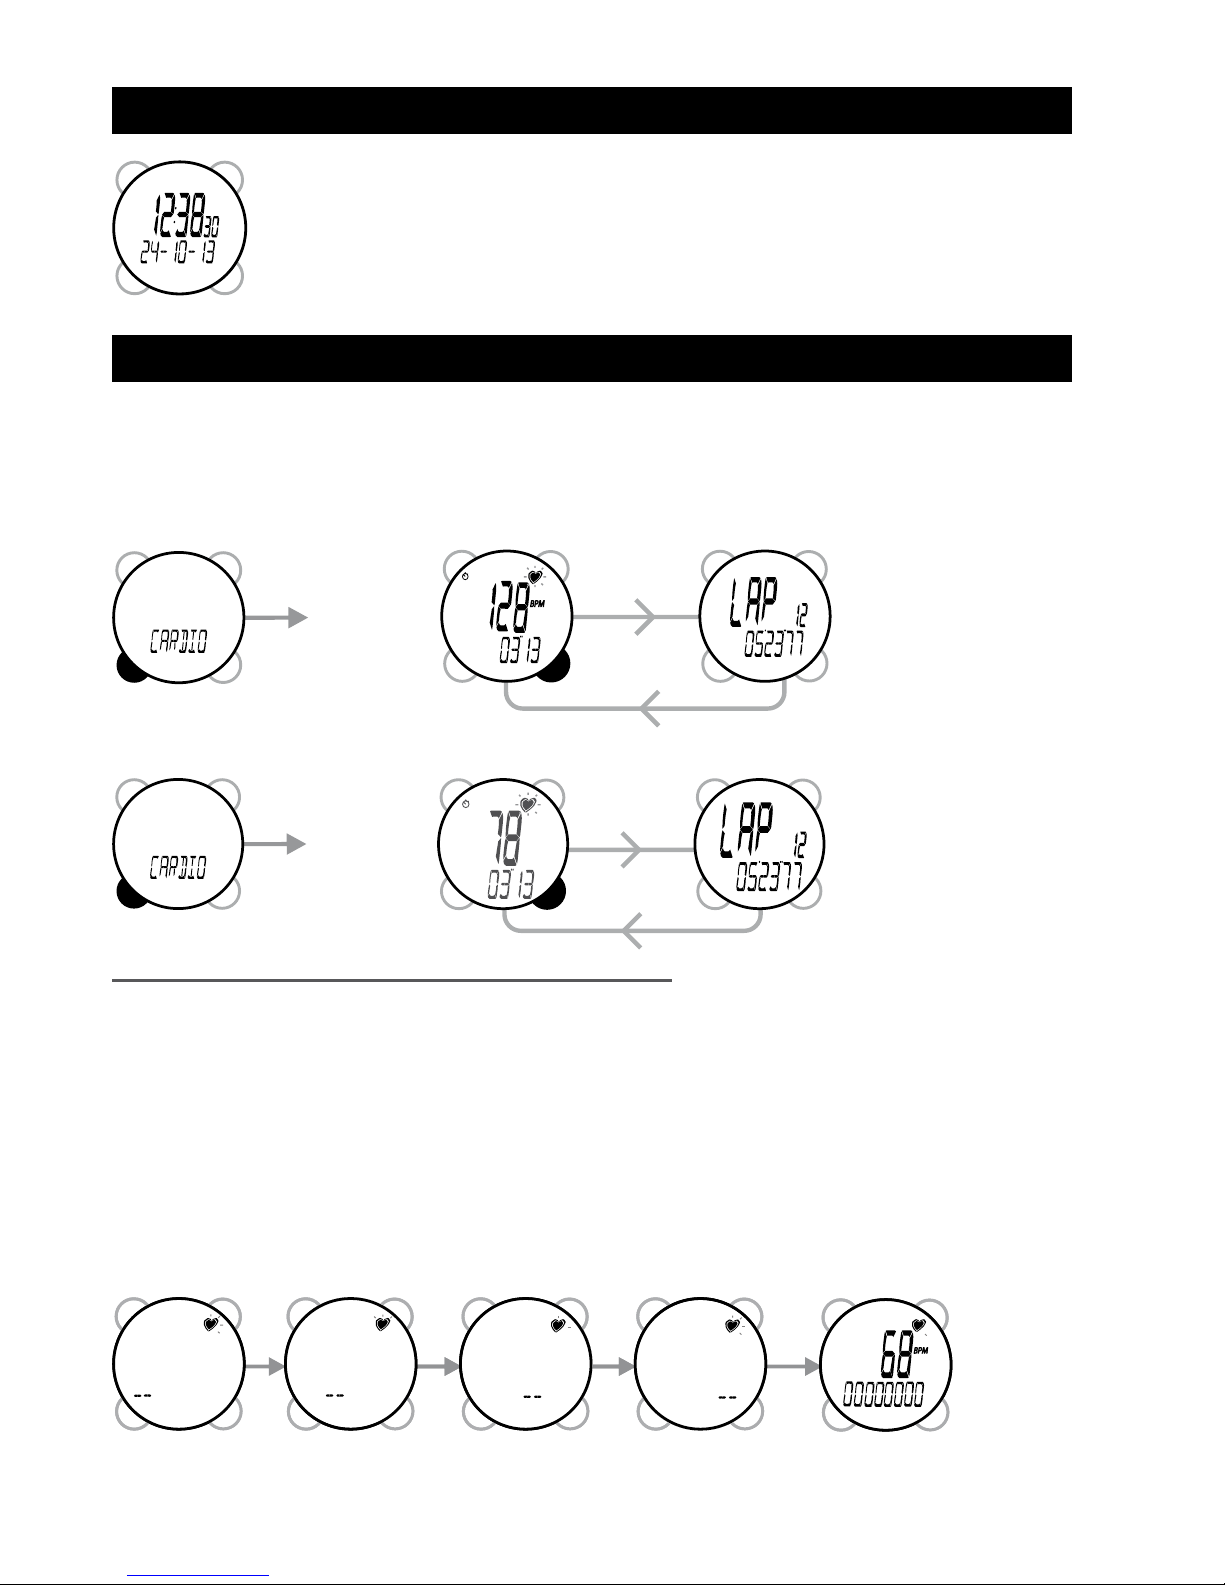
5.2.3/ Target zone (as a percentage of the maximum heart rate or in beats per
minutes)
A target zone is a heart rate zone in which you wish to exercise.The watch will sound an alarm if
your heart beats faster than the upper limit or slower than the lower limit.This target zone is set
in SETTINGS mode.. See the corresponding section for more information.
The target zone will be expressed in beats per minute but you have the option to express it
as a percentage of the maximum heart rate by modifying the HR UNIT parameter within the
SETTING mode.
NB: 1. The target zone is active when it is set to ON (setting within Settings) and the training
stopwatch has started up.
2. If you go over the Upper limit 2 beeps every 10 seconds will sound and the symbol (▲)
will be displayed on the watch screen. If you go below the Lower limit 1 beep every 10
seconds will sound and the symbol (▼) will be displayed on the watch screen.
3. It is possible to only use the upper limit or the lower limit by setting the other to an
unattainable value (e.g. 30 bpm for the lower limit).

10/24
11
3 sec
7/ Training report mode (DATA)
Data storage rules:
The report is reset when the training stopwatch is started for the first time: if a user goes into
DATA mode at that time,he or she will see NO DATA.The data is stored in the memory when the
user stops the stopwatch: the user who enters DATA mode will then see the training report from
the session which he or she has just undertaken, as well as those previously saved.
You can save up to 5 sessions. When the watch memory is full, it will automatically delete the
oldest session.
Consulting the saved sessions:
The most recent session is displayed first. Sessions are identifiable by the duration and the
mode used "CARDIO" or "TIMER" ».
In between each repetition, the watch displays the number of the next repetition, the total
number of programmed repetitions and RUN or REST. RUN workout phase
REST rest phase.
During each repetition, pressing down LAP/RESET enables the number and phase of the
repetition to be displayed.
When your session ends or the training stopwatch is stopped, hold down the LAP/RESET button
. “RESET” appears on the screen, hold down the button for 3 seconds. Your session is put
back to 0.

11/24
12
Number of grams of fat burnt during the training.
Time produced on the 1st lap (Lap1).
Total number of kilocalories burnt during the training session.
Consultation mode of the training reports:
Date of the session.
Average heart rate (AVG HR) in Beats per minute (Bpm is displayed)over the
duration of the training or as a percentage of the maximum heart rate (BPM is not
displayed) if you have programmed HR Units as a %.
Maximum heart rate (MAX HR) in Beats per minute (Bpm is displayed ) over the
duration of the training or as a percentage of the maximum heart rate (BPM is not
displayed) if you have programmed HR Units as a %.
Time spent in the target zone in hours minutes seconds.The value is 0 if the target
zone has been deactivated.
Details about the Cardio session:
You move from one session to another by pressing LAP/RESET .You consult the
contents of a session by pressing START/STOP . Each time LAP/RESET is
pressed you can scroll through the information about the selected session

12/24
13
Average heart rate (AVG HR) in Beats per minute (Bpm is
displayed)over lap 1 or as a percentage of the maximum rate
(BPM is not displayed) if you have programmed HR Units as a
% . AVG HR and the lap number (LAP) are displayed alternately.
Time produced on the 8th lap (Lap 8)
Average heart rate (AVG HR) in Beats per minute (Bpm is
displayed)over lap 8 or as a percentage of the maximum
rate (BPM is not displayed) if you have programmed HR Units
as a %. AVG HR and the lap number ( LAP ) are displayed
alternately.
Return to the home screen. Press down LAP/RESET to consult the previous
session or on START/STOP to review the contents of this session.
All the session data has been shown.
Split time (SPLIT) of lap 1.
Split time (SPLIT) of lap 8

13/24
14
Number of grams of fat burnt during the training.
First run time saved (Run1) and its duration.
Average heart rate (AVG HR) in Beats per minute (Bpm is
displayed)over workout time 1 or as a percentage of the
maximum rate (BPM is not displayed) if you have programmed
HR Units as a %. AVG HR and the lap number (LAP) are
displayed alternately.
Total number of kilocalories burnt during the training period.
Detail about the Timer session:
Consultation mode of the exercise reports:
Date of the session.
Average heart rate (AVG HR) in Beats per minute (Bpm is displayed)over the
duration of the training or as a percentage of the maximum heart rate (BPM is not
displayed) if you have programmed HR Units as a %.
Maximum heart rate (MAX HR) in Beats per minute (Bpm is displayed ) over the
duration of the training or as a percentage of the maximum heart rate (BPM is not
displayed) if you have programmed HR Units as a %.
You move from one session to another by pressing LAP/RESET .You consult the
contents of a session by pressing START/STOP . Each time LAP/RESET is
pressed you can scroll through the information about the selected session

14/24
15
Average heart rate (AVG HR) in Beats per minute (Bpm) is
displayed)
over rest time 1 or as a percentage of the maximum
rate (BPM is not displayed) if you have programmed HR Units
as a %. AVG HR and the lap number (LAP
) are displayed
alternately.
Second run time saved (Run2) and its duration.
Average heart rate (AVG HR) over the workout time 2 in Beats
per minute (Bpm) or as a percentage (%) if you have set HR
units as a %, during the first rest time (Run 2).
All the session data has been shown.
Return to the home screen. Press down LAP/RESET
to consult the previous
session or on START/STOP to review the contents of this session.
First rest time saved (Rest 1) and its duration.
Deleting sessions
To select the session to be deleted, hold down LAP/RESET for 3 seconds
until the word
DELETE disappears
3 sec

15/24
16
8/ Parameter mode (Settings)
The general setting rule is to select the parameter to be set by successively pressing on LAP/
RESET , then to enter the setting mode by pressing on START/STOP , then to increase or
decrease the value by pressing on MODE or LAP/RESET and lastly to validate this by
pressing on START/STOP .
Setting the target zone
When entering setting mode of the target zone, the type of target zone is displayed:
Practical information:
- When setting things, the LAP/RESET button enables the value to be increased
and the MODE button enables it to be decreased.
- To set things more quickly, you can keep LAP/RESET or MODE pushed in and
the values will change rapidly.
- If no button is pressed for 2 minutes during setting, the watch automatically exits
setting mode.
Either the target zone is deactivated (ZONE: OFF) or it is activated and expressed in beats per
minute (BPM) or as a percentage of the maximum heart rate. The watch will then alternately
display the selected mode and the zone values.
Modification to the upper and lower levels in one of the two display modes will be automatically
converted to the other mode.
If you want to modify the target zone mode to be used, select it using START/STOP , then
change it by pressing down LAP/RESET .Validate your selection by pressing again on START/
STOP , you will then access the setting mode for the target zone values.
Setting the timer
The TIMER mode is set within the SETTINGS mode, press down the Mode button several times
to access it.
Once you are in SETTINGS, these are the steps to take:
- Press down on LAP/RESET once, SET TIMER appears on the screen.
- Press down on START/STOP ,you access the setting of the First Timer RUN (workout). Set the
number of seconds using the LAP/RESET (+) and MODE (-) buttons.
- Press down on START/STOP to access the setting of the number of minutes.Set the number

16/24
17
of minutes using the LAP/RESET (+) and MODE (-) buttons.
- Press down on START/STOP , you access the setting of the Second Timer REST
(rest time).
Set the number of seconds using the LAP/RESET (+) and MODE buttons (-)
. Press down
on START/STOP
to access the setting of the number of minutes.Set the number of minutes
using the LAP/RESET (+) and MODE (-) buttons.
- Press down on START/STOP
,you have the option of activating or deactivating the repetition
of timers set previously, in order to do this use the LAP/RESET (+) or MODE buttons. (-),
ON or OFF is displayed on the screen.
If "ON" is selected press down START/STOP
, you will access the setting of the number of
repetitions of the timers
Set it using the LAP/RESET (+) and MODE buttons (-).
Once you have set the parameter, you have two options. If you want to set other heart rate
parameters, once you have returned to the SET TIMER display, press down once on LAP/RESET
. If you want to exit the SETTINGS mode, press down once on the MODE button .
Activating/deactivating the timer repetitions:
ON/OFFON/OFF ON/OFFON/OFF

17/24
18
VIEW
LAP
/RESET
LAP
/RESET
LAP
/RESET
LAP
/RESET
Setting the alarm
When you activate the alarm (ON,a small musical note icon will appear at the
bottom right of your watch screen. This will disappear when you deactivate
the alarm (OFF).
ON/OFF ON/OFF
Setting the time
Setting the alarm
You can switch the button tone
(ON) or (OFF) .
You can use the watch with
Anglo-Saxon units (weight in
pounds, height in inches, time
display in 12 hour mode with
AM and PM, and date in YY-MM-
DD order) or with European units
(weight in kg, height in cm, time
in 24 hour display, and date in
DD-MM-YY order).
Setting the system of units.

18/24
19
LAP
/RESET
LAP
/RESET
LAP
/RESET
LAP
/RESET
LAP
/RESET
Setting your age (in years)
Setting your height
(the unit
is displayed according to the
system used: cm (centimetres)
or inches.
Setting your weight
(the unit
is displayed according to the
system used: kg (kilograms) or
lb (pounds).
Setting your personal information
MALE/
FEMALE
MALE/
FEMALE
Your gender (male (M) or female
(F))
You can’t set the seconds to a precise value,but can only reset them to 0 when
you confirm by pressing START/STOP .
Setting the date
Setting your resting heart rate
Resting heart rate plays a part in the calculation of grams of fat burnt during exercising. To
determine it, after waking up, stay lying down. Measure your heart rate after a few minutes; try

19/24
20
LAP
/RESET
LAP
/RESET
LAP
/RESET
It is set in the same way as the
other parameters START/STOP
for selecting it, LAP/RESET
and MODE for setting
its value, START/STOP for
checking its value).
It is set in the same way as the
other parameters START/STOP
for selecting it, LAP/RESET
and MODE for setting
its value, START/STOP for
checking its value.
Entering maximum heart rate
The maximum heart rate is the highest heart rate that you can reach when
exercising. Its default setting is 220 - Age. This value impacts the heart rate
value expressed as a percentage of the HR max. In chapter 10 "Training
principles", you will find a fitness test for evaluating your maximum heart rate.
Setting the heart rate display
This parameter enables you to display your heart rate and target zone
values,either in beats per minute or as a percentage of the maximum heart
ra t e.
You can use the unit that is most convenient to you.
As you enter the CARDIO and TIMER modes, the choice of display as a
percentage of the maximum heart rate will be shown by the following
temporary screen
to remain as still as possible. Repeat the procedure on several consecutive days and take the
average of these values.
9/ Resetting the watch

20/24
21
3 SEC3 SEC
3 SEC3 SEC
10/ Training principles
For reasons of effectiveness and safety, it is essential that you are aware of some training-
specific physiological guidelines.The advice we give below is an indication for healthy, sporty
people with no medical disorders. We strongly recommend that you seek advice from your
doctor for more precise information on training zones. Know your limits and do not exceed
them!
Values to be aware of
To optimise the benefits of your physical
training, you must first know your maximum
heart rate (HRmax) in beats per minute (bpm) .
The HRmax can be estimated using the
following calculation: HRmax = 220 – your age.
A fitness test will however enable you to obtain a
more accurate value.
Training zones
During a fitness programme, several training zones will give specific results which correspond
to different objectives. Depending on the intensity of the training, the percentage of energy
produced by burning sugar and burning fat will change.
- Within the endurance zone (70 to 80% of HR max) the sportsperson works his or her overall
fitness, long distances and general endurance levels. It’s the pace at which you can run for
more than an hour. Energy combustion uses a proportion of fats that becomes increasingly
significant according to the duration of the training.
- Within the resistance zone (80 to 90% HR max)the sportsperson works at strengthening his or
her heart and muscles,his or her middle distance speed and resistance at full strength.It’s the
pace at which you run 5 to 10 km in competition.This pace is no longer comfortable and you
get tired. Energy combustion uses sugars almost exclusively, especially if you can’t keep up
this pace for more than half an hour.
E.g.: A 30-year-old athlete training using aerobic endurance to increase his or her resistance
to effort and improve his or her half marathon time. The most effective training area for her
objective will be the resistance zone.
Heart
rate
200
Resistance
Endurance
Max HR =
220 - age
All segments are displayed for a short time and then the
watch will be restarted.
20
LAP
/RESET
LAP
/RESET
LAP
/RESET
It is set in the same way as the
other parameters START/STOP
for selecting it, LAP/RESET
and MODE for setting
its value, START/STOP for
checking its value).
It is set in the same way as the
other parameters START/STOP
for selecting it, LAP/RESET
and MODE for setting
its value, START/STOP for
checking its value.
Entering maximum heart rate
The maximum heart rate is the highest heart rate that you can reach when
exercising. Its default setting is 220 - Age. This value impacts the heart rate
value expressed as a percentage of the HR max. In chapter 10 "Training
principles", you will find a fitness test for evaluating your maximum heart rate.
Setting the heart rate display
This parameter enables you to display your heart rate and target zone
values,either in beats per minute or as a percentage of the maximum heart
ra t e.
You can use the unit that is most convenient to you.
As you enter the CARDIO and TIMER modes, the choice of display as a
percentage of the maximum heart rate will be shown by the following
temporary screen
to remain as still as possible. Repeat the procedure on several consecutive days and take the
average of these values.
9/ Resetting the watch
Table of contents
Other GEONAUTE Heart Rate Monitor manuals

GEONAUTE
GEONAUTE CW F500 User manual

GEONAUTE
GEONAUTE ONrhythm 310 Manual

GEONAUTE
GEONAUTE HEART RATE MONITOR CW User manual

GEONAUTE
GEONAUTE CW F300 User manual

GEONAUTE
GEONAUTE On Rythm 100 User manual

GEONAUTE
GEONAUTE ONmove 510 User manual

GEONAUTE
GEONAUTE Dual Belt Bluetooth Smart / ANT+ User manual

GEONAUTE
GEONAUTE HEART RATE MONITOR CW600T User manual

GEONAUTE
GEONAUTE HEART RATE MONITOR CWT500 User manual

GEONAUTE
GEONAUTE HEART RATE BELT User manual