manuals.online logo
Brands
  1. Home
  2. •
  3. Brands
  4. •
  5. GeoVision
  6. •
  7. IP Camera
  8. •
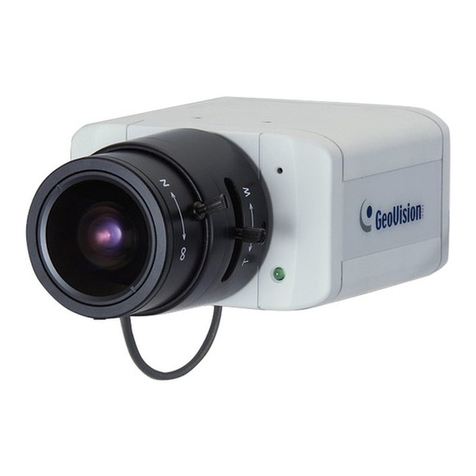
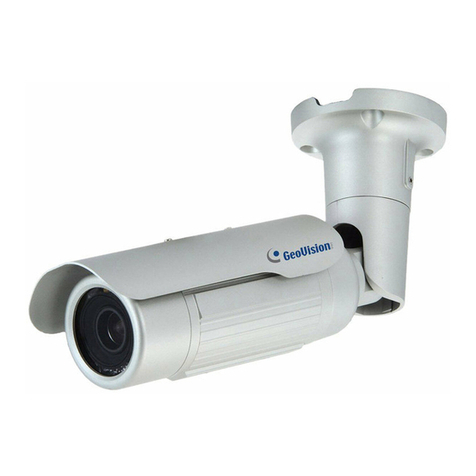
  9. GeoVision GV-IRCAM 10M EIA AC24V User manual

GeoVision GV-IRCAM 10M EIA AC24V User manual

GV-IRCAM
Installation Guide
© 2008 July GeoVision Inc. All rights reserved. IRCAMV10-B
Before attempting to connect or operate this product,
please read these instructions carefully and save this manual for future use.
(10-Meter / 20-Meter Models)
GV-IRCAM offers a selection of models that support different power supplies, optimal
distances and video formats to meet various needs.
GV-IRCAM 10M EIA DC12V / GV-IRCAM 10M CCIR DC12V
GV-IRCAM 20M EIA DC12V / GV-IRCAM 20M CCIR DC12V
AC Power Cable x 1
Power Adapter (100-240V, 12V/3A) x 1
Outdoor Mounting Bracket x 1
GV-IRCAM 10M EIA AC24V / GV-IRCAM 10M CCIR AC24V
GV-IRCAM 20M EIA AC24V / GV-IRCAM 20M CCIR AC24V
Outdoor Mounting Bracket x 1
Models
Packing List
Model
GV-IRCAM 10M EIA AC24V
GV-IRCAM 10M EIA DC12V
GV-IRCAM 20M EIA AC24V
GV-IRCAM 20M EIA DC12V
GV-IRCAM 10M CCIR AC24V
GV-IRCAM 10M CCIR DC12V
GV-IRCAM 20M CCIR AC24V
GV-IRCAM 20M CCIR DC12V
Power Supply
AC
DC
AC
DC
AC
DC
AC
DC
Optimal Distance
10 M
20 M
10 M
20 M
Video Format
NTSC
PAL
Installing Camera Module
Push the sun shield forward to align
with the back of camera enclosure.
1. Slightly lift the camera module and
slide it out completely.
4.
Remove the foam.5.
For the users of all 10-meter models,
skip Steps 6 to 10 and continue to
Step 11.
*
2.
Pull out the camera module.
Sun Shield
Camera Enclosure Back
Camera Module
Completely slide the camera
module out
Loosen the set screws on the back of
the camera enclosure.
3.
On the back of the pedestal, loosen the
screw of the camera.
6.
A CS mount lens adaptor is attached to
the camera. Mount it between the lens
and the camera.
7.
Mount the camera onto the pedestal
and align the lens with LED.
9.
Screw the camera on the pedestal.10.
Loosen the screw cap on the right.
Continued on the reverse >>
11.
8.
CS Mount Lens Adaptor
Remove the lens caps.
Specifications
Model
Distance (optimal)
Sensor
Resolution
Lens Focal Length
Construction
Protection classification
Environmental
Power Supply
Power Consumption
LED Quantity
Illumination Range
Illumination View Angle
Illuminator Life
GV-IRCAM 10M
7~15M
1/3" B/W EXview CCD
600 TVL
5 ~ 50 mm, 10X
Robust aluminum with weatherproof sun-shield
IP 66
Operation: -20˚C ~ 50˚C
Storage: -30˚C ~ 60˚C
AC 24V / DC 12V
15W
12 high-efficiency
reflex LED
20M (object of view
reflecting IR light)
30˚
25,000 hrs
GV-IRCAM 20M
15~25M
10 ~ 120 mm, 12X
20W
24 high-efficiency
reflex LED
30M (object of view
reflecting IR light)
The camera has its own default settings.
See details in the chart below.
Adjusting Camera Settings
ME
FL
BLCOFF
AUTO IRIS
AI SHUT
Pk
SUPERAGC
r
AE
FLOFF
BLC
CCD-I
NORM
Av
NAGC
r=.45
For the DC model users, plug the
power cable into the DC jack.
For the AC model users, connect the
two power cables to the AC power
supply.
17.
Adjust the length of the cable, seal it
with the waterproof tape and then
tightly screw the cap (see Steps 14 and
15 for the pictures).
18.
You can also change the settings to suit different needs. The charts below provide
you an overview of how you can adjust the settings.
Note: The default settings are marked with (*).
Important: The gray areas in the charts are not recommended for use.
Overview of Settings Adjustment
Shutter Speed Settings
Gain Control Settings
Auto Iris Selection
SHUTTER SPEED
1/50(1/60) SEC
1/120(1/100)SEC
1/250 SEC
1/500 SEC
1/1000 SEC (*)
1/2000 SEC
1/4000 SEC
1/10000 SEC
GAIN
0 dB
6 dB (*)
12 dB
18 dB
AE/ME
ME
ME
ME
ME
Av
Pk
Av
Pk
NAGC
NAGC
SUPERAGC
SUPERAGC
AE/ME
ME
ME
ME
ME
ME
ME
ME
ME
FLOFF
FL
FLOFF
FL
FLOFF
FL
FLOFF
FL
BLC
BLC
BLCOFF
BLCOFF
BLC
BLC
BLCOFF
BLCOFF
CCD-I
CCD-I
CCD-I
CCD-I
AUTO IRIS
AUTO IRIS
AUTO IRIS
AUTO IRIS
DC VIDEO
After the installation of camera module
and settings adjustment, you are now
ready to install the camera enclosure
back.
Installing Camera Enclosure
Align the camera module to the
camera enclosure and slide it back.
3.
Secure the camera enclosure with the
screws on both sides.
4.
Push the sun shield back.5.
1. Adjust the lens focus.
2. Lift the camera module.
9F, No. 246, Sec. 1, Neihu Rd.,
Neihu District, Taipei, Taiwan
Tel: +886-2-8797-8377
Fax: +886-2-8797-8335
[email protected]
http://www.geovision.com.tw
VIDEO OUT Jack
For the DC model users, attach the
video cable to the BNC connector and
plug it into the “VIDEO OUT” jack.
For the AC model users, attach the
video cable to the BNC connector and
plug it into the “MONI. OUT” jack.
13.
Insert the video cable through the
screw cap and the inside rubber of the
cap.
12. Adjust the length of the video cable and
seal it with the waterproof tape.
14.
Tightly screw the cap.15.
Loosen the screw cap on the left, insert
the power cable through the screw cap
and the inside rubber.
16.
MONI. OUT Jack
Rubber
Screw Cap
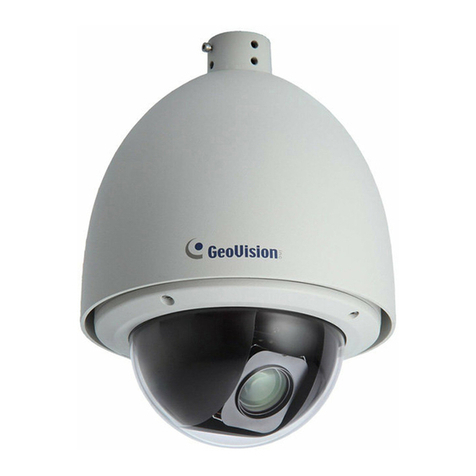
This manual suits for next models

7

Other GeoVision IP Camera manuals

GeoVision GV-BX Series User manual

GeoVision

GeoVision GV-BX Series User manual

GeoVision GV-LPR1200 User manual

GeoVision

GeoVision GV-LPR1200 User manual

GeoVision GV-BX120D series User manual

GeoVision

GeoVision GV-BX120D series User manual

GeoVision GV-BL120D User manual

GeoVision

GeoVision GV-BL120D User manual

GeoVision GV-LPC2210 User manual

GeoVision

GeoVision GV-LPC2210 User manual

GeoVision GV-IPCAM User manual

GeoVision

GeoVision GV-IPCAM User manual

GeoVision GV-BX110D User manual

GeoVision

GeoVision GV-BX110D User manual

GeoVision GV-Fisheye GV-FE2301 User manual

GeoVision

GeoVision GV-Fisheye GV-FE2301 User manual

GeoVision GV-BX2400-0F User manual

GeoVision

GeoVision GV-BX2400-0F User manual

GeoVision GV-VD120D User manual

GeoVision

GeoVision GV-VD120D User manual

GeoVision GV-3D People Counter V2 User manual

GeoVision

GeoVision GV-3D People Counter V2 User manual

GeoVision GV-BL1200 User manual

GeoVision

GeoVision GV-BL1200 User manual

GeoVision GV-BL120D User manual

GeoVision

GeoVision GV-BL120D User manual

GeoVision GV-ABL Series User manual

GeoVision

GeoVision GV-ABL Series User manual

GeoVision GV-BX130D-0 User manual

GeoVision

GeoVision GV-BX130D-0 User manual

GeoVision GV-Fisheye User manual

GeoVision

GeoVision GV-Fisheye User manual

GeoVision GV-Fisheye User manual

GeoVision

GeoVision GV-Fisheye User manual

GeoVision GV-Fisheye User manual

GeoVision

GeoVision GV-Fisheye User manual

GeoVision GV-Fisheye SERIES User manual

GeoVision

GeoVision GV-Fisheye SERIES User manual

GeoVision GV-OPAL S1 User manual

GeoVision

GeoVision GV-OPAL S1 User manual

GeoVision GV-BX120D series User manual

GeoVision

GeoVision GV-BX120D series User manual

GeoVision GV-BX120D series User manual

GeoVision

GeoVision GV-BX120D series User manual

GeoVision GV-Fisheye User manual

GeoVision

GeoVision GV-Fisheye User manual

GeoVision GV-Fisheye GV-FE2301 User manual

GeoVision

GeoVision GV-Fisheye GV-FE2301 User manual

Popular IP Camera manuals by other brands

Bosch 200 Series specification

Bosch

Bosch 200 Series specification

Sting IP Camera user guide

Sting

Sting IP Camera user guide

Ness 104-463 user manual

Ness

Ness 104-463 user manual

Digital Home System Foscam FI8910W Integration manual

Digital Home System

Digital Home System Foscam FI8910W Integration manual

Ganz Thermal Series user manual

Ganz

Ganz Thermal Series user manual

Paradox HD78 installation manual

Paradox

Paradox HD78 installation manual

E-line ELI-IP5-ED21-4R user manual

E-line

E-line ELI-IP5-ED21-4R user manual

Apexis APM-J803-WS user manual

Apexis

Apexis APM-J803-WS user manual

Edimax IC-3010 Quick instillation guide

Edimax

Edimax IC-3010 Quick instillation guide

D-Link DCS-G900 - SECURICAM Wireless G Internet Camera... manual

D-Link

D-Link DCS-G900 - SECURICAM Wireless G Internet Camera... manual

Omcon OMC-935IPBMEGA user manual

Omcon

Omcon OMC-935IPBMEGA user manual

Panasonic AW-HE100E operating instructions

Panasonic

Panasonic AW-HE100E operating instructions

LB Technology JM83910-H2V quick guide

LB Technology

LB Technology JM83910-H2V quick guide

LENCO Sportcam-400 user manual

LENCO

LENCO Sportcam-400 user manual

A-MTK AH21K9M quick start guide

A-MTK

A-MTK AH21K9M quick start guide

Spy On A Bird Network Camera user manual

Spy On A Bird

Spy On A Bird Network Camera user manual

Grandstream Networks GXV3601 quick start guide

Grandstream Networks

Grandstream Networks GXV3601 quick start guide

Digisol SKYROS SERIES Quick installation guide

Digisol

Digisol SKYROS SERIES Quick installation guide

manuals.online logo
manuals.online logoBrands
  • About & Mission
  • Contact us
  • Privacy Policy
  • Terms and Conditions

Copyright 2025 Manuals.Online. All Rights Reserved.