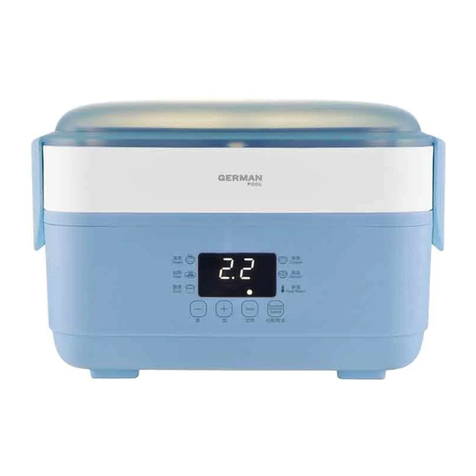
German pool JET-118 User manual

P.1
Please read these instructions and warranty information carefully
before use and keep them handy for future reference.
在使用之前請詳細閱讀「使用說明書」及「保用條款」,並妥為保存。
即時網上登記保用
Online Warranty Registration
使 用 說 明 書US E R M A N U A L
桑拿蒸氣料理鍋
Stackable Steam Hotpot Cooker
JET-118
白色面贴
除垢加水 火力
大蝦扇貝 花蛤 魚片
預約
定時 倒數
紫薯 包點
蔬菜 排骨
螃蟹 肉片
預約
Timer
開關
On/Off
除垢
Descale
菜單
Menu
保溫/取消
Keep Warm
/Cancel
定時/火力
Set Time
/Power
按下確認
Press Confirm

P.3P.2
目錄
產品特點 4
安全注意事項 5
產品結構 6
使用前注意事項 8
操作說明 9
清洗與保養 10
常見故障及處理 12
產品線路圖 12
技術規格 13
保用條款 27
請即進行保用登記﹗
有關保用條款細則,請看本說明書最後一頁。
Please register your warranty information now!
For Warranty Terms & Conditions,
please refer to the last page of this user manual.

P.5P.4
產品特點 安全注意事項
• 微壓蒸氣產生系統,30秒內出蒸氣,分段加熱,慳時、慳電、慳水
• 2kPa微壓蒸氣,加熱更快、更全面保留營養、味道更天然
• 活動蒸格靈活組合多層蒸籠*,以容納全雞等大體積食物
• 清晰電子顯示屏及多個一按自動烹調程式
• 可自選火力與加熱時間
• 設有預約功能
• 多重安全保護措施
• 可拆式蒸籠選用304不銹鋼材質,內鍋易拆易放,方便清洗
• 可移動外置式水箱,清晰水位視窗,加水更靈活,清潔更方便
• 特設除垢提示及排水口,方便清潔蒸氣產生器
1. 為了您的安全,使用時產品主機應放置在穩固的檯面上,同時應遠離會因蒸氣而受損的
物體,並注意避免兒童被燙傷。
2. 接通電源前,應先確認所使用的電壓與產品上標明的電壓相符。電源應用可靠的接地。
3. 產品切勿放在接近易燃易爆物品或其他熱源的地方,以免發生故障或危險。
4. 產品不能讓兒童單獨操作使用,要放在兒童不能觸及的地方,以免發生觸電或燙傷等安
全事故。
5. 使用前請先確認水箱內的水位不低於“下水位線”,方可接通電源進行工作。水箱加水
時應注意加水不能過滿,以免溢出。水箱內只可加自來水、純淨水和蒸餾水,切勿加入
其他液體或雜物。
6. 產品工作時應注意不要直接接觸到高溫部位,可採取隔熱措施或帶上隔熱手套進行操
作,以免燙傷。
7. 在加熱狀態下,欲取上層部件時,應當小心避免連帶下層部件翻倒食物等。
8. 如果產品出現加水提示警報,請及時加水進水箱。
9. 產品工作時請勿移動,避免危險。
10. 切勿將電源線、主機浸入水中清洗,以免電器進水造成故障和危險。
11. 收藏前應將各部件放置於安全、乾爽處晾乾。
12. 本產品僅限於家庭使用,不得用於商業用途上,不得在戶外使用。
13. 本產品可在海拔高度2000米以下正常使用。
14. 請將本產品存儲在0℃以上的環境中,以免主機內管路結冰,影響性能。
15. 非專業人員切勿拆卸、修理本產品。如果電源線損害,為避免危險,必須由本公司維修
部門的專業人員來檢測更換或用製造廠提供的專用電源線來更換,不可自行更換電線或
插頭。當產品出現故障且無法排除時,切勿自行維修,請與本公司的客戶服務部及維修
中心聯繫。
*另購配件

P.7P.6
按下確認
Press Confirm
白色面贴
除垢加水 火力
大蝦扇貝 花蛤 魚片
預約
定時 倒數
紫薯 包點
蔬菜 排骨
螃蟹 肉片
預約
Timer
開關
On/Off
除垢
Descale
菜單
Menu
保溫/取消
Keep Warm
/Cancel
定時/火力
Set Time
/Power
按下確認
Press Confirm
白色面贴
除垢加水 火力
大蝦扇貝 花蛤 魚片
預約
定時 倒數
紫薯 包點
蔬菜 排骨
螃蟹 肉片
預約
Timer
開關
On/Off
除垢
Descale
菜單
Menu
保溫/取消
Keep Warm
/Cancel
定時/火力
Set Time
/Power
產品結構
鍋蓋 使用前請確保鍋膽密封圈套在鍋
膽上,方向如下圖
蒸籠*
鍋膽
主機
蒸氣蓋
控制
面板
蒸格
蒸氣罩
鍋膽密
封圈
水箱
水位視窗
防堵罩
注水口蓋
產品結構
輕觸式按鍵設計,按鍵功能示意如下:
按鍵 說明
開關 開關
On/Of f
控制整機電源的開和關。
菜單 菜單
Menu
共有10個菜單功能,按下此鍵可進入菜單選擇狀態,在菜單選擇
狀態下亦可扭動旋鈕快速切換功能表,按下「確認」鍵快速進入
程式。如沒有按下「確認」鍵,主機將延時5秒後自動進入程式。
定時/火力 定時/火力
Set Time
/Power
按下此鍵可進行自定時設定;再按此鍵可進行火力切換,一共有3
檔火力可選擇,三檔1800W(6盞燈點亮),二檔1200W(4盞燈
點亮),一檔500W(2盞燈點亮)。
保溫/取消 保溫/取消
Keep Warm
/Cancel
保溫:待機狀態下按此鍵或烹調完畢後進入保溫狀態,屏幕顯
示“bb”計時(預設保溫4小時)。
取消:工作或操作過程中按此鍵可停止加熱或取消當前操作,返
回待機狀態。
預約 預約
Timer
待機狀態下按「預約」鍵,默認設定“04:00”小時閃爍,扭動旋
鈕調整時間,以30分鐘為單位遞增或遞減,最短時間為30分鐘,
最長時間為24小時。設定好預約時間後,再按菜單鍵和火力鍵選
擇菜單功能與設定火力,5秒後開始預約倒數。也可以先選擇菜單
功能,設定火力再調整預約時間。
除垢 除垢
Descal e
長按“除垢”鍵3秒,進入除垢程式。
按下確認 按下確認
Press Confirm
按下旋鈕可快速確認所選菜單,左右旋轉可快速調節時間。在菜
單選擇模式下,扭動旋鈕可快速切換菜單功能。
主機 控制面板
*另購配件

P.9P.8
• 使用前請先把鍋蓋、蒸籠*、蒸格、蒸氣罩、鍋膽、蒸氣蓋和水箱清洗乾淨。(蒸氣蓋可
從主機上拔出,如下圖;使用前請務必把蒸氣蓋安裝在主機上)。
• 使用前,應先確保水箱有足夠的水量。抓住注水口蓋的手柄,稍微往上一提,即可打開注
水口,然後通過注水口往水箱裏加水。可隨時透過水位視窗觀察水箱內剩餘水量。
1. 水箱加水後放置在主機上,並確認水箱兩端與主機扣合、安裝到位
(圖1)。
2. 把裝了鍋膽密封圈的鍋膽套進主機,再把蒸氣罩放在蒸氣出口上
(圖2)
注意:
• 水箱儲水量約為1.6公升,水箱滿水時可在三檔火力狀態下最長工作時間約55分鐘。約55
分鐘後水箱內的水將被用完。
• 當智能加水系統檢測到沒水時,控制面板上的「加水」指示燈會一直閃爍,並且每2秒發
出一聲警報聲,若2分鐘內還未加水,系統會自動返回待機狀態
使用前注意事項 操作說明
水位視窗
注水口蓋
注水口
水箱快滿
水箱快空
觀看操作視頻
3. 放上蒸格或蒸籠*,再放入食材,蓋上鍋蓋。主機接通電源後即可選擇烹調模式。
功能 預設時間 預設火力檔
紫薯 20分鐘(可調8-33分鐘) 3檔(最高火力)(3分鐘轉2檔,火力不可調)
蔬菜 5分鐘(可調3-15分鐘) 3檔(最高火力)(3分鐘轉2檔,火力不可調)
螃蟹 8分鐘(可調3-15分鐘) 3檔(最高火力)(3分鐘轉2檔,火力不可調)
扇貝 5分鐘(可調3-15分鐘) 3檔(最高火力)(3分鐘轉2檔,火力不可調)
大蝦 3分鐘(可調3-11分鐘) 3檔(最高火力)(3分鐘轉2檔,火力不可調)
花蛤 3分鐘(可調3-15分鐘) 3檔(最高火力)(3分鐘轉2檔,火力不可調)
魚片 3分鐘(可調3-15分鐘) 3檔(最高火力)(3分鐘轉2檔,火力不可調)
肉片 5分鐘(可調3-15分鐘) 3檔(最高火力)(3分鐘轉2檔,火力不可調)
排骨 6分鐘(可調5-20分鐘) 3檔(最高火力)(3分鐘轉2檔,火力不可調)
包點 18分鐘(可調8-28分鐘) 3檔(最高火力)(3分鐘轉2檔,火力不可調)
4. 當鍋膽用於煮粥時,請注意最大煮粥量不能超過鍋膽最高刻度線。
注意:
1. 使用前務必確認鍋膽安裝到位,如沒有裝上內鍋而啟動加熱程式會導致主機故障;
2. 請勿堆滿蒸籠*,應預留出適當的空間以便蒸氣流動,均勻加熱食材;
3. 應盡量擺放大小相若的食材,如大小不同,可將小件食物放在上層,以達致理想的蒸煮
效果;
4. 本產品的菜單功能預設時間均是從蒸氣噴出後開始計時。
圖1 圖2
*另購配件 *另購配件

P.11P.10
清潔與保養
1. 使用後,請務必拔出電源插頭,待產品冷卻後再進行清洗。
2. 產品長期不用時,應倒掉水箱剩餘的水。
3. 使用後,擰開底座排水口蓋,把蒸氣產生器內的水排出,以減少水垢累積。
4. 不得使用研磨性清潔產品或具有腐蝕性的溶劑進行清潔。
5. 應定期清潔不銹鋼鍋膽、蒸籠*、蒸格及鍋蓋。
6. 切勿將電源線、主機浸入水中清洗,以免電器入水引致故障和漏電。
7. 收藏各部件前應放置於安全及乾爽處晾乾。
注意:打開排水口蓋前,請先關掉電源,待主機內的水降溫,再進行排水,避免排出的熱
水造成燙傷。
清潔水垢
產品使用一段時間後,會有一些水垢沉澱,這是正常現象。沉澱物的多少取決於水質的硬
度。當水垢累積到一定數量時,會影響主機正常的發熱效率。所以在使用本產品一段時間
之後,應進行除垢清潔以確保主機運作暢順及延長產品使用壽命。建議使用純淨水進行除
垢。
除垢操作
當「除垢」鍵字樣閃爍時,即提示產品應進行除垢清潔。如果從「除垢」提示開始累計使
用產品5小時也沒有進行除垢操作的話,此時除了除垢鍵之外其他鍵均不可操作(如果已
完成除垢的話,則可以通過同時按住「除垢」鍵+「定時/火力」鍵3秒強行重置)。
除垢步驟如下(以下所用的除垢劑為食品級檸檬酸):
1. 將除垢劑和水按照1:20的比例混合(共約500ml)加入到水箱(亦可先加水,再加
入適量除垢劑);
清潔與保養
排水口蓋
水和除垢劑的混合物
逆時針擰開排水口蓋 水
蒸氣蓋
廢水排出
拔出蒸氣蓋後灌
入自來水或純
淨水
提示:為保安全,請待產品冷卻一段時間後再移動配件和打開排水口蓋排水,以避免
燙傷。
注意:
1. 由於除垢劑與水會產生化學作用,除垢後排出的水有可能呈現淡黃色,這是正常現
象。
2. 除垢劑應選用食品級檸檬酸,安全無毒。如沒食品級檸檬酸,可用適量食用白醋代
替,直接加入水箱。(除垢後要把醋排出、清洗乾淨,否則會出現噴水現象)
2. 按下「除垢」鍵,「除垢」指示燈長亮,屏幕顯示“00:30”除垢時間(時間不可
調)。除垢程序開始,完成後自動返回待機模式;
3. 除垢完成後,把水箱中剩餘的水倒掉並沖洗乾淨,待產品冷卻至室溫,拔開蒸氣蓋,
然後逆時針擰開排水口蓋,將主機內的廢水排出,接著將乾淨的自來水或純淨水從蒸
氣產生器頂部灌入,沖洗蒸氣產生器內部,把水垢隨著廢水沖出來,如此沖洗2-3次
即可,沖洗之後再擰上排水口蓋。
*另購配件

P.13P.12
常見故障及處理
如遇以下一般故障,請按以下指示處理,如仍處理不了或未發現故障原因時,請與本公司
維修服務中心聯繫,切勿自行拆卸修理。
序號 故障顯示 故障原因 如何處理
1“加水”燈閃爍 水箱水不夠 往水箱裏加水
2“除垢”燈閃爍 需要進行除垢 進行除垢操作
3屏幕顯示C1 傳感器開路 送往指定維修點維修
4屏幕顯示C2 傳感器短路 送往指定維修點維修
5屏幕顯示C3 乾燒 • 檢查水箱水量
• 檢查防堵罩是否堵住
• 送往客戶服務中心進行維修
6屏幕顯示C4 強制除垢 進行除垢操作
7屏幕無顯示
—
• 確認是否接通電源
• 送往客戶服務中心進行維修
產品線路圖
NTC
220V~
50Hz
L
N
E
M
熔斷器
電源控制板
顯示板
水位開關
水泵 發熱管 發熱管
熔斷器
型號 JET-118
電壓 220V
頻率 50Hz
功率 1800W
外型尺寸 (H)260mm(W)360mm(D)407mm
淨重 3.7kg
產品規格及設計如有變更,恕不另行通知。
中英文版本如有出入,一概以中文版為準。
本產品使用說明書以 www.germanpool.com 網上版為最新版本。
技術規格

P.15P.14
Product Features
• Low pressure steam generation system. The steamer rapidly generates steam in 30 seconds and
heats food at regular intervals, saving time, energy and water.
• 2kPa low pressure steam cooks food more rapidly, preserves more nutrients and retains its
natural avour.
• Movable steam rack exibly combines multiple layers to accommodate sizable items such as a
whole chicken.
• Modern digital display and one-touch programs
• 3-level customized power settings and adjustable cooking time
• Accurate timer function.
• Multi-tier protective functions.
• Sturdy and detachable steamer ring*made of 304 stainless steel. Removable inner pot for easy
cleaning.
• Movable external water tank and conspicuous water column facilitate water relling and cleaning.
• Unique descaling function conveniently reminds users the machine needs descaling.
Content
Product Features 15
Attention 16
Product Structure 17
Safety Precautions 19
Operating Instructions 20
Care & Maintenance 22
Trouble Shooting 25
Circuit Diagram 26
Technical Specications 26
Warranty Terms & Conditions 27
*Optional accessory

P.17P.16
Attention
1. For safety purpose, the steamer should be put on a at and stable surface. Keep it away from
objects which are vulnerable to steam attack. Prevent children from reaching the steamer.
2. Before activating the device, ensure the supply voltage is consistent with the rated voltage of the
machine. The AC source should be properly grounded.
3. To avoid accidents, never expose the product to combustible, explosive objects or other heat
sources.
4. To avoid electric shock, scald or any other accidents, do not let children operate the appliance
without supervision. Keep it out of the reach of children.
5. Before using the appliance, ensure the water level in the water tank is above the “minimum
mark”. Do not pour in too much water to avoid overow. Use only tap water, pure water or distilled
water. Do not pour in any other liquids or items.
6. To avoid scald, do not touch the metal parts with bare hand when the steamer is running. Apply
thermally inert materials or heat-resistant gloves.
7. In order to avoid spillage and wastage, while removing the upper steamer ring, ensure that it is
not clung to the lower ring or the components underneath.
8. Rell the water tank in a timely manner when water shortage alarm goes off.
9. To avoid any danger, do not move the appliance while it is running.
10. Never immerse the power cord or the main body in water to avoid malfunction and electricity
leakage.
11. Air-dry every component at a well-ventilated location before setting them aside for storage.
12. The appliance is intended for domestic use only. Do not run it outdoors or use it for commercial
purposes.
13. The appliance works normally at altitude below 2000 meters.
14. Store the unit above 0°C to prevent the inner components and electric circuit from icing up, which
can impact product performance.
15. Unqualied personnel should not attempt to disassemble or repair the product. To avoid potential
danger, if the power cord is damaged, it must be tested by a qualied technician and replaced it
with a dedicated power cord provided by the manufacturer. Do not undertake any unauthorized
repair. If the problem persists, please contact the Repairs and Customer Service Centre for repair.
Product Structure
Main Body
按下確認
Press Confirm
白色面贴
除垢加水 火力
大蝦扇貝 花蛤 魚片
預約
定時 倒數
紫薯 包點
蔬菜 排骨
螃蟹 肉片
預約
Timer
開關
On/Off
除垢
Descale
菜單
Menu
保溫/取消
Keep Warm
/Cancel
定時/火力
Set Time
/Power
Steamer
Lid
Before running the steamer, ensure
the inner pot seal ring is t in the
inner pot. (direction is shown below)
Steamer
Ring*
Inner Pot
Main Body
Steam Cap
Control Panel
Steam
Rack
Steam
Sheath
Inner Pot
Seal Ring
Water Tank
Water Column
Anti-block
Shield
Rell Cartridge
*Optional accessory

P.19P.18
Product Structure Safety Precautions
按下確認
Press Confirm
白色面贴
除垢加水 火力
大蝦扇貝 花蛤 魚片
預約
定時 倒數
紫薯 包點
蔬菜 排骨
螃蟹 肉片
預約
Timer
開關
On/Off
除垢
Descale
菜單
Menu
保溫/取消
Keep Warm
/Cancel
定時/火力
Set Time
/Power
The appliance adopts pushbutton control and the functionality of each button is shown in
the following chart.
Buttons Instructions
On/Off 開關
On/Of f
Turn on or off the machine.
Menu 菜單
Menu
There are 10 programs in total. Press the “Menu” button, rotate and
press the knob to select a program. Then press the rotary knob to run the
machine. If the knob is not pressed, the appliance will start automatically in
5s.
Set Time/
Power
定時/火力
Set Time
/Power
Press this button to set time. Press again to switch between 3 power levels.
The highest level is 1800W (6 LED indicators); the medium level is 1200W
(4 LED indicators); the lowest level is 500W (2 LED indicators).
Keep
Warm/
Cancel
保溫/取消
Keep Warm
/Cancel
Keep Warm: To enter keep-warm mode, press this button while the machine
is on standby mode or when cooking is complete. The screen will display
“bb” (default time is 4 hours).
Cancel: Pressing this button will cancel the current operation and return to
standby mode.
Timer 預約
Timer
On standby mode, press the “Timer” button, default timer “04:00” hours
ashes on the screen. Rotate the knob to adjust the timer, 30-minute
interval at a time. The shortest time is 30 minutes and the longest duration
is 24 hours. After setting the timer, press the “Menu” button and “Power”
button to select the program and power level respectively. The timer will start
counting down in 5s.
The program and power level can be selected rst before clicking the “Timer”
button.
Descale 除垢
Descal e
Press “Descale” button for 3 seconds to start descaling.
Press
Conrm 按下確認
Press Confirm
Rotate and press the button to select the menu. Rotate the knob to adjust
the cooking time.
Control Panel • Before running the machine, wash the steamer lid, steamer ring*, steam rack, steam sheath,
inner pot, steam cap and water tank thoroughly. (The steam cap can be detached from the main
body as shown in the following picture; Make sure the steam cap is installed on the main body
prior to running the steamer.)
Note:
• The volume of water tank is about 1.6L. When the water tank is full, the machine can at most run
for approximately 55 minutes at the highest power level. After that, water in the water tank will be
used up.
• When the smart monitoring system detects an empty water column, the “Rell” indicator on the
control panel will keep ashing and emit an alarm signal every 2 seconds. If the water tank is not
relled within 2 minutes, the system will automatically go back to standby mode.
Water Column
Rell Cartridge
Opening
Full
Empty
• Make sure there is enough water in the water tank. Hold the rell cartridge and lift the lid to
uncover the opening leading to the water column. Fill up the water tank by pouring water into the
opening. The water level can be observed at any time through the transparent water column.
*Optional accessory
P.21P.20
Operating Instructions Operating Instructions
Watch the video clip
1. Upon lling the water tank, install the water tank on the main body and make
sure two sides of the water tank are securely attached to the main body
(Picture 1).
2. Install the inner pot, together with the inner pot seal ring, onto the main body and place the steam
sheath over the steam outlet (Picture 2).
3. Put steamer ring* or steam racks in place, lay out food ingredients and cover the steam lid. Power
up the steamer and select a cooking program.
Program Default Time Default Power
Potato 20 minutes
(Adjustable between 8 – 33 minutes)
Level 3 (Highest) (Switch to level 2 after 3
minutes, power not adjustable)
Vegetable 5 minutes
(Adjustable between 3 – 15 minutes)
Level 3 (Highest) (Switch to level 2 after 3
minutes, power not adjustable)
Crab 8 minutes
(Adjustable between 3 – 15 minutes)
Level 3 (Highest) (Switch to level 2 after 3
minutes, power not adjustable)
Scallop 5 minutes
(Adjustable between 3 – 15 minutes)
Level 3 (Highest) (Switch to level 2 after 3
minutes, power not adjustable)
Prawn 3 minutes
(Adjustable between 3 – 11 minutes)
Level 3 (Highest) (Switch to level 2 after 3
minutes, power not adjustable)
Clam 3 minutes
(Adjustable between 3 – 15 minutes)
Level 3 (Highest) (Switch to level 2 after 3
minutes, power not adjustable)
Fish Fillet 3 minutes
(Adjustable between 3 – 15 minutes)
Level 3 (Highest) (Switch to level 2 after 3
minutes, power not adjustable)
Sliced
Meat
5 minutes
(Adjustable between 3 – 15 minutes)
Level 3 (Highest) (Switch to level 2 after 3
minutes, power not adjustable)
Sparerib 6 minutes
(Adjustable between 5 – 20 minutes)
Level 3 (Highest) (Switch to level 2 after 3
minutes, power not adjustable)
Bun 18 minutes
(Adjustable between 8 – 28 minutes)
Level 3 (Highest) (Switch to level 2 after 3
minutes, power not adjustable)
4. If the inner pot is used to prepare congee, its amount should not exceed the maximum height
mark indicated in the inner pot.
Picture 1 Picture 2
Notes:
1. Before using the appliance, make sure the inner pot is properly installed. Running the steamer in
the absence of the inner pot will cause machine malfunction.
2. Do not ll up the steamer ring*. Leave appropriate amount of space for steam to effectively
permeate the entire ring and evenly cook the ingredients.
3. The size of every ingredient should be comparable. Otherwise, place the smaller ones on the
upper layer to achieve ideal cooking result.
4. The timer for each of the default menu will start counting down from the moment when steam is
produced.
*Optional accessory *Optional accessory
P.23P.22
1. The appliance should be unplugged and allowed to cool down before
cleaning.
2. Empty the water tank if the steamer will not be used for a prolonged period
of time.
3. After using the appliance, twist off the water outlet lid located at the bottom
of the unit to discharge residual water inside the steam generator. This will
limit the deposit of limescale.
4. Do not use abrasive cleansers or corrosive diluents to clean the appliance.
5. Regularly clean the stainless steel inner pot, steamer rings*, steam rack and steamer lid.
6. Never immerse the power cord or the main body in water to avoid malfunction and electricity
leakage.
7. Air-dry every component at a well-ventilated location before setting them aside for storage.
Note: To avoid scald, turn off the appliance and allow water remained in the main body to cool down
before twisting off the water outlet lid.
Descaling
Precipitation of limescale is a normal phenomenon after a period of application. The amount of
precipitate depends on the water hardness. When the amount of limescale reaches a certain level, it
will affect the thermal efciency of the machine. Therefore, descaling is a necessary step to maintain
operational efciency and extend its service life. It is recommended to use pure water to descale the
steamer.
How to Descale
The ashing of the “Descale” button indicates that the steamer should be descaled. From this moment
onward, if the cumulative usage exceeds 5 hours and no descaling is performed during this period, all
buttons except the “Descale” function will be deactivated (if descaling has been performed, machine
resetting can be enforced by pressing the “Descale” and “Set Time/Power” buttons simultaneously for
3 seconds).
Care and Maintenance
Watch the video clip
Descaling procedure is shown below (food-grade citric acid is used as the descaling agent):
1. Mix 1:20 solution of descaling agent and water (500ml in total) and then pour it into water tank
(or pour water into the water tank rst and then add an appropriate amount of descaling agent).
Care and Maintenance
Mixture of water and descaling agent
2. Pressing the “Descale” button will light up its LED indicator, the screen will display “00:30” as the
descaling duration (value not adjustable). Then the descaling operation begins. The steamer will
automatically return to standby mode when descaling is complete.
3. After descaling the steamer, discard residual water in the water tank and wash it clean. Let the
appliance cool down to room temperature, remove the steam cap, rotate anti-clockwise to twist
off the water outlet lid and discharge the waste water. Then pour tap water or puried water on
top of the steam generator to wash its interior. The precipitate will be ushed out together with the
waste water. Repeat this step 2-3 times. Close the water outlet lid after cleaning.
Water Outlet Lid
Rotate anti-clockwise to twist
off the water outlet lid
Water
Steam Cap
Waste Water Discharge
Pour tap water or
puried water onto the
steam generator after
removing the steam
cap
*Optional accessory
P.25P.24
Reminder: To avoid scald, cool down the machine before detaching the parts and twisting off the water
outlet lid.
Notes:
1. As a result of the chemical reaction between the descaling agent and water, it is a normal
phenomenon that the discharged water appears pale yellow in colour.
2. Food-grade citric acid should be used as the descaling agent. If food grade citric acid is not
available, an appropriate amount of edible white vinegar can used as a substitute. (After
descaling the machine, discard the remaining vinegar and wash it thoroughly, otherwise water
squirt may occur.)
Care and Maintenance Trouble Shooting
If the following issues are encountered, follow the instructions below. If the problem persists, please
contact the Repairs and Customer Service Center, any unauthorized attempt to dismantle the product
is prohibited.
No. Issues Causes Solutions
1“Rell” indicator
ashes.
Not enough water in the water
tank.
Rell the water tank.
2“Rell” indicator
ashes.
Descaling is needed. Descale the machine.
3 Screen displays “C1” Open-circuit sensor Send the unit to designated
repair center.
4 Screen displays “C2” Short-circuit sensor Send the unit to designated
repair center.
5 Screen displays “C3” Dry heating • Check the water volume in
the water tank.
• Check whether the anti-
block shield is obstructed.
• Send the unit to designated
repair center.
6 Screen displays “C4” Mandatory descaling is
needed.
Descale the machine.
7 No screen display
—
• Conrm whether the
appliance is powered up.
• Send the unit to designated
repair center.

P.27P.26
Model JET-118
Voltage 220 V
Frequency 50 Hz
Power 1800W
Dimensions (H) 260 mm (W) 360 mm (D) 407mm
Net Weight 3.7 kg
Specications are subject to change without prior notice.
If there is any inconsistency or ambiguity between the English version and the Chinese version, the Chinese version shall prevail.
Refer to www.germanpool.com for the most up-to-date version of the Operating Instructions.
Technical Specications
保用條款
此保用提供德國寶產品之機件在正常使用下壹年保用
(自購買日起計算)。
Warranty Terms & Conditions
Under normal operations, the product will gurantee a 1-year full
warranty provided by German Pool (effective from the date of
purchase).
1. Customer who fails to present original purchase invoice will
not be eligible for free warranty service.
2. Customer should always follow the operating
instructions. This warranty does not apply to:
- labour costs for on-site installation, check-up, repair,
replacement of parts and other transportation costs;
- damages caused by accidents of any kind (including
material transfer and others);
- operating failures resulting from applying incorrect voltage,
improper usage, and unauthorized installations
or repairs.
3. This warranty is invalid if:
- the purchase invoice is modified by an unauthorized party;
- the product is used for any commercial or industrial purposes;
- the product is repaired or modified by unauthorized
personnel, or unauthorized parts are installed;
- the serial number is modified, damaged or removed from
the product.
4. German Pool will, at its discretion, repair or replace any
defective part.
5. This warranty will be void if there is any transfer of
ownership from the original purchaser.
1. 未能出示購買發票正本者,將不獲免費維修服務。
2. 用戶應依照說明書的指示操作。本保用並不包括﹕
- 上門安裝、檢驗、維修或更換零件之人工以及
一切運輸費用﹔
- 因天然與人為意外造成的損壞 (包括運輸及其他)﹔
- 電源接合不當、不依說明書而錯誤或疏忽使用本
機所引致之損壞。
3. 於下列情況下,用戶之保用資格將被取消﹕
- 購買發票有任何非認可之刪改;
- 產品被用作商業或工業用途;
- 產品經非認可之技術人員改裝或加裝任何配件;
- 機身編號被擅自塗改、破壞或刪除。
4. 總代理有權選擇維修或更換配件或其損壞部份。
5. 產品一經被轉讓,其保用即被視作無效。
機身號碼 Serial No. :
購買商號 Purchased From :
發票號碼 Invoice No. :
購買日期 Purchase Date :
型號 Model No. :
另請填妥以下表格並與正本發票一併保存,以便維修時核對資料。用戶提供之所有資料必須正確無誤,否則免費保用將會無效。
Please fill out the form below. This information and the original purchase invoice will be required for any repairs. Warranty will be
invalidated if information provided is found to be inaccurate.
此保用只適用於香港及澳門 This warranty is valid only in Hong Kong and Macau
JET-118
客戶服務及維修中心 Customer Service & Repair Centre
Hong Kong
10/F, Kowloon Godown
1-3 Kai Hing Road, Kowloon Bay,
Kowloon, Hong Kong
Tel : +852 2333 6249
Fax : +852 2356 9798
Macau
3/F, Edificio Industrial Pou Fung,
145 Rua de Francisco Xavier Pereira,
Macau
Tel : +853 2875 2699
Fax : +853 2875 2661
香港
九龍灣啟興道1-3號
九龍貨倉10樓
電話:+852 2333 6249
傳真:+852 2356 9798
澳門
澳門俾利喇街145號
寶豐工業大廈3樓
電話:+853 2875 2699
傳真:+853 2875 2661
*
貴戶須在購機十天內,以下列其中一種方式向本公司
登記資料,保用手續方正式生效﹕
1)
填妥本公司網頁內之
保用登記表格
www.germanpool.com/
warranty
2)
填妥保用登記卡,
郵寄至本公司。
* This warranty is not valid until customer registration information
is received by our Service Centre within 10 days of purchase
via one of the following means:
1) Visit our website and register
online:
www.germanpool.com/
warranty
2)
Complete all the fields on the
attached Warranty Card and
mail it back to our Customer
Service Centre.
Circuit Diagram
N TC
220V ~
50H z
L
N
E
M
Display Board
Circuit Board
Fuse
Fuse
Water Level Switch
Water
Pump Heating
Element
Heating
Element

P.28
© 版權所有。未獲德國寶授權,不得翻印、複製或使用本說明書作任何商業用途,違者必究。
© All rights reserved. Copying, reproducing or using the contents of this manual is not allowed without prior authorization from German Pool, violators will be prosecuted.
德國寶(香港)有限公司
German Pool (Hong Kong) Limited
Room 113.Newport Centre PhaseII. 116 Ma Tau
Kok Road. Tokwawan. Kowloon. Hong Kong.
電話
傳真
電話
傳真
3/F, Takshun Plaza, Nanguo East Road,
Shunde, Foshan, Guangdong
3/F, Edificio Industrial Pou Fung,
145 Rua de Francisco Xavier Pereira, Macau
電話
傳真
Tel: +852 2773 2888
Fax:+852 2765 8215
Tel:+86 757 2980 8308
Fax:+86 757 2980 8318
Tel:+853 2875 2699
Fax:+853 2875 2661
香港
Hong Kong
香港九龍土瓜灣馬頭角道116號
新寶工商中心2期113號室
中國
China
廣東省佛山市順德區
大良南國東路德順廣場三層
澳門
澳門俾利喇街145號
寶豐工業大廈3樓
Macau
HONG KONG TOP BRAND TEN YEAR
ACHIEVEMENT AWARD
JET-118-M-16(1)
Table of contents
Other German pool Electric Steamer manuals