Geum Technology Decolt Grand User manual

Decolt Grand
User manual
Gebruikershandleiding
Uživatelský manuál
Benutzerhandbuch

2
ELEKTRICKÝ POHON
ELECTRIC DRIVE
ELEKTROANTRIEB
ELEKTRISCH AANDRIJVING

4
DŮLEŽITÉ BEZPEČNOSTNÍ POKYNY
IMPORTANT SAFETY INSTRUCTIONS
WICHTIGESICHERHEITSHINWEISE
BELANGRIJKEVEILIGHEID INSTRUCTIES
Refer to the Users Manual for your Decolt Grand trolley.
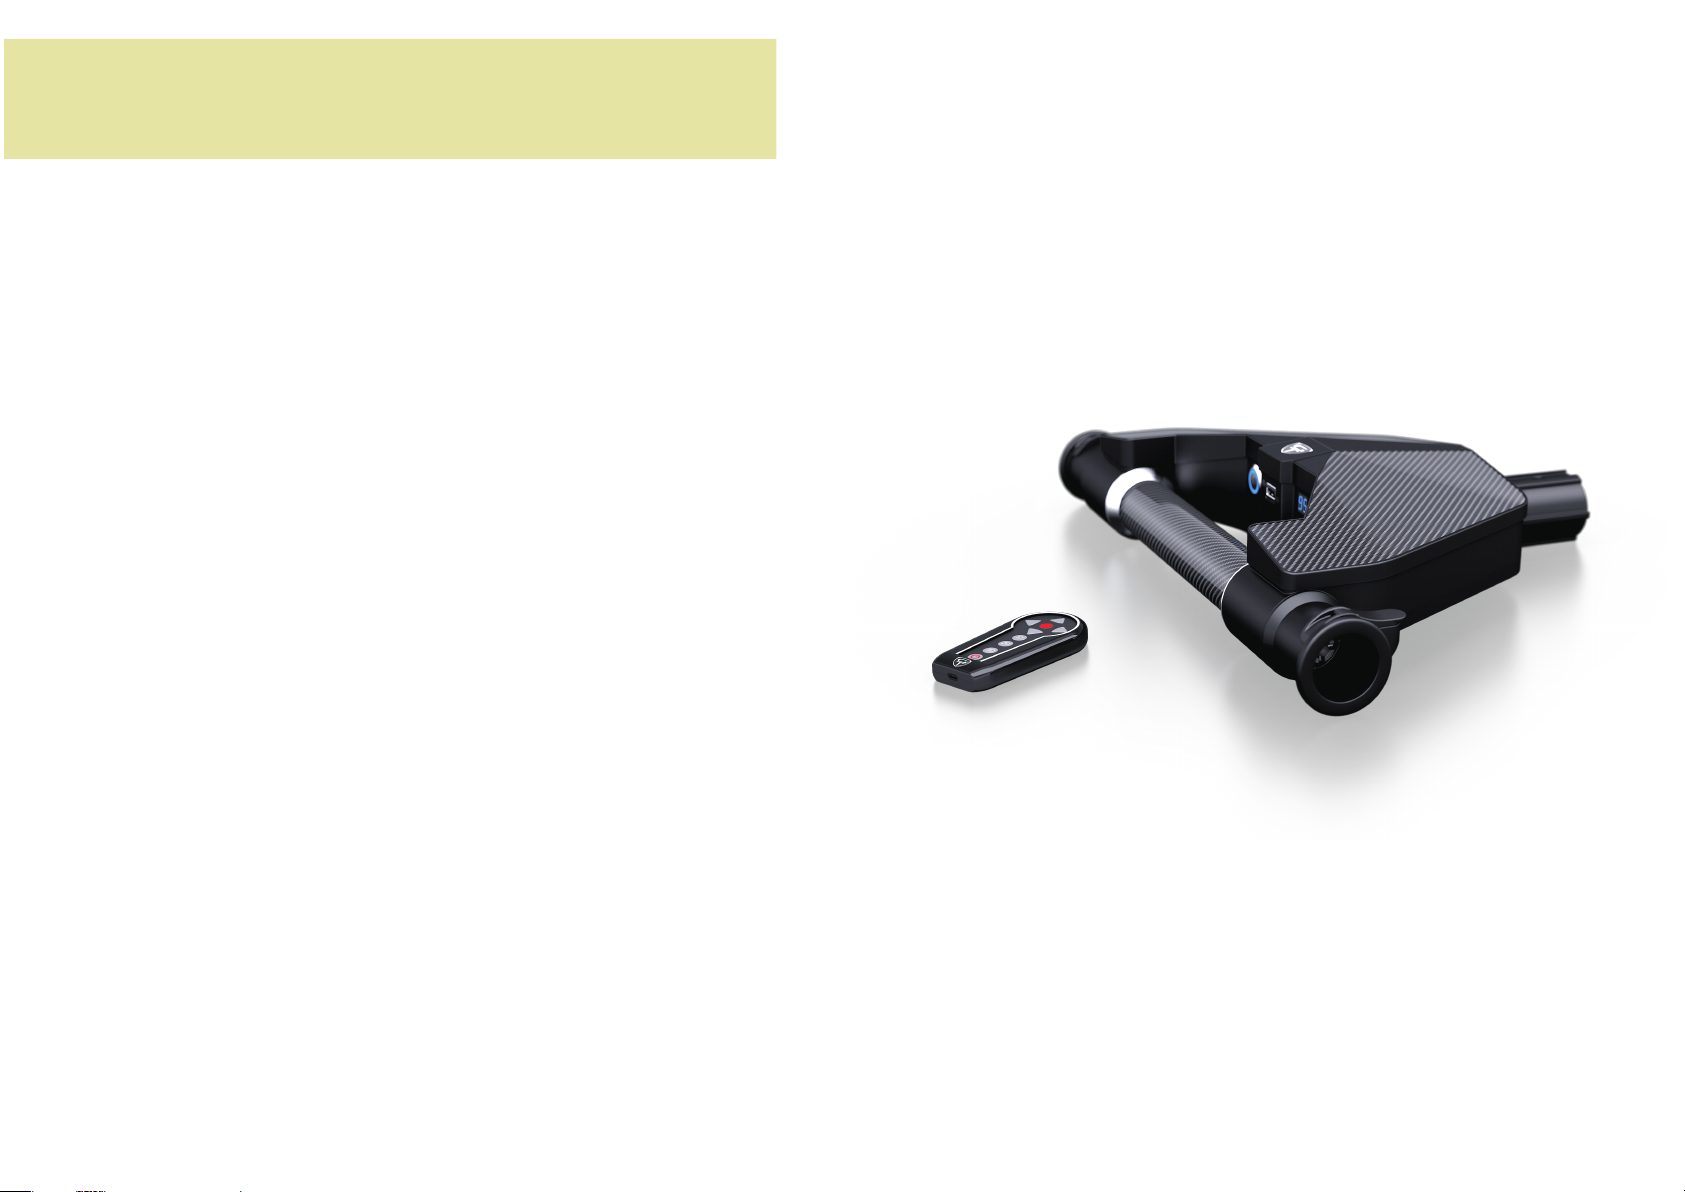
This Electric Drive Module (EDM) is designed for use in the Golf Geum Technology (GGT) Decolt Grand golf trolley
and GGT will bear no liability for resulting damage or loss to any party, direct or indirect.
Use the EDM only when line of sight with your trolley can be maintained, and never steer the trolley towards people,
Use free-wheel mode, or power-off mode when around the club house or in confined spaces.
The EDM is tolerant of light rainfall, however do not use in heavy rain or submerged.
The EDM is not to be used by or around children, or while operator is under the influence of alcohol or drugs.
The EDM must be disconnected from the trolley and powered OFF before transport.
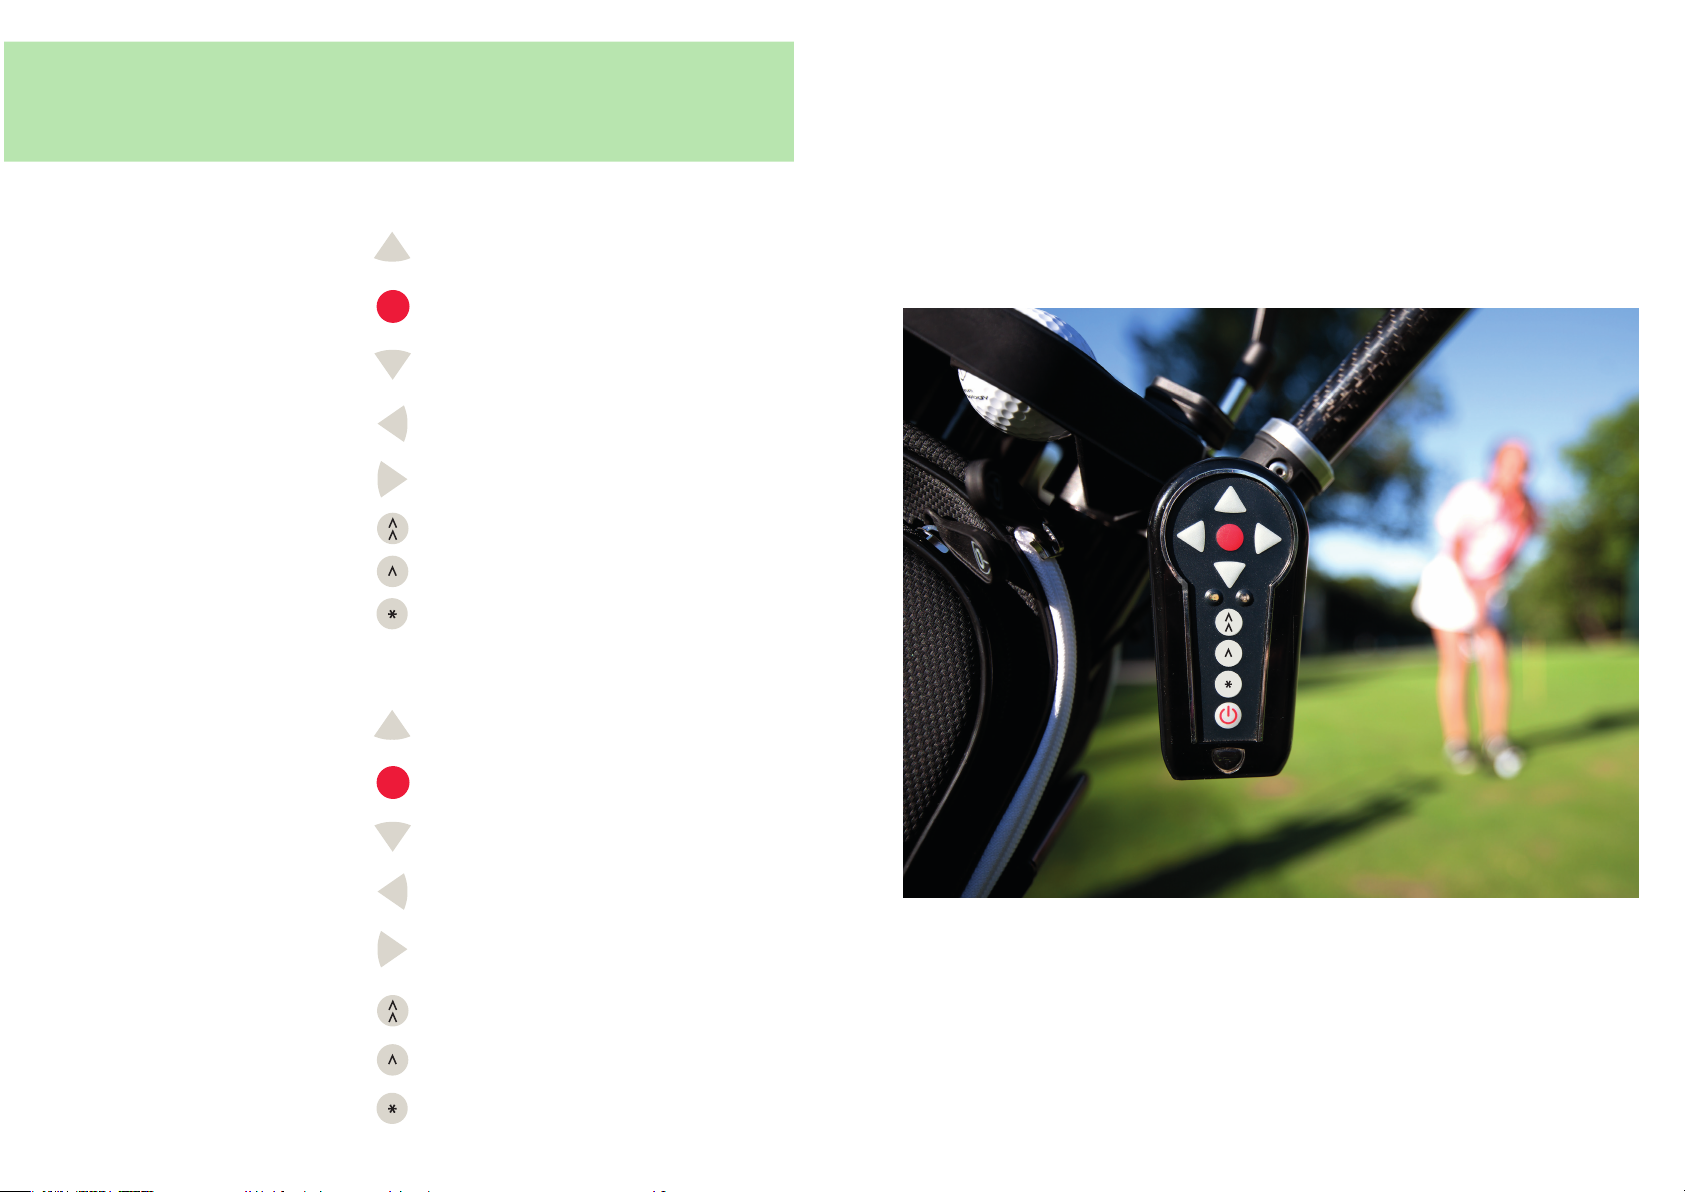
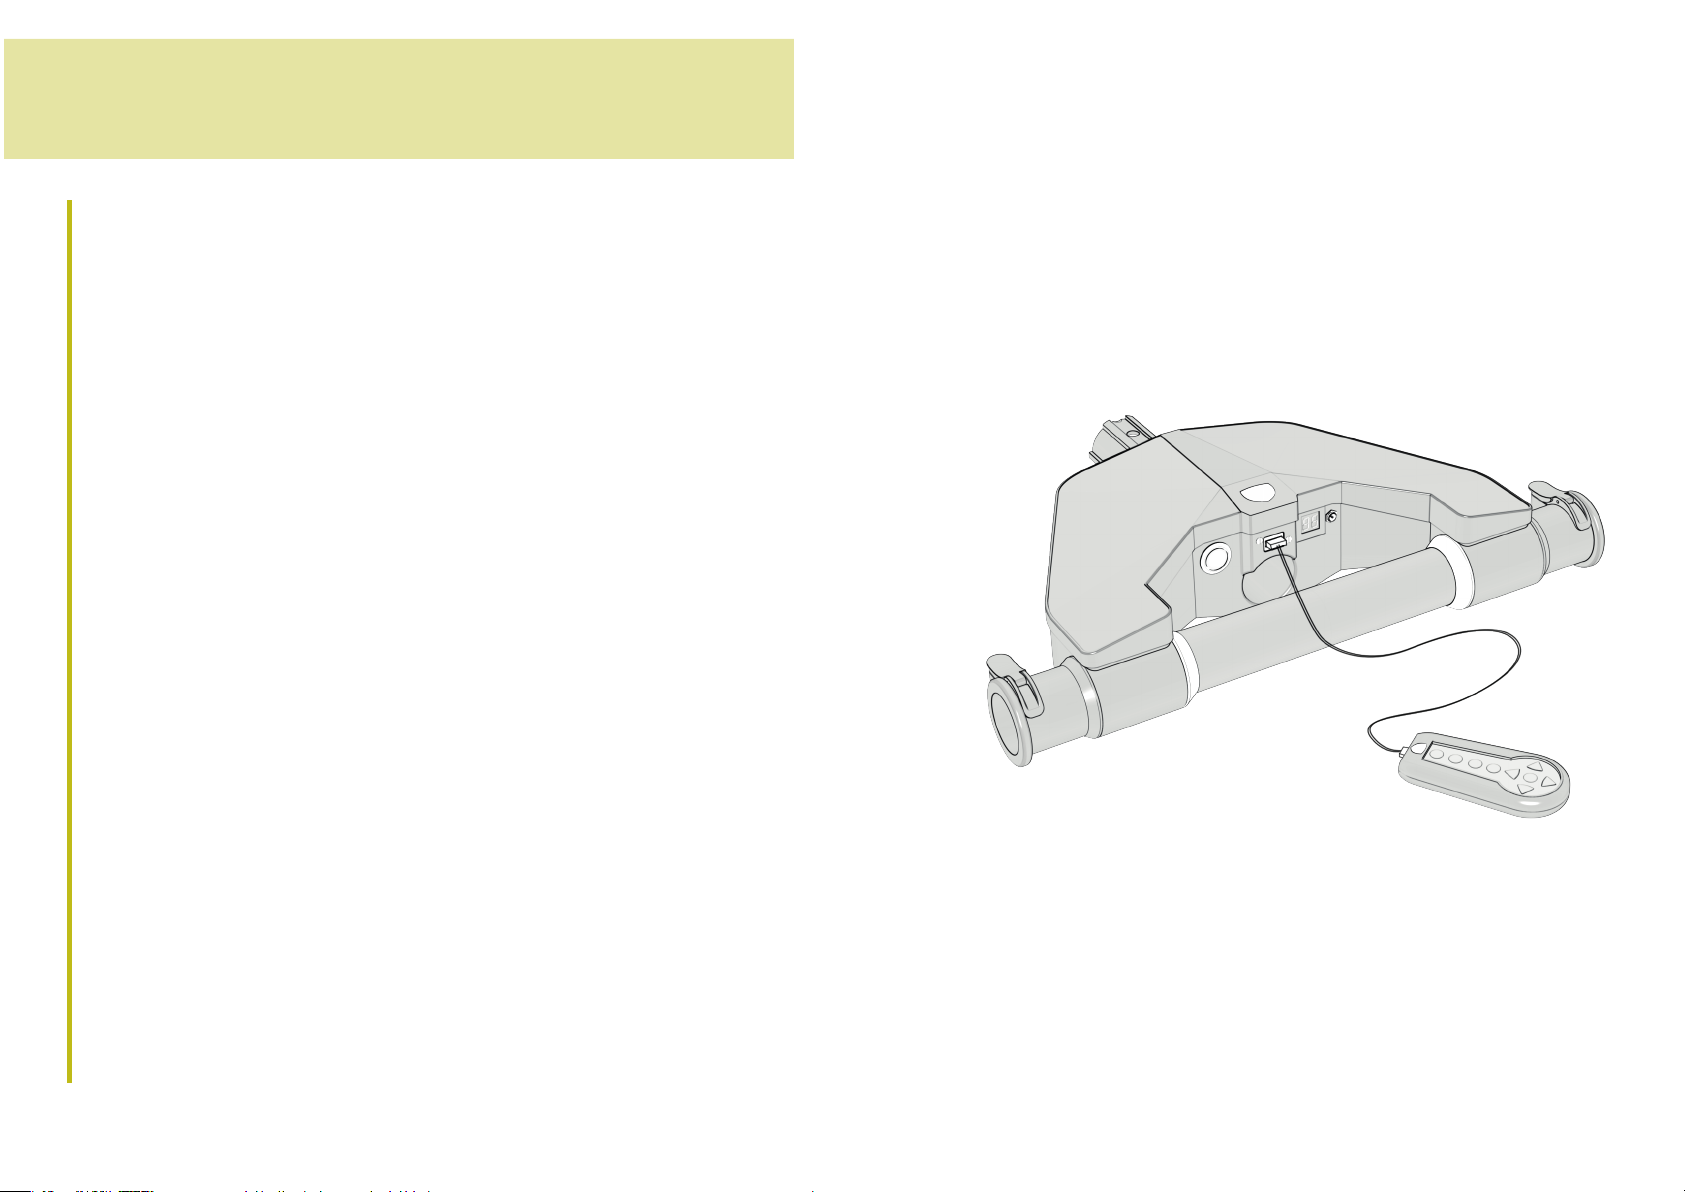
The USB port is for charging of EDM remote control only. Connection of any other device is not authorised by GGT
ONLY and in accordance with this Operating Manual. Any other use is not approved by GGT, will void warranty
or use in confined spaces.
and GGT will bear no liability for resulting damage or loss to any party, direct or indirect.
Verwenden Sie zur Nutzung Ihres Decolt Grand Trolleys das dazugehörige Benutzerhandbuch.
Dieses Elektroantriebsmodul ist AUSSCHLIESSLICH zur Nutzung in Verbindung mit dem Golftrolley Decolt Grand
der Firma Golf Geum Technology (GGT) und in Übereinstimmung mit dieser Betriebsanleitung bestimmt.
Jegliche Nutzung anderer Art, die seitens GGT nicht genehmigt wurde, hat einen Garantieverlust zur Folge und
entbindet GGT von jeglicher Verantwortung für entstandene Sach- oder Personenschäden oder Verluste,
Verwenden Sie das EDM nur, wenn Ihr Trolley in direkter Sichtweite ist.
Lenken Sie den Trolley nicht in Richtung von Menschen und verwenden Sie ihn nicht in beengten Räumlichkeiten.
Verwenden Sie in engen Räumlichkeiten oder in Nähe des Klubhauses die freilaufende Einstellung oder
Das EDM hält leichtem Regen stand, verwenden Sie es jedoch nicht bei starkem Regen oder unter Wasser.
Verwenden Sie das EDM nicht in der Nähe von Kindern. Das EDM darf nicht von Kindern bedient werden.
Verwenden Sie es nicht unter Alkohol- oder Drogeneinfluss.
Trennen Sie zum Transport das EDM vom Trolley und schalten Sie es ab.
Der USB-Ladestecker dient ausschließlich zum Aufladen der EDM-Fernbedienung. DerAnschlussandererGeräte
ob direkt oder indirekt.
die Einstellung „aus“.
istseitens GGTnicht autorisiert und GGT übernimmt keine Verantwortung für eventuelle Schäden oder Verluste,
Lees de gebruikershandleiding van uw Decolt Grand Trolley.
Deze elektrisch aandrijfunit (EDM) is geproduceerd alleen voor gebruik met de Golf Geum Technology
(GGT) Decolt Grand golf trolley volgens de gebruikershandleiding. Alle andere toepassingen worden door
GGT net goedgekeurd, garantie vervalt en GGT verwerpt alle claims van schade, direct of indirect, bij onheus gebruik.
Gebruik de EDM alleen in zicht van uw trolley en stuur deze nooit naar mensen; gebruik de aandrijving niet
wanneer ruimte beperkt is.
Gebruik de trolley zonder elektrisch aandrijving (vrij loop of power-off-mode) in de buurt van het clubhuis
of bij weinig ruimte.
De EDM kan tegen lichte regen, maar gebruik hem niet bij hevige regenval en zorg, dat hij niet onder water komt.
Das EDM hält leichtem Regen stand, verwenden Sie es jedoch nicht bei starkem Regen oder unter Wasser.
Gebruik de EDM niet in de buurt van kinderen, of wanneer de gebruiker alcohol of drugs heeft gebruikt.
Voor transport moet de EDM uit staan en los zijn gekoppeld van de trolley.
De USB-poort is alleen voor het laden van de afstandsbediening. Verbinden met enig ander apparaat is niet
toegestaan door GGT en GGT is niet verantwoordelijk voor schade, direct of indirect, ontstaan door aansluiting
van enig ander apparaat.
Pro váš vozík Decolt Grand použijte příslušnou uživatelskou příručku.
Tento modul elektrického pohonu je určen pro použití VÝHRADNĚ ve spojení s golfovým vozíkem Decolt Grand
odpovědnost za následné škody nebo ztráty na majetku ani osobám, ať už přímo nebo nepřímo.
Používejte EDM pouze, pokud máte přímou viditelnost vašeho vozíku. Nikdynesměřujte vozík směrem k lidem
a nepoužívejte jej v stísněných prostorách.
V stísněných prostorách nebo okolo budovy klubovny nastavte volnoběžnou polohu nebo polohu “vypnuto”.
Zatímco EDM je odolný v lehkém dešti, nepoužívejte jej v intenzivním dešti ani neponořujte.
Nepoužívejte EDM v blízkosti dětí. Děti nesmí EDM používat. Nepoužívejte pod vlivem alkoholu nebo drog.
Pro přepravu odpojte EDM od vozíku a vypněte.
Nabíjecí port USB slouží pouze k nabíjení dálkového ovládání EDM. Připojení jakéhokoli jiného přístroje není
autorizováno ze strany GGT a GGT nenese žádnou odpovědnost za případnou škodu nebo ztrátu, ať už přímo
společnosti Golf Geum Technology (GGT) a v souladu s tímto provozním manuálem. Jakékoli jiné použití,
které nebylo schváleno ze strany GGT, bude mít za následek ztrátu platnosti záruky a GGT nenese žádnou
nebo nepřímo.

6
POPIS ELEKTROPOHONU
DESCRIPTION OF EDM
ELEKTROMOTOR BESCHREIBUNG
BESCHRIJVING ELEKTRISCHE AANDRIJVING MODULE (EDM)
1
2
3
4
5
6
7
Hlavní spínač
Aretace kol
USB konektor k dobíjení dálkového ovladače
Otvor pro uchopení el. pohonu
Konektor dobíjení el. pohonu
Ukazatel nabití baterie (v%)
Aretace kol
1
2
3
4
5
6
7
Hauptschalter EIN/AUS
Radarretierung
Öffnung zur Aufhängung des Elektroantriebs
Batterieanzeige (in %)
Radarretierung
USB-Anschluss zum Aufladen der Fernbedienung
Anschluss zum Aufladen des Elektroantriebs
1
2
3
4
5
6
7
Main ON/OFF switch
Wheel lock
USB connector for charging of remote control
Opening for holding the electric drive
Charging connector for electric drive
Battery charge indicator (%)
Wheel lock
1
2
3
4
5
6
7
Hoofdschakelaar Aan/Uit
Wiel blokkering
USB-connector voor het laden van
Opening voor de elektrische aandrijving
Laadconnector voor de elektrische aandrijving
Acculading indicator (%)
Wiel blokkering
de afstandsbediening
1 5
6
7
3
4
2

8
POPIS OVLADAČE
DESCRIPTION OF REMOTECONTROL
BESCHREIBUNG FERNBEDIENUNG
BESCHRIJVING AFSTANDSBEDIENING
1
2
3
4
5
6
7
8
9
10
1 1
5 rychlostí vpřed
Zatáčení vlevo
Stop
2 rychlosti dozadu
Kontrolka nabíjení a vysílání signálu
Rychlost vozíku 5 vpřed
Rychlost vozíku 3 vpřed
Zatímco se vozík pohybuje vpřed, pokračuje
dále rychlostí 3 zhruba 15 s a pak zastaví
Hlavní spínač
Micro usb
Zatáčení vpravo
1
2
3
4
5
6
7
8
9
10
1 1
Forward (5 speeds)
Left turn
Stop
Reverse (2 speeds)
Indicator of charging and signal transmission
1
2
3
4
5
6
7
8
9
10
1 1
Nach vorne (5 Geschwindigkeiten)
Abbiegen links
Stop
Zurück (2 Geschwindigkeiten)
Trolley-Geschwindigkeit 5 Vorwärts
Trolley-Geschwindigkeit 3 Vorwärts
Während sich der Trolley bereits bewegt, fahr t fur
15 Sekunden auf Stufe 3 und stoppt dann
Hauptschalter EIN/AUS
Micro USB
Abbiegen rechts
Kontrolllämpchen Aufladen und Signalübertragung
1
2
3
4
5
6
7
8
9
10
1 1
Vooruit (5 snelheden)
Draai links
Stop
Achteruit (2 snelheden)
Aanduiding voor laden en zendsignaal
Trolleysnelheid 5 Vooruit
Trolleysnelheid 3 Vooruit
Ga ongeveer 15 seconden door op snelheid 3 wanneer
de trolley al in beweging is en druk dan op stop
Hoofdschakelaar Aan/Uit
Micro-USM connector voor laden via de EDM
Draai rechts
12
Speed trolley 5 forward
Speed trolley 3 forward
While trolley already moving, continue at Speed
3 for approx. 15 seconds and then stop
Main ON/OFF switch
Micro USB connector for charging from EDM
Right turn
Magnet for attachment to the trolley
13 Battery charge indicator, Green – charged,
Red - discharged
12 Magnet zur Befestigung am Trolley
13 Kontrolllämpchen Batteriestatus, grün – aufgeladen,
rot – leer
12 Magnetický úchyt
13 Kontrolka zelená - nabito, červená - vybito
12 Magneet om aan de trolley te bevestigen
13 Acculading indicatie: Groen: geladen; Rood: ongeladen
1
13
12
112
3
4
5
6
7
8
9
10

10
FITTING AND STARTING ELECTRIC DRIVE MODULE
BEFESTIGUNG UND INBETRIEBNAHME
DES ELEKTROANTRIEBS
EDM and Remote Control must remain powered OFF until securely installed in trolley and all three wheels are fitted.
Do not insert hands/arms or any body parts through wheels while mounting onto EDM, or after mounted.
It is recommended that free-wheel mode is used while manoeuvring the trolley around clubhouse.
Release both main drive wheels slightly outward, and re-lock.
Check wheels turn freely and are disengaged from motors.
Press POWER button and check battery level.
Turn remote control ON.
Check motors turn when commanded.
Turn remote control OFF.
When in open area, engage wheels to full drive mode.
Turn EDM ON, and remote control ON.
Refer to Decolt Grand user manual.
DasEDMunddieFernbedienung müssen so lange AUSGESCHALTET bleiben,bis das Modul und alle drei Räder
am Trolley befestigt sind – siehe Benutzerhandbuch des Decolt Grand Trolleys.
Vermeiden Sie es Ihre Hände oder andere Teile des Körpers durch die Räder hindurchzustecken, während oder
nachdem Sie das EDM am Trolley befestigen bzw. befestigt haben.
Wir empfehlen die Freilauf-Einstellung zu verwenden, wenn Sie den Trolley im Bereich des Klubhauses
bedienen. Lösen Sie von sich gerichtet die beiden Haupträder und arretieren Sie sie wieder.Überprüfen Sie,
ob sich die Räder selbst drehen können und dass sie nicht an den Elektromotor angeschlossen sind.
Schalten Sie den Hauptschalter ein und überprüfen Sie den Batteriestatus.
Schalten Sie die Fernbedienung ein. Kontrollieren Sie, ob sich die Motoren bei Abgabe des Befehls drehen.
Schalten Sie die Fernbedienung aus.
Stecken Sie die Räder in die eingerastete Position ein, sobald Sie sich auf freier Fläche befinden.
Schalten Sie das EDM und die Fernbedienung ein.

12
MONTAGE EN STARTEN VAN DE ELEKTRISCHE
AANDRIJVING
UPEVNĚNÍ A SPUŠTĚNÍ MODULU ELEKTRICKÉHO POHONU
EDM a dálkové ovládání musí zůstat VYPNUTÉ až do doby, kdy budou modul a všechna tři kola bezpečně
upevněna na vozík – viz uživatelská příručka vozíku Decolt Grand.
Nezasunujte ruce nebo jiné části těla skrz kola v průběhu či po ukončení procesu nasazování EDM na vozík.
Doporučujeme používat volnoběžnou pozici v situaci, kdy budete manévrovat vozík v okolí klubovny.
Uvolněte obě hlavní kola směrem od sebe a znovu zaaretujte.
Zkontrolujte, že se kola samovolně otáčí a že nejsou napojena na elektrický pohon.
Zapněte hlavní vypínač a zkontrolujte stav nabití baterie.
Zapněte dálkové ovládání.
Zkontrolujte, že se motory otáčejí při zadání příkazu.
Vypněte dálkové ovládání.
Až budete ve volném prostoru, zasuňte kola do uzamčené pozice.
Zapněte EDM a dálkové ovládání.
De EDM en afstandsbediening dienen UIT te staan tijdens montage zie handleiding Decolt Grand.
Steek geen lichaamsdelen (handen, armen) door de wielen tijdens montage van de EDM of na montage.
Gebruik de trolley in de vrije-wiel-loop-stand in de buurt van het clubhuis.
Beweeg daarvoor de wielen licht naar de buitenzijde en bevestig de wiel blokkering opnieuw.
Controleer of de wielen vrij draaien.
Druk de Aan / Uit schakelaar in en controleer de accu capaciteit.
Zet de afstandsbediening aan.
Controleer of de motoren draaien na commando via de afstandsbediening.
Zet de afstandsbediening UIT.
Aangekomen in de open ruimte, zet de wielen in de aandrijving-stand.
Zet de EDM en de afstandsbediening aan .

14
OVLÁDÁNÍ VOZÍKU VYBAVENÉHO EDM
OPERATING EDM EQUIPPED TROLLEY
BEDIENUNG EINES MIT EDM AUSGERÜSTETEN TROLLEYS
BEDIENING VAN DE TROLLEY MET ELEKTRISCHE AANDRIJFUNIT
Dodržujte veškeré bezpečnostní pokyny na straně 56
Pro zrychlení, opakovaně stiskněte tlačítko “dopředu”
Pro dosažení maximální rychlosti
stiskněte tlačítko 5krát
Pro zastavení, stiskněte tlačítko “stop”
Pro couvání, stiskněte tlačítko “dozadu”
Druhým stisknutím zvýšíte rychlost couvání
Zatáčení doleva – stiskněte tlačítko “zatáčení doleva”
Držte tlačítko stisknuté po dobu požadovanou
pro zatáčení
Zatáčení doprava – stiskněte tlačítko “zatáčení doprava”
Držte tlačítko stisknuté po dobu požadovanou
pro zatáčení
Pro pojezd rychlost 5 vpřed
stiskněte tlačítko
Pro pojezd rychlost 3 vpřed
stiskněte tlačítko
Pro pojezd rychlost 3 vpřed 15 s a pak zastaví
stiskněte tlačítko
Comply with all safety instructions on Page 56
To increase forward speed
press Forward button repeatedly
Press 5 times for maximum speed
To stop trolley, press Stop button
To reverse trolley, press Reverse button
A second press increases reverse speed
Turn left – press LEFT button
and hold for the time you want to turn left
Turn right – press RIGHT button
and hold for the time you want to turn right
Speed trolley 5 forward - press button
Speed trolley 3 forward - press button
Speed trolley 3 for approx. 15 seconds and then stop
- press button
Halten Sie alle Sicherheitshinweise von Seite 56 ein
Um zu beschleunigen, drücken Sie wiederholt die
Taste “nach vorne”
Höchstgeschwindigkeit zu erreichen, drücken Sie die
Taste 5mal
Um anzuhalten drücken Sie die Taste “Stop”
Um rückwärts zu fahren drücken Sie Taste “zurück”
Durch erneutes Drücken erhöhen Sie die Geschwindigkeit
des Rückwärtsfahrens
Links abbiegen – drücken Sie die Taste „Abbiegen links“.
Halten Sie die Taste so lange gedrückt,
wie Sie abbiegen möchten
Rechts abbiegen – drücken Sie die Taste „Abbiegen rechts“.
Halten Sie die Taste so lange gedrückt,
wie Sie abbiegen möchten
Trolley-Geschwindigkeit 5 Vorwärts - Taste drücken
Trolley-Geschwindigkeit 3 Vorwärts - Taste drücken
Trolley-Geschwindigkeit 3 Vorwärts für ca. 15 Sekunden
und stoppt dann - Taste drücken
Zorg dat u de veiligheidsinstructies (pag. 56) in acht neemt
Om de snelheid te verhogen druk meermaals
op de VOORUIT- toetst
5 Maal drukken geeft maximale snelheid
Om de trolley te stoppen druk op de STOP-toets
Voor achteruit druk op de toets achteruit
Een tweede keer drukken verdubbelt de snelheid
Linkse draai: druk LINKS-toets en houdt deze ingedrukt
als u linksaf wilt draaien
Rechtse draai: druk RECHTS-toets en houdt deze ingedrukt
als u rechtsaf wilt draaien
Trolleysnelheid 5 Vooruit
druk op de toets
Trolleysnelheid 3 Vooruit
druk op de toets
Trolleysnelheid 3 Vooruit ongeveer 15 seconden
en dan stopt de trolley - druk op de knop

16
PAIRING REMOTE CONTROL TO EDM01
SYNCHRONISIERUNG DER FERNBEDIENUNG
MIT DEM EDM01
check the USB cable (or change it) and repeat the above process again.
the remote control OFF.
Once the EDM and remote control are switched back on, the trolley is ready to use.
If green light comes on, the pairing process was successful. Disconnect USB cable and switch the EDM and
On remote control, press and hold both ON/OFF and STOP buttons until green or red light comes on.
Switch remote control ON.
Switch electric drive ON.
Connect remote control into the EDM using USB cable.
In the event of loss of communication between remote control and EDM01, or use of a new remote control
with your EDM it may be necessary to “re-pair” the connection.
Once green or red light is flashing, release both buttons.
If the pairing process was unsuccessful (red light is flashing instead of green light), switch both units OFF,
Falls die Verbindung zwischen der Fernbedienung und dem EDM01 verloren geht oder falls Sie eine neue
Fernbedienung für das EDM haben, kann es notwendig sein die Geräte erneut zu synchronisieren.
Schließen Sie die Fernbedienung an das EDM mithilfe des USB-Kabels an.
Schalten Sie den Elektromotor ein (AN).
Schalten Sie die Fernbedienung ein (AN).
Drücken Sie auf der Fernbedienung die Taste EIN/AUS und gleich darauf die Taste STOP so lange,
bis das grüne oder rote Kontrolllämpchen leuchtet.
Lassen Sie die Tasten in dem Moment los, in dem das rote oder grüne Kontro lllämpchen zu blinken beginnt.
Falls das grüne Kontrolllämpchen zu leuchten beginnt, war die Synchronisierung erfolgreich.
Stecken Sie das USB-Kabel aus und schalten Sie den Elektromotor EDM01 sowie die Fernbedienung aus.
Sobald Siebeide Geräte wieder einschalten, wird das System wieder einsatzbereit sein.
Falls der Vorgang der Synchronisierung nicht erfolgreich war (es leuchtet das rote anstatt des grünen
Kontrolllämpchens), schalten Sie beide Einheiten aus, kontrollieren Sie das USB-Kabel (tauschen Sie es ggf. aus)
und wiederholen Sie den Vorgang.

18
SPÁROVÁNÍ OVLADAČE S EL. POHONEM
SYNCHRONISATIEVAN DE AFSTANDSBEDIENING
MET DEEDM01
Pokud nebyl proces párovaní úspěšný (bliká červená kontrolka namísto zelené), vypněte obě jednotky,
zkontrolujte USB kabel (případně jej vyměňte za jiný) a proces zopakujte.
Odpojte USB kabel a vypněte elektrický pohon EDM01 i dálkové ovládání.
Ve chvíli, kdy obě zařízení znovu zapnete, bude systém připraven k užívání.
Pokud se rozsvítí zelená kontrolka, párovaní bylo úspěšné.
Ve chvíli, kdy bliká červená nebo zelená kontrolka, tlačítka pusťte.
Na dálkovém ovládání stiskněte a držte tlačítko ON/OFF a hned poté tlačítko STOP, dokud se nerozsvítí zelená
nebo červená kontrolka.
Zapněte dálkové ovládání (ON).
Zapněte elektrický pohon (ON).
Připojte dálkové ovládání na EDM pomocí USB kabelu.
V případě ztráty komunikace mezi dálkovým ovládáním a EDM01 nebo pokud máte nové dálkové ovládání pro
EDM, může být nutné zařízení znovu spárovat.
USB-kabel of vervang deze en herhaal het beschreven proces.
Verwijder de USB-kabel en zet de EDM en de afstandsbediening uit.
Wanneer u beide apparaten weer inschakelt kan de trolley worden gebruikt.
Wanneer het groene ledje brandt is de verbinding gelukt.
Wanneer het groene of rode ledje begint te knipperen de toetsen loslaten.
Op de afstandsbediening druk tegelijk de AAN/UIT en de STOP-toets in en houdt deze vast tot er een groen of
een rood ledje gaat branden.
Zet de afstandsbediening aan.
Zet de EDM aan.
Verbind de afstandsbediening met de EDM met de USB-kabel.
In het geval u communicatie verliest tussen de afstandsbediening en de EDM01, of wanneer u een nieuwe
afstandsbediening in gebruik neemt kan het nodig zijn de verbinding te herstellen.
Wanneer de verbinding niet is geslaagd (rode ledje flikkert ipv het groene), zet beide unit uit.Controleer de

20
CALIBRATION OF GYROSCOPIC SENSOR
KALIBRIERUNG DES GYROSKOPISCHEN SENSORS
If EDM01 tends to turn when commanded forward, it might be necessary to recalibrate the sensors
that control straight movement.
1 Connect remote control to the EDM using USB cable.
3 Place EDM on level surface.
4 On the remote control, press and hold button followed by button until green
and red light flash in alternate sequence.
5 Wait until calibration is confirmed - this is displayed by multiple red or green light signals.
6
7 If green light comes on, the calibration process was successful.
8 Disconnect USB cable and switch both the EDM01 and the remote control OFF.
9 When you turn both units back ON, they will be ready for use.
10 If the calibration process was unsuccessful (red light comes on instead of green),
turn both units OFF, check the USB cable (or change it) and repeat the process.
Once red or green light is flashing, release both buttons.
Falls das EDM01 zum Abbiegen neigt, wenn es vorwärts gesteuert wird, kann eine
Neukalibrierung der Sensoren zum geradeaus fahren notwendig sein.
1 Verbinden Sie hierzu die Fernbedienung mit dem EDM über ein USB-Kabel.
2 Schalten Sie das EDM und Sie die Fernbedienung EIN.
4 Halten Sie die -Taste auf der Fernbedienung gedrückt und drücken dann zusätzlich
die Taste bis das Kontrolllämpchen abwechselnd grün und rot leuchtet.
5 Warten Sie, bis die Kalibrierung bestätigt ist – dies wird durch mehrmaliges Aufleuchten
des Lämpchens in grün oder rot angezeigt.
6
7 Die Kalibrierung war erfolgreich, wenn grünes Licht leuchtet.
8 Entfernen Sie das USB-Kabel und schalten Sie das EDM und die Fernbedienung AUS.
9 Sobald Sie sie wieder einschalten, sind beide Geräte betriebsbereit.
10
Lassen Sie beide Tasten los, sobald das Lämpchen rot oder grün aufleuchtet.
2 Turn EDM and remote control ON.
3 Platzieren Sie das EDM auf waagerechtem Untergrund.
Falls die Neukalibrierung nicht erfolgreich war (statt grünem leuchtet rotes Licht),
schalten Sie beide Geräte AUS, überprüfen Sie das USB-Kabel (oder tauschen Sie es aus)
und wiederholen Sie den Vorgang.

22
CALIBRATIE VAN DE GYROSCOOP SENSOR
KALIBRACE GYROSKOPICKÉHO SENZORU
V případě, že EDM01 začne při navoleném přímém pohybu vykazovat známky zatáčení,
může být nutné zkalibrovat senzory pro řízení přímého pohybu.
1 Připojte dálkové ovládání na EDM pomocí USB kabelu.
3 Umístěte EDM na vodorovný podklad.
4 Na dálkovém ovládání stiskněte a držte tlačítko a hned poté tlačítko dokud nezačne
po sobě blikat zelená a červená kontrolka.
5 Vyčkejte do doby potvrzení kalibrace, kdy vícenásobně po sobě zabliká zelená,
nebo červená kontrolka.
6
7 Pokud se rozsvítí zelená kontrolka, kalibrace byla úspěšná.
8 Odpojte USB kabel a vypněte elektrický pohon EDM01 i dálkové ovládání.
9 Ve chvíli, kdy obě zařízení znovu zapnete, bude systém připraven k užívání.
10 Pokud nebyl proces kalibrace úspěšný (bliká červená kontrolka namísto zelené),
vypněte obě jednotky, zkontrolujte USB kabel (případně jej vyměňte za jiný)
a proces zopakujte.
Ve chvíli, kdy bliká červená nebo zelená kontrolka, tlačítka pusťte.
IWanneer de EDM01 bij commando VOORUIT van de rechte lijn afwijkt kan het nodig zijn om
de sensor van de gyroscoop, die een rechte beweging controleert, opnieuw te calibreren.
1 Sluit de afstandsbediening aan op de EDM01 met de USB-kabel.
2 Zet de EDM01 ANN. Zet de afstandsbediening AAN.
4 Druk op de -toets van de afstandsbediening en houd deze vast en druk daarna
op de -toets totdat een groen en rood LEDje afwisselend knipperen.
5 Wacht tot de calibratie wordt bevestigd – dit wordt weergegeven door verschillen
de rode of groene lichtsignalen.
6
7 Licht een groen licht op dan was de her-calibratie succesvol.
8 Maak de kabel van de USB los en zet zowel de EDM01 als de afstandsbediening UIT.
9 Wanneer je nu beide apparaten AAN-zet zijn ze klaar voor gebruik.
10 Als de her-calibratie niet succesvol was ( een rood licht knippert in plaats van gro en),
zet dan beide apparaten UIT, controleer de USB-kabel (of vervang deze) en herhaal het proces.
Als een rood of groen lichtje knippert laat beide toetsen los.
2 Zapněte elektrický pohon a dálkové ovládání (ON).
3 Zet de EDM01 op een vlakke ondergrond.

24
ELEKTRICKÝ POHON SESTAVENÍ
ELECTRIC DRIVE ASSEMBLY
ELEKTROANTRIEB ZUSAMMENBAU
ELEKTRISCH AANDRIJVING MONTAGE

26
Nasaďte kola na elektrický pohon - aretace kol je
Kola poté zapadnou do první volnoběžné polohy.
Připravíme bag bez předního kolečka.
Jednou rukou držte bag tak, abyste prsty dosáhli na
Druhou rukou uchopte elektrický pohon dvěma prsty
ve středovém otvoru tak, aby dlaň směřovala k logu GT.
Celý elektrický pohon zasuňte do otvoru pro píst
dokud není cítit, že píst narazil na čep aretace nápravy.
V tuto chvíli aretaci na krátkou dobu odjistěte a jakmile
posunete elektrický pohon dále dovnitř, pusťte páčku
Dále však tlačte elektrický pohon silou dovnitř, dokud
neuslyšíte, že aretační čep zapadl do otvoru v pístu
Zkontrolujte, zda je elektrický pohon pevně spojen
s bagem - pokuste se jej vytáhnout, aniž byste zvedli
páčku aretace nápravy. Je–li EDM správně nasazen,
Attach wheels to the electric drive. Wheel lock is in
Prepare the bag without the front wheel.
2 fingers in the opening on the drive unit.
Insert the electric drive into the opening for the shaft until
you feel that the shaft touched the pin of the axle lock.
At this moment, unlatch axle lock and keep pushing
the electric drive inside while releasing the lever of the lock.
Continue pushing the electric drive inside until you hear
that the lock pin fully clicks in.
Verify that the electric drive is firmly attached to the bag
Setzen Sie die Räder auf den Elektroantrieb auf,
Die Räder rasten dann in der ersten freilaufenden
Bereiten Sie das Bag ohne das Vorderrad vor. Halten Sie
das Bag so mit einer Hand, dass Sie mit den Fingern die
Greifen Sie mit zwei Fingern der anderen Hand den
Elektroantrieb in der Öffnung des Antriebsmoduls.
Schieben Sie den Elektroantrieb in die Öffnung für
den Kolben bis der Kolben an das Ende der
Entriegeln Sie in diesem Moment die Arretierung für
kurze Zeit und sobald Sie den Elektroantrieb weiter
hineingeschoben haben, lassen Sie den Hebel
Drücken Sie den Elektroantrieb mit Kraft noch weiter
hinein, bis Sie hören, dass der Haken der Arretierung
im Kolben des Elektroantriebs einrastet.
Überprüfen Sie, ob der Elektroantrieb fest mit dem
Zet de wielen op de elektrische aandrijving-unit.
Wielblokkering in de stand met aandrijving.
De wielen zullen in de eerste stand klikken.
Maak de golftas klaar zonder het voorwiel te plaatsen.
Houdt de tas met één hand vast, zodat u bij de as
Gebruik de andere hand; houd de elektrische
aandrijfunit door 2 vingers in de opening van
Uw handpalm dient tegenover het GT logo te zijn.
Schuif de elektrische aandrijfunit in de as geleiding tot
u de pin van het as blokkering voelt.
Haal op dat moment de blokkering van het as slot
en schuif de elektrische unit verder terwijl u de as
Duw de elektrische unit verder tot u de pin van de
blokkering in het gat voelt klikken.
Controleer of de unit goed aan de tas vastzit.
aretace, aby se zajistila.
elektrického pohonu.
aretaci nápravy.
v uzamčené poloze.
nebude možné jej z bagu vytáhnout.
the engaged position.
Using your other hand, hold the electric drive by inserting
Your palm should face GT logo.
by attempting to remove it without operating axle
release lever. EDM will not pull out if correctly fitted.
Hold the bag with one hand so that you can reach axle
lock with your fingers.
Wheels will latch into the first free-wheel position.
die Radarretierung befindet sich in eingerasteter Position.
Ihre Handfläche sollte zum GT Logo gerichtet sein.
Position ein.
Achsenarretierung erreichen.
Achsenarretierung stößt.
der Arretierung los, damit er einrastet.
Bag verbunden ist.
blokkering kunt met u vingers.
blokkering open zet.
de aandrijfunit te steken.
Electric drive – assembly - optional extra
Elektrický pohon - sestavení - volitelné
Elektroantrieb – Zusammenbau (wählbares Zubehör)
Elektrisch aandrijving - montage (optioneel)

28
Nasaďte přední kolečko viz návod tříkolka - sestavení.
Jelikož jsou kola v první, volnoběžné poloze, nejsou propojena s motory
a vozík se může pouze tlačit, což využijte například při složitějším
manévrování před klubovnou a podobně.
Attach the front wheel – see section “Three-wheel version – assembly”.
Now the trolley is still in manual version as the wheels are locked in the
drive. You can use this setup to manually push the trolley and maneuver
in busier areas such as in front of the clubhouse.
Stecken Sie das Vorderrad auf, siehe Anleitung Dreirad Trolley –
Zusammenbau.
nicht mit den Motoren verbunden und der Trolley kann nur geschoben
werden.
Davon machen Sie beispielsweise bei kompliziertem Manövrieren vor
dem Klub u. Ä. Gebrauch.
Monteer het voorwiel (zie sectie: 3-wiel versie montage).
De trolley is nu nog in de stand voor handmatig gebruik, omdat de
wielen nog in de „vrije“ stand staan.
Hierdoor zijn ze nog niet gekoppeld met de elektrische aandrijving.
Deze stand kunt u gebruiken om de kar handmatig te duwen bijvoorbeeld
op lastige ondergrond en in de buurt van het clubhuis.
first free-wheel position and therefore are not connected to the electric
Da sich die Räder in der ersten, freilaufenden Position befinden, sind sie
Electric drive – assembly - optional extra
Elektrický pohon - sestavení - volitelné
Elektroantrieb – Zusammenbau (wählbares Zubehör)
Elektrisch aandrijving - montage (optioneel)

30
Přejete-li si využít elektrický pohon, odjistěte páčky aretace kol směrem
nahoru a kola postupně zatlačte dále do elektrického pohonu, aby kola zapadla
do unašeče motoru - je třeba s kolem pootáčet.
Propojení s motorem je poté cítit v ruce.
Páku aretace umístěte do spodní polohy a zkontrolujte zda jsou kola v této připojené
poloze zaaretovaná.
Vozík je připraven za pomoci dálkového ovladače k jízdě.
Once you are ready to use the electric drive, put the wheel lock lever up and push
the wheels further into the electric drive.
Put the wheel lock lever back down and verify, that the wheels are fully latched
in this position.
In order to fully lock them into the drive, you need to turn the wheels slightly while
pushing in.
You will feel with your hand when the connection with the drive is completed.
The trolley is now ready – use the remote control to drive it.
Wenn Sie bereit sind den Elektroantrieb zu nutzen, entriegeln Sie die Haken
der Radarretierung Richtung aufwärts und drücken Sie die Räder nach und
nach weiter in den Elektroantrieb hinein, sodass die Räder in den Antrieb
des Motors einrasten – sie müssen während des Drückens leicht gedreht werden.
Es ist mit der Hand spürbar, wenn sie mit dem Motor verbunden sind.
Stellen Sie den Hebel der Arretierung in die untere Position und überprüfen
Sie, ob die Räder in der verbundenen Position arretiert sind.
Der Trolley ist nun mithilfe der Fernbedienung zum Fahren bereit.
Wanneer u er klaar voor bent kunt u de elektrische aandrijving gebruiken:
zet de wiel-blokkeringen omhoog en duw de wielen verder op de as
voor elektrische aandrijving.
Om de wielen goed op hun plaats te krijgen kunt u de wielen een beetje draaien
tijdens het duwen.
U voelt aan uw hand wanneer de wielen op hun plaats schuiven.
Zet de wielbokkering terug naar beneden en test of de wielen werkelijk op de
aandrijving vast zitten.
De trolley is nu klaar - gebruik de afstandsbediening om te rijden.
Electric drive – assembly - optional extra
Elektrický pohon - sestavení - volitelné
Elektroantrieb – Zusammenbau (wählbares Zubehör)
Elektrisch aandrijving - montage (optioneel)

32
TECHNICAL DATA AND OPERATING
Charger voltage: 240VAC
Operating voltage: up to 60V DC
Battery capacity : 320 Whr
Recharge rate : 2/3A ( 3-6 hours )
Maximum range: 36 holes ( standard )
Battery management system – on board software
Remote control : 2.4 GHz band
Operating Tips
Power OFF EDM01 and remote control when not in use.
Avoid overloading the trolley or operating in extreme slopes.
Charge the EDM01 ONLY using the provided battery charger.
Deep cycle the battery from time to time to prolong capacity.
Technical Specifications
Safety Features of the EDM01
operation on slopes.
Gyroscope is factory calibrated.
In the event the trolley is not operating in a straight line on sloped surface,
it is necessary to recalibrate the gyroscopic sensor - see instructios on page
"CALIBRATION OF GYROSCOPIC SENSOR". If the trolley continues to fail
to maintain a straight line on sloped surface even after repeated calibration
process, please refer to our customer service or to your distributor.
Do not operate at extended distances or outside line-of-sight.
The EDM01 will automatically shutdown if the battery level is too low
or if communication with remote control is lost.
The trolley may be used manually in free-wheel mode.
Transportation
The EDM contains Lithium-Ion batteries exceeding 300Whr capacity.
These batteries, under current regulations may not be carried by air.
Do not attempt to carry as hand luggage or checked luggage on any aircraft,
or dispatch as air freight.
Most road freight carriers have restrictions on carriage of Lithium Ion batteries.
Inform any road freight company of the contents of this product before carriage.
Always remove EDM from trolley, and power OFF prior to transportation.
The EDM01 is fitted with an on-board gyroscope to ensure straight line

34
TECHNISCHE DATEN UND
PROBLEMLÖSUNG
Technische Daten und Problemlösung
Ladespannung des Ladegeräts: 240V
Bedienungsspannung: bis 60V
Akkukapazität: 320 Wh
Ladegeschwindigkeit: 2/3A (3-6 Stunden)
Maximale Reichweite: 36 Löcher (Standard)
System zur Batterieregelung – Teil der Software
Fernbedienung: 2.4 Ghz Band
Bedienungsempfehlungen
Schalten Sie das EDM01 und die Fernbedienung aus, wenn
Sie diese nicht verwenden.
Überlasten Sie den Trolley nicht mit zu viel Gewicht und
verwenden Sie ihn nicht bei extremem Gefälle.
Laden Sie das EDM01 NUR mit dem originalen Ladegerät auf.
Entladen Sie die Batterie regelmäßig komplett, um ihre
Lebensdauer zu erhöhen.
Sicherheitselemente des Moduls EDM01
Das Gyroskop wird während des Herste llungsprozesses kalibriert.
Falls der Trolley auf schiefen Flächen nicht gerade fährt, wenden Sie sich bitte
an unseren Kundenservice oder an Ihren Händler, um Instruktionen zur
Neueinstellung der Kalibrierung zu erhalten.
Siehe auch Seite " KALIBRIERUNG DES GYROSKOPISCHEN SENSORS".
Setzen Sie es nicht auf weiten Entfernungen ein oder falls der Trolley
nicht in Ihrer Sichtlinie ist.
Das EDM01 schaltet sich automatisch aus, falls die Verbindung zur
Fernbedienung verloren geht.
Der Trolley kann benutzt werdender manuell im Freilauf-Modus.
Transport
Das EDM enthält Lithium-Ionen-Batterien mit einer Kapazität von über 300 Wh.
Gemäß den aktuellen Regulierungen dürfen solche Batterien nicht im Flugzeug
transportiert werden.
Versuchen Sie nicht das EDM als Handgepäckstück oder als aufgegebenes
Gepäckstück zu transportieren und versenden Sie es nicht per Luftfracht.
Die meisten Anbieter von Landtransporten haben ein Limit für den Transport
von Lithium-Ionen-Batterien.
Informieren Sie daher Ihren Anbieter vor dem Absenden über den Inhalt
des Pakets.
Trennen Sie das EDM vom Trolley vor jeder Art von Transport und schalten
Sie es aus (AUS).
Das EDM01 ist mit einem eingebauten Gyroskop ausgestattet, das eine
gerade Fahrt auf schiefen Flächen gewährleistet.

36
TECHNICKÁ DATA A PROVOZ
Napájecí napětí nabíječky: 240VAC
Provozní napětí: do 60V DC
Kapacita baterií: 320 Whr
Rychlost nabíjení: 2/3A (3-6 hodiny)
Maximální dosah: 36 jamek (standardní)
Systém řízení baterií – součástí palubního softwaru
Dálkové ovládání: 2.4 GHz pásmo
Provozní doporučení
Vypněte EDM01 a dálkové ovládání, pokud je nepoužíváte.
Vozík nadměrně nezatěžujte a nepoužívejte na extrémních sklonech.
Nabíjejte EDM01 POUZE za použití originální nabíječky.
Pravidelně baterii kompletně vybijte za účelem prodloužení životnosti.
Technické specifikace
Bezpečnostní prvky modulu EDM01
EDM01 modul je vybaven zabudovaným gyroskopem,
který zajišťuje přímou jízdu na nakloněných plochách.
Gyroskop je kalibrován během výrobního procesu.
V případě, že vozík nejede na nakloněné ploše rovně, je nutná
kalibrace gyroskopického senzoru viz strana "KALIBRACE
GYROSKOPICKÉHO SENZORU". Pokud i po opakované úspěšné
kalibraci gyroskopického senzoru vozík stále nejede na nakloněné
ploše rovně, obraťte se prosím na naši zákaznickou podporu nebo
na vašeho distributora ohledně pokynů pro resetování kalibrace.
EDM01 se automaticky vypne při nízké úrovni baterie nebo pokud
dojde ke ztrátě komunikace s dálkovým ovladadačem.
Neprovozujte na velké vzdálenosti nebo pokud nemáte s vozíkem
přímou linii viditelnosti.
Vozík je možno používat manuálně ve volnoběžné pozici.
Přeprava
EDM obsahuje ion-lithiové baterie přesahující kapacitu 300Whr.
Dle současné regulace takové baterie nemohou být přepravovány
Nepokoušejte se EDM přepravovat jako kabinové ani
zapsané zavazadlo a nezasílejte leteckou přepravou.
Většina pozemních dopravců má limity na přepravu
ion-lithiových baterií.
Informujte tedy svého dopravce o obsahu zásilky před odesláním.
Před jakoukoli přepravou, vždy odpojte EDM od vozíku
letecky.
a vypněte jej (OFF).

38
TECHNISCHE SPECIFICATIES EN TIPS
Voltage lader: 240 VAC
Voltage tijden gebruik: maximaal 60V DC
Accu capaciteit: 320 Watt/uur
Laadstroom: 2/3 Ampère (3-6 uur)
Actie radius: 36 holes (standaard)
Accu Management Systeem: ingebouwd in de unit
Afstandsbediening: 2.4 GHz band
Bediening tips
Zet de EDM en de afstandsbediening UIT wanneer u ze niet gebruikt.
Laad de trolley niet té zwaar en vermijdt erg steile hellingen.
Laadt de EDM alleen met de meegeleverde lader.
Zorg dat de accu zo nu en dan ver leeg is; dit kan de levensduur vergroten.
Technische specificaties Veiligheid ingebouwd in de EDM
De EDM01 heeft een ingebouwde gyroscoop, zodat in rechte lijn
wordt gereden.
De gyroscoop is in de fabriek gekalibreerd.
Mocht de trolley niet in rechte lijn rijden op vlakke ondergronden neem
dan contact op met de helpdesk om de gyroscoop opnieuw te kalibreren.
Wanneer de verbinding met de afstandsbediening is verbroken zal de
trolley auto matischstoppen.
Zie ook pagina "CALIBRATIE VAN DE GYROSCOOP SENSOR".
Gebruik de trolley niet op grote afstand of buiten uw zicht.
DE EDM01 zal automatisch uitschakelen wanneer de accuspanning
te laag is.
U kun de wielen dan in de „vrij-loop“-stand zetten om eenvoudig
verder te kunnen.
Vervoer
De EDM bevat Lithium Ion batterijen, die meer dan 300 watt/uur
capaciteit hebben Volgens de huidige regelgeving mogen deze batterijen
niet met vliegtuigen vervoerd worden.
Neem de EDM niet in de handbagage mee bij vluchten en stuur
de EDM niet per luchtvracht.
De meeste vervoersmaatschappijen hebben restricties voor het vervoer
van Lithium-Ion batterijen.
In geval u ze wilt laten transporteren informeer dan de
vervoersmaatschappij over de inhoud van uw zending.
Hall de EDM altijd van uw trolley af en schakel de spanning AF
voor transport.
Other manuals for Decolt Grand
1
Table of contents
Other Geum Technology Golf Trolley manuals