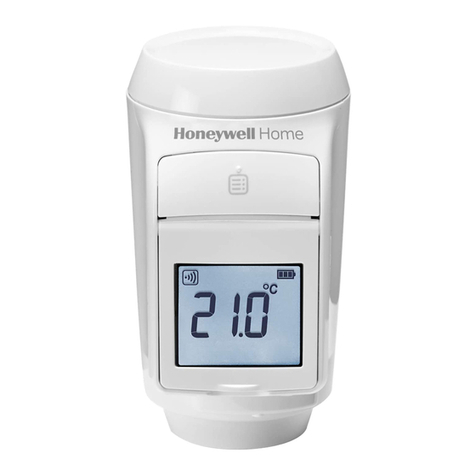
Honeywell Home TheraPro HR90 User manual

OWNER’S GUIDE
33-00084EFS-03
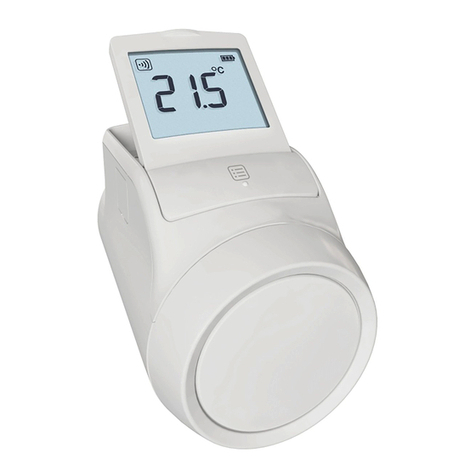
TheraPro HR90
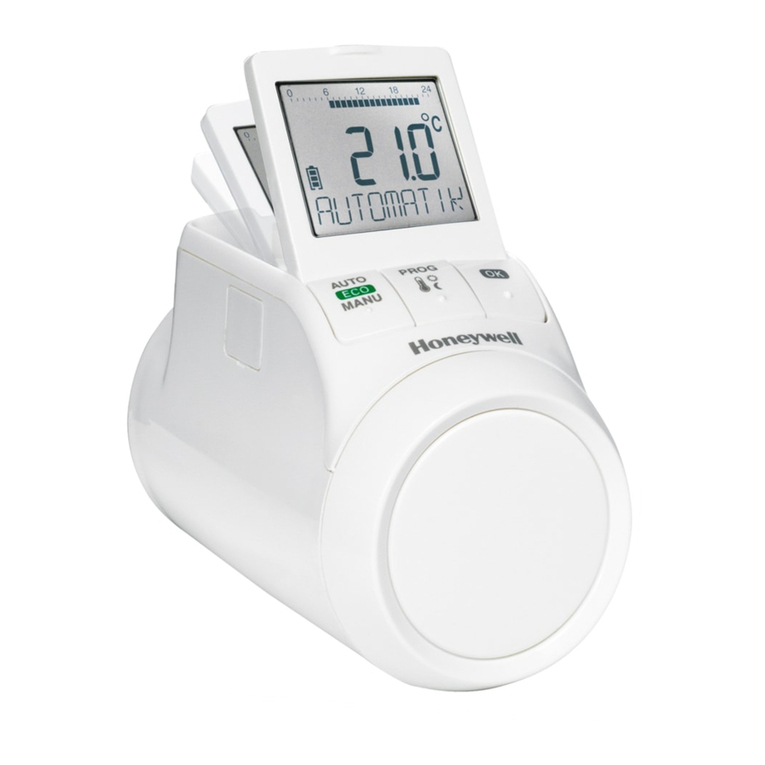
ELECTRONIC RADIATOR CONTROLLER
1. SCOPE OF DELIVERY
The radiator controller packaging contains:
1. Radiator controller with valve baseplate M30 x
1.5; batteries included
2. Display support
3. Valve adapter type Danfoss RA
4. Screws for securing radiator controller and bat-
tery compartment
WARNING
Danger of suffocation!
Keep packaging materials away from children.
2. BRIEF DESCRIPTION
With the electronic radiator controller, you can set
your room temperature exactly to your requirements
while allowing you to save energy.
Please note: The HR90 radiator controller does not
directly switch your boiler on/off. It provides local
room temperature control whilst the boiler is running.
The boiler will be switched on/off by other controls
such as timer, thermostat, etc. For use with hot water
and steam systems.
User-friendly
• Large, adjustable display with backlight.
• Convenient programming by removing the
radiator controller from the valve.
• Copy function for transferring the time program to
other HR90 radiator controllers.
Installation
• The radiator controller fits on the most common
radiator valves of the type M30 x 1.5.
• The HR90 is set to factory settings out the box, but
is programmable pre or post mounting.
Features for your convenience
• Individual programs for each day of the week.
• Up to 6 setpoints per day and 3 different
temperatures.
• Holiday, party, day-off, and ECO operating modes
can be set easily.
• Parameters can be set individually, see Section 9.
• Operation lock/child-proofing to protect against
unauthorized operation.
• Copy programs between multiple controllers
Energy saving features
• With the window function, the radiator valve is
closed when ventilating the room.
• In ECO mode, the room temperature is lowered by
5°F.
• Optimized control of the room temperature.
CAUTION
Care of use is required!
Use the radiator controller only in accordance
with these operating instructions.
Do not let children play with the radiator
controller.
1
2
3
4
M35625

THERAPRO HR90
33-00084EFS—03 2
3. DEVICE OVERVIEW
Operating elements and display
1. Heating period/setback period in hours
2. Day of the week 1 ... 7 (Monday ... Sunday). Dis-
played only while the time program is being pro-
grammed
3. Temperature display: e.g. set point temperature
(factory setting) or measured temperature, if
configured in Parameter 9
4. Text display with 9 characters
5. Button OK: Confirm settings
6. Button PROG: Select the operating modes, set
the time program;
Press button >10 seconds: access to the param-
eter menu;
Programming: Back to next level up
7. Adjustment dial: Change the set point, navigate
menu
8. Button AUTO/ECO/MANU: Change between
automatic, ECO and manual mode
In programming mode: Exit (without storing)
9. Battery status
10. Operation lock
11. Symbol for Comfort temperature 1,
Comfort temperature 2, Setback temperature
Battery display
4. INSTALLATION
Ready to operate in three steps:
• Insert batteries
• Set the language, time and date
• Mount on radiator – FINISHED
Inserting/changing batteries
The radiator controller is set for the following battery
type:
• 2 alkaline cells 1.5 V; type LR6, AA, AM3
You can instead use the following batteries or
rechargeable batteries:
• Lithium 1.5 V; type LR6, AA, AM3
• NiMH 1.2 V; type LR6, AA, AM3
NOTES:
• If lithium or NiMH batteries are used, Parameter 14
has to be adapted, see Section 9.
• Always change batteries in pairs.
1. Pull off the adjustment dial. To do so, start at the
notch on the bottom of the device.
2. If used, unscrew any fastening screws from the
battery compartment.
3. Release the lock and fold out battery spring.
The battery compartment is now accessible.
4. Insert the batteries.
Ensure that the polarity “+” and “–” is correct.
5. Fold down the battery spring and latch it in.
6. Option: Screw the battery spring to secure the
batteries against removal.
7. Place the adjustment dial back on.
First the software version number and then the
language ENGLISH is displayed.
8. If desired, use the adjustment dial to select a dif-
ferent language.
9. Confirm the selected language with the OK but-
ton. HOUR is displayed.
Battery
status Meaning
Batteries fully charged
Batteries half charged
Batteries have to be replaced soon
Flashing display: Batteries are dead and
have to be replaced
8
5
7
3
2
1
4
11
10
9
6
PROG
AUTO
MANU OK
ECO
M35568
F
5
4
–
+
7
6
1
3
2
M35626
OPTION
OPTION

THERAPRO HR90
3 33-00084EFS—03
NOTE: The language selection is only displayed
during initial commissioning. During future
battery changes, setting of time and date is
prompted directly.
NOTE: The battery life of new alkaline cells amounts
to approx. 2 years. The batteries need chang-
ing when the battery symbol flashes. All set-
tings are retained when the batteries are
changed.
WARNING
Explosion hazard!
Never charge non rechargeable batteries.
Never short-circuit batteries or throw them into
fire.
Dispose of used batteries ecologically.
Setting the time and date
1. When HOUR is displayed, use the adjustment
dial to set the current hour and confirm with OK.
MINUTE is displayed.
2. Use the adjustment dial to set the current min-
ute and confirm with OK.
YEAR is displayed.
3. Use the adjustment dial to set the current year
and confirm with OK.
MONTH is displayed.
4. Use the adjustment dial to set the current month
and confirm with OK.
DAY is displayed.
5. Use the adjustment dial to set the current day
and confirm with OK.
The normal display with set temperature and selected
operating mode is displayed.
Checking/changing the time and date
Proceed as follows to check or to change the date and
time later on:
1. Press the PROG button.
2. Select TIME DATE and confirm with OK.
HOUR is displayed.
3. Further checking/changing is carried out as
described above.
Mounting the radiator controller
The radiator controller can be mounted on all common
thermostatic valves with an M30 x 1.5 connection
without draining system.
WARNING
Prevent damage to the radiator controller
through humidity and moisture!
Mount the radiator controller in dry, closed
rooms only.
Protect the radiator controller against
humidity, moisture, dust, direct sunlight or
exposure to excessive heat.
Removing the old thermostat head
1. Turn the old thermostat head counter-clockwise
until it stops and loosen the mounting ring.
2. Remove the old thermostat head from the radia-
tor valve.
Selecting the adapter
The radiator controller fits on common radiator valves
of the type M30 x 1.5. Adapters are required for some
valve types.
1. Check whether an adapter is required and, if
necessary, select the appropriate adapter.
2. Slide the adapter onto the radiator valve and
turn it until you feel it click into place.
3. If necessary, screw the adapter tight with a
screw.
Mounting the valve baseplate
1. Separate the valve baseplate from the radiator
controller. To do so, push the slide towards
unlock.
2. Turn the adjustment dial of the valve baseplate
anti-clockwise until it stops.
3. Put the valve baseplate onto the radiator valve or
the adapter and tighten by hand (without tools!).
1
2
M35627
1A
1B
M35628
3
2
M35629

THERAPRO HR90
33-00084EFS—03 4
Mounting the radiator controller
1. Ensure that the slide on the radiator controller is
in the open position.
2. Put the radiator controller onto the valve base-
plate so that the indentation latches in and is no
longer visible.
3. Lock the radiator controller in the end position.
To do so, push the slide towards lock.
After approx. 1 minute CYCL (self-test) is displayed.
Afterwards the radiator controller changes to
automatic mode.
NOTE: The radiator controller only operates if it is
locked correctly in the end position.
FINISHED! – After mounting, the radiator controller
operates immediately in the factory setting (standard
time program), see Section 5.
Securing the radiator controller
NOTE: The radiator controller and the batteries can
be secured against removal by using the sup-
plied screws.
Setting the position of the
display
In order to improve the legibility the display of the
radiator controller can be tilted to different positions
(10°, 20°, 30°, 40°).
The angle of 40° can be fixed with the supplied display
support.
Mounting
1. Lift the display and set it to the desired angle.
2. If desired, tilt the display by 40° and slide the
display support from above between the display
and the housing until it latches in.
Unmounting
Press the display support in at the back and remove it
upwards.
5. OPERATION
Standard time program (factory
setting)
In automatic mode, the radiator controller
automatically controls the room temperature in
accordance with the stored time program.
Week program 1: At home all day
Factory preset time program is set for each day of the
week Mo – Su (1 – 7):
• Two further week programs are stored in the
radiator controller. Further information is available
in Section 9.
• You can also adapt one of the stored week
programs to your individual requirements, see
Section 8.
2
31
M35635
°
M35636
M35637
Set-
point Time Temperature
1 6:00 am – 10:00 pm 68 °F (Comfort temperature 1)
2 10:00 pm – 6:00 am 61 °F (Setback temperature)
1
2
M35638
HEATING
68°F
61°F
LOWERING/
SAVING
SETPOINT1 SETPOINT2
12am6am 12pm 6pm12am
M35641

THERAPRO HR90
5 33-00084EFS—03
Adapting the temperature
temporarily
If you want to change the temperature specified by the
time program temporarily:
• Set your desired temperature using the adjustment
dial.
• The change remains in effect until the next
setpoint.
NOTE: The process of changing the temperatures
permanently is described in Section 7.
Saving energy in ECO mode
In ECO mode, the room temperature in automatic
mode specified by the time program is lowered by 5 °F.
To activate ECO mode, press the button
AUTO/ECO/MANU until ECONOMY is displayed.
The displayed temperature is reduced by 5 °F.
ECO mode runs until you press the button
AUTO/ECO/MANU again and select a different
operating mode.
Manual mode
In manual mode, the radiator controller operates at
the (manually) set temperature until you change the
temperature or change to a different operating mode.
To activate the manual mode. press the button
AUTO/ECO/MANU until manual is displayed.
The temperature can be adjusted manually using the
adjustment dial.
Manual mode runs until you press the button
AUTO/ECO/MANU again and select a different
operating mode.
6. PROGRAMMING –
OPERATING MODES
Overview of the operating modes
• "Party" operating mode: In this operating mode, you
can specify a temperature for a number of hours.
After the set period has expired, the radiator
controller changes back to automatic mode.
• "Day off" operating mode: If, for example, a public
holiday during the week, the automatic mode
settings may not meet your requirements on these
days. In such cases you can activate a different time
program for one or more days. After the set period
has expired, the radiator controller changes back to
automatic mode.
• "Holiday" operating mode: In this operating mode
you can specify a temperature for a specific
number of days. After the set period has expired,
the radiator controller changes back to automatic
mode.
Selecting operating modes
Selecting the "Party" or "holiday"
operating mode
1. Press the PROG button and turn the adjustment
dial to the left until party or holiday is displayed.
2. Confirm the selected operating mode with the
OK button.
Hours or Days flashes.
3. Use the adjustment dial to set the desired num-
ber of hours or days and confirm with OK.
The temperature display flashes.
4. Use the adjustment dial to set the desired tem-
perature and confirm with OK.
The selected operating mode and the set tem-
perature are displayed.
Selecting the "Day off" operating mode
1. Press the PROG button and turn the adjustment
dial to the left until day off is displayed.
2. Confirm the selected operating mode with the
OK button.
3. days flashes.
4. Use the adjustment dial to set the desired num-
ber of days and confirm with OK.
The selected operating mode is displayed.
• The procedure of creating the time program for
special days is described in Section 8.
• When you enter the number of days for
holidays/special day the current day counts as the
first day.
• An overview of the program structure is shown on
the last page of these instructions.
7. PROGRAMMING –
TEMPERATURES
Three preset temperatures can be assigned to the set
points in the time program:
• Comfort temperature 1 Factory setting 68 °F
• Comfort temperature 2 Factory setting 71.5 °F
• Setback temperature Factory setting 61 °F
Setting the temperatures
1. Press the PROG button.
Comfort 1 is displayed.
2. Press the OK button, use the adjustment dial to
set the Comfort temperature 1 and confirm with
OK.
Saved is displayed briefly and then again com-
fort 1.
3. Turn the adjustment dial clockwise until the next
temperature is displayed.
4. Repeat Steps 2 and 3 for the Comfort tempera-
ture 2 and the Setback temperature.
5. Use the AUTO button to exit programming.
The three preset temperatures (Comfort temperature
1, 2 and Setback temperature) can be changed at any
time.
NOTES:
• During programming the PROG button can be used
to return to the next level up.
• You can abort programming at any time by using
the AUTO button.
• An overview of the program structure is shown on
the last page of these instructions.
THERAPRO HR90
33-00084EFS—03 6
Operating hints
Operating the radiator controller
comfortably
The radiator controller can be removed from the
radiator to facilitate programming.
1. Unlock the radiator controller. To do so, push the
slide at the radiator controller towards unlocked.
2. Pull the radiator controller off the valve base-
plate.
8. Programming – Time program
Planning the time program
You can specify up to 6 setpoints per day.
The following has to be assigned to each setpoint:
• One of the three preset temperatures (Comfort
temperature 1, 2 and Setback temperature).
• Beginning of the Heating/Setback period
• End of the Heating/Setback period
Example
The example shows the following time program:
NOTE: An overview of the program structure is
shown on the last page of these instructions.
Week program
You can adjust the time program to your personal
weekly routine. You have the following options to this
purpose:
• Separate time programs for weekdays Mo – Fr (1 –
5) and weekend Sa – Su (6 – 7)
• One time program for the days of the week Mo – Su
(1 – 7)
• A different time program for each day of the week
Mo, Tu, We, Th, Fr, Sa, Su (1, 2, 3, 4, 5, 6, 7)
NOTE: We recommend that you write down your time
program before beginning programming.
Lost your way in the program?
Press the button AUTO/ECO/MANU
Automatic is displayed. The last entry is rejected.
Setting the time program
Selecting weekdays
1. Press the PROG button.
COMFORT 1 is displayed.
2. Turn the adjustment dial clockwise until pro-
gram is displayed.
3. Press the OK button and use the adjustment dial
to select the desired weekdays for your time pro-
gram:
MO - FR, SA - SU, MO - SU, MO, TU, ..., SU or day
off
4. Confirm the selected weekdays with the OK but-
ton.
The temperature as well as the beginning and
end of the first setpoint, e.g.:
• The end of a setpoint is also the beginning of the
next setpoint.
• You can use the adjustment dial to change from
one setpoint to another and thus view the setting of
all the programmed setpoints.
• Only the programmed setpoints are displayed.
Editing setpoints
1. In order to edit the displayed setpoint press the
OK button.
The temperature display flashes.
2. Use the adjustment dial to select the desired
temperature (Comfort temperature 1, 2 or Set-
back temperature) for the selected setpoint and
confirm with OK.
The beginning of the selected setpoint flashes.
NOTE: The time scale for programming of the set-
points begins at 3:00 in the morning and
ends at 2:50 on the following day.
3. Use the adjustment dial to set the desired begin-
ning for the selected setpoint and confirm with
OK.
The end of the selected setpoint flashes.
4. Use the adjustment dial to set the desired end of
the selected setpoint and confirm with OK.
Saved is displayed briefly. Subsequently the
temperature as well as the beginning and end of
the setpoint are displayed.
Set-
point Time Temperature
1 6:00 am – 9:00 am 68 °F (Comfort temperature 1)
2 9:00 am – 12:00 pm 61 °F (Setback temperature)
3 12:00 pm – 2:00 pm 68 °F (Comfort temperature 1)
4 2:00 pm – 5:00 pm 61 °F (Setback temperature)
5 5:00 pm – 10:00 pm 71.5 °F (Comfort temperature 2)
6 10:00 pm – 6:00 am 61 °F (Setback temperature)
2
1
M35642
2345
1 6
COMFORT1
SAVING
COMFORT2
LOWERING/
SAVING
HEATING
HEATING
HEATING
SETPOINTS
12am6am 12pm 6pm12am
M35643
°
M35644

THERAPRO HR90
7 33-00084EFS—03
5. For the further setpoints also select the tem-
perature as well as the beginning and end of the
setpoint as described in Steps 1 to 5.
NOTES:
• A setpoint is not saved until the temperature,
beginning and end have been confirmed with the
OK button.
• If a setpoint is not required, select the setting --.-
Deleting a setpoint
When a setpoint is not required, select the
temperature setting --.- and confirm with OK.
NOTE: The first setpoint cannot be deleted.
Adding a setpoint
1. Turn the adjustment dial until add new is dis-
played and confirm with OK.
The temperature display flashes.
2. Use the adjustment dial to select the desired
temperature (Comfort temperature 1, 2 or Set-
back temperature) for the new setpoint and con-
firm with OK.
The beginning of the new setpoint flashes.
3. Use the adjustment dial to set the desired begin-
ning for the new setpoint and confirm with OK.
The end of the desired setpoint flashes.
4. Use the adjustment dial to set the desired end of
the new setpoint and confirm with OK.
NOTE: Add new is only displayed when less than 6
setpoints are programmed.
Copying the time program
If several HR90 radiator controllers are to operate with
the same time program, the time program only has to
be created at one device (master) and can then be
copied to further radiator controllers.
NOTE: The ACC90 cable is required to copy the time
program.
IMPORTANT
The ACC90 cable must be used to copy pro-
grams. Use of any other cable may damage the
device.
•2xMicroBmini-plugs
•0.5mlong
• Not included in the scope of delivery
1. Remove the side cover from all the radiator con-
trollers.
2. Connect the master (with time program) and a
further HR90 radiator controller using the
ACC90 cable.
3. Press the buttons AUTO and OK at both devices
simultaneously for 4 seconds.
Com mode is displayed in the display of both
devices.
4. Press the PROG button at the master.
Master is displayed on the master and then
tramsmit.
Com mode is displayed on the other device and
then receive.
The time program is copied.
5. The copying process is completed when finished
is displayed at both devices.
6. After 2 seconds the device with the copied time
program changes to the automatic mode, com
mode is displayed again at the master.
7. Disconnect the ACC90 cable from the device
with the copied time program.
NOTE: If there are no activities at one of the two radi-
ator controllers for 4 minutes, they change
automatically to automatic mode.
Copying to further devices
1. Insert the ACC90 cable into the next device.
2. Press the buttons AUTO and OK at the next
device simultaneously for 4 seconds.
Com mode is displayed at this device.
Com mode is displayed at the master.
3. Press the PROG button at the master.
The further copying procedure is the same as
described at the first copying process.
Terminating copying
After the last copying process has been completed:
1. Press the AUTO button at the master in order to
change to the automatic mode.
2. Remove the ACC90 cable and put the side cover
back on at all the devices.
9. CONTROLLER
OPERATING PARAMETERS
Overview
If required, the 19 basic settings (parameters) can be
adjusted.
Factory settings are in bold text.
M35645
2
13
M35646

THERAPRO HR90
33-00084EFS—03 8
Parameters marked with an * are described in more
detail below.
Changing parameters
1. Keep the PROG button pressed for at least 10
seconds until Parameter 1 flashes (left-hand
digit).
The right-hand digit shows the current setting.
The parameter is displayed additionally in plain
text. For example, the display 1 1 stands for
Parameter 1 (language) with Setting 1 (German).
2. Use the adjustment dial to select the desired
parameter (left-hand digit).
3. Press the OK button to edit the parameter.
The current setting of the parameter flashes
(right hand digit).
4. Use the adjustment dial to set the desired set-
ting (right-hand digit) and confirm with OK.
The parameter being edited flashes (left-hand
digit).
5. For the further parameters repeat Steps 2 to 4.
6. Use the AUTO button to return to automatic
mode.
Description of the parameters
Parameter 2 –Selecting the preset time
programs
• Week program 1 (factory setting, 2 setpoints):
Mo – Su (1 – 7) at home all day
This time program is described in Section 8.
Table 1.
Par. Setting Meaning
1
1
2
3
4
5
6
Language setting
German
English
Danish
Swedish
Norwegian
Finnish
2
0
1
2
Preset time programs *
Week program 1 "At home all day"
Week program 2 "Lunch break at home"
Week program 3 "Part-time work"
3
0
1
Backlight *
Deactivated
Activated
4
0
1
Summer/winter time changeover
No automatic changeover
Automatic changeover
50
30
...
90
Duration of the window function *
Window function not active
Valve opens at the latest after 30 minutes
...
Valve opens at the latest after 90 minutes
6
0.2
...
2.0
Sensitivity of the window function during dropping
room temperature *
0.2 (sensitive)
...
2.0 (less sensitive)
Factory setting: 0.4
7
0.1
...
2.0
Sensitivity of the window function during rising
room temperature *
0.1 (sensitive)
...
2.0 (less sensitive)
Factory setting: 0.2
8
0
1
Setting the valve stroke *
Standard valve stroke
Full-stroke mode
9
0
1
Temperature representation in the display *
Set/programmed temperature (setpoint
temperature)
Measured room temperature
10
16
17
...
30
Upper temperature limit
The room temperature cannot be set higher than
the specified upper temperature limit (Max Limit).
Factory setting: 86 °F
11
5
6
...
15
Lower temperature limit
The room temperature cannot be set lower than the
specified lower temperature limit (Min Limit).
Factory setting: 41 °F
12
0
1
2
Optimization function *
No optimization
Optimum start
Optimum start/stop
13
3
...
-3
Temperature offset *
To adjust the temperatures measured by the
radiator controller and in the room
Factory setting: 32 °F
14
0
1
2
Battery type
Alkaline
Lithium
NiMH (rechargeable batteries)
15
0
1
Display valve position *
No display of the valve position
Momentary display of the valve position
16
0
1
2
3
4
5
6
7
Valve exercise day *
Monday
Tuesday
Wednesday
Thursday
Friday
Saturday
Sunday
Off
17
0
1
2
Window open function *
Off (no window function)
Auto (corresponding to Parameters 5-7)
Cabled (with floating window contact)
18
0
1
Temperature unit
°Celsius
°Fahrenheit
19
0
1
2
3
Restore to factory setting
No reset
Reset only the basic settings
Reset only the time program
Reset all
Table 1. (Continued)
Par. Setting Meaning
M35647

THERAPRO HR90
9 33-00084EFS—03
• Week program 2 (6 setpoints):
Mo – Fr (1 – 5) lunch break at home
Sa – Su (6 – 7) like Week program 1
• Week program 3 (4 setpoints):
Mo – Fr (1 – 5) part-time work
Sa – Su (6 – 7) like Week program 1
Parameter 3 – Backlight
The display has a backlight for reading the
information.
• The backlight is ON when the adjustment dial is
turned or a button is pressed.
• The backlight switches OFF if no action is carried
out at the radiator controller for approx. 7 seconds
in order to save battery power.
Parameters 5 to 7 – Window
function
In order to save energy, the radiator controller closes
the radiator valve when you open a window resulting in
a large drop of the temperature.
When you close the window so that the temperature
rises the radiator controller opens the radiator valve
again.
If you should ever forget to close the window, the
radiator controller opens automatically after the set
time in order to ensure frost protection.
Parameter 8 – Valve stroke
The radiator controller operates with the optimum
valve stroke set in the factory.
If the entire valve stroke is to be used or if the valve
does not open completely, activate the full-stroke
mode.
Parameter 9 – Temperature
representation in the display
• In the factory setting the set or programmed
temperature (Comfort temperature 1, 2 or the
Setback temperature) is displayed.
• With the setting "measured temperature" the
measured room temperature is displayed. A
changeover to the set temperature is carried out by
turning the adjustment dial or pressing a button. If
required, the temperature can now be reset. The
display returns to the measured temperature after
approx. 3 seconds.
Due to the heat influence of the radiator the
"measured temperature" displayed at the radiator
controller can differ from the temperature
measured at another point in the room.
Parameter 12 – Optimization
function
Without optimization (factory setting) the radiator
controller begins to heat up the room or lower the
temperature at the programmed time.
For example, in order to have a warm bathroom at
7:00, the setpoint has to be brought forward.
Otherwise the room only starts heating at 7:00.
However, the advanced setpoint may lie too early so
that heating is started far earlier than necessary.
With optimization the radiator controller calculates
when to open the valve in order to achieve the desired
temperature at the set time.
• Optimum start:
The room is heated up at the optimum moment in
order to reach the programmed temperature.
•Optimumstart/stop:
The room is heated up at the optimum moment and
cooled down at an earlier moment.
Set-
point Time Temperature
1 6:00 am – 9:00 am 68 °F (Comfort temperature 1)
2 9:00 am – 12:00 pm 61 °F (Setback temperature)
3 12:00 pm – 1:00 pm 68 °F (Comfort temperature 1)
4 1:00 pm – 5:00 pm 61 °F (Setback temperature
5 5:00 pm – 10:00 pm 71.5 °F (Comfort temperature 2)
6 10:00 pm – 6:00 am 61 °F (Setback temperature)
Set-
point Time Temperature
1 6:00 am – 9:00 am 68 °F (Comfort temperature 1)
2 9:00 am – 1:00 pm 61 °F (Setback temperature)
3 9:00 am – 1:00 pm 71.5 °F (Comfort temperature 2)
4 9:00 am – 1:00 pm 61 °F (Setback temperature)
234 5
1 6
LOWERING/
SAVING
HEATING
HEATING
SETPOINTS
71.5°F
68°F
61°F
12am
6am 12pm 6pm12am 10am
M35648
23
1
LOWERING/
SAVING
HEATING
HEATING
4
SETPOINTS
71.5°F
68°F
61°F
12am
6am 12pm 6pm12am 10am
M35649
SETPOINT
WITHOUT
OPTIMIZATION
OPTIMUM
START
OPTIMUM
STOP
WITHOUT
OPTIMIZATION
SETPOINT
°F
M35650

THERAPRO HR90
33-00084EFS—03 10
Parameter 13 – Temperature
offset
Since the radiator controller measures the room
temperature in the area of the radiator, it is possible
that this temperature deviates from the temperature
measured at a different point in the room.
If, for example, 68 °F is measured in the room and
70 °F at the radiator, this effect can be compensated
by an offset of 30 °F.
Parameter 15 – Display of the
valve position
When this parameter is activated (setting "1"), the
calculated valve position (0 to 100% opened) is
displayed momentarily.
The main display is shown again after approx. 3
minutes or when the AUTO button is pressed.
Parameter 16 – Valve exercise
day
If the radiator valve has not been opened once
completely within the period of 2 weeks, a self-test
(forced operation) is carried out. The radiator
controller opens the radiator valve briefly on the
subsequent Monday (factory setting) in order to
prevent seizing.
The weekday for valve protection can be selected
freely
Parameter 17 – Window open
function
• If a window contact is connected, the parameter is
set automatically to "2" (cabled). The window
function is controlled by the window contact.
*This is not currently an option for the US market, so
parameter must be set to 0 or 1.
10. FURTHER FUNCTIONS
Monitoring functions
Window function
If you open a window causing the temperature to drop,
the radiator controller closes the radiator valve in
order to save energy.
WINDOW is displayed.
When the temperature rises again, but at the latest
after the set period (factory setting: 30 minutes), the
radiator controller opens the radiator valve again.
You can also open the radiator valve beforehand by
pressing the AUTO button or turning the adjustment
dial.
The sensitivity of the radiator controller to a
temperature drop or temperature rise can be set, see
Section 9, Parameters 5 to 7.
If a window contact is connected, the window function
reacts directly to the opening and closing of the
window, see Parameter 17.
Valve protection
If the radiator valve has not been opened once
completely within a period of 2 weeks, a self-test
(forced operation) is carried out. The radiator
controller opens the radiator valve briefly on the
subsequent Monday (factory setting) in order to
prevent seizing.
CYCL is displayed.
The day for the valve protection can be set in
Parameter 16.
Frost protection
If the temperature drops below 41 °F, the radiator
controller opens the radiator valve until the
temperature rises above 43 °F again. This prevents the
heating system from freezing up.
FROST is displayed.
NOTE: The heating must be switched on to ensure
the frost protection function.
Manual override
If you have switched off the central heating system in
summer and do not want to waste the batteries of the
radiator controller, you can close the radiator valve
continuously.
Closing the valve
1. Press the button AUTO/ECO/MANU until MAN-
UAL is displayed.
2. Turn the adjustment dial counter-clockwise until
OFF is displayed.
The radiator valve now remains closed. The valve
and frost protection functions continue to be
active.
Opening the valve
Use the AUTO/ECO/MANU button to change to
automatic mode.
– or –
Set the desired temperature in manual operation.
Child-proofing / Operation lock
You can block the radiator controller to protect it
against unauthorized operation:
• Keep the AUTO/ECO/MANU and PROG buttons
pressed simultaneously for at least 3 seconds.
The lock symbol is displayed.
NOTE: The same key combination is used to release
the radiator controller again for operation.

THERAPRO HR90
11 33-00084EFS—03
11. HELP WITH PROBLEMS
Error table
Emergency operation when
batteries are flat
1. Unlock the radiator controller. To do so, push the
slide at the radiator controller towards unlocked.
2. Pull the radiator controller off the valve base-
plate.
3. Operate the radiator valve by hand using the
adjustment dial on the valve baseplate.
Restoring the factory setting
1. Keep the PROG button pressed for approxi-
mately 10 seconds until Parameter 1 flashes
(left-hand digit).
2. Use the adjustment dial to select Parameter 19
(left-hand digit) and Setting 1 (right-hand digit).
3. Press the OK button to restore the factory set-
ting.
12. TECHNICAL DATA
Type: HR90
Supply voltage:
Battery type LR6, AA, AM3 Alkaline: 2 x 1.5 V
Lithium: 2 x 1.5 V
NiMH: 2 x 1.2 V
Power consumption:
Standby: typ. 165 mW
Control: typ. 240 mW
Control accuracy (CA): 33 °F
Connection to the radiator: M30 x 1.5
Ambient temperature: 32 ... 122 °F
Transport and storage temperature: –4 °F ... 149 °F
Dimensions: 3-25/32” x 2-1/8” x 2-23/64”
Weight: 6.5 oz (with batteries)
Ambient conditions:
For living area, business and trade sections as well as
small businesses
Humidity: 10-90% Relative Humidity
Standards:
EN55014-1:2006 +A2:2011
EN55014-2:1997 +A2:2008
EN60730-1:2011
EN60730-2-9:2010
RoHS 2011/65/EC
CE
13. DISPOSAL
The radiator controller has to be disposed of in
accordance with WEEE directive 2012/19/EC – Waste
Electrical and Electronic Equipment directive.
• At the end of the product life dispose of the
packaging and product in a corresponding
recycling centre.
• Do not dispose of the unit with the usual domestic
refuse.
• Do not burn the product.
• Remove the batteries.
• Dispose of the batteries according to the local
statutory requirements and not with the used
domestic refuse.
Problem/Display Cause Remedy
Battery flashes Batteries flat Replace the
batteries.
E1 sensor Device defective Replace the
device.
E2 valve Motor can not be
moved. Check the
installation.
The radiator
stays hot The radiator
valve does not
close fully.
Check the
installation. If
appropriate,
change to full-
stroke mode
(Parameter 8).
The room does
not heat up
during
optimization
Heating is not
switched on in
time
Ensure that the
pre-controller
switches on the
heating.
Synchronize the
on/off times of
boiler control
and radiator
controller.
Motor does not
move Valve baseplate
not interlocked Set the slider to
the locked
position.
–
+
M35651

THERAPRO HR90
© 2020 Resideo Technologies, Inc. All rights reserved.
The HoneywellHome trademark is used under license from Honeywell International, Inc. This product is manufactured by Resideo Technologies, Inc. and its affiliates.
www.resideo.com
Resideo Technologies, Inc.
1985 Douglas Drive North, Golden Valley, MN 55422
1-800-468-1502
33-00084EFS—03 M.S. Rev. 02-21 | Printed in United States
14. PROGRAMMING – OVERVIEW
Temperatures and operating modes
(turn adjustment dial counter-clockwise)
ButtonPROG
(turn adjustment dial clockwise)
time date holiday day off party comfort 1 comfort 2 setback program
OK OK OK OK OK OK OK OK
Hours Days Days Hours Temp. Temp. Temp. Edit time
program, see
below
OK OK OK OK OK OK OK
Minute Temp. Temp.
OK OK OK
Year
OK
Month
OK
Day
OK
Time program
program
OK
(turn adjustment dial)
mo - fr sa - su mo - su mo tu ... su day off
OK OK OK OK OK OK OK OK
(turn adjustment dial)
SP 1 ... SP 6 New
setpoint:
add new Delete a
setpoint:
SP x
OK OK OK OK OK
Temp. Temp. Temp. Temp. --:-- .(Delete)
OK OK OK OK OK
Beginning Beginning Beginning Beginning
OK OK OK OK
End End End End
OK OK OK OK M35652

GUIDE DU PROPRIÉTAIRE
33-00084EFS-03
TheraPro HR90
CONTRÔLEUR DE RADIATEUR ÉLECTRONIQUE
1. CONTENU
L'emballage du contrôleur du radiateur comprend :
1. Contrôleur de radiateur avec embase de vanne
M30 x 1,5; piles incluses
2. Support d'afficheur
3. Adaptateur de vanne de type Danfoss RA
4. Vis de fixation du contrôleur de radiateur et du
compartiment des piles
AVERTISSEMENT
Danger d'asphyxie!
Conservez le matériel d'emballage à l'écart des
enfants.
2. BRÈVE DESCRIPTION
Grâce au contrôleur de radiateur électronique, vous
pouvez régler la température de la pièce avec
exactitude selon vos préférences, tout en
économisant plus d'énergie.
Remarque : Le régulateur de radiateur HR90 n’active
et ne désactive pas directement votre chaudière. Il
permet de régler la température de la pièce lorsque la
chaudière est en fonction. La chaudière est activée et
désactivée par d’autres commandes, comme une
minuterie, un thermostat, etc. Convient aux systèmes
de chauffage à l’eau chaude et à la vapeur.
Convivial
• Grand afficheur réglable rétroéclairé.
• Programmation pratique en retirant le contrôleur
du radiateur de la vanne.
• Fonction copie pour le transfert du programme
horaire à d'autres contrôleurs de radiateur HR90.
Installation
• Le contrôleur de radiateur est compatible avec la
plupart des vannes de radiateur standard de type
M30 x 1,5.
• Le HR90 est réglé en usine lorsqu'il est sorti de la
boîte, mais il est programmable avant ou après de
montage.
Fonctionnalités pratiques
• Programmes individuels pour chaque jour de la
semaine.
• Jusqu'à 6 points de consigne par jour et 3
températures différentes.
• Vacances, fête, congé, et modes de
fonctionnement ECO peuvent être facilement
réglés.
• Les paramètres peuvent être définis séparément.
Voir la Section 9.
• Fonction verrouillage/sécurité enfant pour une
protection contre les manipulations non
autorisées.
• Copie des programmes entre plusieurs
contrôleurs.
Économies d'énergie
• Grâce à la fonction Fenêtre, la vanne du radiateur
est fermée lorsque la pièce est aérée.
• En mode ECO, la température ambiante est réduite
de 5 °F.
• Régulation optimisée de la température ambiante.
MISE EN GARDE
Utilisez avec soin!
Utilisez le contrôleur de radiateur
conformément à ces instructions de
fonctionnement.
Ne laissez pas les enfants jouer avec le
contrôleur du radiateur.
1
2
3
4
M35625

THERAPRO HR90
33-00084EFS—03 2
3. PRÉSENTATION DU
DISPOSITIF
Éléments de fonctionnement et
afficheur
1. Période de chauffage/réduction de température
en heures
2. Jour de la semaine 1... 7 (lundi... dimanche).
S'affiche uniquement lorsque la programmation
horaire est en cours de programmation
3. Affichage de la température : température de
point de consigne (réglage d'usine) ou tempéra-
ture mesurée, par exemple, si elle est configurée
dans le paramètre 9
4. Affichage du texte à 9 caractères
5. Bouton OK : confirmation des réglages
6. Bouton PROG : sélection des modes de
fonctionnement, réglage du programme horaire;
Lorsque le bouton est pressé pendant plus de 10
secondes : accès au menu des paramètres;
Programmation : Retour au niveau supérieur
sui-vant
7. Disque de réglage : modification du point de
consigne, navigation dans le menu
8. Bouton AUTO/ECO/MANU : passage entre les
modes automatique, ECO et manuel
En mode de programmation : Quitter (sans
enregistrer)
9. État des piles
10. Fonctionnement verrouillé
11. Symbole de la température de confort 1,
température de confort 2 et température réduite
Affichage des piles
4. INSTALLATION
Prêt à fonctionner en trois étapes :
• Insérez les piles.
• Réglez la langue, l'heure et la date.
• Montez le dispositif sur le radiateur. C'est terminé!
Installation/remplacement des
piles
Le contrôleur de radiateur fonctionne avec le type de
piles suivant :
• 2 piles alcalines 1,5 V; type LR6, AA, AM3
Il est également possible d'utiliser les piles ou les piles
rechargeables suivantes :
• Lithium 1,5 V; type LR6, AA, AM3
• NiMH 1,2 V; type LR6, AA, AM3
REMARQUE :
• Si des piles au lithium ou NiMH sont utilisées, le
paramètre 14 doit être modifié en fonction. Voir la
Section 9.
• Remplacez toujours les batteries par deux.
1. Tirez sur le disque de réglage pour le détacher.
Pour ce faire, commencez au niveau de l'enco-
che au bas du dispositif.
2. Le cas échéant, dévissez toute vis de fixation du
compartiment des piles.
3. Dégagez le verrou et ouvrez le ressort des piles.
Le compartiment des piles est maintenant
accessible.
4. Insérez les piles. Assurez-vous que la polarité +
et - est correcte.
5. Repliez le ressort des piles et verrouillez.
6. Option : vissez le ressort des piles pour
empêcher le retrait des piles.
État des
piles Signification
Les piles sont complètement chargées.
Les piles sont chargées à moitié.
Les piles doivent être remplacées
prochainement.
Affichage clignotant : Les piles sont
entièrement déchargées et doivent être
remplacées.
8
5
7
3
2
1
4
11
10
9
6
PROG
AUTO
MANU OK
ECO
M35568
F
5
4
–
+
7
6
1
3
2
M35626
OPTION
OPTION

THERAPRO HR90
3 33-00084EFS—03
7. Replacez le disque de réglage. Le numéro de
version logicielle puis la langue ENGLISH
(Anglais) est affichée.
8. Si cela est souhaité, utilisez le disque de réglage
pour choisir une langue différente.
9. Confirmez la langue avec le bouton OK. HOUR
(Heure) s'affiche.
REMARQUE : La sélection de la langue ne s'affiche
que lors de la mise en service initiale.
Lors du remplacement ultérieur des
piles, le réglage de l'heure et de la date
s'affichent immédiatement.
REMARQUE : La durée de vie des piles alcalines
neuves est d'environ 2 ans. Les piles
doivent être remplacées lorsque le sym-
bole des piles clignote. Tous les
réglages sont maintenus dans la
mémoire lorsque les piles sont rem-
placées.
AVERTISSEMENT
Risque d'explosion!
Ne chargez jamais des piles non rechargeables.
Ne court-circuitez jamais les piles ni ne les
jetez dans un feu.
Éliminez les piles en respectant
l'environnement.
Réglage de l'heure et de la date
1. Lorsque HOUR (Heure) s'affiche, utilisez le dis-
que de réglage pour régler l'heure actuelle et
confirmez avec le bouton OK. MINUTE s'affiche.
2. Utilisez le disque de réglage pour régler les min-
utes actuelles et confirmez avec le bouton OK.
YEAR (Année) s'affiche.
3. Utilisez le disque de réglage pour régler l'année
en cours et confirmez avec le bouton OK.
MONTH (Mois) s'affiche.
4. Utilisez le disque de réglage pour régler le mois
en cours et confirmez avec le bouton OK. DAY
(Jour) s'affiche.
5. Utilisez le disque de réglage pour régler le jour
en cours et confirmez avec le bouton OK.
L'écran normal avec la température réglée et le mode
de fonctionnement sélectionné s'affiche.
Contrôle/modification de l'heure et de
la date
Procédez comme suit pour contrôler ou modifier
ultérieurement l'heure et la date :
1. Appuyez sur le bouton PROG.
2. Sélectionnez TIME DATE (Horaire) et confirmez
avec OK. HOUR (Heure) s'affiche.
3. Pour procéder à un contrôle ou des modifica-
tions supplémentaires, procédez comme indiqué
ci-dessus.
Montage du contrôleur de
radiateur
Le contrôleur de radiateur peut être monté sur toutes
les vannes thermostatiques standard munies d'un
raccord M30 x 1,5 sans système d'évacuation.
AVERTISSEMENT
Évitez les dommages du contrôleur du
radiateur causés par l'humidité!
Montez le contrôleur du radiateur dans des
pièces sèches et fermées uniquement.
Protégez le contrôleur du radiateur de
l'humidité, de la poussière, des rayons solaires
directs et de la chaleur excessive.
Retrait de la tête de l'ancien
thermostat
1. Tournez la tête de l'ancien thermostat dans le
sens antihoraire jusqu'à ce qu'elle arrête de
tourner, et desserrez la bague de montage.
2. Retirez la tête de l'ancien thermostat de la vanne
du radiateur.
Sélection de l'adaptateur
Le contrôleur de radiateur est compatible avec les
vannes de radiateur standard de type M30 x 1,5. Des
adaptateurs sont requis pour certains types de vanne.
1. Voyez si un adaptateur est requis, et le cas
échéant, sélectionnez l'adaptateur approprié.
2. Faites glisser l'adaptateur sur la vanne du radia-
teur et tournez-le jusqu'à ce qu'il s'enclenche en
place.
3. Si nécessaire, vissez l'adaptateur à l'aide d'une
vis.
Montage de l'embase de la vanne
1. Séparer l'embase de la vanne du contrôleur du
radiateur. Pour ce faire, poussez le curseur vers
la position de déverrouillage.
1
2
M35627
1A
1B
M35628
3
2
M35629

THERAPRO HR90
33-00084EFS—03 4
2. Tournez le disque de réglage de l'embase de la
vanne dans le sens antihoraire jusqu'à ce qu'il
s'arrête.
3. Placez l'embase de la vanne sur la vanne du
radiateur ou sur l'adaptateur et serrez la main
(sans ou-tils!).
Montage du contrôleur de
radiateur
1. Veillez à ce que le curseur sur le contrôleur du
radiateur soit en position ouverte.
2. Placez le contrôleur du radiateur sur l'embase de
la vanne de manière à ce que l'encoche
s'enclenche à l'intérieur et ne soit plus visible.
3. Verrouillez le contrôleur du radiateur en fin de
course. Pour ce faire, poussez le curseur vers le
verrou.
Après une minute environ, CYCL (test automa-
tique) s'affiche. Le contrôleur du radiateur passe
ensuite en mode automatique.
REMARQUE : Le contrôleur du radiateur ne
fonctionne que s'il est correctement ver-
rouillé en fin de course.
C'est terminé! - Après le montage, le contrôleur du
radiateur fonctionnement immédiatement en suivant
les réglages d'usine (programme horaire standard).
Voir la Section 5.
Fixation du contrôleur de
radiateur
REMARQUE : Le contrôleur du radiateur et les piles
peuvent être fixés en position à l'aide de
vis pour empêcher leur retrait.
Positionnement de l'afficheur
Pour améliorer la lisibilité, l'afficheur du contrôleur de
radiateur peut être incliné à diverses positions (10°,
20°, 30°, 40°).
L'angle de 40° peut être fixé à l'aide du support
d'afficheur fourni.
Montage
1. Relevez l'afficheur et réglez-le à l'angle désiré.
2. Si cela est souhaité, inclinez l'afficheur de 40° et
faites glisser le support de l'afficheur par le haut
entre l'afficheur et le boîtier jusqu'à ce qu'il se
verrouille en position.
Démontage
Enfoncez le support de l'afficheur à l'arrière et retirez-
le en tirant vers le haut.
5. FONCTIONNEMENT
Programme horaire standard
(réglage d'usine)
En mode automatique, le contrôleur du radiateur
régule automatiquement la température ambiante
conformément au programme horaire enregistré.
Programme de semaine 1 : À la maison
toute la journée
Le programme horaire préréglé en usine est réglé pour
tous les jours de la semaine, du lundi au dimanche
(1 - 7) :
2
31
M35635
°
M35636
M35637
Point de
consigne Heure Température
1 6:00 am – 10:00 pm 68 °F (température de confort 1)
2 10:00 pm – 6:00 am 61 °F (température réduite)
1
2
M35638
CHAUFFAGE
68°F
61°F
RÉDUCTION/
ÉCONOMIES
POINT DE CONSIGNE 1 POINT DE CONSIGNE 2
12am6am 12pm 6pm12am
MF35641

THERAPRO HR90
5 33-00084EFS—03
MISE EN GARDE
Deux programmes de semaine
supplémentaires sont enregistrés dans le
contrôleur du radiateur. Pour plus
d'informations, voir la Section 9.
• Vous pouvez également adapter un des
programmes de semaine enregistrés à vos
préférences personnelles. Voir la Section 8.
Modification provisoire de la
température
Si vous souhaitez modifier provisoirement la
température spécifiée par le programme horaire :
• Réglez la température désirée à l'aide du disque de
réglage.
• Ce changement reste en vigueur jusqu'au prochain
point de consigne.
REMARQUE : La Section 7 décrit la procédure à suivre
pour modifier les températures de
manière permanente.
Économies d'énergie en mode
ECO
En mode ECO, la température ambiante en mode
automatique spécifiée par le programme horaire est
réduite de 5 °F.
Pour activer le mode ECO, appuyez sur le bouton
AUTO/ECO/ MANU jusqu'à ce que ECONOMY soit
affiché.
La température affichée est réduite de 5 °F.
Le mode ECO reste activé jusqu'à ce que vous
appuyiez de nouveau sur le bouton AUTO/ECO/MANU
et sélectionniez un mode de fonctionnement différent.
Mode manuel
En mode manuel, le contrôleur du radiateur
fonctionne à la température réglée (manuellement)
jusqu'à ce que vous modifiez la température ou
passiez à un mode de fonctionnement différent.
Pour activer le mode manuel, appuyez sur le bouton
AUTO/ ECO/MANU jusqu'à ce que Manuel soit
affiché.
Le disque de réglage permet d'ajuster manuellement
la température.
Le mode manuel est activé jusqu'à ce que vous
appuyiez une nouvelle fois sur le bouton
AUTO/ECO/MANU et sélectionniez un mode de
fonctionnement différent.
6. PROGRAMMATION -
MODES DE
FONCTIONNEMENT
Présentation des modes de
fonctionnement
• Mode de fonctionnement «Party »(Fête) : Dans ce
mode de fonctionnement, vous pouvez spécifier
une température pour un nombre d'heures donné.
Une fois le nombre d'heure écoulé, le contrôleur du
radiateur revient en mode automatique.
• Mode de fonctionnement «Day off »(Jour de
congé) : Si la semaine comporte un jour férié par
exemple, les réglages du mode automatique
peuvent ne pas correspondre à votre emploi du
temps de la journée. Dans ces cas, vous pouvez
activer un programme horaire différent pour un ou
deux jours. Une fois la période définie écoulée, le
contrôleur du radiateur revient en mode
automatique.
• Mode de fonctionnement «Holiday »(Vacances) :
Dans ce mode de fonctionnement, vous pouvez
spécifier une température pour un nombre de jours
donné. Une fois la période définie écoulée, le
contrôleur du radiateur revient en mode
automatique.
Sélection des modes de
fonctionnement
Sélection du mode de fonctionnement
Party (Fête) ou Holiday (Vacances)
1. Appuyez sur le bouton PROG et tournez le dis-
que de réglage vers la gauche jusqu'à ce que
Party (Fête) ou Holiday (Vacances) s'affiche.
2. Confirmez le mode de fonctionnement sélec-
tionné avec le bouton OK.
Les heures ou les jours clignotent.
3. Utilisez le disque de réglage pour régler le nom-
bre d'heures ou de jours désiré et confirmez avec
le bouton OK.
L'affichage de la température clignote.
4. Utilisez le disque de réglage pour régler la
température désirée et confirmez avec le bouton
OK.
Le mode de fonctionnement sélectionné et la
température réglée sont affichés.
Sélection du mode de fonctionnement
«Day off »(Jour de congé)
1. Appuyez sur le bouton PROG et tournez le dis-
que de réglage vers la gauche jusqu'à ce que
Day Off (Jour de congé) s'affiche.
2. Confirmez le mode de fonctionnement sélec-
tionné avec le bouton OK.
3. Les jours clignotent.
4. Utilisez le disque de réglage pour régler le nom-
bre de jours désiré et confirmez avec le bouton
OK.
Le mode de fonctionnement sélectionné
s'affiche.
• La procédure de création d'un programme horaire
pour les jours spéciaux est décrite dans la Section
8.

THERAPRO HR90
33-00084EFS—03 6
• Lorsque vous entrez le nombre de jours pour les
vacances/les jours spéciaux, la journée en cours
compte comme le premier jour.
• Une présentation de la structure des programmes
est présentée à la dernière page de ce mode
d'emploi.
7. PROGRAMMATION -
TEMPÉRATURES
Trois températures préréglées peuvent être attribuées
aux points de consigne dans le programme horaire :
• Température de confort 1 Réglage d'usine 68 °F
• Température de confort 2 Réglage d'usine 71,5 °F
• Température réduite 1 Réglage d'usine 61 °F
Réglage des températures
1. Appuyez sur le bouton PROG.
Confort 1 s'affiche.
2. Appuyez sur le bouton OK, utilisez le disque de
réglage pour régler la température de confort 1
et confirmez avec le bouton OK. «Saved »
(Enregistré) s'affiche brièvement suivi de Com-
fort 1 (Confort 1).
3. Tournez le disque de réglage dans le sens
horaire jusqu'à ce que la température suivante
s'affiche.
4. Répétez les étapes 2 et 3 pour la température de
confort 2 et la température réduite.
5. Utilisez le bouton AUTO pour quitter le mode de
programmation.
Les trois températures préréglées (température de
confort 1, température de confort 2 et température
réduite) peuvent être modifiées à tout moment.
REMARQUE :
• Durant la programmation, le bouton PROG peut
être utilisé pour revenir au niveau supérieur
suivant.
• La programmation peut être annulée à tout
moment en utilisant le bouton AUTO.
• Une présentation de la structure des programmes
est présentée à la dernière page de ce mode
d'emploi.
Astuces pour le fonctionnement
Pour utiliser le contrôleur du radiateur
dans le plus grand confort
Le contrôleur du radiateur peut être retiré du radiateur
pour faciliter la programmation.
1. Déverrouillez le contrôleur du radiateur. Pour ce
faire, faites glisser le curseur sur le contrôleur du
radiateur en position déverrouillée.
2. Détachez le contrôleur du radiateur de l'embase
de la vanne.
8. Programmation - Programme
horaire
Planification du programme
horaire
Un maximum de six points de consigne par jour
peuvent être programmés :
Les valeurs suivantes doivent être affectées à chaque
point de consigne :
• L'une des trois températures préréglées
(température de confort 1, température de confort
2 et température réduite).
• Début de la période de chauffage/réduction de la
température
• Fin de la période de chauffage/réduction de la
température
Exemple
L'exemple illustre le programme horaire suivant :
REMARQUE : Une présentation de la structure des
programmes est présentée à la dernière
page de ce mode d'emploi.
Programme hebdomadaire
Vous pouvez régler le programme horaire en fonction
de votre emploi du temps hebdomadaire. Les options
suivantes sont disponibles à cette fin :
• Programmes horaires séparés pour les jours de la
semaine, Lundi - Vendredi (1 - 5) et les fins de
semaine Samedi - Dimanche (6 - 7)
• Un programme horaire pour les jours de la
semaine, Lundi - Dimanche (1 - 7)
• Un programme horaire différent pour chaque jour
de la semaine, Lundi, Mardi, Mercredi, Jeudi,
Vendredi, Samedi, Dimanche (1, 2, 3, 4, 5, 6, 7)
REMARQUE : Il est recommandé de noter le pro-
gramme horaire avant de commencer la
programmation.
2
1
M35642
Point de
consigne Heure Température
1 6:00 am – 9:00 am 68 °F (température de confort 1)
2 9:00 am – 12:00 pm 61 °F (température réduite)
3 12:00 pm – 2:00 pm 68 °F (température de confort 1)
4 2:00 pm – 5:00 pm 61 °F (température réduite)
5 5:00 pm – 10:00 pm 71,5 °F (température de confort 2)
6 10:00 pm – 6:00 am 61 °F (température réduite)
2345
1 6
CONFORT 1
ÉCONOMIES
CONFORT 2
RÉDUCTION/
ÉCONOMIES
CHAUFFAGE
CHAUFFAGE
POINTS DE
CONSIGNE
12am6am 12pm 6pm12am
MF35643
CHAUFFAGE

THERAPRO HR90
7 33-00084EFS—03
Vous ne savez plus où vous vous
trouvez dans le programme?
Appuyez sur le bouton AUTO/ECO/MANU.
Automatic (Automatique) s'affiche. La dernière entrée
est rejetée.
Réglage du programme horaire
Sélection des jours de la semaine
1. Appuyez sur le bouton PROG. COMFORT 1
s'affiche.
2. Tournez le disque de réglage dans le sens
horaire jusqu'à ce que le programme s'affiche.
3. MO - FR, SA - SU, MO - SU, MO, TU,..., SU ou day
off (lundi - vendredi, samedi - dimanche, lundi -
dimanche, lundi, mardi, mercredi, jeudi, ven-
dredi, samedi, dimanche, ou jour de congé) MO -
FR, SA - SU, MO - SU, MO, TU,..., SU ou day off
(lundi - vendredi, samedi - dimanche, lundi -
dimanche, lundi, mardi, mercredi, jeudi, ven-
dredi, samedi, dimanche, ou jour de congé)
4. Confirmez les jours de la semaine sélectionnés
avec le bouton OK. La température ainsi que le
début et la fin du premier point de consigne, par
exemple :
• La fin d'un point de consigne est aussi le début du
point de consigne suivant.
• Vous pouvez utiliser le disque de réglage pour
passer d'un point de consigne à un autre et
consulter tous les points de consigne programmés.
• Seuls les points de consigne programmés sont
affichés.
Modification des points de consigne
1. Pour modifier le point de consigne affiché,
appuyez sur le bouton OK.
L'affichage de la température clignote.
2. Utilisez le disque de réglage pour sélectionner la
température désirée (température de confort 1,
température de confort 2 ou température
réduite) pour le point de consigne sélectionné, et
confirmez avec OK.
Le début du point de consigne sélectionné
clignote.
REMARQUE : La plage horaire de programmation des
points de consigne commence à 3 heu-
res du matin et se termine à 2 heures 50
le jour suivant.
3. Utilisez le disque de réglage pour régler le début
souhaité du point de consigne sélectionné et
confirmez avec le bouton OK. La fin du point de
consigne sélectionné clignote.
4. Utilisez le disque de réglage pour régler la fin
souhaitée du point de consigne sélectionné et
confirmez avec le bouton OK. «Saved »(Enreg-
istré) s'affiche brièvement. Par la suite, la
température ainsi que le début et la fin du pre-
mier point de consigne s'affichent :
5. Pour les points de consigne suivants, sélection-
nez également la température ainsi que le début
et la fin du point de consigne comme décrit dans
les étapes 1 à 5.
REMARQUE :
• Un point de consigne n'est pas enregistré tant que
la température, le début et la fin n'ont pas été
confirmés avec le bouton OK.
• Si un point de consigne n'est pas requis,
sélectionnez le réglage --.-
Suppression d'un point de consigne
Quand un point de consigne n'est pas requis,
sélectionnez le réglage de température --.- et
confirmez avec OK.
REMARQUE : Le premier point de consigne ne peut
pas être supprimé.
Ajout d'un point de consigne
1. Tournez le disque de réglage jusqu'à ce que
«Add new »(Ajouter nouveau) s'affiche, et con-
firmez avec OK.
L'affichage de la température clignote.
2. Utilisez le disque de réglage pour sélectionner la
température souhaitée (température de confort
1, température de confort 2 ou température
réduite) pour le nouveau point de consigne et
confirmez avec OK.
Le début du nouveau point de consigne clignote.
3. Utilisez le disque de réglage pour régler le début
souhaité du nouveau point de consigne et con-
firmez avec le bouton OK.
La fin du point de consigne désiré clignote.
4. Utilisez le disque de réglage pour régler la fin
souhaitée du nouveau point de consigne et con-
firmez avec le bouton OK.
REMARQUE : «Add new »(Ajouter nouveau) est
uniquement affiché lorsque moins de 6
points de consigne sont programmés.
Copie du programme horaire
Si plusieurs contrôleurs de radiateur HR90 doivent
fonctionner avec le même programme horaire, il suffit
de créer le programme horaire sur un seul appareil
(principal) et de le copier sur les contrôleurs de
radiateur supplémentaires.
REMARQUE : Le câble ACC90 est requis pour copier le
programme horaire.
IMPORTANT
Le câble ACC90 doit être utilisé pour copier les
programmes. L'utilisation de tout autre câble
peut endommager l'appareil.
• 2 mini fiches micro B
•0,5mdelong
• non inclus avec le contrôleur
°
M35644
M35645

THERAPRO HR90
33-00084EFS—03 8
1. Retirez le couvercle latéral de tous les con-
trôleurs de radiateur.
2. Branchez le contrôleur principal (avec le pro-
gramme horaire) sur un autre contrôleur de radi-
ateur HR90 à l'aide du câble ACC90.
3. Appuyez simultanément sur les boutons AUTO
et OK des deux appareils pendant 4 secondes.
Le mode Com s'affiche sur l'écran des deux
appareils.
4. Appuyez sur le bouton PROG du contrôleur prin-
cipal.
«Master »(Principal) s'affiche sur le contrôleur
principal, et la transmission débute.
«Com mode »(Mode Com) s'affiche sur l'autre
appareil indiquant que la réception est en cours.
Le programme horaire est copié.
5. Le processus de copie est terminé lorsque
«Finished »(Terminé) s'affiche sur les deux
appareils.
6. Après 2 secondes, l'appareil avec le programme
horaire copié passe en mode automatique, et
mode Com s'affiche de nouveau sur le con-
trôleur principal.
7. Débranchez le câble ACC90 de l'appareil avec le
programme horaire copié.
REMARQUE : Si aucune activité n'a lieu sur l'un des
deux contrôleurs de radiateur pendant 4
minutes, ils passent automatiquement
en mode automatique.
Copie vers d'autres appareils
1. Insérez le câble CCA90 dans l'appareil suivant.
2. Appuyez simultanément sur les boutons AUTO
et OK de l'appareil suivant pendant 4 secondes.
«Com mode »s'affiche sur cet appareil.
«Com mode »s'affiche sur le contrôleur princi-
pal.
3. Appuyez sur le bouton PROG du contrôleur prin-
cipal.
La procédure de copie est la même que celle
décrite pour la première copie.
Finalisation de la copie
Une fois la dernière copie terminée :
1. Appuyez sur le bouton AUTO sur le contrôleur
principal pour passer en mode automatique.
2. Retirez le câble ACC90 et réinstallez le couvercle
latéral sur tous les appareils.
9. PARAMÈTRES DE
FONCTIONNEMENT DU
CONTRÔLEUR
Présentation
Si nécessaire, les 19 réglages (paramètres) de base
peuvent être réglés.
Les réglages d'usine sont en caractères gras.
Les paramètres marqués d'un * sont décrits plus en
détail ci-dessous.
2
13
M35646
Tableau 1.
Par. Réglage Signification
1
1
2
3
4
5
6
Paramètre de langue
German (Allemand)
English (Anglais)
Danish (Danois)
Swedish (Suédois)
Norwegian (Norvégien)
Finnish (Finnois)
2
0
1
2
Programmes horaires préréglés *
Programme de semaine 1 «à la maison toute la
journée »
Programme de semaine 2 «pause déjeuner à la
maison »
Programme de semaine 3 «travail à temps
partiel »
3
0
1
Rétroéclairage *
Désactivé
Activé
4
0
1
Passage à l'heure d'été/hiver
Pas de passage automatique à la nouvelle heure
Passage automatique à la nouvelle heure
5
0
30
...
90
Durée de la fonction fenêtre *
Fonction fenêtre non active
La vanne s'ouvre au plus tard au bout de 30
minutes
...
La vanne s'ouvre au plus tard au bout de 90
minutes
6
0.2
...
2.0
Sensibilité de la fonction fenêtre durant la
réduction de la température ambiante *
0,2 (sensible)
...
2,0 (moins sensible)
Réglage d'usine : 0,4
7
0.1
...
2.0
Sensibilité de la fonction fenêtre durant
l'augmentation de la température ambiante *
0,1 (sensible)
...
2,0 (moins sensible)
Réglage d'usine : 0,2
8
0
1
Réglage de la course de la vanne *
Course de vanne standard
Température ambiante mesurée
9
0
1
Affichage de la température à l'écran*
Température réglée/programmée (température
de consigne)
Measured room temperature
Other manuals for TheraPro HR90
1
Table of contents
Languages:
Other Honeywell Home Controllers manuals

Honeywell Home
Honeywell Home Lyric Instruction manual

Honeywell Home
Honeywell Home H4600A User manual

Honeywell Home
Honeywell Home TheraPro HR90 Instruction Manual

Honeywell Home
Honeywell Home H46C-F User manual

Honeywell Home
Honeywell Home HR92UK User manual

Honeywell Home
Honeywell Home HVC0001 User manual

Honeywell Home
Honeywell Home 3000 Series User manual

Honeywell Home
Honeywell Home DB7110U User manual

Honeywell Home
Honeywell Home Resideo HCC100 User manual

Honeywell Home
Honeywell Home D6 PRO User manual