GILMAN GEMINI GVS140 User manual

1
MODEL NO 型號: GVS140
140W
VACUUM SEALER
真空保鮮機
A GILMAN GROUP BRAND

2
Please read and retain for future reference.
• Verify that the mains voltage is the same as that indicated on the rating plate
on the appliance before use.
• Make sure that you always use a grounded wall socket to connect the appliance.
• Always remove the plug from the wall socket when the appliance is not in use.
• Remove the plug from the wall socket by pulling the plug, not the power cord.
• Make sure that the appliance, the power cord and plug do not make contact
with water.
• Make sure that the appliance, the power cord and plug do not make contact
• with hot surface, such as a hot hob or naked ame.
• Check the appliance’s power cord regularly to make sure it is not damaged.
• Do not use the appliance if the power cord is damaged. If the power cord is
damaged, it must be replaced by an electrical technician or a person with
similar qualication, in order to avoid any hazards.
• Never use the appliance in the vicinity of ammable material.
SAFETY INSTRUCTION - GENERAL
SAFETY INSTRUCTION - ELECTRICITY AND HEAT
• Use this appliance solely in accordance with these instructions.
• This appliance is for household use only, not for commercial purpose.
• Remove all packaging material from the appliance before use.
• This appliance shall not be used by children of 0 to 8-year old.
• This appliance can be used by children older than 8-year old and persons
with reduced physical, sensory or mental capabilities or lack of experience
and knowledge, but only if they have been given supervision or instruction
concerning use of the appliance in safe way and understand the hazards
involved.
• Children should be supervised to ensure that they do not play with the appli-
ance.
• Cleaning and maintenance must not be done by children.
• Have any repairs carried out solely by a qualied electrician. Never try to re-
pair the appliance yourself.
• Do not handle the plug or appliance with wet hands.
• Do not immerse the main body in water.
• Children shall not play with the appliance.
• Do not leave the appliance unattended when connected to the mains supply.
• Only use the attachments/accessories supplied with the product.

3
• Make sure you give the appliance time to cool down. Wait at least 20 seconds
between seals. Under very heavy usage, appliance will shut off automatically
to prevent overheating. If it does, wait 25 minutes to allow appliance to cool
off.
• Do not put too much stuff inside the bag: leave enough empty space in the
open end of the bag so that the bag can be placed in the vacuum chamber
area without creating wrinkles or ripples;
• Do not wet the open end of the bag. Wet bags will cause difculty to heat-seal
tightly. If the food has moisture or the bag is wet, you can choose the ‘Moist’
function which is designed for a longer sealing time and seals better for wet
bags.
• Clean and straighten the open end of the bag before sealing. Make sure noth-
ing is left on the open area of the bag, no wrinkle or creased lines should ap-
pear on the open panel, foreign objects or creased bag may cause difcult to
seal tightly.
• Do not leave too much air inside the bag. Press the bag to allow extra air
to escape from the bag before vacuuming it. Too much air inside the bag
increases the vacuum pump loading and may cause the motor insufcient
power to draw away all the air inside the bag.
• Do not vacuum packaging objects with sharp points like sh bones and hard
shells! Sharp points may penetrate and tear the bag! You may use a thicker
bag to cover the object before placing into the vacuum bag, or pad the edges
with paper towels to keep them from puncturing the bag.
• Make sure there is no crack or deformation or small particles resting on the
foam gas- kets around the vacuum chamber. When this happens, take it out
and wash and dry it thoroughly, or replace with a new one.
• Pre-freeze fruits and blanch vegetables before vacuum packaging for best
results.
• Store perishable foods in the freezer or refrigerator. Vacuum packing extend
the shelf life of foods.
• When vacuum packaging powdery items like our, it is best to use their origi-
nal packaging inside of the vacuum bags. The ne powder could get sucked
into the appliance and cause enough damage to shorten the life of the sealer.
NOTE:
After nished the vacuum work, please always keep the appliance cover open,
do not fasten the cover, it will deform the form “Foam Sealing Gaskets” and af-
fect the appliance function.
SAFETY INSTRUCTION - DURING OPERATION

4
1. Dry button:
Press this button to choose vacuumizing pattern for dry food.
2. Moist button:
Press this button to choose vacuumizing pattern for moist food.
3. Pulse button:
This button is used when extreme control of the vacuuming process is
needed for delicate foods.
4. Seal Time + button:
Press this button to increase the sealing time, and the green light ashes.
It usually supports to seal unique thickness bags or some moist food with
a little liquid. You can choose Seal Time + button rst, then choose Moist
for vacuum sealing.
5. Seal button:
Press this button to create a seal when making bags from a roll.
6. Cancel button:
Press this button to stop the on-going process.
1 2 3 4 5 6
PRODUCT REVIEW & FUNCTIONS

5
7. Silicone Sealing Strip
8. Foam Sealing Gaskets (Upper & Lower)
9. Release Buttons (Left & Right)
Press left and right release buttons to unlock the lid.
10.Heating Bar Covered by Teon Tape
Do not tear the tape away.
11.Canister Function
This function is used when the appliance is connected to a vacuum canister.
12.Marinate Function
This function is used when user wants to marinate food packed in a vacuum
canister.
13.Air intake
Allows vacuum packaging with Canisters and Accessories.
14.Cutter Groove
15.Bag Cutter
16.Removable Drip Tray
The removable drip tray allows for easy cleaning when vacuum sealing liquids
7
8
9
10
11
12
16
13
14
15

6
17.Power Cord Winding Rack
18.Rubber Feet
17
18
OPERATING INSTRUCTIONS
I. Making a bag from a bag roll (Need to
purchase separately Model No. GVBR28)
1. Plug the unit into a power source;
2. Use bag cutter to cut a bag from the bag rolls
to the desired length. Leave at least 2 inches
between the contents and the top of the bag to
allow for bag contraction.(Pic.1)
3. Put one end of the bag on top of the sealing
strip. (Pic.2)
4. Press the cover down on both sides using both
hands until click sound is heard from the release
buttons. (Pic.3)
5. Press Seal button to start sealing the bag.
(Pic.4). the red light indicator is on during opera-
tion, after the process is completed, the green
light indicator is on.
6. Press the release buttons to open the cover and
take the bag out of the appliance, one end of the
bag is sealed (Pic.5)
One set (total 5 pieces) of vacuum bags are
equipped in the package. One end of the bag is
already sealed. Seal the other end after placing in
the items for storage.
Pic.1
Pic.3
Pic.2
Pic.4
Pic.5

7
Pic.6
Pic.8
Pic.7
Pic.9
II. Vacuum packaging with a bag
1. Put the foods/items inside the vacuum bag.
Use only the food grade standard vacuum bags
(Model No. GVBR28 bag roll) supplied by us
with vacuum sealer. Do Not to use other vac-
uum bags to avoid any risks and damage the
appliance.
2. Clean and straighten the open end of the bag,
make sure there is no dust, wrinkle or ripples.
3. Place the open end of the bag within the vac-
uum chamber area (about 5-10mm edge over
the lower foam sealing gasket). (Pic.6)
4. Press the cover down on both sides using both
hands until click sound is heard from the release
buttons. (Pic.7)
5. The vacuum and sealing time depends on the
type of food packed (Dry, Moist, Pulse or Seal).
6. Press Dry, Moist or Seal button to start sealing the
bag.(Pic.8). the red light indicator is on during op-
eration, after the process is completed, the green
light indicator is on.
NOTE:
This appliance provides very high vacuum press-
sure during vacuum packaging with a bag, in order
to avoid crushing of the delicate item by the high
vacuum pressure, you can press “CANCEL” button
to turn it off.
7. The vacuum packaging is done. The green
light is on. Press the release buttons on both
sides of the appliance simultaneously to open
the cover and take out the packed bag (Pic.9)
NOTE:
• For the best sealing effect, it is better to let
the appliance cool down for 20 seconds be-
fore using it again. Wipe out any excess liquid
or food residue in the vacuum chamber after
each bag packaged.
• Do not seal one bag after another continu-
ously to avoid overheat of the sealing ele-
ment.

8
• Your appliance can only work on the food
grade vacuum bags.
• Cut the bag straight across with scissors to
open a sealed bag.
III. Canister Function : (Canister and hose need
to purchase separately, suitable for 5.4-5.6mm
diameter adapter)
IV. Marinate Function : (Canister and hose need
to purchase separately, suitable for 5.4-5.6mm
diameter adapter)
Pic.10
Pic.12
Pic.13
Pic.11
1. Plug the unit into a power source;
Open the lid of the appliance. (Pic. 10)
2. Connect the vacuum sealer and canister via a
hose. You must connect one of the ends to the
canister valve and other end to the accessory
port of the appliance.(Pic.11)
3. To start the vacuum process, press the
“Canister” button. If you want to cancel the vac-
uum process, press the “Canister” button again.
(Pic.12)
4. Once the vacuum process is complete, the appli-
ance stops automatically. Disconnect thehose,
the vacuum canister food is completed.
1. Plug the unit into a power source;
Open the lid of the appliance. (Pic.10)
2. Connect the vacuum sealer and canister via
a hose. You must connect one of the ends to
the canister valve and other end to the acces
sory port of the appliance.(Pic.11)
To start the marinate process, press the
“Marinate” button. (Pic.13) When the vacuum
sealer reaches the vacuum pressure, the
machine will stop vacuumizing automatically
and then release air into the canister, this
working cycle repeats continually for
30 minutes and then stops automatically.
If you want to cancel the Marinate process,
press the “Marinate” button again. If you think

9
the food is not marinated enough, you can
marinate again on this Marinate function.
3. Once the vacuum process is complete,
the appliance stops automatically.
Disconnect the hose, the vacuum canister
food is completed.
V. Cord Storage
After use, put the power cord into winding rack lo-
cated at the bottom of the appliance. Do not wrap
the cord around the appliance.
CLEANING AND MAINTENANCE
Vacuum sealer
1. Always unplug the appliance before cleaning.
2. Do not immerse in water or any other liquid.
3. Avoid using abrasive products or material to clean the appliance as they will scratch
the surface of the appliance.
4. Use mild dishwashing soap and a warm, damp cloth to wipe away food residue on the
appliance.
5. Dry thoroughly before using again.
6. Wait 25 seconds to allow appliance to cool off, and then try using again
NOTE: The Foam Sealing Gaskets around the vacuum chamber should be dried thor-
oughly before re-assembling. When re-assembling, be careful to prevent any damage,
and assemble back to the original position to ensure no vacuum leaking.
IMPORTANT: To avoid possible illness, do not reuse bags after storing raw meats, raw
sh or greasy foods. Do not reuse bags that have been microwaved or boiled.
Storing Your Vacuum Sealer:
1. Keep the appliance in a at and safe place, out of reach from children.
2. Please keep the cover lid UNLOCK when not in use and in storage to prevent distort
of foam gasket that may cause air leakage.

10
Nothing happens when I try to vacuum package
1. Check power cord to see if it is rmly and correctly plugged into electrical outlet.
2. Examine power cord for any damages.
3. See if electrical outlet is operative by plugging in another appliance.
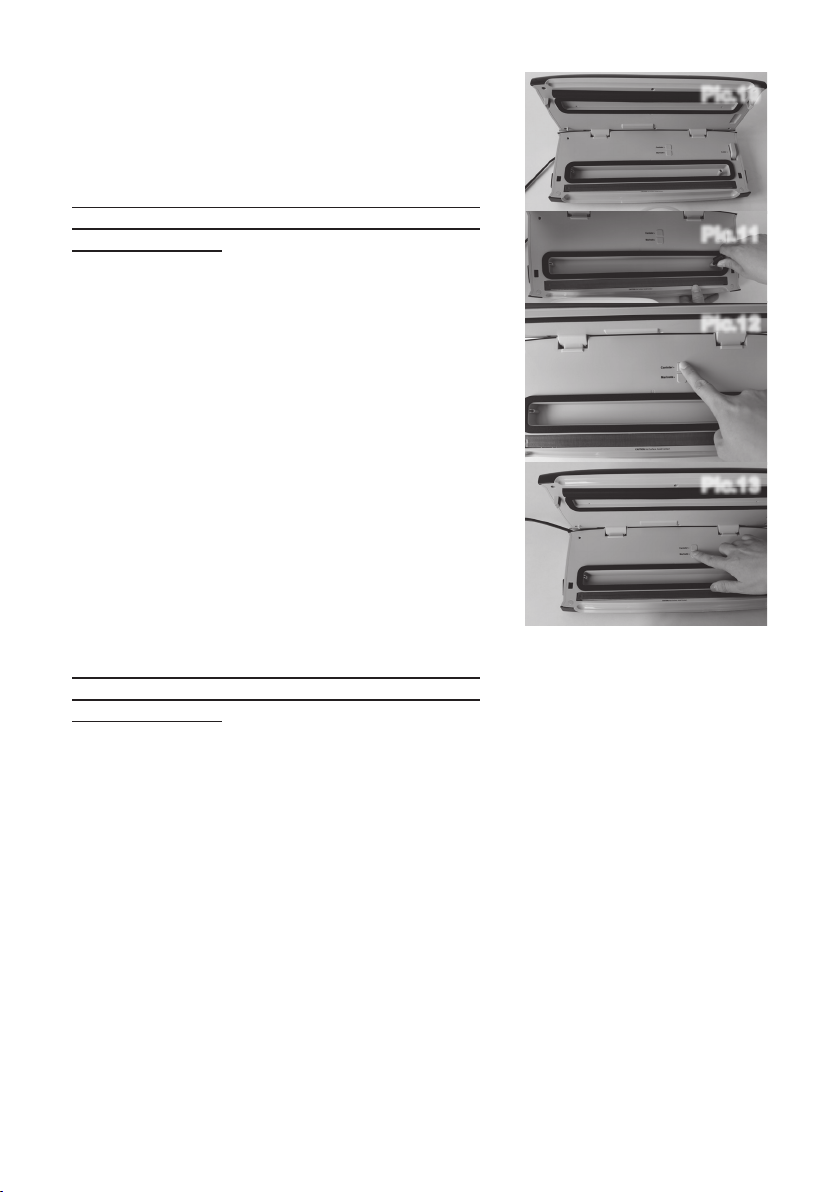
4. Make sure it is set to the correct mode. Refer to the above operating instructions.
5. Make sure the bag is placed correctly inside the vacuum chamber and beneath the
air intake.
6. Wait 25 minutes to allow appliance to cool off, and then try using again.
Air is not removed from the bag completely:
1. To seal properly, open end of bag should be resting entirely inside vacuum chamber area.
2. Check the Upper and Lower Foam Sealing Gaskets beneath the lid. Make sure no break-
ing or dis- tortion of the Upper and Lower Foam Sealing Gaskets on both the cover and
on the base around the vacuum chamber.Wipe clean and smooth them back into place.
3. Vacuum bag may have a leakage. To test, seal the bag with some air in it, submerge in
water, and apply pressure. Bubbles indicate leakage. Reseal or use another new bag.
4. Leakage along the seal which can be caused by wrinkles, debris crumbs, grease or liq-
uids. Reopen the bag, wipe the inner top of the bag and smooth it out along the sealing
strip before resealing.
The appliance does not turn to seal after vacuuming:
1. There is a vacuum pressure sensor built in this appliance. The appliance will not turn to
seal automatically if the vacuum pressure inside the bag is not able to reach to the prede-
termined vacuum pressure. Check sealing strip and the foam gasket beneath the lid for
debris and correct position.Wipe clean and smooth them back into place, and try again..
2. Make sure no breaking or distortion of thehe Upper and Lower Foam Sealing Gaskets on
both the cover and on the base around the vacuum chamber.
3. Vacuum bag may have leakage. To test, seal the bag with some air in it, submerge in
water, and apply pressure. Bubbles indicate leakage. reseal or use another new bag.
4. Leakage along the seal which can be caused by wrinkles, debris crumbs, grease or liq-
uids from the bag. Reopen the bag, wipe the inner top of the bag and smooth it out along
the sealing strip before resealing.
5. When using a bag roll, the placing directing required align with bag roll. If rotated the bag,
may not able to reach to the predetermined vacuum pressure.
Air has re-entered into the bag after being sealed.
1. Leakage along the seal which can be caused by wrinkles, debris crumbs, grease or liq-
uids. Reopen the bag, wipe the inner top of the bag and smooth it out along the sealing
strip before resealing.
2. It may be the release of natural gases or fermentation from foods (such as fresh fruits and
vegetables). Open the bag, if you think food has begun to spoil, discard it immediately.
Lack of refrigerator or uctuating temperatures in the refrigerator can cause food to spoil.
If food is not spoiled. Consume food immediately.
3. Check the bag for a puncture or hole which may have released the vacuum. Do not vac-
uum packaging hard items with sharp points (like bones or cracks of nut shell). Cushion
sharp edges in the contents of the bag with paper towels.
TROUBLE SHOOTING

11
The bag melts:
Should sealing strip or sealing element be overheat and melt the bag, it may be necessary to
lift the lid and allow sealing strip or heating element to cool around 25 minutes. Please aware
that the heating strip will be very hot after operation to avoid burns.
SPECIFICATIONS
Model no.: GVS140
Voltage: 220-240V AC
Frequency: 50Hz
Output power: 140W
* Each package is equipped with 5 pcs (28W x 40L cm) vacuum bags.
* The final product specification may be varied according to a different lot of
material and actual input voltage power of the usage area.

12
安全指引 - 一般安全
安全指引 - 電子和熱能產品
- 請按照這些說明事項, 使用本產品。
- 本產品僅供家用,不作商業用途。
- 使用前,請將所有包裝材料拆除。
- 0至8歲的兒童不應使用本產品。
- 超過8歲的兒童可使用本產品,但請勿由肢體不健全、感覺或精神上有障礙或
缺乏相關經驗和知識的人使用,除非有負責他們安全的人對他們使用本產品進
行監督或指導。
- 請務必看顧好兒童,以確保他們不玩耍本產品。
- 兒童不應清潔或維修本產品。
- 當需進行任何維修,必須由專業維修人員進行維修。永遠不要嘗試自己修理本
產品。
- 手濕時不可以接觸電源插頭或本機。
- 主機不可以浸入水中。
- 兒童不可以把玩本機。
- 本機開著後不可以無人監管。
- 只使用隨機附送的配件。
- 使用相符的電源和電壓,以防止觸電。
- 本產品只能使用帶接地線的電源插座。
- 當本產品不使用時,請從牆上的插座中拔掉插頭。
- 從牆上插座中拔掉插頭時,應拿著插頭而不是電源線。
- 確保本產品、電源線和插頭不與水接觸。
- 確保本產品、電源線和插頭不接觸發熱表面,如明火。
- 定期檢查本產品的電源線以確保其沒有損壞。如果電源線損壞,請勿使用其產
品,並須由專業維修人員來更換,以避免出現任何危險。
- 切勿在易燃材料附近使用本產品。
閱讀下列說明事項並請妥善保管,以供日後參考。

13
安全指引 - 操作期間
- 請確保讓產品有時間冷卻。 密封之間至少等待 20 秒。 在非常頻繁的使用情況
下,產品會自動關閉以防止過熱。 如果發生這種情況,請等待 25 分鐘讓產品冷
卻。
- 真空袋內不要放太多的物品,袋子開口端要留下足夠長度,讓袋口能方便地放入
本機的抽真空區域內。
- 不要弄濕真空袋開口,否則很難封口。如果食物有水份或袋子是濕的,可選擇
“MOIST/濕真空”功能鈕和Seal Time +/封口時間+按鈕,這樣會延長密封時間,
- 封裝前請將真空袋口清潔並拉直,確保沒東西卡在封口處,抽真空時不要讓袋子
- 抽真空前,不要讓袋子裡有太多空氣,可輕按袋子將空氣排出,這樣會減輕本機
抽真空的負荷。
- 真空保鮮袋包裝的物品,不要有像魚骨、硬殼等尖狀物,否則會刺破袋子。如果
想用真空保鮮袋包裝類似物品,可用比較硬身的袋先包好物品再放入真空保鮮袋
真空包裝,或用紙巾包著尖銳處,避免刺穿袋子。
- 確保上及下密封棉沒有裂開或變形或周圍有一些小顆粒,如發生這種情況,請將
其取下來清洗乾淨並吹乾,或更換新的密封棉。
- 水果和蔬菜在真空包裝前,冷凍一段時間,會達到更好的效果。
易腐食品一般需冷凍或冷藏,真空包裝它們可延長其保質期,但不能保證它們永
不變質。
- 真空包裝麵粉等粉狀物品時,最好使用他們的原包裝再放入真空袋內。細粉可
能會被吸入機器並造成足夠的損壞,從而縮短封口機的使用壽命。
注意:使用後,請勿鎖住本機的上蓋,否則會造成密封棉變形,影響機器抽真空
效果。

14
1 乾真空 (Dry)
輕觸此按鈕可選擇乾真空模式。
2 濕真空 (Moist)
輕觸此按鈕可選擇濕真空模式。
3 按動 (Pulse)
這個功能是用來控制真空度的。按住此按鈕,機器開始抽真空;放開此按鈕,抽真
空停止。
4 封口時間 + (Seal Time +)
輕觸此按鈕增加封口時間,綠色指示燈閃爍。如果真空包裝袋較厚或需封口比較濕
性食物,可以選擇Seal time+,再選擇Moist進行抽真空封口。
5 單封 (Seal)
輕觸此按鈕啟動單封製作片袋。
6 取消 (Cancel)
輕觸此按鈕停止當前操作。
結構和功能
1 2 3 4 5 6

15
7
8
9
10
11
12
16
13
14
15
7 封口矽膠
8 上下密封棉
9 釋放按鈕
按下左右兩邊的洩氣按鈕來打開上蓋。按壓上蓋兩側鎖緊上蓋,當聽到兩聲哢噠聲
音說明上蓋已經鎖好。
10 密封發熱條
11 抽真空保鮮罐/盒
這個功能要配合真空保鮮罐/盒一起使用。
12 醃制功能
這個功能在使用罐子醃制食物的時候使用。
13 抽氣孔
允許使用真空保鮮罐/盒和其他配件進行真空包裝。
14 切刀槽
15 切袋刀
16 可拆卸盛水盤
當需密封比較濕性食物時,汁液會流致盛水盤,工件完成後,可拆卸盛水盤便於清
潔。

16
17 繞線架
18 橡膠步防滑腳墊
17
18
1. 連接電源。
2. 從卷裝包裝袋上裁剪所需適當長度。(圖 1) (*注意
需保留卷裝袋已封口兩邊並未有損壞)。在物品和
袋子開口之間留出至少2英寸的距離,以便袋子收
縮。
3. 將已裁剪所需長度大小的卷裝袋開口放在密封綿
上。(圖 2)
4. 關閉上蓋同時向下壓,聽到左右兩邊的釋放按鈕
清脆的鎖扣聲。(圖 3)
5. 按Seal按鈕,密封過程中,紅色指示燈會亮起,
完成密封後,綠色指示燈會亮起。
6. 當本機的綠色指示燈亮起即密封工作完成,請按
機器兩邊的釋放按鈕將本機器上蓋打開,此時袋
子的一端已被封口好了。(圖 5)
操作說明
圖 3
I. 卷裝袋使用方法(需另外購買型號:GVBR28)
圖 4
圖 5
本機附送1套(共5個)包裝袋可供用作包裝或抽真空保
鮮用途。包裝袋已有一邊封口,只需在另一端封口便
可。
圖 2
圖 1

17
1. 將需要真空包裝的食品放入包袋內,請務必使用
本機提供的包裝袋進行抽真空(或本司產品真空
封口機專用的食品級包裝袋(型號:GVBR28),如
使用其他包裝袋有損壞機器及受傷風險,請不要
使用本司以外的包裝袋)。
2. 在進行真空封口之前清理袋口,確保沒有雜物、
皺褶,讓袋口保持乾淨與乾爽。
3. 將袋子的開口端放在真空腔內(在下密封棉位置
約 5-10毫米距離)。(圖 6)
4. 關閉上蓋同時向下壓,聽到左右兩邊的釋放按鈕
清脆的鎖扣聲。(圖 7)
5. 根據實際需要選擇Dry, Moist, Pulse, Seal”的設
定。
6. 按Dry, Moist or Seal 按鈕, 密封過程中,紅色指
示燈會亮起,完成密封後,綠色指示燈會亮起。(
圖 8)
注意:本機會產生很高的真空能力,為免在抽真空
過程中使珍貴的物品損壞。如見有異常情況,請立
即按下“CANCEL/取消”按鈕,停止抽真空的操作
7. 真空包裝完成後。綠色指示燈會亮起。同時按
下兩側的釋放按鈕打開上蓋並取出已真空好的物
品。(圖9)
注意事項:
最佳的密封效果,待本機完成每一個抽真空或密封
操作後,建議讓本機冷卻20秒後進行下一個工作。
請適當清潔真空區域餘下的液體或殘留的食物。
本機只能使用已通過食品級測試的真空包裝袋進行
包裝。
Ⅱ.真空包裝說明
圖 6
圖 7
圖 8
圖 9

18
1. 連接電源。打開機產品蓋子。(圖10)
2. 用真空軟管連接真空保鮮機和罐子。將真空軟管
的其中一端連接到罐/盒閥,另一端連接到機器的
抽氣孔處。
3. 開始真空的過程,請按下“Canister/真空保鮮
罐/盒”按鈕即可。如要取消真空過程,請再次按
下“Canister/真空保鮮罐/盒”按鍵即可取消。
(圖11)
4. 真空過程完成後,產品會自動停止。拆卸軟管,
完成真空罐/盒子食物。
1. 連接電源。打開機產品蓋子。(圖10)
2. 用真空軟管連接真空保鮮機和罐子/盒。將真空軟
管的其中一端連接到罐/盒閥,另一端連接到機器
的抽氣孔處。
3. 開始真空的過程,請按下“Marinate/醃制”
按鈕即可。如要取消真空過程,請再次按
下“Marinate/醃制”按鍵即可取消。(圖13)
4. 開始醃制功能時,請按“Marinate/醃制”按鈕。
當真空封口機達到真空壓力時,機器會自動停止
抽真空,然後將空氣釋放到罐中,這樣的工作迴
圈重複約30分鐘,然後機器自動停止。若要取消
醃制功能,請再次按下“Marinate/醃料”按鈕。
如果你認為食物醃制的不夠,你可以再重複執行
醃制一次。
III. 抽真空保鮮罐/盒 (真空保鮮罐/盒和軟管需另外購
買, 適合直徑為5.4-5.6毫米毫米的連接頭)
IV. 醃制功能
如需打開密封好的真空包裝袋,請用剪刀直接剪開
袋口即可。
圖 9
圖 10
圖 11
圖 12

19
5. 醃制功能完成後,產品會自動停止。拆卸軟管,
完成真空罐子食物。
把電源線收藏在本機底部的收線盒內,不要把電源
線繞在機上。
V. 電源線收藏
清潔和維護
真空封口機
1. 確保清潔時,拔除電源插頭。
2. 本機切勿浸在水裡或者其他液體內。
3. 避免使用磨損性的清潔劑清潔本機,以免刮花表面。
4. 用中性清潔劑和柔軟的抹布清潔食物殘渣和其他部件。
5. 確保本機全乾後才再次使用。
6. 等待25秒讓產品冷卻,然後再嘗試使用。
注意:確保重裝前封氣棉已全乾透,小心組裝切勿造成任何破壞,確保位置正確以
防漏氣。
注意:為避免引起疾病,請在裝過生肉、生魚片和油膩食物後,不要再使用袋子。
不得使用經微波爐加熱或煮沸過的袋子。
儲存方式:
放置在平面並安全的地方;兒童接觸不到的地方。
注意:如不使用本機,請確保不要鎖住上蓋。否則會造成密封棉變形,影響本機抽
真空效果。

20
故障排除
真空包裝無反應
1. 檢查電源線是否正確連接插座。
2. 檢查電源線是否有損壞。
3. 是否有另一電器正在使用插座。
4. 請檢查是否已選擇正確模式及參照以上操作指示。
5. 確保袋子正確放置在真空管道內和進氣口下方。
6. 等待25秒讓產品冷卻,然後再嘗試使用。
抽氣不足:
1. 袋子的開口端是否全部置於真空區域內。
2. 檢查發熱條和封氣棉部位是否有碎屑,位置是否正確。確保上下封氣棉完好無
損。擦拭乾淨並置於正確位置。
3. 袋子是否有漏氣。按以下方式可檢驗:袋子內保留一些空氣,封口,然後浸在水
中,稍微用力擠壓,若產生氣泡證明袋子漏氣。需重新封口或者使用新的真空袋
子。
4. 漏氣可能由於袋子皺褶、碎屑,油脂或其它液體引導。打開袋子,擦拭端口部
分,拉平袋口確保無皺褶再進行抽真空。
抽真空後不封口:
1. 機器內設真空壓力感測器。當袋子內的壓力沒有達到此預設壓力時,本機便不會
自動封口。檢查熱壓膠條和上封氣棉是否有碎屑,位置是否正確。擦拭乾淨並置
於正確位置,重新操作。
2. 確保上下封氣棉沒有變形和損壞。
3. 袋子可能漏氣,按以下方式可檢驗。袋子內保留一些空氣,封口,然後浸在水
中,稍微用力擠壓,若產生氣泡證明袋子漏氣。重新封口或者使用新的真空袋
子。
4. 漏氣可能由於袋子皺褶、有碎屑,油脂或其它液體在袋口。打開袋子,拉平袋子
確保無皺褶再進行抽真空。
5. 如用卷裝袋,膠袋放入機台的方向,需與拉出的方向一致。旋轉放入可能會使袋
子內的壓力沒有達到預設壓力,而不能封口。 封口後,空氣又進入袋子。
Table of contents
Other GILMAN Kitchen Appliance manuals