Gin Yeti-4 Manual


pilot manual
v1.0, 30/11/2015

Photo: Jerome Maupoint

4
Contents
Warning 6
About Gin Gliders 7
Introducing the Yeti 4 8
Before you fly 10
Flying the Yeti 4 13
Care and maintenance 26
Final words... 30
Technical specification 31
Line plan 32
Riser diagram 33
Materials 34
Brake line knot diagram 35
Diagram of parts 36

5
Thank you...
...for choosing Gin Gliders. We are confident you’ll enjoy many rewarding experiences in the air
with your GIN Yeti 4.
This manual contains important safety, performance and maintenance information. Read it
before your first flight, keep it for reference, and please pass it on to the new owner if you ever
re-sell your paraglider.
Any updates to this manual, or relevant safety information, will be published on our website:
www.gingliders.com. You can also register for e-mail updates via our website.
Happy flying and safe landings,
GIN team

6
Warning
Like any extreme sport, paragliding involves unpredictable risks which may lead to injury or
death. By choosing to fly, you assume the sole responsibility for those risks. You can minimize the
risks by having the appropriate attitude, training and experience and by properly understanding,
using and maintaining your equipment. Always seek to expand your knowledge and to develop
self-reliance. If there is anything you do not understand, consult with your local dealer as a first
point of contact, with the GIN importer in your country or with Gin Gliders directly.
Because it is impossible to anticipate every situation or condition that can occur while
paragliding, this manual makes no representation about the safe use of the paraglider under
all conditions. Neither Gin Gliders nor the seller of GIN equipment can guarantee, or be held
responsible for, the safety of yourself or anyone else.
Many countries have specific regulations or laws regarding paragliding activity. It’s your
responsibility to know and observe the regulations of the region where you fly.

7
About Gin Gliders
Dream
In forming Gin Gliders, designer and competition pilot Gin Seok Song had one simple dream:
to make the best possible paragliding equipment that pilots all over the world would love to fly—
whatever their ambitions.
At Gin Gliders, we bring together consultant aerodynamists, world cup pilots, engineers and
paragliding school instructors, all with one goal: creating better paragliders.
Touch
We’re a “hands-on” company that puts continuous innovation and development at the centre of
everything we do.
At our purpose-built R&D workshop at head office in Korea, we are able to design, manufacture,
test-fly and modify prototypes all in a matter of hours. Our international R&D team is on hand both
in Korea and at locations worldwide. This guarantees that your equipment has been thoroughly
tested to cope with the toughest flying conditions.
Our own production facilities in East Asia ensure the quality of the finished product and also
the well-being of our production staff. Our facilities are independently certified to AS9100C
(Aerospace standard) and also to ISO 9001:2008.
Believe
We believe that the product should speak for itself. Only by flying can the pilot understand the
wing and develop trust and confidence in it. From this feeling comes safety, comfort, performance
and fun. The grin when you land should say it all!

8
Introducing the Yeti 4
The Yeti 4 is a versatile paraglider, suitable for hike ‘n fly or for thermalling and leisurely XCs.
Due to the wide range of sizes, the wing accomodates a wide range of pilots: from beginners and
pilots flying less frequently to experienced adventure pilots.
Designed for simplicity
The Yeti 4 brings comfort, ease and simplicity to lightweight paragliding.
The Yeti 4 is a 3-liner and is simple to sort out on the ground. It inflates easily and evenly,
even when the terrain or conditions are less than ideal. The low stall speed gets you airbourne
quickly and provides a good safety margin for landings. In flight, the turn is responsive and
playful, but always co-ordinated and comfortable.
The Yeti 4 is part of a complete range of lightweight equipment that provides you with
everything you need to enjoy beautiful flights in stunning scenery. Take a Yeti harness, airbag and
Yeti rescue — the only things you only need to add are your helmet and sunglasses!
More than just an “ultralight glider”
Our latest EPT airfoil means significantly more glide performance than you might expect from
such a stable, low-aspect wing. What’s more, the climb is outstanding—you can get tightly into
thermal cores. The Yeti 4 feels so secure that even in the most challenging conditions you’ll be
turning back for more.
Finely crafted from the most durable lightweight materials, you can expect a long lifetime with
normal, careful use. The Yeti utilizes the latest generation of double-coated Skytex fabrics from
Porcher Sport.
WARNING: The Yeti 4 is suitable for trainee
pilots only under the strict supervision of
a competent and qualified instructor.

9
Easy or dynamic, ultra-light or extreme-light—the choice is yours
The Yeti 4 has an extended weight range. Flown in the normal weight range, low-airtime pilots
will discover an easy, well-behaved wing. Flown at a higher wing loading in the extended weight
range, suitably experienced pilots can enjoy dynamic flying in stronger conditions. The Yeti 4 is
certified EN A in both normal and extended weight ranges.
The Yeti 4 comes with standard Kevlar risers and sheathed main and mid- lines for ease of use
and durability. A optional Dyneema riser saves around 300g and makes the Yeti one of the lightest
wings of its type.
All in all, the Yeti is an outstanding choice for all pilots who prefer minimal equipment and
maximal fun. Try it for yourself and discover love at first flight!

NOTE: Your glider may have been
delivered with some lines looped on the
maillons, this is to allow the glider to be
re-trimmed during a professional check
at the recommended service interval.
WARNING: If you fly with wraps, be
sure to release them in any extreme
situation. Failure to do so could prevent
normal recovery of the wing.
CAUTION: If you do shorten the brake
lines, make sure there is enough free
brake travel that the trailing edge is
not braked (deformed) when the glider
is fully accelerated. There should be at
least 10cm of free brake travel when the
glider is flown “hands-off”.
10
Before you fly
Delivery
Make sure your dealer has checked and test-flown the glider. Your glider will be delivered to
you with the original trim settings which correspond to the tested configuration. Do not make any
modifications, such as changing the risers or altering the line lengths. This would invalidate the
certification and is potentially dangerous.
Brake lines
GIN test pilots have carefully tuned the brake line lengths during testing, and there should be
no need to change them. We generally suggest flying with wraps (a turn of brake line around the
hand).
If you do decide to make adjustments to suit your harness, body or flying style, make any
adjustments in steps of 2cm. Be sure to test fly the glider after each adjustment. See the reference
section of this manual for the recommended knot to use to re-attach the brake handles.
Risers and line layout
A line plan and a diagram of the risers can be found in the reference section at the end of this
manual. Familiarize yourself with the layout of the risers and the position of the “stabilo (STB)”
line.
Speed system
The speed system accelerates the wing by progressively shortening the risers towards the
front.
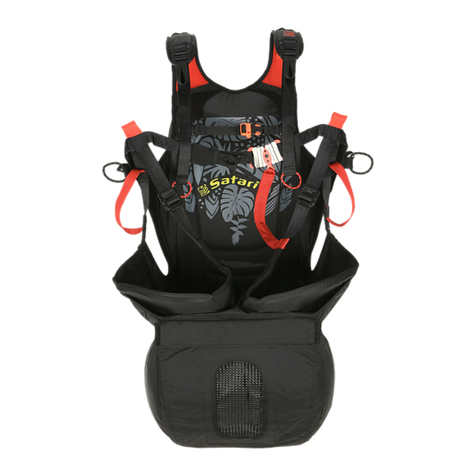
Make sure that the speed system lines are routed properly through your harness and attached
11
CAUTION: Make sure that the speed
system is not too short. The front risers
must not be pulled down in normal
(unaccelerated) flight.
CAUTION: Don’t adjust your leg and
shoulder straps too tightly. If you do,
you may have difficulty sitting back into
your harness after take-off.
CAUTION: If you fly with a cocoon
harness in a reclined position, be sure
to quickly get into an upright position
in any turbulence or extreme situations.
If you don’t, you may experience
a reduction in control travel or an
increased risk of riser twists.
to the risers using the Brummel hooks. Perform any adjustments symmetrically while on the
ground. Adjust the speed system so that the maximum speed is attained (“pulley-to-pulley” on the
riser) when your legs are fully extended. Ask a friend to hold the risers in the flying position while
you are seated in your harness on the ground.
Harness
It’s important for your comfort and safety to fly with a suitable harness that is properly
adjusted. When choosing a harness, remember that the height of the attachment points (i.e.
distance from the carabiners to the seat plate) affects the sensitivity of the glider and the
relative brake travel. The lower (shorter) the attachment points, the more sensitive the glider is
to weightshift. GIN gliders are developed with GIN harnesses, which have an attachment point of
approximately 40-48cm (depending on size and model).
Adjust your chest strap so that the distance between the carabiners is approximately 46cm.
Lighter pilots may fly with a slightly narrower setting. A rule of thumb is to set the width of your
chest strap to that of your shoulders.
Your dealer will be able to offer individual advice regarding harnesses.
Rucksack
GIN gliders are delivered with a rucksack, designed to carry all your equipment in comfort. If
you have any particular requirements, a wide range of optional rucksacks and reversible harnesses
are also available. Please see our website or ask your dealer for details.

12
TIP: Check your total flying weight by
standing on weighing scales with all your
equipment packed into your rucksack.
TIP: Remember that ballast can also
be used to adjust wing loading to the
conditions.
Weight range
Be sure to fly your glider within the certified weight range given in the Technical Specification
section. Due to EPT technology, the Yeti 4 flies well at any wing loading within this weight range. If
you are choosing between 2 sizes, choose your optimum wing loading according to your personal
preferences and the conditions you fly in.
If you prefer dynamic flight behaviour with fast reactions, you should fly at a high wing-
loading, i.e. choose the smaller model. This may be an advantage in strong, tight thermals.
The dynamics are reduced in the middle and lower part of the weight range. Flight behaviour
becomes more straightforward and many pilots fly with this wing loading because they find it
easier to centre in thermals, especially weaker and wider thermals. If these features appeal to
you, you should fly with a lower wing-loading and choose the larger model.
The Yeti 4 reacts to weight changes only by slightly increasing or reducing trim speed, with
little noticeable effect on glide performance. You can therefore choose the size completely
according to your own flying style.
Extended weight range
The Yeti 4 has an extended weight range. This enables suitably experienced pilots to enjoy
dynamic flying in stronger conditions or to reduce weight by carrying a smaller-sized glider. The
Yeti 4 is certified EN A in both normal and extended weight ranges.
Overload
The EN 926-2:2013 describes the weight measurement with: “All weights are subject to
an acceptable tolerance of ± 2kg”. Therefore a slight overload of the wing would be within EN

13
TIP: Practice inflating your glider and
making short flights on a training
hill.
tolerances. However, flying over the maximum weight further increases the dynamic flight
behaviour. In small bubbles, the wing has more horizontal momentum and less tendency towards
lifting. A test flight is always recommended if in doubt.

14
TIP: Always follow a consistent method
of preparation and pre-flight checks
each time you fly.
General warnings and advice
Before flying with your paraglider, check the following:
Are you in good physical and mental condition?
Are you familiar and compliant with all applicable laws and regulations in your area?
Are you within the certified weight range of your paraglider?
Do you have the necessary valid insurance cover (e.g. liability, medical, life)?
Are you briefed thoroughly about the site, airspace and expected weather conditions of the
day?
Is your equipment and choice of site suitable for your level of experience?
Do you have a suitable helmet, gloves, boots, eyewear and adequate clothing?
Are you carrying some form of identification, so that people know who you are in case of an
accident? Take along a radio and mobile phone if possible.
Do you fully understand how to safely fly your new paraglider? If not, have your instructor or
dealer explain anything you are not sure about.
When you go for your first flight on your new Yeti 4, be sure to pick a day and site that does
not present you with any unfamiliar challenges. During your first flight, familiarize yourself with
the in-flight characteristics of your new wing.
Flying the Yeti 4

15
TIP: If the glider comes up slightly
off-centre, make small corrections by
moving towards the lower side.
TIP: In stronger winds, be prepared
to take a couple of steps towards the
canopy as it inflates and rises.
TIP: Launch the Yeti 4 by pulling upwards
in an arc, not towards you.
TIP: Practice ground-handling regularly
to improve your take-off skills!
CAUTION: Groundhandling (especially
on rough surfaces) will accelerate the
ageing process of your wing.
Preparation for launch
Check the condition of your paraglider and other flying equipment before every flight.
Lay out your wing on its top surface in an arc. Make sure that the centre of the wing is higher
than the tips.
Prepare for launch by checking the following:
Is the glider fabric free from tears or other damage?
Are the lines free from knots, tangles or other damage?
Are the maillons connecting the lines and risers closed and secured?
Are your carabiners in good condition?
Are the risers in good condition?
Is your harness in good condition?
Is your speed system correctly connected?
Is your rescue correctly installed in your harness?
Is your rescue handle secure and rescue pin in?
Pre-flight check
Check the following before every take-off:
Is your personal equipment in order? (harness and helmet straps done up, reserve handle
secure and pin in, carabiners done up)
Are you holding the ‘A’ risers and brake handles?
Is the wing arranged in an arc with the leading edge open and into wind?
Is the wind strength and direction suitable?

16
TIP: the Yeti 4 has good basic speed,
good glide and excellent energy
retention. Give yourself enough space
and bleed off speed gradually before
flaring.
CAUTION: Although the Yeti 4 is
remarkably manouvreable even in the
lower half of the brake range, do not be
tempted to make an excessively slow
landing approach. Strong gusts and/
or a steep wind gradient may cause any
glider to suddenly lose altitude, or even
stall.
CAUTION: Never let the leading edge
crash to the ground, you risk damaging
the seams and/or internal structure.
WARNING: Never perform steep turns
near the ground. This may cause the
pilot to pendulum dangerously.
Is the airspace and visibility clear?
Launching
The Yeti 4 has smooth and progressive inflation characteristics with no tendency to hang back
or shoot forwards.
Forward launch (nil to light winds)
Lean forward positively and guide the ‘A’ risers smoothly upwards in an arc, keeping your
elbows bent and hands at the level of the shoulders. The Yeti 4 will inflate easily—there is no
need to aggressively pull or push the risers. As the glider comes above your head, make sure that
the canopy is correctly inflated and that there are no knots or tangles in the lines. Check that the
airspace and visibility are clear. If everything is in order, move forward decisively off the take-off.
Reverse launch (light to strong winds)
Take the brakes and turn around to face the wing. Pass one set of risers over your head as you
turn. Make sure the lines are free from knots or tangles. Check that the airspace and visibility are
clear. Gently pull up the glider in an arc with the ‘A’ risers. When the glider is overhead, brake it
gently if necessary, turn around and launch.
Landing
Remember the following general points to make a good landing:
Observe the wind direction and strength, and any hazards in, or near, the landing area.
Fly a proper landing circuit and plan your final approach well in advance.
Actively choose a spot on the ground in the landing field to aim for. Adopt an upright position

17
TIP: During your first few flights,
familiarize yourself with your glider’s
speed range and corresponding brake
positions and pressures.
CAUTION: Don’t use full bar near the
ground or in turbulence. Although the
wing is stable at this speed, higher
aerodynamical forces mean that any
collapses that do occur could be more
significant and require more height for
recovery.
CAUTION: Never apply brakes when using
the speed bar.
CAUTION: Always check for clear airspace
before initiating a turn.
in your harness by sliding your legs forward, ready to make contact with the ground.
Make your final approach as straight as possible. Fly at around trim speed (keep just enough
tension on the brakes to keep contact with the wing, a little more tension in turbulent air). Once
you come within a metre of the ground, brake progressively to maintain a level flight path.
In nil or light winds, flare positively to reduce your groundspeed to a minimum. In stronger
winds, use only the minimum amount of flare necessary to sufficiently minimize your vertical and
horizontal speed. If you flare too hard in strong winds, the glider will climb rapidly upwards and
backwards, and you may get injured.
In strong winds, turn to face your wing as soon as your feet touch the ground. Immediately
stall the glider as rapidly as possible with the brakes or rear risers. Be prepared to run towards
your wing.

18
TIP: The further in front of you the
glider pitches, the larger the brake input
required, but for a shorter duration.
CAUTION: Never release the brakes when
the glider is behind you but accelerating
forwards.
In-flight characteristics
Normal flight
“Trim speed” (brakes fully released) is the best glide speed in still air.
Minimum sink speed on the Yeti 4 is achieved by light braking. In a normal flying position
(knees parallel to the ground and your body slightly reclined), your hands should be holding the
brakes at a level between your eyes and your shoulders. Use this speed for thermalling and ridge
soaring.
Stall speed is approached by bringing your hands towards your hips. Notice the decreased wind
noise and a significant increase in brake pressure. Be sure not to allow your glider to enter a stall.
Accelerated flight
The speed system causes the glider to accelerate by lowering the angle of attack. Apply the
speed system by pushing the speed bar progressively with your feet. Use your speed bar when
gliding in sinking air, headwinds and crosswinds. The stability of the Yeti 4 does not degrade
significantly at speeds of up to half bar.

19
WARNING: Uncontrolled re-openings
after rapid descent techniques,
collapses, extreme manoeuvres or
during ground-handling may place
additional stress on your glider.
Wherever possible, avoid such flight
configurations in order to reduce the
possibility of material damage.
TIP: Always try to avoid the need to use
these descent techniques. Thoroughly
check the conditions before launch,
and pay close attention to how the day
develops.
WARNING: Do not attempt to release big
ears near the ground.
Turning
Make your first turns gradual and progressive. Also remember that your harness and its set-up
has an influence of the turning behaviour of the wing.
Enter a turn with good airspeed, weightshift and then apply the brake. Once established in the
turn, regulate your speed and turn radius with weightshift and the outer brake.
Active flying
Practice active flying to eliminate collapses in all but the most turbulent conditions.
Keep tension on the brakes approximately equal to the weight of your arms. This allows you to
stay relaxed and sensitively feel the internal pressure in the wing through the brakes. If you feel a
loss of pressure in one or both sides of the wing, quickly apply the appropriate brake(s) to re-gain
pressure. Release the brake promptly as soon as normal pressure is resumed.
If you miss the above timing and get a collapse, be sure to first raise your hands and release
the brakes before considering any other corrective actions.
The Yeti 4 has excellent pitch stability. Nonetheless, in turbulence or during manoeuvres, the
glider may pitch. If the glider pitches in front of you, apply brake to slow it down. If the glider
drops behind you, ease off the brakes to allow it to speed up. The objective is to reduce the
pendulum effect by adjusting the speed of your glider so that glider and pilot are travelling at the
same speed.
The same general principles also apply when gliding on bar.

20
WARNING: The high G-forces experienced
in steep or prolonged spirals may
result in disorientation or even
loss of consciousness. Spirals with
descent rates above 10 m/s are not
recommended.
CAUTION: Frequent steep spirals may
cause premature aging of your wing.
WARNING: Do not attempt to enter a
spiral dive while in big ears. This places
excessive forces on the paraglider and
may result in structural failure.
Rapid descent techniques
Learn and practice the techniques in this section under qualified supervision. Big ears and
spiral dives are generally the most common methods of descent. Big ears can achieve a moderate
rate of descent with the advantage of forward speed and manoeuvrability. Spiral dives attain
higher rates of descent, but the G-forces can be significant and the manoeuvre is more technically
demanding. ‘B-stalls’ have little or no advantages compared to the other methods of descent and
therefore are not recommended in normal situations.
Big ears
To enter big ears, pull down firmly the outermost A lines on each side of the wing one-by-one
until the wingtips fold under. The glider can then be steered by weightshift. Do not use the brakes
unless you intend to exit big ears.
Once in big ears, you can increase your sink rate and forward speed by applying the speed bar.
Always apply the speed bar AFTER entering big ears, never before.
To exit big ears, release both A lines at the same time. Apply brake progressively one side at
a time to help re-inflation. Be careful not brake too deeply on both sides at the same time as this
could cause a stall.
Spiral dives
Before entering a spiral, make sure you have adequate height for recovery. To enter the spiral
dive, weight shift and progressively apply the inside brake until the glider enters the spiral. As
the glider accelerates into the spiral, centre your weight and control your rate of descent with
weightshift and outer brake.
Table of contents
Other Gin Aircraft manuals
Popular Aircraft manuals by other brands

ICARO paragliders
ICARO paragliders TWICE TE manual

Tecnam
Tecnam P2006T Flight manual

Cessna
Cessna 172S Skyhawk Quick reference handbook

ICARO paragliders
ICARO paragliders MAVERICK 2 manual

NIVIUK GLIDERS
NIVIUK GLIDERS IKUMA 2 P user manual

Schempp-Hirth
Schempp-Hirth Ventus-3M Performance Preliminary Flight Manual