Gin Zulu User manual

Zulu Owners’ Manual
Thank you for taking the time to read this manual.

2
Thank you…
Thank you for choosing the Zulu. We are confident that this paraglider will provide you with
countless exciting flying experiences. This manual contains all the information you need to fly
and maintain your paraglider. A thorough knowledge of your equipment will keep you safe and
enableyoutomaximizeyourfullpotential.
Pleasepassonthismanualtothenewownerifyoudoresellyourglider.
HappyFlights and Safe Landings,
TheGIN Team
Safety Notice
By the purchase of our equipment, you are responsible for being a certified
paraglider pilot and you accept all risks inherent with paragliding activities
including injury and death. Improper use or misuse of GIN equipment greatly
increases these risks. Neither Gin Gliders Inc nor the seller of GIN equipment
shall be held liable for personal or third party injuries or damages under any
circumstances.
Please note: The Zulu is a DHV class 1-2 glider and it is suitable for use by
experienced and qualified pilots or may be used by Pilots under advanced
instruction with their school. The Zulu is especially suited to the experienced,
frequently flying pilot who will be able to fully benefit from the Zulu’s qualities.
If any aspect of the use of our equipment remains unclear, please contact your
local paragliding instructor, GIN reseller or the importer in your country.

3
Contents
Thankyou…........................................................................................................................................2
SafetyNotice .................................................................................................................................... 2
1.GinGliders...........................................................................................................................................4
2.Introducing the Zulu...........................................................................................................................5
ForPilotsWho...................................................................................................................................5
Cutting-edgedesign …………………………………………………………………………………………………….5
Manufacturing …………………………………………………………………………………………………………….6
3.Beforeyoufly.......................................................................................................................................7
Pre-deliveryInspection ………………………………………………………………………………………………..7
SpeedSystem.....................................................................................................................................7
BreakLineAdjustment………………………………………………………………………………………………….8
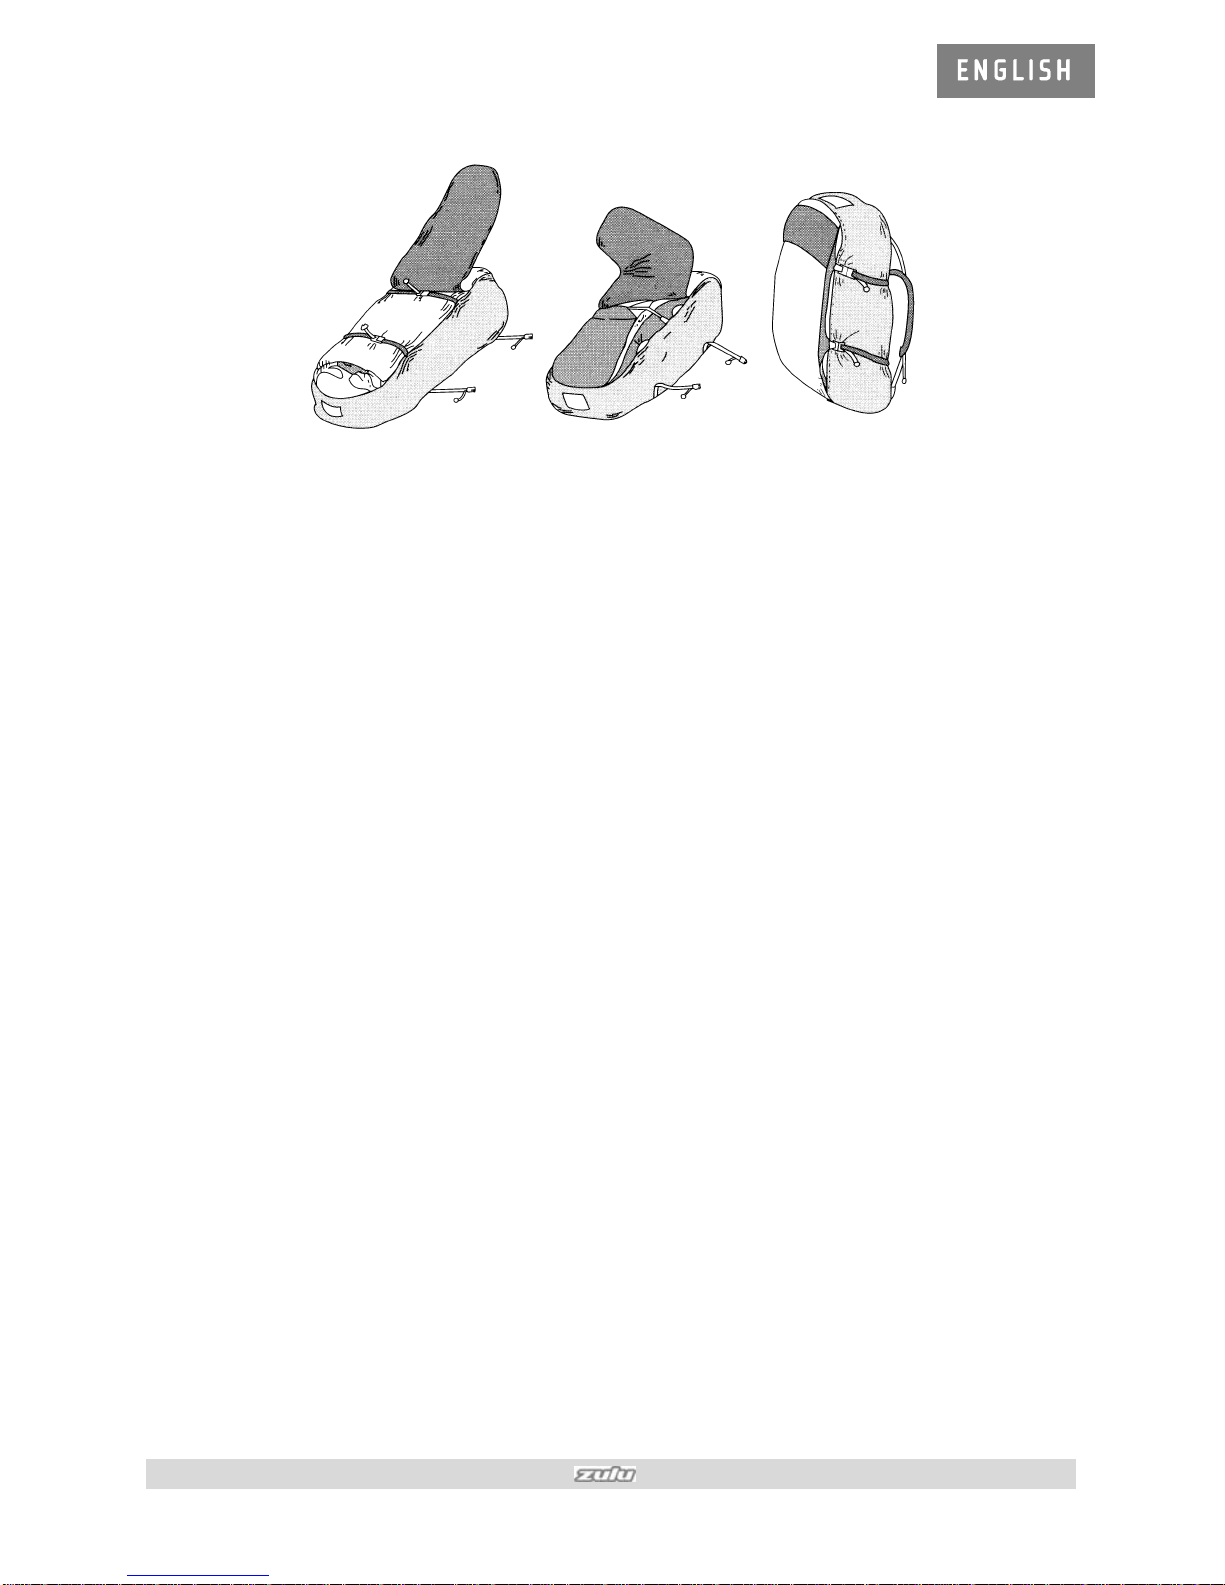
Rucksack.............................................................................................................................................8
Yourharness ……………………………………………………………………………………………………………..9
Certifiedweightrange ………………………………………………………………………………………………….9
Pre-flightsafety …………………………………………………………………………………………………………9
4.Flying the Zulu ..................................................................................................................................10
Preparationfor launch.....................................................................................................................10
Takeoff............................................................................................................................................11
Lineknotsortangles .......................................................................................................................11
Minsink/bestglide.........................................................................................................................11
Accelerated flight.............................................................................................................................11
Activeflying…………………………………………………………………………………………………………….11
Inturbulence....................................................................................................................................12
Losingaltitude………………………………………………………………………………………………………….13
Steeringwithoutbrakes ………………………………………………………………………………………………15
Aerobatics........................................................................................................................................16
LandingwiththeZulu ......................................................................................................................16
Towlaunch.......................................................................................................................................16
Motorizedflight...............................................................................................................................16
5.Care, maintenance and repairs...........................................................................................................17
Groundhandling...............................................................................................................................17
UVdamage.......................................................................................................................................17
Packinginstructions.........................................................................................................................17
Transportandstorage......................................................................................................................18
Cleaning...........................................................................................................................................18
Inspections ......................................................................................................................................18
Repairs.............................................................................................................................................18
6.Technical Details.................................................................................................................................19
TestandCertification………………………………………………………………………………………………….19
TechnicalSpecifications...................................................................................................................20
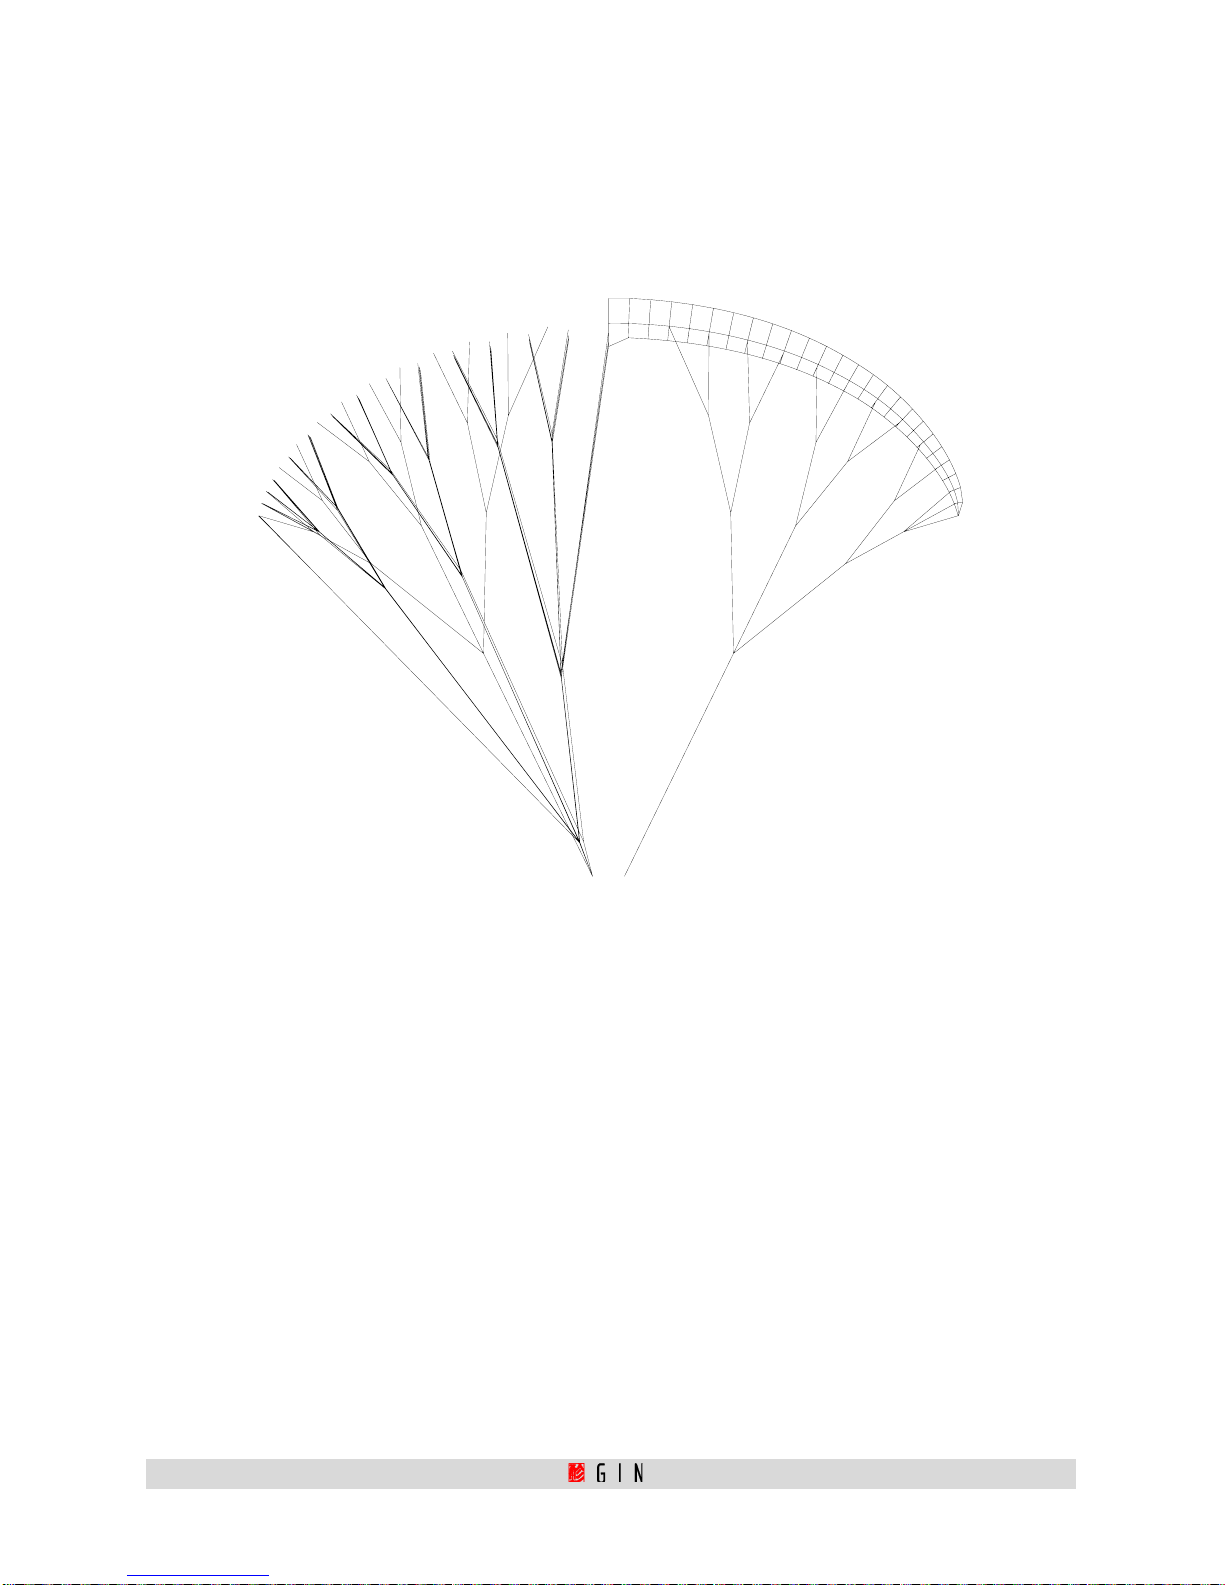
LinePlan...........................................................................................................................................21
Materials …………………………………………………………………………………………………………………22

4
1. GIN Gliders
GIN Gliders was formed in 1998 by paraglider designer and competition pilot Gin Seok Song and
histeam of engineers and test pilots.
Gin's philosophy is simple: to design gliders that he, and any other pilot, will love to fly. This
philosophy applies equally for an intermediate glider such as the Zulu, as for the world-beating
competition glider, the Boomerang. No glider is released to the market without Gin's complete
satisfaction.
Gin has over 15 years' experience of designing and manufacturing paragliders, and is backed up
by an equally experienced team, both within the company in Korea and throughout a worldwide
network of distributors and dealers. The GIN Team dominated the Paragliding World Cup from
1998 to today and has had countless other competition successes in World Cups, World and
National Championships. This high level of expertise provided by dedicated professionals
ensuresthat you get the best possible product support andaftersalesservice.

5
2. Introducing the Zulu
The Zulu is an intermediate wing built around a completely new concept. It is designed by Gin
Seok Song and Robert Graham. They have combined their years of experience to produce a wing
that is uniquely in tune with the needs of today's pilots. The Zulu offers outstanding security
and top performance combined with precise and dynamic handling. This allows the pilot to
accurately feel the sensations of flight, and thus develop an active flying style. Rapid
progression up the learning curve is enabled, as the pilot becomes acquainted with the myriad
of different movements and moods of the air. The Zulu will allow you to experience the full
pleasureof free flight, without ever compromising your safety.
For Pilots Who …
The Zulu is anideal all round glider and is suitable for the new pilotwho demands easy handling
and forgiving wing reactions up to the experienced pilot who flies frequently and wants a fast
and high performing glider with a very high safety margin. The Zulu is designed for all kinds of
flying, from ridge soaring and your first explorations from your regular hill to regular
thermaling,cross country flying and club competitions.
Cutting-edge Design
Gin and Robert have made extensive improvements to the Zulu compared to its predecessor, the
successful Oasis. Performance, take-off and handling have been improved with focus on higher
passivesafetyand more forgiving glider characteristics.
Countless prototypes have been built, tested andcompared to find theoptimum. A new planform,
optimized brake layout and a new profile give this wing an incredible safety, superb handling
andhigh stability.
A special feature on the ZULU is the “Keel” that gives the wing it’s characteristic shape. When
combined with the optimised line layout these innovations give much higher stability,
especially in extreme situations. Inflation of the canopy is easier and it minimizes movements
ofthe wing in turbulent air for your comfort.
The new wingtip shape improves flying characteristics and reduces drag from the tips. These
newdesign elements come directly from our competition gliderBoomerang4research.
Wind tunnel research and new software to optimize the shape of the leading edge has produced
aneven cleaner airfoil.
A double reinforcement at the leading edge with an optimised profile has been introduced. This
improvestake-off characteristics, performance and increases the lifetime of the canopy.
The brake line layout is designed for easy turning, with proportionally increasing brake
pressure for precise and direct handling. This enables efficient and easy climbing in thermals as
wellas using weak lift when ridge soaring.

6
Weight and drag have been reduced by using a new hi-tech, lightweight fabric and an efficient
linelayout that reduces the total amount of line.
These and other innovations ensure that by purchasing the Zulu, you are getting the best
possibleglider in its class.
Manufacturing
All GIN gliders are produced in the company's own facilities using the most modern techniques.
Highly skilled staff take extreme care during the entire manufacturing process. Stringent
quality control is made after each step, and all materials that go into each wing can be traced.
These measures guarantee that pilots fly with the assurance that their wing meets the most
exactingsafety standards.

7
3. Before you fly
Pre-delivery Inspection
The Zulu is delivered with speed system, rucksack, inner bag, compression strap, repair tape
and this manual. Your instructor or dealer should have made a test inflation followed by a test
flightbefore delivery.
Speed System
The speed system increases the maximum speed by lowering the angle of attack with a pulley-
guided, foot-operated system. Up to 12 km/h gain in speed can be realized with the accelerator
atfull travel.
It is important to have your accelerator system correctly routed through your harness and
attached to the risers with the supplied Brummel hooks. The length of the speed bar should be
initially adjusted while on the ground, sitting in the harness so that the legs are fully extended
atthe pointoffullacceleratortravel.It ishelpfultohavean assistant hold theriserstautwhile
makingthis adjustment.
Subsequent fine tuning can be done on the ground following the first flight with the speed
system.If in doubt about this procedure, consult your instructorordealer.
Riser A B C D
lengthat trim speed (XS,S / M,L) 48cm/ 52cm 48cm / 52cm 48cm / 52cm 48cm / 52cm
lengthat full speed (XS,S / M,L) 35.5cm/
36.5cm 38.5cm
/39.5cm 43cm
/45.5cm 48cm/ 52cm
BC
A
D
D
A

8
Brake line adjustment
The main brake line lengths of the Zulu are the same as on the sample that has been used for
the DHV certification test flights. These line lengths have been fine tuned by GIN test pilots,
andit should not be necessary to adjust them.
In soaring flight, it is common to fly with half a wrap on the brakes and hold the handles on the
knot.However, care should be taken to release the wrapsinanyextremesituation.
If you do need to make adjustments to suit your harness, body and flying style, we strongly
recommend that you test fly the glider with every 2cm of adjustment. There should be a
minimum of 10cm of free brake travel when the glider is flown hands-off. This prevents the
brakes being applied unintentionally when the speed system is fully engaged. We recommend a
doublesheepshank or a bowline knot for the brakehandleattachmentasshowninthe diagram.
Rucksack
All Gin gliders are delivered with a durable ripstop KODURA®rucksack with 160L capacity. This
rucksackis designed for ergonomic carrying comfort and ease ofuse.
The rucksack should be packed carefully to achieve maximum comfort. First, place the glider
inside the harness and then put the top of harness in the bottom of the rucksack with the glider
side next to the back of the rucksack. Finally, tighten the internal and external compression
straps and adjust the shoulder and waist straps to ensure the equipment stays firmly in place
whenwalking. There are also two storage pockets for accessories.
AnXXL rucksack (200L capacity) is available as an optional extraforpilotsthatrequireit.

9
Your harness
TheZulu is certified foruse with allharnesses with variable cross-bracing (GHtype). Practically
all modern harnesses are GH type harnesses. Older harnesses with fixed cross-bracing (GX
type) are not certified and should not be used. Check with the manufacturer of the harness or
yourparagliding instructor if in doubt whether your harness isaGHorGXtypeharness.
The adjustment of the harness chest strap controls the distance between karabiners and affects
the handling and stability of the glider. Tightening the chest strap increases stability but also
the risk of twisting after a collapse. With the chest strap in a more closed position the glider
also has more tendency to maintain a stable spiral, lengthening of the chest strap gives more
feedbackfrom the glider but decreases stability.
Gin calculates and draws the plan of the glider with a distance between the carabiners of 44cm.
DHV certification test flights are also carried out with this setting. We recommend setting a
distance of 42cm to 50cm between the carabiners, depending on the size and design of the
harness. There is no need to fly with a tight chest strap setting with the Zulu, as there is no
tendencyfor it to feel unstable, unlike older gliders.
Certified Weight Range
The Zulu must be flown within the certified weight range given in the reference section of this
manual. The weight range is quoted as the total weight in flight, i.e. the weight of the pilot,
glider, harness and accessories. The easiest way to check your total weight is to stand on
weighingscales with all your equipment packed into your rucksack.
Pre-flight safety
Tofly this equipment you should:
Haveappropriate practical and theoretical training and experience for thisclassofglider.
Havethe necessary insurance and licences.
Bein your right mind, unaffected by extreme stress, recreationalorprescribeddrugs.
Onlyfly in conditions suitable for your level ofparagliding.
Wearsuitable head protection, use a certified harness and emergencyparachute.
Makea thorough pre-flight check.

10
4. Flying the Zulu
We recommend that you first practice inflating your glider on a small training hill or flat ground.
Makeyourfirstflightswith your new paraglider in gentle conditions onafamiliarflyingsite.
Preparation for launch
Following a consistent method of preparation and pre-flight checks is vital for safe flying. We
recommendthe following:
On arrival at the flying site, assess the suitability of the conditions: wind speed and
direction,airspace, turbulence and thermal cycles.
Inspectyour glider, harness, reserve handle and pin, helmet andanyotherequipment.
Choosea sufficiently large take-off area with even ground andnoobstacles.
Laythe glider out according to the planform, and getthelinesandriserssortedout.
Putyour helmet on. Secure yourself in your harness anddon'tforgetthelegloops!
Connect the risers to your harness carabiners, ensuring there are no twists or loops
aroundthe lines.
Connectthe speed system to the risers with the Brummelhooks.
Do a final line check by pulling gently on the risers or lines to ensure there are no new
knots,tangles or interfering branches or rocks. Take extra careinnilorlightwinds.
Pre-flightchecklist
Reserveparachute: pin in and handle secure.
Helmetand harness buckles closed.
Linesfree.
Canopyopen and into wind.
Airspaceclear.
Take off
Thekey to a successful launch technique is to practicegroundhandlingonflatgroundwhenever
youcan.
LightorNilWindLaunch
The Zulu inflates steadily in nil-wind conditions. Simply guide the glider with the A-risers,
keeping your arms bent and hands at the level of the shoulders. Allow your arms to rise in an
arcand wait for the glider to inflateandcome above yourhead- do not pushthe risers. There is
no need topull the risershard. Run positively as the glider comes above your head. Be sure to
look up and check that the canopy is fully inflated before you take-off, and that there are no
tangles in the lines. If any irregularity should occur and you are not yet airborne, abort the
launch immediately by stalling the glider. Onsteep launches, stall one side of the glider and run
parallelto the hill.

11
Ifthe glider should come up sideways, and the situationisrecoverable,runtowardsthelower
siderather than trying to struggle against the force.
Animpulse launch where you start running with slack linesclosetothegliderisnot needed.
StrongWindLaunch
The reverse launch technique is recommended. Holding the brakes, turn around to face the wing
passing one set of risers over your head as you turn. We suggest building a "wall" by partially
inflating your glider on the ground, thus sorting out the lines thoroughly. Check the airspace is
clear and gently pull the glider up with the A risers. When the glider is overhead, check it gently
with the brakes, turn and launch. In stronger winds, be prepared to take a couple of steps
towardsthe glider as it inflates and rises.
Line knots or tangles
If you do take off with a line knot or tangle, try to get clear of the ground and any traffic before
taking corrective action. Weight shift and/or counter brake to the opposite side and pump the
knotted side with your brake. Be careful not to fly too slowly to avoid a stall or spin. If the knot
ortangle is too tight to pump out, immediately flytothelandingzoneandlandsafely.
Min sink / best glide
The minimum sink speed is achieved by pulling approximately 20 cm of brake. The theoretical
bestglide speed in calm air is realized at thehands-offposition.
Accelerated flight
Once you have become accustomed to flying the Zulu, you can practice using the speed system,
which allows improved glide in headwinds and greater penetration in strong winds. When flying
accelerated the glider is less stable and the risk of a collapse is higher. Also the glider reacts
more radically when a collapse happens during accelerated flight compared to flying at trim
speed.
Apply the speed system by pushing the speed bar progressively with your feet. Be prepared to
control roll by using weightshift and pitch by varying the amount of bar. Keep a very light
pressureon the brakes in order to feel the canopy.
Avoidflying accelerated near the ground, and be careful usingtheacceleratorinturbulence.
If you do encounter a collapse while using the accelerator, immediately step off the bar
completelybefore taking any other corrective actions.
Active flying
The Zulu has a high internal pressure, resistance to tucking and a very high degree of passive
safety. However, it is recommended that you always practise an active flying style. This will
help you avoid deflations in all but the most turbulent conditions. The key to active piloting is
keeping the glider above your head at all times. If it falls back behind you, let up the brakes. If
itsurges in front of you, counter brake until thesurgeiscontrolled.

12
If you sense a loss of pressure on one side of the canopy, smoothly apply brake and/or weight
shift on the appropriate side until you feel pressure return. In all cases, maintain adequate
airspeedand avoid overreaction.
In turbulence
Deflations of the canopy can occur in strong turbulence. The Zulu will recover without pilot
input in almost all situations, so whenever in doubt, let up the brakes and let the glider fly.
Only if the wing surges very fast in front of you should you stop it with the brakes. However, it
is recommended that you follow the advice below in order to help the wing recover more rapidly.
Asymmetricdeflation
In the event of encountering strong turbulence and suffering an asymmetric deflation (collapse
on one side), the Zulu will promptly and easily re-inflate without interference from the pilot,
but the wing will turn slightly towards the collapsed side. This might be unwanted close to the
ground or other gliders. Maintain your course by weight shifting away from the collapsed side.
This action can be aided by applying a little force on the brake opposite to the deflation. This
will normally be sufficient for recovery. However, if the deflation fails to come out, pump the
deflated side with a firm and smooth pumping motion. Let the glider regain its flying speed
afterit has re-inflated.
If you have a big collapse - especially when flying fully accelerated - you must observe the
following:
Whena bigcollapsehappens,due to the differencein weight andinertiaofthecanopy andpilot,
the pilot will continue to travel forward and the canopy will move behind the pilot at first. You
must wait until you pendulum back below the canopy before reacting and carefully counter
braking the open side of the canopy. If you react too early or you counter brake too much, you
mightrisk stalling the collapsed canopy.
Symmetricdeflation
A symmetric (frontal) deflation will normally reopen promptly by itself without any pilot input.
The glider will regain airspeed with a small surge. If counter braking, be careful not to over-
corrector to brake too early, when the glider isstillbehindyou-dangerof a stall!
Cravat/gliderwrappedaroundlines
A cravat occurs after a severe deflation when the wingtip becomes trapped in the glider lines. It
is extremely unlikely to occur on the Zulu but can happen after big deflations or in cascading
situations. Nevertheless, the pilot should be familiar with the procedure for correcting it.
Counter brake and/or weight shift and pump the brake on the tangled side. On all Gin gliders,
there is a separate stabilizer/winglet main line that goes down to the C riser. This line usually
becomes slack in the event of a cravat. Pull it down completely until it becomes tight and the
cravatnormally comes out.

13
Flatspin
In normal thermal flight, you are very far from the limits of a flat spin. Nevertheless, should
this occur, just let up the brakes immediately and wait for the glider to surge forward, checking
it with the brakes if it surges too far. Never release the spin if the glider is far back behind you,
alwaystry to release it when it is above orinfrontofyou!
Cascadeofevents
Many reserve deployments are a result of a cascade of over-corrections by the pilot. Please
notethat over-corrections are often worse than no input atall.
Losing altitude
Extremely strong and widespread lift is found, for example, in storm conditions. The best place
to be in this situation is on the ground. Nevertheless, if you have been caught out by the
weather and find yourself needing to descend rapidly, there are several ways to do so. The best
way is, of course, to find sink. Failing that, try one of the techniques below. Most of these
techniques place undue stress on your glider, and should be avoided if you want to extend its
lifetime. We recommend you initially practice these manoeuvres under qualified supervision
duringa safety training course.
Bigears
Bigears is a safe method of moderately losing altitudewhilemaintainingsomeforwardspeed.
Pullin big ears one at a time, using theouterAlineoneachside. The Zulu is fitted with a “big
earskit” to facilitate this process. Simply pull the redhandlesvelcroedtotherisersoutwards
anddownwards as shown.
Althoughthe noise of the wind around your ears mayindicatetheairspeedincreases,the
airspeeddoes not increase by pulling big ears. In factitdecreasesbyabout5km/h. You may
usethe speed bar in combination with big ears tomaintainenoughforwardspeedwhile
increasingthe sink rate.

14
Theglider can be steered while in big ears usingweightshiftalone.
When releasing the lines, the Zulu’s ears will come out on their own. Release the big ears at
least 100m above the ground. If this is not possible, keep the big ears in until you flare for
landing rather than letting them out on the approach. This is a safer method because of a
possible wind gradient close to the ground and your low airspeed/high wing loading with big
earsin.
Spiraldive
Thespiral dive should beconsidered anextreme manoeuvre. Practice spiralling with caution and
lower sink rates to get a feeling for the Zulu’s behaviour. Weight shift and pull the brake on one
side gradually. Let it accelerate for two turns and you will enter the spiral dive. Once in the
spiral, your body position will moveautomatically to the opposite side of theturn. You can
control your descent rate and bank angle by applying more or less inner brake. In fast spirals it
might be necessary to apply a bit of brake on the outside as well to prevent the outer wingtip
fromcollapsing.
WARNING! A pilot who is dehydrated and/or not accustomed to spiralling can lose
consciousness in a steep spiral dive! As with all types of aircraft, we advise you to assist the
glider to exit from the spiral dive in a controlled manner. To allow the glider to exit from a
spiral dive, your position in the harness must either be neutral, or even better, on the opposite
site to the turn while spiralling. If you release the inner brake the wing will normally exit the
spiral divebyitself. The Zulu has no tendency to stay in a stable spiral, but nevertheless, you
should know how to exit from a stable spiral: Weightshift actively to the outside of the turnand
pull the outer brake until you feel the deceleration of the wing and your body moving towards a
more upright position. Then, release the outer brake and let the glider decelerate for one or
twomore turns. Apply a short brake action on the inside brake just before the glider exits the
spiral dive completely. This will burn off the remaining energy and avoid a big pendulum
momentafter exiting the spiral.
We advise you to control the sink rate of the spiral to a maximum of 14 m per second. It is
possible to reach a much higher sink rate but the risk of blackout or stable spiral increase
proportionallywith higher sink.

15
B-stall
To quickly lose altitude without straining your body with G-force you can use the B-stall. Reach
up to the B-risers just below the maillons and twist your hands while gently pulling. It will be
difficult at first, but become lighter the more you break the airfoil. Once pulled, do not release
immediately. The glider needs to settle into a stable B-stall before releasing. On exiting the B-
stall the Zulu has a very gentle dive without deep stall tendencies. We advise you to release
theB-stall symmetrically with both hands in a decided manner.
Fullstall,dynamicstall
Thisis an extreme manoeuvre and there should never beanyneedtoperformone.
Do not take wraps with your brakes before entering a full stall. Keep your hands close to your
body during the stall, and lock them under your harness seat plate if necessary. In a stable full
stall, the canopy will oscillate back and forth. Before releasing the stall, raise your hands
slightly and evenly to fill the glider with air. If possible, let the brakes up when the glider is in
front of you to avoid excessive surge. The Zulu will slow down the surge on its own, but you
may counter brake the dive briefly for comfort if needed and then let up the brakes to regain
airspeed.Be careful to not stall the glider again whendampingthesurge.
Never attempt a stall andthen change your mind and release the brakes,as the glider will surge
radically.
Deepstall(parachuting,stablestall)
The Zulu does not have a tendency to go into or stay in a deep stall. Should this nevertheless
occur, put your hands on the A risers and push forward to gain speed. On some modern
harness/accelerator setups, you can reach the speed bar without using your hands. If so, push
the speed bar. Never try to steer out of a deep stall. Don’t touch the brakes when you are in a
deep stall, you will risk stalling the wing completely. If you are very close to the ground you
should never try to exit a stable deep stall. The sink rate in a deep stall is normally below the
sink rate of a rescue parachute; therefore you should not risk collapsing or stalling the glider
near the ground when you are in a deep stall. It is better to hang upright in your harness and
prepare for a hard landing, similar to a parachute landing and be ready for a PLF. Don’t try to
flarebefore hitting the ground in deep stall!
You can recognise a deep stall by the glider getting "mushy" and the airflow around your ears
decreasing. This situation is usually achieved by flying in turbulence or exiting a deflation with
too much brakes applied. A wet glider also has a higher deep stall tendency. If you pass through
some rain, accelerate a little and never induce big ears in this situation. Stretched lines from
hardtowing or high fabric porosity can produce a higherdeepstalltendency.
Steering without brakes
If a brake is not operational for some reason, you can steer the Zulu with the D-risers. Add
steering input by weight-shifting in your harness. Be careful not to steer too much with the
riserto avoid any possibility of a spin.

16
Aerobatics
The Zulu is not designed for aerobatics and in most countries acro flying is forbidden. Besides
the inherent risks, extreme manoeuvres of any kind place unnecessary stress on the glider and
effectivelyshorten its lifespan.
Landing with the Zulu
Select a familiar landing area free of obstacles and carefully note the wind speed and direction
in the landing area. The low minimum flying speed of the Zulu will help you to make a soft
landing in all conditions. Approach the landing with sufficient airspeed and don't leave your last
turntoo late or too steep.
Before landing, slide your legs forward in the harness so that you adopt the standing position.
NEVER land in the seated position; it is very dangerous for your back even if you have back
protection, which is only a passive safety system. Standing up before landing is an active
safetysystem,andismuch more effective.
Tow launch
The Zulu is suitable and certified for towing by pilots who have the relevant towing rating. The
Zulu has no tendencies towards deep stall/parachuting. There is sufficient margin to counter
steer the glider in a normal towing situation. Make sure you use proper equipment, experienced
personnel,the recommended techniques and all relevant safety precautions fortowing.
Motorized flight
Paraglidercertification does not include motorized flight. However, motorizedflyingwiththe
Zulu ispossible due to its very easy take-off characteristics,goodperformance, stability and
extraordinarilygood handling. Always use certified combinations of paramotor andglider.To
knowwhich glider / paramotor combinations have been certified tobeusedinGermany,check
theGerman Ultralight Association (DULV) web site www.dulv.de
Oncethe glider has been DULV certified with a certainparamotoritonlyneedsatest flight and
applicationat DULV by the manufacturer of another paramotor(thathasalreadybeencertified
inanother combination) to certify this new combination.

17
5. Care, Maintenance and Repairs
Thematerials used in the Zulu have been carefully selected formaximumdurability.
Nevertheless,following the guidelines below will keep your paraglider airworthyandwill
ensurea long period of continuous safe operation. Excessiveweariscausedbycarelessground
handlingand packing, unnecessary exposure to UV light, chemicals, heatandmoisture.
Ground handling
Thefollowing should be avoided:
Violentshocks to the upper surface (e.g. when the canopycrashestothegroundleading
edgefirst whilst ground handling).
Draggingthe glider along the ground.
Steppingon the lines or canopy. The Kevlar line insidethesheathcantakelotsof pulling
forcewithout stretching, but is sensitive to bending with smallradius.
Openingyour wing in strong winds without first untangling thelines.
UV damage
Avoidleaving the glider out in the sun unnecessarily. UVraysfromthesundegradeparaglider
cloth.
Packing instructions
Weadvise you to pack the glider “accordion wise” asshowninthedrawing.Thispacking
proceduretakes slightly longer and is easier to do withanassistant,butitconservesthe
rigidityin the profile reinforcements.
Sincefolding the glider weakens the materials, pack the glideraslooselyaspossible.

18
Transport and Storage
Moisture is the worst enemy for your glider, adversely affecting the ageing of fabric, lines and
reinforcements. The Zulu should therefore be kept dry and cool. Do not pack the glider away for
a prolonged period if it is damp, sandy, salty, or if other objects have entered the cells. Always
allow it to dry naturally before storage in a dry room. Leave the rucksack zip open whenever
possible to allow residual moisture to evaporate, and do not transport or store the glider in the
proximityof chemicals such as gasoline, paints or other solvents.
Cleaning
Use only lukewarm water and a soft cloth to clean your wing. Never use any abrasive materials
ordetergents. Only clean the wing if it is absolutelynecessarye.g.afteralandingin salt water.
Maintenance Inspections
GIN Gliders recommend that the Zulu is inspected by an authorized Gin agent after every 100
hoursflying time or every year, whichever is sooner.
To extend the validity of the DHV certification a full inspection is required after 30 months and
then every 24 months thereafter. The maintenance instructions, which can be downloaded from
ourhomepage www.gingliders.com, have to be observed.
A full inspection will give you peace of mind and extend your glider's lifetime. Additional
inspections should be performed by a qualified person following a crash or violent landing on
theleading edge, or if you note a deterioration of performanceorbehaviour.
You should also check for any damage to your lines, sail, risers and connectors before each
flight.
Repairs
Very small holes in the sail can be repaired with the sticky back tape provided with your glider.
Damaged lines should be replaced by your GIN dealer. Before fitting a replacement line, check it
for length against its counterpart on the other side of the wing. When a line has been replaced,
alwaysinflate the glider on flat ground to check that everything is in orderbeforeflying.
Major repairs, such as replacing panels, should only be carried out by the distributor or
manufacturer.

19
6. Reference
Testing and Certification
TheGIN Zulu has passed DHV 1-2(GH). The Zulu has also passed load and shock tests withaload
exceeding8G of the maximum weight in flight.

20
Technical Data
Size XS S M L
AREA 24.13m² 25.71m² 27.90m² 30.18m²
SPAN 11.06m 11.42m 11.90m 12.37m
FLAT
A.R 5.07 5.07 5.07 5.07
AREA 20.93m² 22.30m² 24.20m² 26.17m²
SPAN 8.97 9.25 9.64m 10.03m
PROJECTED
A.R 3.84 3.84 3.84 3.84
ROOT 2.79m 2.88m 3.00m 3.12m
CHORDE TIP 0.90m 0.93m 0.97m 1.01m
TOTALHEIGHT 7.10m 7.32m 7.63m 7.94m
CELLNUMBER 50 50 50 50
GLIDERWEIGHT (kg) 5.7 kg 6.1kg 6.5kg 6.9 kg
WEIGHTIN FLIGHT (kg) 55~75kg 70~90kg 85~105kg 100~125k
g
DHV 1-2 1-2 1-2 1-2
Table of contents
Other Gin Aircraft manuals