Gionee Pioneer P1 User manual

1
Gionee
Pioneer P1
User Guide

2
1. For your safety....................................................................................................................................................................................................................................3
2. Learn about the phone......................................................................................................................................................................................................................5
3. Before using.........................................................................................................................................................................................................................................7
4. Getting started.....................................................................................................................................................................................................................................9
5. Communication.................................................................................................................................................................................................................................10
6.Multimedia...........................................................................................................................................................................................................................................12
7. Connecting to networks and devices..........................................................................................................................................................................................14
8.Health & Safety.................................................................................................................................................................................. Error! Bookmark not defined.

3
1. For your safety
Read these simple guidelines. Not following them may be dangerous or illegal.
SWITCH OFF IN HOSPITALS
Follow any restrictions. Switch the device off near medical equipment. Do not use the
device where blasting is in progress.
Please keep this cell phone away from children, as they could mistake it for a toy, and hurt
themselves with it.
Don’t try to modify the phone except by the professional.
Warning!
Only use the authorized spare parts, otherwise it may damage the phone and the warranty
will not work.And it may be dangerous.
SWITCH OFF WHEN REFUELING
Don’t use the phone at a refueling point. Don’t use near fuel or chemicals.
SIM CARD AND T-FLASH CARD ARE PORTABLE
Pay attention to these small things to avoid children eating them.
Notice: The T-Flash Card can be used as a Memory Disk, the USB cable is necessary.
BATTERY
Please do not destroy or damage the battery, it can be dangerous and cause fire.
Please do not throw battery in fire, it will be dangerous
When battery cannot be used, put it in the special container.
Do not open the Battery.
If the battery or the charger is broken or old, please stop using them.
USE QUALITY EQUIPMENT

4
Use our authorized equipment or it will cause dangers
ROAD SAFETY COMES FIRST
Give full attention while driving; Pull off the road or park before using your phone if driving
conditions so require.
INTERFERENCE
All wireless devices may be susceptible to cause interference, which could affect
performance.
SWITCH OFF IN AIRCRAFT
Wireless devices can cause interference in aircraft. It’s not only dangerous but also illegal
to use mobile phone in an aircraft.
BACKUP COPIES
Remember to make back-up copies or keep a written record of all important information stored
in your phone.
CONNECTING TO OTHER DEVICES
When connecting to any external device read its user guide for detailed safety instructions. Do
not connect with incompatible products.
2. Learn about the phone

5
Button
Press
Back
In the menu mode, press the key to go back to upper menu.
Menu
Opens a menu with items that affect the current screen orApplication.
Home
Open the Home screen, If you’re viewing the left or right
Extended Home screen, opens the central Home screen.
Search
On the home screen, opens Google search for searching
Your phone and the web. In many applications, opens a
Search box for searching within the application.
Power
(Left)
Long press the key to turn on the phone, in the power on status, press the
key to lock keypad and screen, long press the key to show phone options.
Volume
Up/Down
(Right side)
When a call is in progress, Increases or decrease the call volume, When
the phone is ringing, silences the ringer. On the Home screen when no calls
in progress, Increase or decreases the ringtone volume, or sets the phone
to be silent instead of ringing. In other applications, controls the volume of
music, spoken directions, and other audio.
3. before using
Insert SIM card
The Phone is a Dual SIM mobile phone allowing you to use the facility of two networks. To
insert SIM card(s):
1. Switch off the mobile phone and remove the rear cover and battery.
2. Insert the SIM card correctly in the card slot(s)

6
3. Finally insert the battery and replace the rear cover of the mobile phone.
Note: The SIM card is a small object; please keep the card out of the reach of children to
avoid swallowing the card by accident. Do not touch the metal surface of the SIM card and
keep it away from electromagnetism to avoid loss and damage of the data. You will not be
able to connect to the network if the SIM card is damaged.
Insert Memory card
U
Us
se
e
o
on
nl
ly
y
c
co
om
mp
pa
at
ti
ib
bl
le
e
m
me
em
mo
or
ry
y
c
ca
ar
rd
ds
s
a
ap
pp
pr
ro
ov
ve
ed
d
b
by
y
o
ou
ur
r
c
co
om
mp
pa
an
ny
y
f
fo
or
r
u
us
se
e
w
wi
it
th
h
t
th
hi
is
s
d
de
ev
vi
ic
ce
e.
.
I
In
nc
co
om
mp
pa
at
ti
ib
bl
le
e
m
me
em
mo
or
ry
y
c
ca
ar
rd
ds
s
m
ma
ay
y
d
da
am
ma
ag
ge
e
t
th
he
e
c
ca
ar
rd
d
o
or
r
t
th
he
e
d
de
ev
vi
ic
ce
e
a
an
nd
d
c
co
or
rr
ru
up
pt
t
t
th
he
e
d
da
at
ta
a
s
st
to
or
re
ed
d
i
in
n
t
th
he
e
c
ca
ar
rd
d.
.
T
To
o
i
in
ns
se
er
rt
t
t
th
he
e
m
me
em
mo
or
ry
y
c
ca
ar
rd
d:
:
1. Power off the mobile phone, then remove the rear cover and battery.
2. Insert the memory card into the slot at the bottom.
3. Finally insert the battery and the rear cover of the mobile phone.
Remove/Insert Battery
You may need to remove the battery to insert SIM cards, Memory card or for replacing the
battery.
To insert the battery:
1. Invert the back of the mobile phone upward and then take off the rear cover.
2. Insert the battery as shown in the following figure.

7
3. Finally place back the rear cover of the mobile phone.
Note: Please use the original-packing battery and accessories.
Charger
1. Connect the charger to the charger jack on the phone.
2. Next connect the charger to a power socket, the charging starts, with the charging icon
in an animated state.]
3. When the charging icon becomes static, it indicates that the battery is full.
4. Disconnect the charger from the power socket and the phone.
Note: Slight heating during charging is normal. It indicates that the battery is full, when the
charging icon becomes static.
4. Getting started
4
4.
.1
1
T
Tu
ur
rn
n
o
on
n/
/o
of
ff
f
y
yo
ou
ur
r
p
ph
ho
on
ne
e
Turn on the phone
Long press the power key to start up the cell phone. If you have started up the SIM card
1/2 lock, you have to enter SIM card 1/2 PIN.
Turn off the phone
Long press the power key, a context menu will prompt, touch “Power off” to switch off the
cell phone.
To wake up the phone
If you don’t use the phone for a while, the Home screen or other screen you are
viewing is replaced with the lock screen and then the screen darkens, to conserve the
battery.
1. Press the Power button.
2. Drag the lock icon downward. The last screen you were working on opens.

8
4
4.
.2
2
G
Ge
et
tt
ti
in
ng
g
t
to
o
k
kn
no
ow
w
t
th
he
e
H
Ho
om
me
e
s
sc
cr
re
ee
en
n
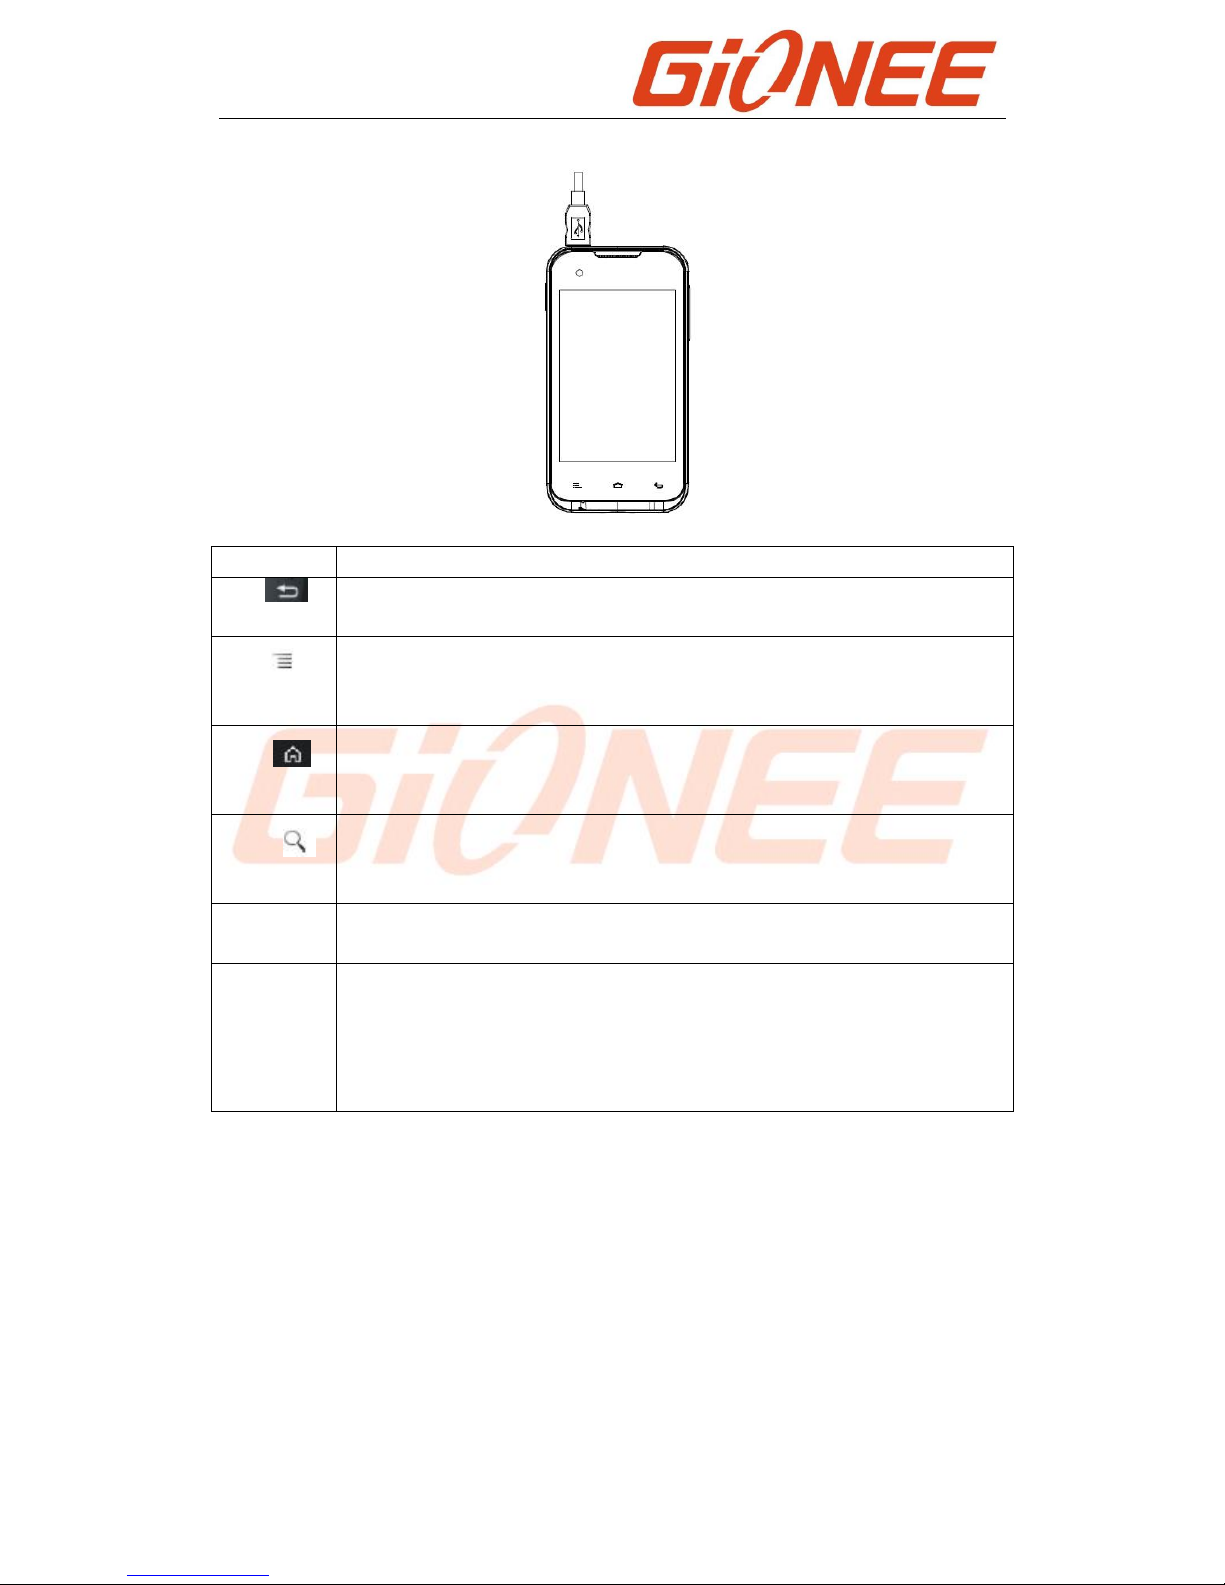
The Home screen is your starting point to access all the features on your phone. It
displays application icons, widgets, shortcuts, and other features. You can customize the
Home screen with different wallpaper and display the items you want.
At the top of the screen, the Status bar displays the time, information about the status of
your phone, and icons for notifications that you’ve received.
Touch the Launcher icon at the bottom of the screen to view all installed applications.
4
4.
.3
3
U
Us
si
in
ng
g
t
th
he
e
t
to
ou
uc
ch
h
s
sc
cr
re
ee
en
n
The main way to control Android features is by using your finger to touch icons, buttons,
menu items, the onscreen keyboard, and other items on the touch screen.
Touch: To act on items on the screen, such as application and settings icons, to type
letters and symbols using the onscreen keyboard, or to press onscreen buttons, you
simply touch them with your finger.
Touch & hold: Touch & hold an item on the screen by touching it and not lifting your finger
until an action occurs. For example, to open a menu for customizing the Home screen,
you touch an empty area on the Home screen until the menu opens.
Drag: Touch & hold an item for a moment and then, without lifting your finger, move your
finger on the screen until you reach the target position. You drag items on the Home
screen to reposition them and you drag to open the Notification panel.
Swipe or slide: To swipe or slide, you quickly move your finger across the surface of the
screen, without pausing when you first touch (so you don’t drag an item instead). For
example, you slide the screen up or down to scroll a list, and in some Calendar views you
swipe quickly across the screen to change the range of time visible.
Double-tap: Tap quickly twice on a webpage, map, or other screen to zoom. For example,
you double-tap a section of a webpage in Browser, then zoom that section to fit the width
of the screen. You can also double-tap to control the Camera zoom, In Maps, and in other
applications, Double-tapping after pinching to zoom in some applications, such as browser,
reflow a column of text to fit the width of the screen.
Pinch: In some applications (Such as Maps, Browser, and Gallery) you can zoom in and
out by placing two fingers on the screen at once and pinching them together (to zoom out)
or spreading them apart (to zoom in).
Rotate the screen: On most screens, the orientation of the screen rotates with the phone
as you turn it from upright to its slide and back again. You can turn this feature on and off.
4
4.
.4
4
C
Cu
us
st
to
om
mi
iz
zi
in
ng
g
t
th
he
e
H
Ho
om
me
e
s
sc
cr
re
ee
en
n
To add items to the Home screen

9
1. Open the Home screen where you want to add the item. For an introduction to working
with the Home screen, including how to switch Home screens.
2. Press menu and touch Add. Or just touch & hold an empty location on the Home
screen. If there are no empty spots on the Home screen. Add is dimmed; you must
delete or move an item before you can add another item, or switch to another Home
screen.
3. In the menu that opens, touch the type of item to add. You can add the following types
of items to the Home screen.
Shortcuts: Add shortcuts to applications, a bookmarked webpage, and a favorite contact,
a destination in Maps, a Gmail label, a music play list, and many other items. The
shortcuts available depend on the applications you have installed.
Widgets: Add any of miniature applications (widgets) to your Home screen, including a
clock, a music player, a picture frame, the Google search bar, a Power manager, a
calendar that shows upcoming appointments, and a News & weather widget. You can also
download widgets from Android Market.
Folder: Add a folder where you can organize Home screen items, or folders that contain
all your contacts, contacts with phone number, or starred contacts. Your folder’s contents
are kept up to date automatically.
To move an item on the Home screen
1. Touch & hold the item you want to move, until it vibrates. Don’t lift your finger.
2. Drag the item to a new location on the screen. Pause at the edge of the screen to drag
the item onto another screen pane.
3. When the item is where you want it, lift your finger.
To remove an item from the Home screen
1. Touch & hold the item you want to remove, until it vibrates. Don’t lift your finger. The
Launcher icon changes to a Trash Can icon.
2. Drag the item to the Trash Can icon.
3. When the icon turns red, lift your finger.
4
4.
.5
5
C
Co
on
nn
ne
ec
ct
t
t
to
o
n
ne
et
tw
wo
or
rk
k
When you assemble your phone with a SIM card from your wireless service provider, your
phone is configured to use your provider’s mobile networks for voice calls and for
transmitting data.
Settings--> Communication--> Dual SIM settings; the name of the wireless service
provider you’re currently registered with is selected in the list.
Click the name of the network provider, you can rename it or set the color for it.
You can set default SIM for voice call and messaging;
4
4.
.6
6.
.
I
In
np
pu
ut
t
t
te
ex
xt
t
You can touch a text field where you want to enter text to open the keyboard.

10
To enter text
Touch a text field, the onscreen keyboard opens.
Touch the keys on the keyboard to type; the characters you’ve entered appear in a
strip above the keyboard. With suggestions for the word you are typing to the right.
Press the left or right arrows in the strip to view more suggestions.
Press space or a punctuation mark to enter the highlighted suggested word. If you
touch the space key, the suggestion strip offers a series of punctuation marks you can
touch, to replace the space with, or touch another suggested word to enter it.
Use the Delete key to erase characters to the left of the cursor.
When you’re finished typing, Press Back to close the keyboard.
5. Communication
5
5.
.1
1
M
Ma
ak
ke
e
a
a
c
ca
al
ll
l
* Touch the phone icon on the Home screen or if you’re already working with Contacts or
the Call log, touch the Phone tab.
* Enter the phone number you want to dial;
* Touch the phone icon to dial the number that you entered.
Space key
Delete
Switch Input methods
Touch once to capitalize the next letter
you type. Touch &hold for all caps.
Touch to insert emoticons
Touch to insert punctuation

11
Answer a call
When there is an incoming call, you can:
. Drag the answer icon downwards to answer the call
. Drag the reject icon upwards to decline.
Emergency Services.
You call emergency service number directly without sim card.Differnet networks using
different emergency numbers,Please query your network operator.
5.2 Contact
In the contacts, press option key to enter.
Search
Input letter or number, the corresponding contacts will be list below the search bar.
New Contact
Select save the contact on phone or sim cards; enter detailed information and select done
to save new contact.
Display Options
Select to show only contacts with phone sort list by, view contact names as or phone.
Contacts Group
Select to add contact to group or create new group
Contact Delete
Select to delete one or more contacts.
Touch to erase a digital, Touch
& hold to erase the entire
number.
Touch & hold to enter “+”
Touch to make a voice call.
Touch to send a message.

12
5
5.
.3
3
M
Me
es
ss
sa
ag
gi
in
ng
g
You can use this phone to exchange text messages and multimedia messages with your
friends on their mobile phones. The messages to and from the same contact or phone
number will be in a single conversation. So you can see your entire message history with
a person conveniently.
Messages
Select messages in the main menu or standby mode to enter.select New message to
create new SMS or MMS and send.
1. Enter receivers a number or add number from contacts.
2. Press Type to Compose to input message contacts.
3. If you want to send picture or vedio file , select attach icon to add pictuers videos and
audio .The messages will shift to multimedia messages automatically.
4. Press send and select SIM card to send the messeges.
6. Multimedia
6
6.
.1
1
C
Ca
am
me
er
ra
a
Camera is a combination camera and camcorder that you use to shoot and share
pictures and videos.
Note: Pictures and videos are stored on the phone’s SD card, so you must install one
to use camera.
6.1.1 Take a picture
Adjust your exposure and other settings if you wish. Or leave them on automatic.
Frame your subject on screen.
Touch the Shutter icon screen.
Touch to preview your pictures or videos in Gallery.
Touch to take a picture or shoot a video.

13
6.1.2 To shoot a video
Select the Camcorder.
Adjust the quality, color effect, and other settings if you wish. Or leave them on
automatic.
Point the lens to frame the scene where you want to start.
Touch the Start Video icon. Camera starts shooting the video.
Touch Stop video icon to stop shooting. An image from your most recent video is
displayed as a thumbnail at the top right.
6
6.
.2
2
V
Vi
ie
ew
w
a
al
lb
bu
um
ms
s
Enter Main menu to touch the Gallery icon to view albums of your pictures and videos.
Gallery presents the pictures and videos on your SD card, including those you’ve taken
with Camera and those you downloaded from the web or other locations.
You can do the following operations:
To share pictures: you can share your pictures through MMS, Bluetooth, and so on.
To delete pictures: You can delete the pictures you are viewing.
To get details about the picture: You can view more details about the picture.
6
6.
.3
3
M
Mu
us
si
ic
c
You use Music to organize and listen to music and other audio files that you transfer to
your SD card from your computer.
7. Others
7
7.
.1
1
B
Br
ro
ow
ws
se
er
r
You can use your phone to access wireless application protocol (WAP) sites and use
Touch to open the current playlist
Touch to shuffle the current playlist
Touch to repeat the current playlist; touch
again to repeat the current track

14
WAP-based services To browse WAP pages,you must subscribe to the data service from
your service provider and configure your phones relevant settings Select the website list
on screen or input URL in address bar to visit.
7
7.
.2
2
C
Cl
lo
oc
ck
k
After setting the alarm clock,ring or vibration to remind you when rthe phone will arrive the
time you set.in order to achieve the role of the alarm clock.you can press the option key to
add alarm,or press the ADD alarm on the interface to add.You can set the alarm clock
according to your needs.
7
7.
.3
3
C
Ca
al
le
en
nd
de
er
r
In the calendar you check schdules for currentmonth.There has no alarm for the date with
schedule.Select one date to check all schedules for the day,or you can edit or delet the
schedules.
8. Connecting to networks and devices
Your phone can connect to a variety of networks and devices, including mobile networks
for voice and data transmission, Wi-Fi data networks, and Bluetooth devices, such as
headsets. You can also connect your phone to a computer, to transfer files from your
phone’s SD card, and share your phone’s mobile data connection via USB or as a
portable Wi-Fi hotspot.
8
8.
.1
1
W
WL
LA
AN
N
WLAN is a wireless networking technology that can provide internet access at distance of
up to 100 meters, depending on the Wi-Fi router and your surroundings. You can
configure the WLAN as follow:
Main menu--> Settings-->Wireless & network, check Wi-Fi to turn it on.
Enter Wi-Fi settings. The phone scans for available Wi-Fi networks and displays the
names of those it finds. Secured networks are indicated with a Lock icon. If the phone
finds a network, you connected previously, It connects to it.
Touch a network to connect to it.
If the network is open, you are prompted to confirm that you want to connect to that
network by touching connect.
If the network is secured, you’re prompted to enter a password or other credentials
8
8.
.2
2
B
Bl
lu
ue
et
to
oo
ot
th
h
Bluetooth is a short-range wireless communications technology that devices can use to
exchange information over a distance of about 10 meters. The most common Bluetooth
devices are headphones for making calls or listening to music, hands-free kits for cars ,
and other portable device, including laptops and cell phones.

15
8.2.1 To send a file
Main menu--> settings-->wireless & network, check Bluetooth to turn it on.
Enter File manager to select a file and long press it, Select Send--> Bluetooth.
Touch Scan for devices, the phone will scan for and display the IDs of all available
Bluetooth devices in range.
Touch the ID of the other device in the list to pair them.After paired the file will be sent.
8.2.2 To receive a file
Main menu--> settings-->wireless & network, check Bluetooth to turn it on. Ensure
the Bluetooth settings--> Discoverable is on.
After paired, the phone will receive the file. The file you received will save to the
“Received file”folder on the SD card.
8.2.3 To connect to a Handsfree device
Main menu--> settings-->wireless & network--> Bluetooth settings, Select “Scan
for devices”;
Turn on the Handsfree device; Select the Handsfree device in the list to pair.
After paired, you can use the Hands free device to enjoy music and receive call.
8
8.
.3
3
C
Co
on
nn
ne
ec
ct
ti
in
ng
g
t
to
o
a
a
c
co
om
mp
pu
ut
te
er
r
v
vi
ia
a
U
US
SB
B
You can connect your phone to a computer with a USB cable, to transfer music, pictures,
and other files between your phone’s SD card and the computer.
When connecting your phone to a computer and mounting its SD card, you must follow
your computer’s instructions for connecting and disconnecting USB devices, to avoid
damaging or corrupting the files on your SD card.
You can’t share your phone’s data connection and SD card via USB cable at the same
time. If you are using USB tethering, you must turn that off first.
8.3.1 To connect your phone to a computer via USB
1. Use the USB cable that came with your phone to connect the phone to a USB port on
your computer. You receive a notification that the USB is connected.
2. Open the notification panel and touch USB connected.
3. Touch USB storage in the screen that opens to confirm that you want to transfer files.
When the phone is connected as USB storage, the screen indicates that USB storage is in
use and you receive a notification. You phone’s SD card is mounted as a drive on your
computer. You can now copy files to and from the SD card.
During this time, you can’t access the SD card from your phone, so you can’t use
applications that rely on the SD card, such as camera, Gallery, and Music. You also can’t
share your phone’s data connection with your computer via USB.
8
8.
.4
4
W
Wo
or
rk
ki
in
ng
g
w
wi
it
th
h
s
se
ec
cu
ur
re
e
c
ce
er
rt
ti
if
fi
ic
ca
at
te
es
s
If your organization’s VPN or Wi-Fi Network rely on secure certificates, you must obtain
the certificates and store them in your phone’s secure credential storage, before you can
configure access to those VPN or Wi-Fi networks on your phone.

16
If you network administrate instructs you to download the certificates from a website,
you’re prompted to set a password for the credential storage when you download the
certificates.
8.4.1 To install a secure certificate from the SD card
1. Copy the certificate from your computer to the root of the SD card
2. Settings>Touch Application Tab
3. Touch security.
4. Touch Install from SD card.
5. Touch the file name of the certificate to install. Only the names of certificates that you
have not already installed on your phone are displayed.
6. If prompted, enter the certificate’s password and touch OK.
7. Enter a name for the certificate and touch OK.
8
8.
.5
5
T
To
o
d
di
is
sa
ab
bl
le
e
p
ph
ho
on
ne
e
c
ca
al
ll
ls
s
(
(A
Ai
ir
rp
pl
la
an
ne
e
m
mo
od
de
e)
)
Some locations may require you to turn off your phone’s mobile, Wi-Fi, and Bluetooth
wireless connections. You can turn off all these wireless connections at once by placing
your phone in Airplane mode.
1. Press & hold the Power button
2. Touch Airplane mode.
9. Health and safety
Please read these simple guidelines. Not following them may be dangerous or illegal.
SAR Compliance
Your phone is designed not to exceed the limits of emission of radio waves recommended
by international guidelines.
SAR (specific absorption rate) is the measurement of body-absorbed RF quantity when
the phone is in use. SAR value is ascertained according to the highest RF level generated
during laboratory tests.
The SAR value of the phone may depend on factors such as proximity to the network
tower, use of accessories and other enhancements.
The true SAR level during normal phone usage will be much lower than this level.
The highest SAR value of this device at the head and body are 1.45W/kg and 1.35 W/kg
respectively averaged over 1.5cm gap of human tissue.
SAR Recommendations
Use a wireless hands-free system (headphone, headset) with a low power Bluetooth
emitter.
Please keep your calls short and use SMS whenever more convenient. This advice
applies especially to children, adolescents and pregnant women
Make sure the cell phone has a low SAR.
Prefer to use your cell phone when the signal quality is good.

17
People having active medical implants should preferably keep the cell phone at least 15
cm away from the implant.
Maintain a preferable distance of 15 mm from the device.
Safe Driving
Do not use the phone while driving. When you have to use the phone, please use the
personal hands-free kit.
Please do not put the phone onto any passenger seat or any place from which it may fall
down in case of vehicular collision or emergency braking.
During Flight
Flight is influenced by interference caused by the phone. It is illegal to use a phone on the
airplane. Please turn off your phone during a flight.
In Hospitals
Your Phone’s radio waves may interfere with the functioning of inadequately shielded
medical devices. Consult a physician or the manufacturer of the medical device to
determine whether they are adequately shielded from external Radio Frequency. Switch
off your device when regulations posted instruct you to do so.
To avoid potential interference with implanted medical devices such as a pacemaker or
cardioverter defibrillator:
Always keep your phone at least 15.3 centimeters (6 inches) from the medical device.
Do not carry the wireless device in a breast pocket.
Turn off the phone if there is any reason to suspect that interference is taking place.
Follow the manufacturer directions for the implanted medical device.
If you have any questions about using your wireless device with an implanted medical
device, consult your health care provider.
Unsafe Areas
Please turn off your phone when you are close to a gas station or in the vicinity of any
place where fuel and chemical preparations, or any other dangerous goods are stored.
Note. If the version of user manual upgrades, we will do not notice. The company
has the final interpretation of the user manual.
Table of contents
Other Gionee Cell Phone manuals

Gionee
Gionee Gpad G1 User manual

Gionee
Gionee V5 User manual

Gionee
Gionee V6L User manual

Gionee
Gionee Infinity G1 User manual

Gionee
Gionee P2M User manual

Gionee
Gionee HY1-5237 User manual

Gionee
Gionee GPAD G2 User manual

Gionee
Gionee M3 User manual

Gionee
Gionee P5 mini User manual

Gionee
Gionee S96 User manual