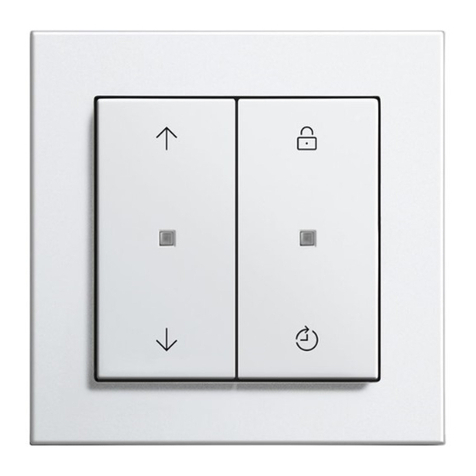
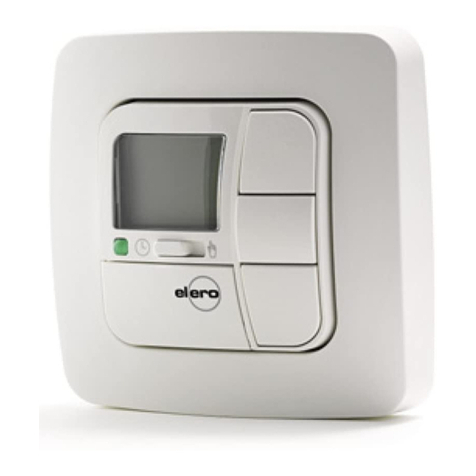
Gira Electronic timer User manual

GIRA
Info
Electronic timer
Installation Instructions
Electronic timer 3/07 Page 1 of 14
Contents
1. Warning
2. Function
3. Installation Instructions
4. Programming
4.1. Setting Current Data
4.2. Astro Function
4.3. Random Function
4.4. Factory Setting and Reset
4.5. Programming Individual Switching Time Events
4.6. Deleting Switching Time Events
4.7. Programming an Astro Time Shift
5. Mode Selection
5.1. Selecting the Program Memory
5.2. Selecting the Time Switch Function
5.3. Manual Operation
5.4. Winter/Summer Time Selection
6. What To Do in Case of Mains Failure?
7. Specifications
8. What happens if...
9. Acceptance of guarantee
2. Function
This attachment is installed into a 60 mm flush box
(recommendation: deep box) in conjunction with the
insert.
The device facilitates the programmed, time-control-
led switching of various lighting fittings (please refer to
Specifications) up to a maximum of 1000 W.
Electronic timer
Attachment
Order no.: 0385 xx
1. Warning
Caution: The installation and assembly of electrical
equipment may only be performed by a skilled elec-
trician.
This electronic timer has been designed for switch-
ing lamps. For the lamp load ratings, please refer to
the Specifications of the flush-mounted insert. Do
not switch any other loads.

GIRA
Info
Electronic timer
Installation Instructions
Electronic timer 3/07 Page 2 of 14
Product features:
• Simple operation through a four-key field.
• Two independent program memories for a total of
up to 18 switching time events (e. g. nine ON and
nine OFF times).
• Time switch function.
• Random function.
• Astro function.
• Summer/winter time change-over.
• Individual astro function by astro time shift.
• Driving via extensions (insert).
• Reset facilitates resetting to factory adjustment.
• Up to 24-hour power reserve (maintenance-free,
without batteries).
3. Installation Instructions
The attachment can only be placed into service in
conjunction with the Electronic timer insert.
Electronic timer insert should be installed in a 60
mm flush box (recommendation: deep box).
The connecting terminals of the insert must be down.
Plug attachment onto the insert together with frame
.
Electrical contacting is established through plug .
l
4. Programming
Note:
If no operation is made for longer than 2 minutes dur-
ing programming, the electronic timer will automaticliy
return to displaying the current data.
Programming can be cancelled any time by pressing
the SET key for about 3 seconds.
4.1. Setting Current Data
Prior to entering your data please make a reset to
bring back the device to factory default setting:
Depress the MODE and SET keys at the same time
until all display segments light up for a short time (ap-
prox. 7 sec.). This completes the reset.
To enable the Electronic Time Switch to start its ope-
ration, please enter the current data:
Hold the SET key depressed until the display reads
prog.
Use key ON or OFF to select the following settings
(please refer to the diagramm):
Time, Date : Set current data
A: Programming memory A
B: Programming memory B
Astro : Shift astro times
Mode Set
ON OFF

GIRA
Info
Electronic timer
Installation Instructions
Electronic timer 3/07 Page 3 of 14
Accept the Time, Date symbol by shortly depressing
the SET key.
The Electronic Time Switch is now in the current data
setting mode.
Setting summer/winter time:
Use key ON or OFF to set summer time (S) or winter
time (W).
Accept by shortly depressing the SET key.
Setting the current month:
Use key ON or OFF to set the month (01..12).
Accept by shortly depressing the SET key.
Setting the current date:
Use key ON or OFF to set the day (01..31) .
Accept by shortly depressing the SET key.
Setting the current day
Use key ON or OFF to set the day (MO..SU).
Accept by shortly depressing the SET key.
Setting the current hour
Use key ON or OFF to set the hours (00..23).
Accept by shortly depressing the SET key.
Setting the current minute
Use key ON or OFF to set the minutes (00..59).
Accept by shortly depressing the SET key.
The electronic timer has taken over the current data
and changed over to its normal operating mode.
4.2. Astro Function
If the light is to be turned on at sunset or to be turned
off at sunrise, switching time events once pro-
grammed must be continuously adapted to the
changing astronomical calendar in automatic mode
(please refer to the illustration).
For this purpose, the Electronic Time Switch calcu-
lates the time of sunrise and sunset for each day of
the year (for the approximate location of Würzburg).

GIRA
Info
Electronic timer
Installation Instructions
Electronic timer 3/07 Page 4 of 14
By adding the astro program, programmed OFF
switching time events are executed at the time of sun-
rise already. Programmed ON switching time events
are only executed at the time of sunset. OFF switch-
ing time events that are in the darkness in the morn-
ing and ON events in the evening darkness are not
shifted.
To adapt the pre-programmed astro times to the local
conditions, the astro times can be shifted by a maxi-
mum of +/- 1 hour and 59 minutes.
Programming examples:
If light is to be turned on daily at sunset and to be
turned off at sunrise, the following programming and
activated astro function can be used to effect this:
Event 1: MO-SU at 16:00 hrs. ON.
Event 2: MO-SU at 22:00 hrs. OFF.
To turn off at 6:30 hrs. in the morning, at the latest and
to turn it on 19:10 hrs. in the evening at the earliest,
use the following program with activated astro func-
tion (please refer to the illustration):
Event 1: MO-SU at 6:30 hrs. OFF.
Event 2: MO-SU 19:10 hrs. ON.
4.3. Random Function
If the random function is activated for a certain switch-
ing time event, this switching time is varied by +/- 15
minutes. The random time shift is used for all switch-
ing time events and changed daily.
If the astro function is additionally activated for this
switching time event, this switching time event will be
adapted to the respective time of sunrise or sunset
and varied by a random time of +/- 15 minutes.
4.4. Factory Setting and Reset
Manual operation has, in all cases, priority over auto-
matic mode.
In the two program memories Aand B, independent
programs can be stored (e.g. for everyday use, week-
end, vacations etc.). A maximum of 18 different
switching time events can be used in the two program
memories altogether (e.g. nine time events per mem-
ory).
Program memories are factory-preset but can be
overwritten by your own programming (in such case,
erase switching times not required).
15 16
3
4
5
6
7
8
9
5 1015202530354045 50
4
5
6
7
8
9
10
Jan. Jul. Dez.Apr. Okt.
WZ SZ
KW
Dunkelheit Darkness
Tageslicht
16
17
18
19
20
21
17
18
19
20
21
22
5 1015202530354045 50
Jan. Jul. Dez.Apr. Okt.
WZ SZ
KW
Daylight
Dunkelheit Darkness
Kalenderwoche Calendarweek
4
5
6
7
8
9
10
5 101520253035404550
15
16
17
18
20
21
19
UhrzeitTime
Ausgeführte AUS-Zeit
Practiced OFF-time
Programmierte AUS-Zeit 6.30 Uh
r
Programmed OFF-time 6.30 h
Programmierte EIN-Zeit 19.10 Uhr
Programmed ON-time 19.10 h
Ausgeführte EIN-Zeit
Practiced ON-time
Tageslicht
Daylight
Dunkelheit Darkness
Darkness
Dunkelheit

GIRA
Info
Electronic timer
Installation Instructions
Electronic timer 3/07 Page 5 of 14
Memory A:
Event 1: OFF 07:00 hrs, MO-FR, astro function active
Event 2: OFF 09:00 hrs, SA-SU, astro function active
Event 3: ON 20:00 hrs, MO-FR, astro function active
Event 4: ON 21:00 hrs, SA-SU, SA-SO, astro function
active
Memory B:
Event 1:OFF 07:00 hrs, MO-FR.
Event 2:OFF 09:00 hrs, SA-SU
Event 3:ON 20:00 hrs, MO-FR
Event 4:ON 21:00 hrs, SA-SU
Timer function C:
The timer has been factory-preset to 15 minutes. For
individual settings, please refer to Chapter 7.
By RESETTING the Electronic Time Switch, pro-
gramming can be reset to factory defaults. In this case
the current data and your own programming will be
deleted.
To RESET:
Depress the MODE and SET keys at the same time
until all display segments light up for a short time (ap-
prox. 7 seconds). This completes the reset.
4.5. Programming Individual Switching Time
Events
Note: If switching time events overlap (identical time
and day for ON and OFF), the OFF event will be exe-
cuted.
Example:MO ON 8:15 hrs. not executed.
MO OFF 8:15 hrs. executed.
Depress the SET key until the display reads prog.
Selecting the program memory
Use key ON or OFF to select program memory Aor
B. Select that programm memory where your new
switching time events are to be stored.
Accept your selection by shortly depressing the SET
key.
The electronic timer is now in the mode for program-
ming new switching time events.
Selecting a memory location
Key ON or OFF indicates the switching time events
which a re already stored in the program memory.
With the ON key, you can scroll towards earlier
events, while the OFF key brings you to later events.
New switching time events are automatically sorted
into this list.
Note: A maximum of 18 different switching time
events can be stored. These events can be distribut-
ed over two program memories (A, B). If all these 18
switching time events have been programmed (e. g.
nine ON and nine OFF times), the display reads
‘FULL’ at the end of the table of events.
Select your desired memory location where the new
switching time event is to be stored. Any switching
time event existing at this memory location will be
overwritten.
Mode Set
ca. 7 Sek.
A
B
C
WS
Datum
Uhrzeit
Prog Zufall Astro
Mo
Di
Mi
Do
Fr
Sa
So
ON
OFF
Mode Set
ON OFF

GIRA
Info
Electronic timer
Installation Instructions
Electronic timer 3/07 Page 6 of 14
Empty memory locations are indicated by a
"——:——" symbol.
Accept your selection by shortly depressing the SET
key.
Programming ON or OFF
Use key ON or OFF to select the direction of the lou-
ver the new switching time event is to be executed for.
The associated symbol will flash in the display.
Accept your selection by shortly depressing the SET
key.
Programming the hour
Use key ON or OFF to select the hour (00..23) where
the switching time event to be programmed is to be
executed.
Accept your selection by shortly depressing the SET
key.
Programming the minute
Use key ON or OFF to select the minute (00..59)
where the switching time event to be programmed is
to be executed.
Accept your selection by shortly depressing the SET
key.
Programming the days
Key ON or OFF change between the days where the
event is to be executed. The current day is shown in
a frame.
The MODE key can be used for cancelling or select-
ing the day.
If the day has been selected for an event, a bar is
shown within the frame. An empty frame indicates
that the event is not executed at this day.
Use key ON or OFF to change to the next day and se-
lect or cancel with the MODE key.
This is the way how to select those days on which the
event is to be executed.
After selecting your desired days:
Accept by shortly depressing the SET key.
Programming the random function
Use key ON or OFF to activate or deactivate the ran-
dom function for the programmed switching time
event.
If the random symbol flashes the random function is
deactivated for this switching time event.
Accept the random function by shortly depressing the
SET key.
Datum
Uhrzeit
Prog Zufall Astro
Mo
Di
Mi
Do
Fr
Sa
So
A
A
Datum
Uhrzeit
Prog Zufall Astro
Mo
Di
Mi
Do
Fr
Sa
So
ON
A
Datum
Uhrzeit
Prog Zufall Astro
Mo
Di
Mi
Do
Fr
Sa
So
ON
A
Datum
Uhrzeit
Prog Zufall Astro
Mo
Di
Mi
Do
Fr
Sa
So
ON
A
Datum
Uhrzeit
Prog Zufall Astro
Mo
Di
Mi
Do
Fr
Sa
So
Mode Set
A
Datum
Uhrzeit
Prog Zufall Astro
Mo
Di
Mi
Do
Fr
Sa
So
ON OFF
A
Datum
Uhrzeit
Prog Zufall Astro
Mo
Di
Mi
Do
Fr
Sa
So
ON

GIRA
Info
Electronic timer
Installation Instructions
Electronic timer 3/07 Page 7 of 14
Programming the astro function
Use key ON or OFF to activate or deactivate the astro
function for the programmed switching time event. If
the astro symbol flashes the astro function is deacti-
vated for this switching time event.
By shortly depressing the SET key, the time, day, run-
ning direction, astro function and random function
data is now stored in the program memory.
The Electronic Time Switch is ready for the pro-
gramming of the next switching time event.
End of programming
Having stored all desired switching time events in the
program memory, exit the programming mode by de-
pressing the SET key for at least 3 seconds. Program-
ming can thereby be cancelled any time.
4.6. Deleting Switching Time Events
Depress the SET key until the display reads prog.
Selecting the program memory
Use key ON or OFF to select program memory Aor
B. Select that program memory where the switching
time events are to be deleted.
Accept your selection by shortly depressing the SET
key.
Use key ON or OFF to select the switching time event
to be deleted.
There are two different ways to delete the switching
time events:
1. By depressing the MODE key for at least 3 sec-
onds.
2. By cancelling all the days associated with the
switching time event.
An empty memory location is indicated by a
"——:——" symbol.
Having deleted the switching time events, exit the
programming mode by depressing the SET key for at
least 3 seconds.
4.7. Programming an Astro Time Shift
The astro shift function facilitates the individual adap-
tation of the factory-pre-calculated sunrise and sunset
times to your local conditions. This shift is executed
for all days throughout the year.
Depress the SET key until the display reads prog.
Use key ON or OFF to select the astro symbol.
Accept by shortly depressing the SET key.
The maximum astro time shift for the sunrise and sun-
set times is 1 hour and 59 minutes, in each case.
A
Datum
Uhrzeit
Prog Zufall Astro
Mo
Di
Mi
Do
Fr
Sa
So
ON
Mode Set
3 Sek.
A
Datum
Uhrzeit
Prog Zufall Astro
Mo
Di
Mi
Do
Fr
Sa
So
ON OFF

GIRA
Info
Electronic timer
Installation Instructions
Electronic timer 3/07 Page 8 of 14
Sunrise hour astro time shift
Use key ON or OFF to set the hour (-1, -0, 0, 1) by
which the astro curve is to be shifted.
-1: Shifting the astro curve 1 hour towards
earlier times.
1: Shifting the astro curve 1 hour towards later
times.
-0, 0: No shifting within the hour range, sign for
shifts within the minute range (please refer
to the next programming step).
Accept by shortly depressing the SET key.
Sunrise minute astro time shift
Use key ON or OFF to set the minute (00..59) by
which the astro curve is to be shifted.
Accept by shortly depressing the SET key.
Sunset hour astro time shift
Use key ON or OFF to set the hour (-1, -0, 0, 1) by
which the astro curve is to be shifted.
-1: Shifting the astro curve 1 hour towards
earlier times.
1: Shifting the astro curve 1 hour towards later
times.
-0, 0: No shifting within the hour range, sign for
shifts within the minute range (please refer
to the next programming step).
Sunset minute astro time shift
Use key ON or OFF to set the minute (00..59) by
which the astro curve is to be shifted.
By shortly depressing the SET key, the new astro
times are stored in the memory.
5. Mode Selection
5.1. Selecting the Program Memory
As described in chapter 4.4, two separate program
memories with up to 18 switching time events can be
occupied.
Thus, two individual switching time programs can be
made up and one of them, in each case, activated by
selecting the corresponding program memory.
Shortly depressing the MODE key selects the pro-
gram memory (Aor B), whose switching time events
are to be executed.
Note:
Memory Ccontains the timer function (refer to Chap-
ter 5.2.) and cannot be occupied by switching time
events.
The display shows the program memory selected.
Only the switching time events programmed in this
selected program memory are executed.
If neither programm memory and no timer function C
has been selected, the Electronic Time Switch is in
manual operation. Programmed switching time
events and the twillight function will then not be exe-
cuted.
Datum
Uhrzeit
Prog Zufall Astro
Mo
Di
Mi
Do
Fr
Sa
So
ON
Datum
Uhrzeit
Prog Zufall Astro
Mo
Di
Mi
Do
Fr
Sa
So
ON
Datum
Uhrzeit
Prog Zufall Astro
Mo
Di
Mi
Do
Fr
Sa
So
OFF
Datum
Uhrzeit
Prog Zufall Astro
Mo
Di
Mi
Do
Fr
Sa
So
OFF
A
W
Datum
Uhrzeit
Prog Zufall Astro
Mo
Di
Mi
Do
Fr
Sa
So

GIRA
Info
Electronic timer
Installation Instructions
Electronic timer 3/07 Page 9 of 14
5.2. Selecting the Timer Function
When the timer function is activated the light is turned
on for a preset time between 1 minute and up to 23
hours and 59 minutes.
Choosing the timer function
Select memory Cby shortly depressing the MODE
key (Cflashes in the display). This memory contains
the timer function.
Note:
Programm memories Aand Bare occupied by
switching time events and must not be selected for
activating the timer function.
The timer function is factory-preset to a period of 15
minutes.
By shortly tipping (1.5 sec. max.) the ON key, you can
start the timer function. This turns on the consumer.
The display counts down.
The colon between the hours and minutes flashes.
The light can be turned off any time by shortly tipping
(1.5 sec. max.) the OFF key.
When the counter reads ‘0’ the light is turned off. The
display then reads the preset time (factory setting is
15 min.).
By depressing the ON key, the preset time can be re-
started, even during the ‘time lapse’.
Individual timer period setting
To increase the timer period, depress the ON key for
more than 1.5 sec. To decrease, depress the OFF key
for more than 1.5 sec.
Setting range:
1 minute minimum.
23 hours, 59 minutes maximum.
Setting an individual timer period does not trigger any
switching event.
5.3. Manual Operation
Using the ON key turns ON the consumer, whereas
the OFF key turns it OFF.
For this purpose the key must be held depressed for
at least 1 second.
5.4. Winter-/Summer Time Selection
By shortly depressing the SET key, you can change
between:
- Winter time and
- summer time
C
Datum
Uhrzeit
Prog Zufall Astro
Mo
Di
Mi
Do
Fr
Sa
So
Datum
Uhrzeit
Prog Zufall Astro
Mo
Di
Mi
Do
Fr
Sa
So
ON
C
Datum
Uhrzeit
Prog Zufall Astro
Mo
Di
Mi
Do
Fr
Sa
So
C

GIRA
Info
Electronic timer
Installation Instructions
Electronic timer 3/07 Page 10 of 14
6. What to Do in Case of Mains Failure
In the event of mains failure, the display shows the
"——:——" symbol for some time before it goes off.
The switching time events programmed by the user
and the current data are kept. The Electronic Time
Switch has a power reserve of approx. 24 hours.
When the mains voltage has reappeared, the last
switching time event in the program memory is exe-
cuted. This moves the lights to the current position as
determined by the program. The programmed data is
kept and the Electronic Time Switch is ready for ser-
vice again.
Example:
Light ON time: 20:15 hrs.
Mains failure at 20:10 hrs.
Mains voltage reappearing at 20:20 hrs.
The last 20:15 hrs. ON switching command is exe-
cuted. The lights go on, the current position is
reached.
For mains failures of longer than 24 hours, the pro-
grammed switching time events are kept.
The current data (time, date) will get lost and must be
re-entered. The display will read 12:00 hrs. and flash.
7. Specifications
Rated input voltage
(insert): 230 V, 50 Hz,
neutral conductor required
Switching capacity: refrer to 'Insert' Operating
Instructions manual
Accuracy: +/- 1 minute per month
Power reserve: Approx. 24 hrs. (no battery
required)
Switching time events: 18 max. (in 2 program
memories)
Timer Function: 1 min. up to 23 hrs. 59 min.
Random generator: +/- 15 minutes
Astro program: Shifting by +/- 1 hour 59
min.
Interval between two
switching events: 1 minute min.
Connection: To be plugged onto Elec-
tronic Time Switch insert
Ambient temperature: 0 °C .... 45 °C
Storage temperature: -10 °C .... +60 °C
8. What happens if...
... the astro times do not seem to be executed cor-
rectly or show highdeviations from sunrise and
sunset, respectively?
Check the settings of the date and of the astro time
shifts.
... the operating voltage had failed?
The display shows the --:-- symbol, the 24 hour power
reserve is activated. If the voltage failure is less than
24 hours, the unit resumes the set functions without
any maintenance. After longer voltage failure, the cur-
rent data (time, date) must be re-entered.
... the programmed time events are executed at a
difference of one hour?
Check the summer/winter time setting and correct, if
necessary.
... the unit is to be reset to factory setting?
Make a RESET. Press the SET and MODE keys si-
multaneously for approx. 7 seconds.
...the lighting goes out after some time after hav-
ing been switched on manually?
An automatic switching time event was executed, or
the time switch function (memory C) has lapsed.

GIRA
Info
Electronic timer
Installation Instructions
Electronic timer 3/07 Page 11 of 14
Acceptance of guarantee
We accept the guarantee in accordance with the corresponding legal provisions.
Please return the unit postage paid to our central service department giving a brief description of the
fault:
Gira
Giersiepen GmbH & Co. KG
Service Center
Dahlienstrasse 12
D-42477 Radevormwald
Gira
Giersiepen GmbH & Co. KG
Postfach 1220
D-42461 Radevormwald
Telefon: +49 / 21 95 / 602 - 0
Telefax: +49 / 21 95 / 602 - 339
Internet: www.gira.de

GIRA
Info
Electronic timer
Installation Instructions
Electronic timer 3/07 Page 12 of 14
Contents
1. Warning
2. Function
3. Installation Instructions
4. Connection
5. Specifications
6. Acceptance of guarantee
2. Function
This electronic timer insert is to be installed into a 60
mm flush box (recommendation: deep box) in con-
junction with the attachment.
The device facilitates the programmed, time-control-
led switching of various lighting fittings (please refer to
Specifications). Due to the use of an efficient relay
with potential-free contacts, consumers of up to a
maximum of 1000 W can be switched.
Via two separate extension inputs, the consumer can
be switched by a mechanical push-button (two-key
principle, 2x n. o. contacts).
The electronic timer insert has six connecting termi-
nals and one plug connector for contact with the at-
tachment.
Electronic timer
Insert
Order no.: 0385 xx
1. Warning
Caution! The installation and assembly of electrical
equipment may only be performed by a skilled elec-
trician.
Not suitable for disconnecting.
This timer has been designed for the automatic
switching of lights. If they are used for any other pur-
poses which may entail hazards (e. g. switching
heaters) such hazards will have to be eliminated by
the user by taking additional suitable safety mea-
sures.
Mode Set
A
B
C
WS
Datum
Uhrzeit
Prog Zufall Astro
Mo
Di
Mi
Do
Fr
Sa
So
ON
OFF
ON OFF
N L
2
1
OFF
ON
N L2
1
OFF
ON
Nebenstelle AUS
Extension OFF
Nebenstelle EIN
Extension ON
Potentialfreier Kontakt
GB
Neutralleiter
Neutral
Phase
Phase
Schnittstelle Aufsatz
Attachment interface
Sensoranschluß
Sensor connection

GIRA
Info
Electronic timer
Installation Instructions
Electronic timer 3/07 Page 13 of 14
3. Installation Instructions
The electronic timer insert can only be used in con-
junction with the attachment.
Electronic timer insert is provided for installation in
a 60 mm flush box (recommendation: deep box).
The connecting terminals of the insert must be down.
Plug attachment onto the insert together with frame
.
Electrical contacting is established through plug .
(For the description, installation and connection of the
attachment, please refer to separate instructions.)
4. Timer insert Connection
Connect phase L with the relay input (‘jumper’).
Two-phase connection
The timer insert is provided with potential-free
contacts.
Connection with mechanical extension
Connect phase L with the relay input (‘jumper’).
N L
12
L
N
N L
12
L2
N
L1
N L
12
L
N

GIRA
Info
Electronic timer
Installation Instructions
Electronic timer 3/07 Page 14 of 14
5. Specifications
Rated voltage: 230 V AC, 50 Hz
(neutral conductor
required)
Switching Capacity
Incandescent lamps: 1000 W
Halogen HV lamps: 1000 W
Halogen LV lamps with
TRONIC transformers: 750 W
Convent. transformers: 750 VA
Conv. transformer with at least 85 % rated load.
Fluorescent lamps
Uncompensated: 500 VA
Shunt-compensated
(47µF): 400 VA
Twin-lamp circuit: 1000 VA
Energy-saving lamps:
When using energy-saving lamps, mind high surge
peak currents.
Check lamps for suitability prior to use.
Relay output: 1 potential-free n. o.
contact
Not suitable for discon-
necting.
Switching time interval: 1 minute min.
Connecting terminals: Screw terminals for
2.5 mm² max. or
2 x 1.5 mm²
Automatic cut-out: 16 A max.
Acceptance of guarantee
We accept the guarantee in accordance with the corresponding legal provisions.
Please return the unit postage paid to our central service department giving a brief description of the
fault:
Gira
Giersiepen GmbH & Co. KG
Service Center
Dahlienstrasse 12
D-42477 Radevormwald
Gira
Giersiepen GmbH & Co. KG
Postfach 1220
D-42461 Radevormwald
Telefon: +49 / 21 95 / 602 - 0
Telefax: +49 / 21 95 / 602 - 339
Internet: www.gira.de
This manual suits for next models
1
Table of contents
Other Gira Timer manuals
Popular Timer manuals by other brands

Marathon
Marathon Jumbo user manual
WHITLOCK INSTRUMENT
WHITLOCK INSTRUMENT DNFT-LED-PS manual

Titan Controls
Titan Controls Hades 1 Easy guide
Intermatic
Intermatic PB314EK Installation, operation & service manual
Orno
Orno OR-PRE-445 manual
Competition Electronics
Competition Electronics POCKET PRO operating manual
