Clarius IP
Illuminators are powered by Power over the Ethernet (PoE) via a network cable
connector to a PoE IEEE802at compliant switch.
The power consumption of the illuminators comply with PoE IEEE802at.
These illuminators are not supplied with a power cord. Instead, they are supplied
with a 1m long network cable. At the end of the network cable is a female RJ45
Cat5e compliant connector with an IP68 rated cover.
The IP68 rated cover is supplied with the illuminator. Follow the instructions
supplied with the connector on how to attached if to the male Cat5e network
cable.
ENSURE THAT THE IP68 RATED COVER IS CORRECTLY FITTED AND ATTACHED TO THE
NETWORK CABLE. IF THIS IS NOT FITTED CORRECTLY MOISTURE CAN GET INTO THE
CONNECTOR AND MAY CAUSE THE UNIT TO MALFUNCTION. THIS WOULD VOID THE
WARRANTY ON THE PRODUCT.
Power and Control Cable Connections
Remote Switching
The Illuminator may be activated remotely by a volt-free contact latched across
the telemetry wires (see Diagram above).
Photocell following contact
Volt-free relay contact-normally open (day) to normally closed (night). See
Diagram above.
Recommended PSU
Switch or injector compliant Any IEEE802.3at
Power supply should be approved to relevant EN Safety standards.
Power Supply should be used with devices to protect against short circuits and
overload.
External circuits used for interfacing with the illuminator (Camera Day/Night
switching and Telemetry) should be reinforced/double insulated from mains.
Trouble Shooting
Ensure all tests are undertaken by a qualied, trained engineer and ensure safe
working practices are followed at all times.
Step 1: Basics
• Check power connection
• Ensure PoE+ spectrum switch/injector
• Check the photocell is working - cover photocell ,light should turn on
• Ensure power supply is suitably rated to product - check the specications
Step 2: Set up Camera, lens and Illumination
• Check alignment of lamp
• Check camera lens- fully open at night and set correctly
• Check model number to performance specication to ensure required
distance is achievable
Step 3: Call for further assistance
If the lamp is still not delivering the required performance, please contact
Technical Support for further assistance
Note down:
• Model number and serial number of illuminator
• Camera make and model
• Lens make and model
mount
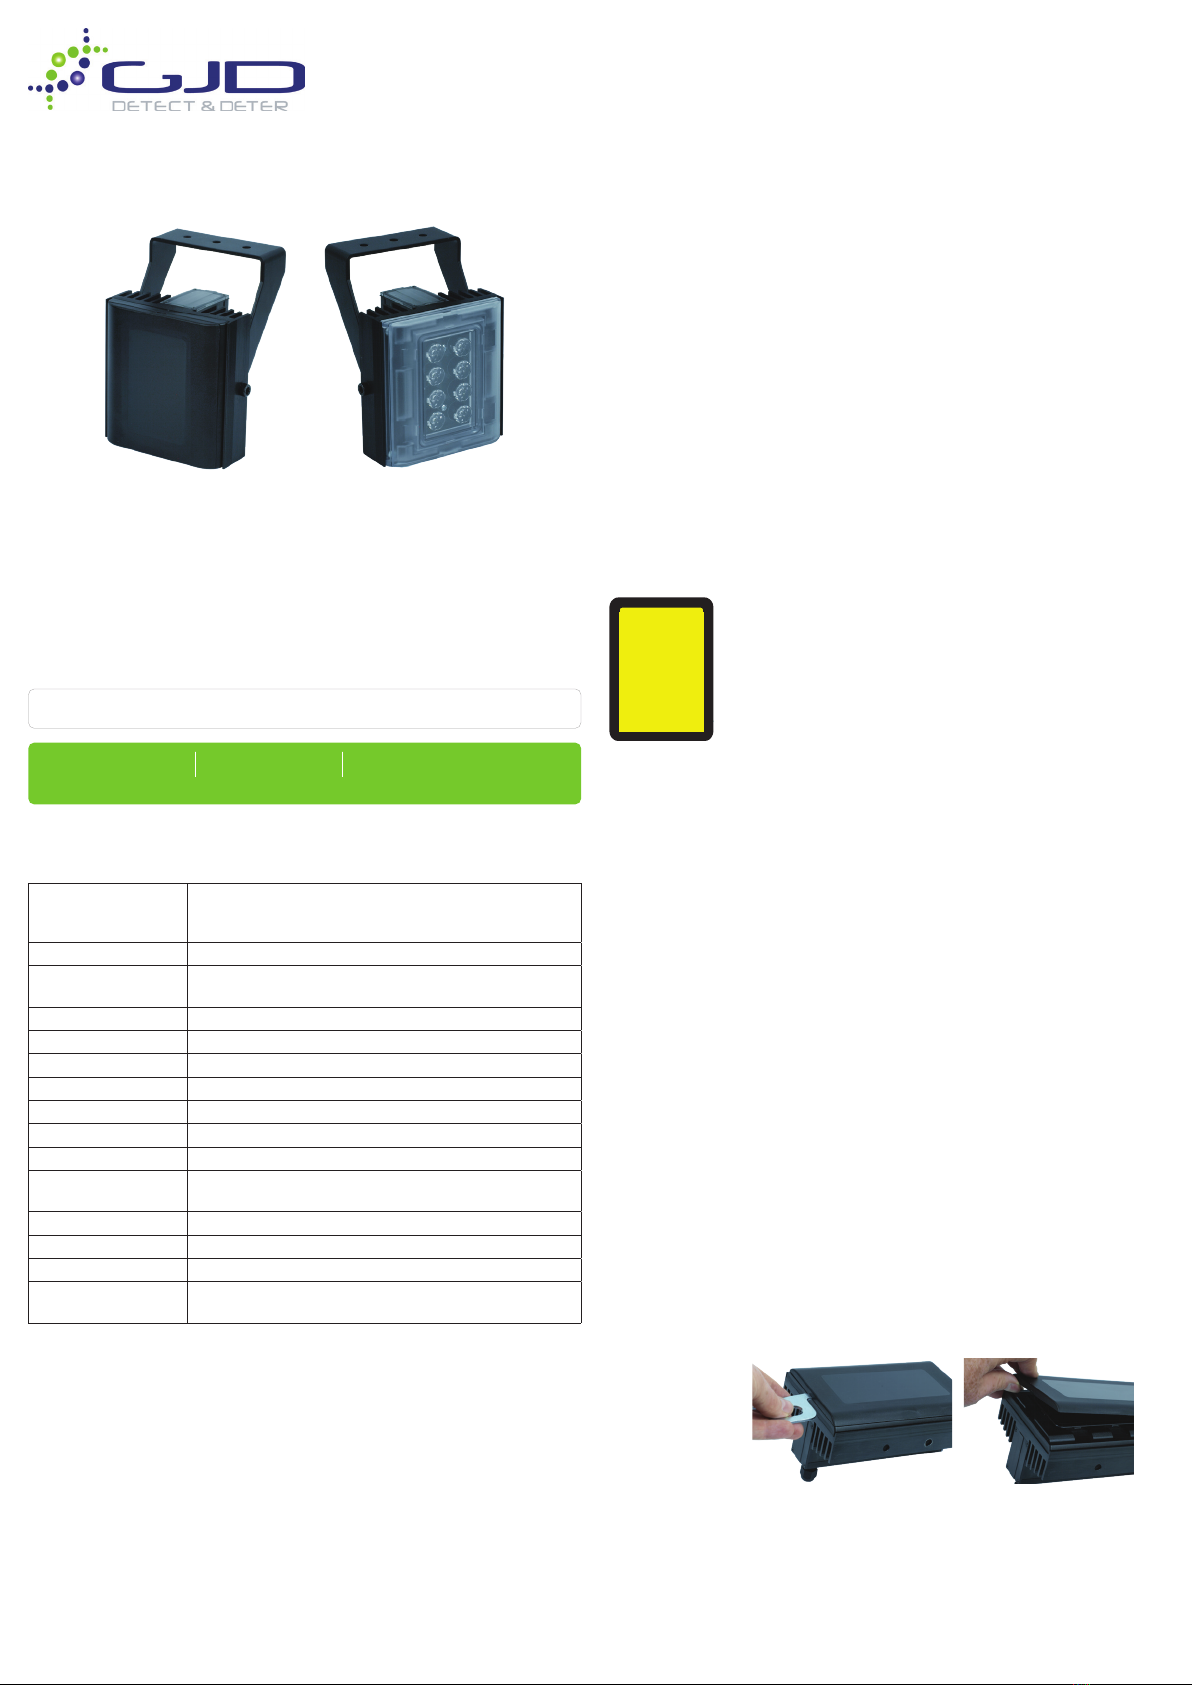
Reset
Shows LED
Pressure relief
valve
IM Ethernet cable with
IP68 connector
OUTPUT +
OUTPUT -
TELEMETRY +
TELEMETRY -
Factory Default Settings
When using the system for the rst time, or if a factory reset has been made, the
following settings are used.
Product IP number: 192.168.0.10
Subnet mask: 255.255.255.0
Default router: 192.168.0.1
Login
1. Open a web browser.
2. In the address eld, type in the selected unit IP-address.
3. The user interface login page is shown.
4. Create your username and password.
Safety Warning
• When the lamp is running, it is hot to touch. before touching switch off the illuminator
and allow to cool for a minimum of 10 minutes.
• The illuminator should be positioned so that prolonged starring into the illuminator at a
distance closed than 1m is not expected.
• The light source of this illuminator is not replaceable, when the light source reaches its
end of life the whole illuminator should be replaced.
• If the exible power cord of the illuminator is damaged it should be exclusively
replaced by an authorised service agent.
• This equipment is not suitable for us in locations where children are likely to be present.
Certifications
This product complies with the European Directive 2014/30/EU Electromagnetic
Compatibility and 2014/35/EU Low Voltage Directive by meeting the following
standards:
This symbol on the product means that the electrical and/or electronic
equipment to which it relates should be disposed of at the end of life separately
from domestic household waste.
There are separate collection systems for recycling in the EU. For more information
please contact the Local Authority or supplier of the product.
Photocell
The photocell is designed to automatically switch the lamps on at dusk and turn
off at dawn. A high degree of hysteresis is incorporated to void on/off switching
in marginal conditions. The unit is factory set at approximately 30 Lux On and 70
Lux Off, but can be adjusted.
CE-EMC EN55032
EN55024
EN 61547
EN 55015
EN 62493
EN 50130-4
(IT Immunity)
(IT Emmision)
(Lighting-Immunity)
(Lighting-Emission)
(Lighting -EMF)
(Alarm-EMC)
CE-LVD EN 60598-1
EN 60598-2-1
(Luminaires-General)
(Luminaires)
Safety EN 62471 Risk
group 2
(LED safety)
Environmental IEC/EN 60529
EN50130-5
IP66
(Alarm-environmental)
USA cULus
FCC
UL 2108
UL 8750
Class B
AUS RCM (AS/NZS CISPR 22 Class B)
RoHS: Restriction of Hazardous Substances European directive
202/95/EC
Certications
WEEE: Waste Electrical & Electronic Equipment European
directive 202/96/EC