-3-
Changing The Random Code
In the unlikely event of another radio signal interfering with and
affecting the correct operation of a single RF channel, the D-Tect
X MKIII is able to generate an alternative random code.
To do this, press the Program Button on the D-Tect X MKIII nine
times. On the ninth press, ‘hold’ down the button for 5 seconds
until the LED goes out, then release the button.
Erase the existing code from the receiver by holding down the
Channel Button until the alarm LED ashes, then repeat steps
3 to 6 of the CODE LEARNING procedure to program in the new
code.
Code Learning
Before the detector is mounted in its desired position, the
detector and receiver must be able to communicate with each
other, therefore the detector’s identication and communication
codes must be transferred to the relevant channel in the receiver
unit in the following way:
1. Connect a 12-24 volt power source to the receiver
and insert the 2 x CR123 lithium batteries into the
detector. Always check that the batteries have been
inserted correctly. When powered up the detector takes
approximately 2-3 minutes to stabilise and the red LED
in the detector will ash 3 times when the power is
connected.
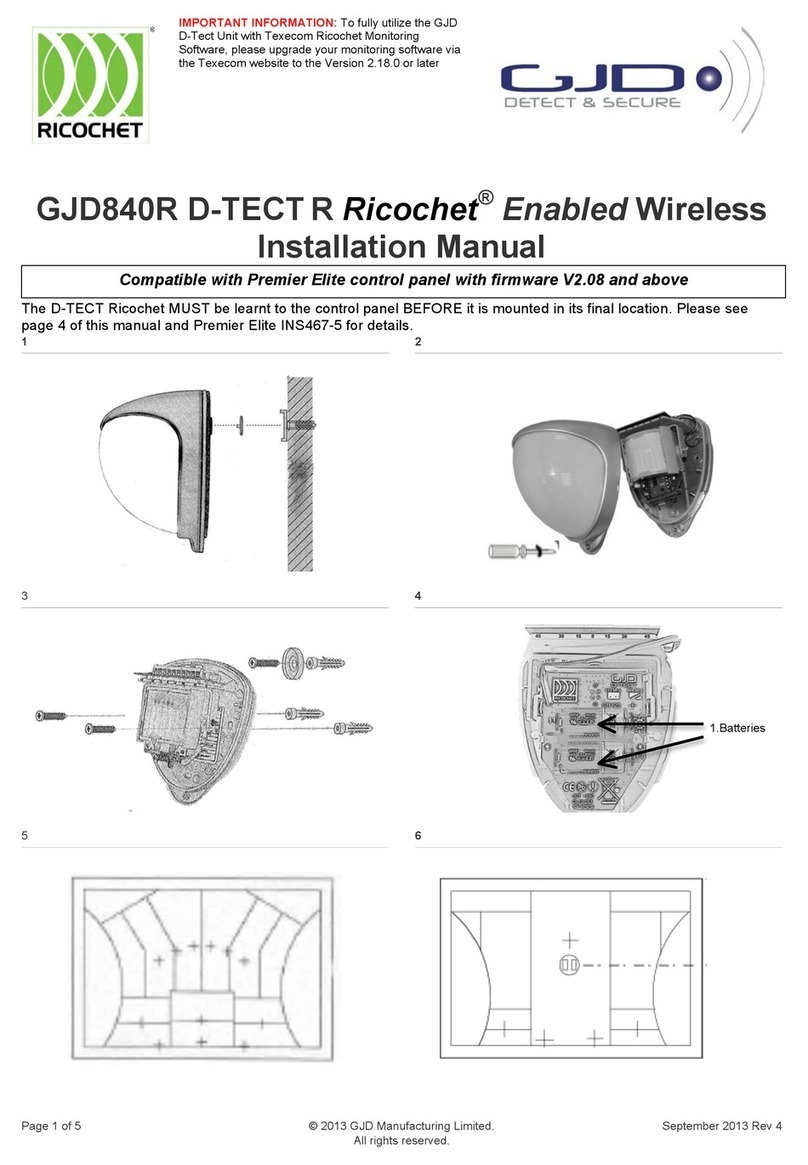
2. Plug in the Program Link Wire from the detector into the
code transfer socket in the receiver (see Figure 7).
3. Press the ‘Program button’ on the detector once (see
Figure 8) The red LED will light.
4. Immediately press the respective ‘Channel button’ on the
receiver module once and the LEDs will light up for the
selected channel. When the red LED on the detector turns
off the code is transferred and the 3 LEDs on the selected
channel will ash. The code has now been transferred
from the detector to the receiver.
5. Remove the link wire from the receiver module and plug
it into the Tamper PCB Connector on the top of the
detector (see Figure 6). Repeat steps 2 to 5 for all the
detectors to be on the receiver module. The receiver box
is equipped with one 4 way PCB module as standard, but
can accept up to 3 additional expander modules in total.
As each module can communicate with 4 detectors, each
receiver box is able to monitor 16 separate wireless D-Tect
X detectors.
6. To verify that a code has been stored for any individual
detector, press the appropriate Channel button on the
receiver module once and 4 LED’s will ash 3 times to
indicate a code has been stored.
7. To delete a code from a channel, press and hold the
Channel button; all 4 LEDs will light. Keep the Channel
button pressed for approximately 4 seconds until the
alarm LED ashes, then release the button. The channel
is now blank.
Walk Test
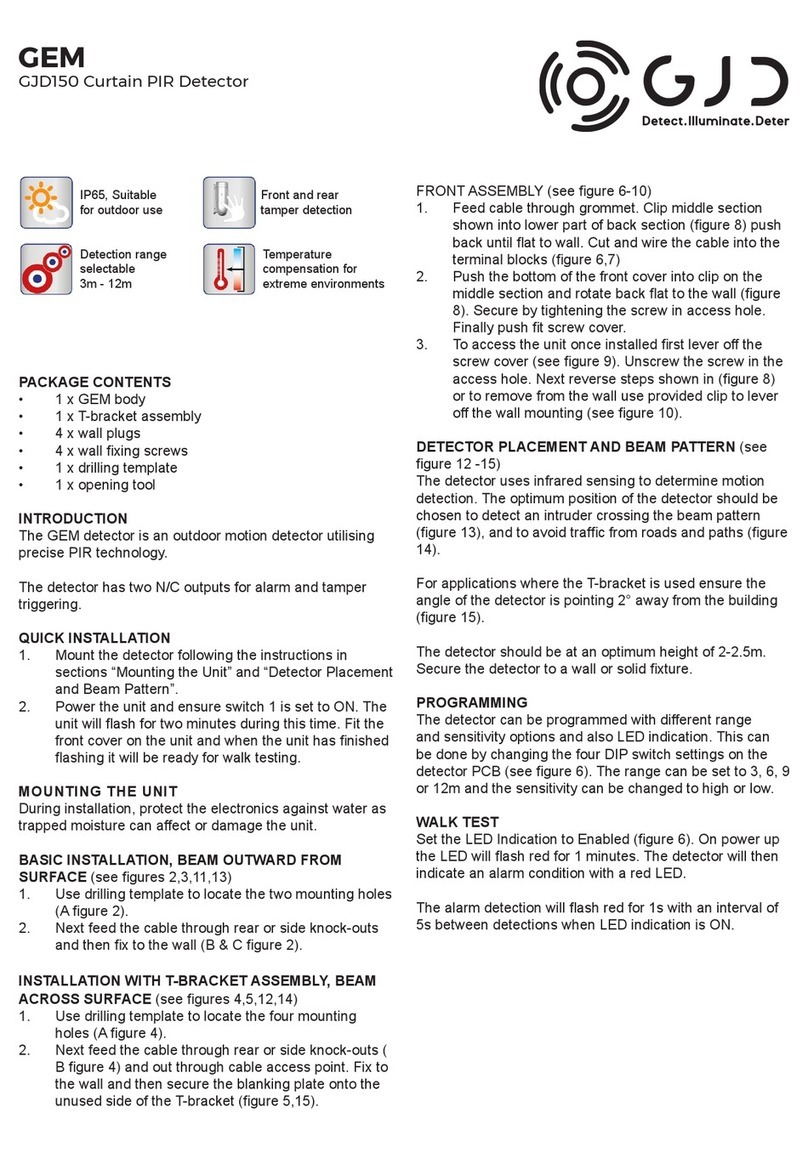
In walk test mode, the detection LED is set to ON. The detection
LED lights each time D-Tect X MKIII Wireless Detector detects
your presence.
To enter the walk test mode, press the programming button once.
The unit can then be aligned. The detection LED lights on D-Tect
X MKIII Wireless Detector every time detection takes place.
The test mode ends automatically ve minutes after last
detection.
Note: When you conduct a walk test, make sure that the
front cover is in place. Do not conduct walk tests with the
cover removed.
The range of the detector increases without the protective front
cover. Therefore the front cover must be tted to establish the
correct beam pattern. Pan and tilt the lens module over the eld
of view to obtain the correct coverage area.
Tamper Protection
The D-Tect X MKIII Wireless Detector is tted with two tamper
switches to detect the front cover being removed and removal
from the xing surface. The ying lead on the rear of the D-Tect X
MKIII Wireless Detector PCB must be plugged into the top PCB
for the tamper switches to operate.
Detector Features
• There are independent front and rear tamper circuits which
are combined to provide a volt-free tamper alarm contact.
• The exibility of the various outputs and timers allows the
D-Tect X MKIII to be used in multiple situations without
the need for any further customised equipment – and of
course as these are wireless movement detectors the
installation work is minimal.
• The integral dual axis tilt sensor allows 180 degrees of
pan and 90 degrees of tilt. This increases the speed of
the outdoor installation and provides incredible accurate
aiming of the detection pattern, particularly important for
BS 8418 installations.
• The electronics module is acrylic coated for additional
component stability
• The sensors are encased in a vandal-resistant high impact
ABS housing with a UV stabilised translucent front cover,
ensuring the sensor is impervious to and unaffected by
adverse weather conditions.
• The combination of precision electronics, digital white light
lter and double shielding eliminates false and nuisance
alarms from the sun and othe visible light sources.
• When a low battery is detected a signal is sent to the
receiver unit which displays a low battery indication and
operates the ‘LOW BATTERY’ contacts for the relevant
detector.
• The D-Tect X MKIII design has a neat and aesthetically
pleasing appearance with no visible indication of the
orientation of the detector head.
