GL Communications PacketExpert 10GX Operator's manual

Page 1
PacketExpert™ 10GX (PXN100)
RFC2544 - Quick Verification
If this is your First-Time-Use of PacketExpert™10GX unit, then we recommend you follow all the steps explained in
PacketExpert-10GX-Quick-Install-Guide before proceeding with the steps below.
Quick Verification
“RFC 2544” is a basic application available within the PacketExpert™ software. No additional license installation is required.
For ‘RFC 2544’ functional verification, self-test can be performed using a single PacketExpert™ 10GX unit.
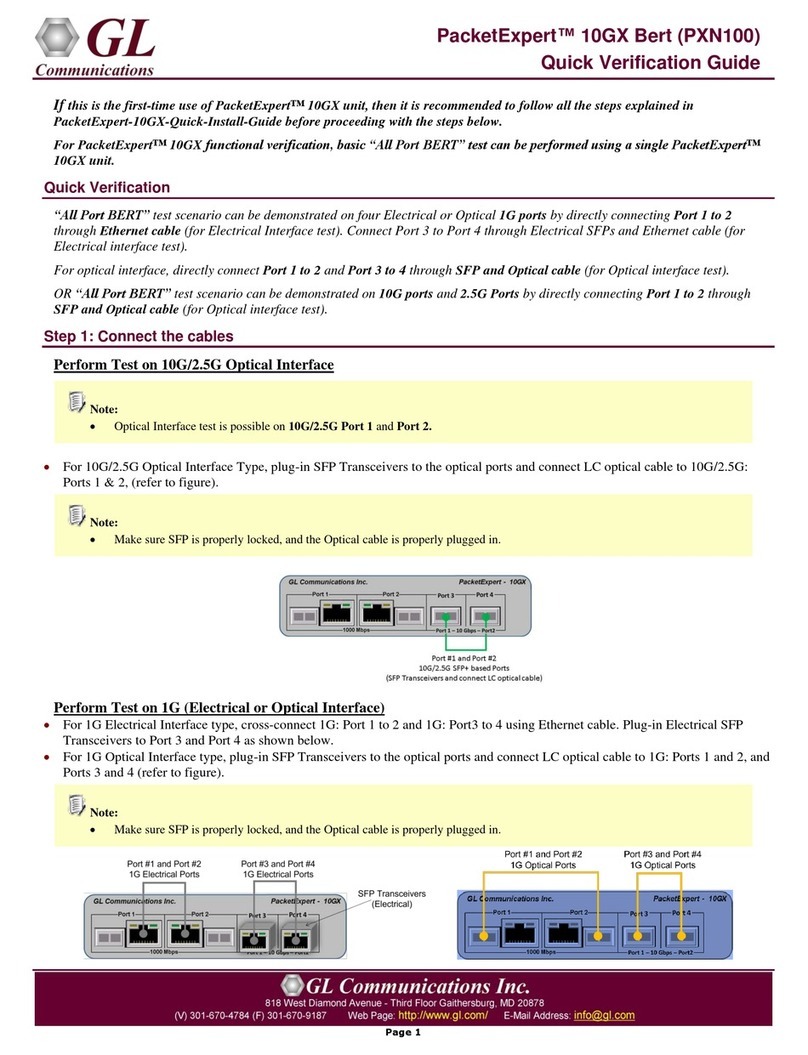
“RFC 2544” test scenario can be demonstrated on 1G ports by directly connecting Port 1 to 2 through Ethernet cable (for
Electrical Interface test) or connect 1G: Port 1 to 2 through SFP and Optical cable (for optical interface test).
“RFC 2544” test scenario is also supported on 10G ports and 2.5G Ports by directly connecting Port 1 to 2 through SFP and
Optical cable (for Optical interface test).
Step 1: Connect the cables
Perform Test on 10G/2.5G Optical Interface
Note:
•Optical Interface test is possible on 10G/2.5G Port 1 and Port 2 only.
•Plug-in SFP Transceivers to the optical ports and cross connect LC optical cable between Port 1 and Port 2 as shown in the figure
below.
Note:
•Make sure SFP is properly locked, and the optical cable is properly plugged in.
Perform Test on 1G (Electrical or Optical Interface)
•For 1G Electrical Interface type, cross-connect 1G: Port 1 to 2 using Ethernet cable as shown in the figure below.
•For 1G Optical Interface type, plug-in SFP Transceivers to the optical ports and connect LC optical cable to 1G: Ports 1 & 2 (refer
to figure).
Note:
•Make sure SFP is properly locked, and the optical cable is properly plugged in.

Page 2
PacketExpert™ 10GX (PXN100)
RFC2544 - Quick Verification
Step2: Launch PacketExpert 10GX Application
•Click on the PacketExpert 10GX shortcut icon created on the desktop and launch PacketExpert 10GX application as shown
below.
Note:
•Ensure that the additional Warranty License is installed before invoking
the application, else the Warranty Error message is prompted as shown.
Refer to PacketExpert 10GX Quick Install Guide for installation
procedure.
•If the Warranty License is expired, please contact GL to renew the
warranty license.
•If optional license PXN101 (license for 10G/2.5G ports) is installed, then
the launch window appears to choose 1G/2.5G/10G type testing as shown
below. If the PXN101 license is not installed, by default, the application is
loaded on 1G ports.
•Click on Launch 10G option, to invoke the application with 10G ports.
•Click on Launch 2.5G option, to invoke the application with 2.5G ports.
•Or click on Launch 1G option, to invoke the application with 1G ports.
•The application may take some time to get started due to hardware and software initializations.
•On launch, by default, All Port Bert application is loaded. To load RFC2544 application, select RFC2544 from the Applications
drop-down list as shown in the figure. Also, a default configuration file for the application is automatically loaded with the pre-
configured settings.
Step 3: Configure Interface parameters
For 10G Optical connections
On the RHS side, in the Interface pane, select the ports from the drop-down list and verify the following settings for each port.
•Interface Type = Optical
•Speed = 10000 Mbps
•Verify IP Addresses for 10G: Ports 1 & 2 are
configured as listed below:
➢Port1: 192.168.1.11
➢Port2: 192.168.1.12
For 2.5G Optical/Electrical connections
On the RHS side, in the Interface pane, select the
ports from the drop-down list and verify the
following settings for each port.
•Interface Type = Optical
•Speed = 2500 Mbps
•Verify IP Addresses for 2.5G: Ports 1 & 2 are
configured as listed below:
➢Port1: 192.168.1.11
➢Port2: 192.168.1.12

Page 3
PacketExpert™ 10GX (PXN100)
RFC2544 - Quick Verification
➢
For 1G Electrical or Optical connections
On the RHS side, in the Interface pane, select the ports from the Port Selection drop-down list and set the following for
each port:
•Select Interface Type = Electrical (or) Optical (depending on the ports connected)
•Speed = 100/1000Mbps
•Verify IP Addresses for 1G: Ports 1 & 2, which are configured as listed below:
➢Port1: 192.168.1.11
➢Port2: 192.168.1.12
•Click on the Apply button (this will set the Interface Type in the hardware)
•Verify that the Link Status is UP on both ports, that is, the function tree should display Port 1 and Port 2 with Green LEDs link
status (refer to figure).
Note:
•If the LED shows red, then link is down. Refer to PacketExpert™ Quick Install Guide for Troubleshooting steps to get the links
UP
Step 5: Default Test Parameter Settings
•RFC2544 function includes default values
for all test parameters (refer to figure). User
can run the self-test without any changes to
these values.
•Global configuration provides
configurations common to all the tests,
while each of the test has separate options
as shown in the screen.
•On the function tree, double click on Throughput,
observe the default Throughput test
configurations, which includes Trial Duration,
Number of Trials, Min and Max bandwidth for
either direction (Port1 to Port2 and Port2 to Port1)
configurations.

Page 4
PacketExpert™ 10GX (PXN100)
RFC2544 - Quick Verification
•On the function tree, double click on Latency, observe the default
Latency test configurations, which includes Trial Duration, Number of
Trials and bandwidth for either direction (Port1 to Port2 and Port2 to
Port1.
•On the function tree, double click on Frame Loss, observe the default
Frame Loss test configurations, which includes Trial Duration,
Number of Trials, Min and Max bandwidth for either direction (Port1
to Port2 and Port2 to Port1).
•On the function tree, double click on Back-to-Back, Observe the
default Back-to-Back test configurations, which includes Trial
Duration, Number of Trials, Bursts Size in msec and No. of Bursts
for either direction (Port1 to Port2 and Port2 to Port1).
Step 6: Start test
•Select RFC2544 in the Function Menu list and click Start to run the test.

Page 5
PacketExpert™ 10GX (PXN100)
RFC2544 - Quick Verification
Step 7: Verify Results
•The Results can be verified for the completed
tests and when the status for the completed
test is updated as ‘Test Done’.
•Results start displaying after the Time
Duration (By default, set to 60 secs) selected
by the user for each test
•From the function tree, double-click Results
and observe that the Results pane opens up in
one of the 4 RHS panes.
•The Results pane →Status tab shows the
status while the test is running indicating the
sending test frames. For each and every trial,
prior to sending the test frames, RFC 2544
learning frames are sent, which can be
observed in the figure below.
•Tabular and Graphical results can be viewed
for each of the test procedure, that is Statistics
as well as Graph results.
➢Throughput Statistics and Graph
Results
➢Latency Statistics and Graph Results

Page 6
PacketExpert™ 10GX (PXN100)
RFC2544 - Quick Verification
➢Back-to-Back Statistics and Graph Results
➢Frame Loss Statistics and Graph Results
This manual suits for next models
2
Table of contents
Other GL Communications Network Hardware manuals