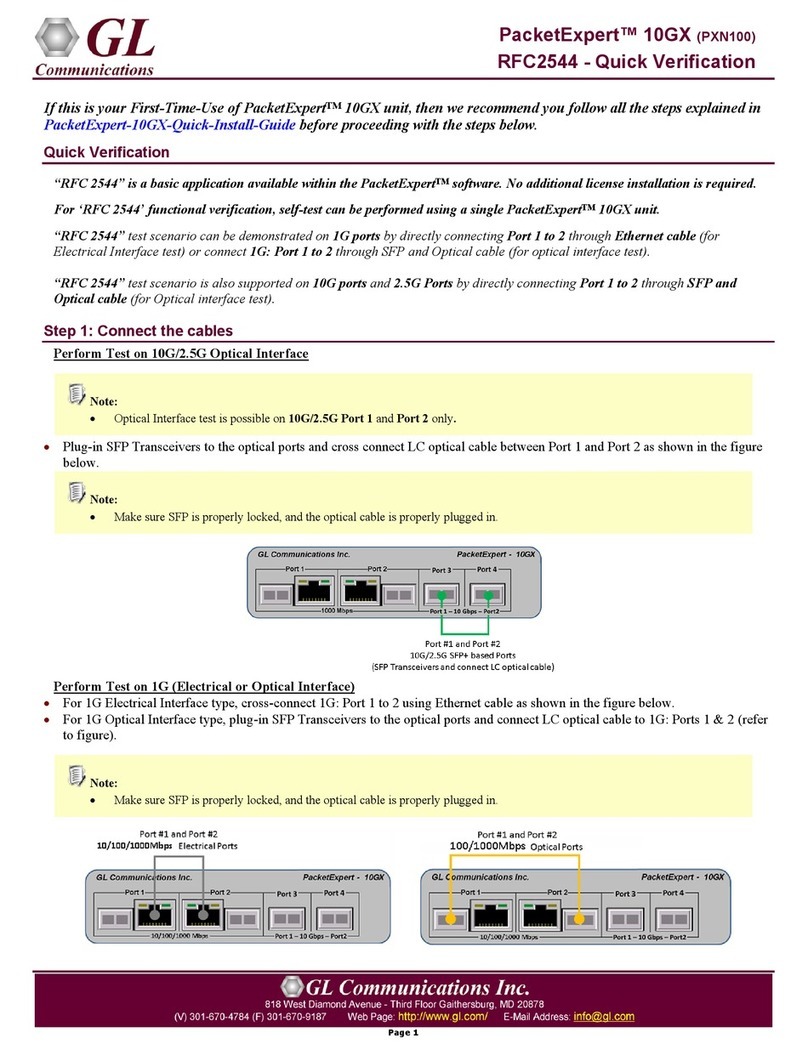
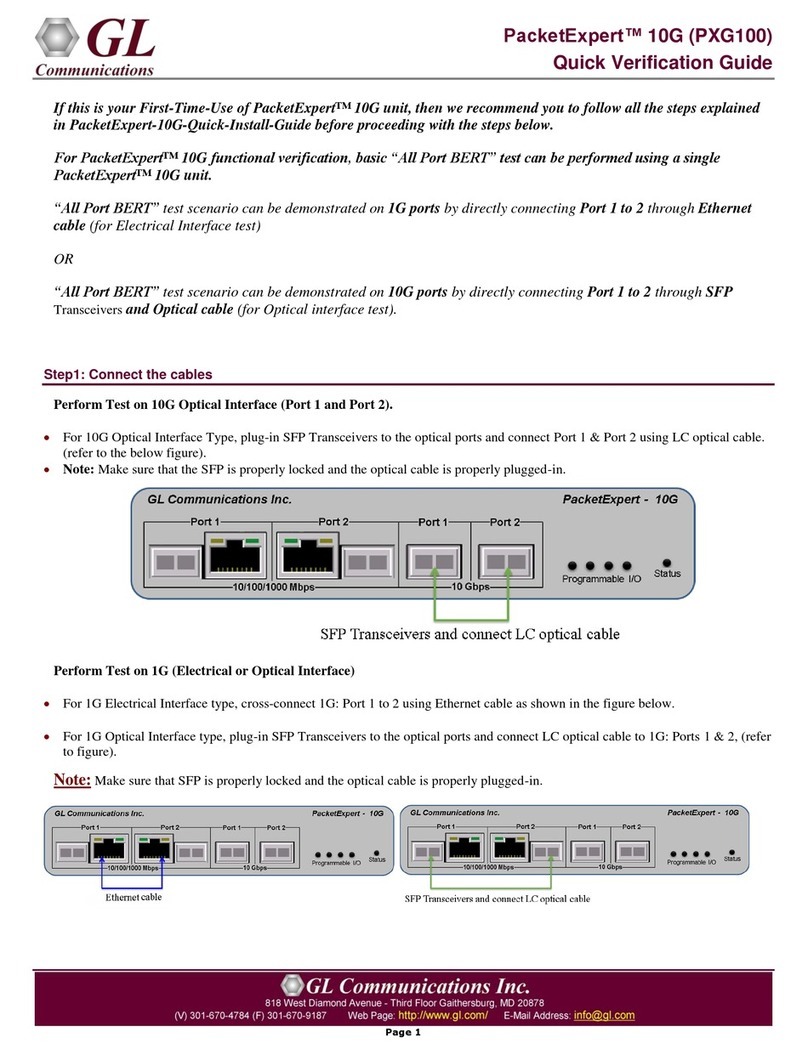
GL Communications PacketExpert 10GX Bert User manual

Page 1
PacketExpert™10GX Bert (PXN100)
Quick Verification Guide
If this is the first-time use of PacketExpert™10GX unit, then it is recommended to follow all the steps explained in
PacketExpert-10GX-Quick-Install-Guide before proceeding with the steps below.
For PacketExpert™10GX functional verification, basic “All Port BERT” test can be performed using a single PacketExpert™
10GX unit.
Quick Verification
“All Port BERT” test scenario can be demonstrated on four Electrical or Optical 1G ports by directly connecting Port 1 to 2
through Ethernet cable (for Electrical Interface test). Connect Port 3 to Port 4 through Electrical SFPs and Ethernet cable (for
Electrical interface test).
For optical interface, directly connect Port 1 to 2 and Port 3 to 4 through SFP and Optical cable (for Optical interface test).
OR “All Port BERT” test scenario can be demonstrated on 10G ports and 2.5G Ports by directly connecting Port 1 to 2 through
SFP and Optical cable (for Optical interface test).
Step 1: Connect the cables
Perform Test on 10G/2.5G Optical Interface
Note:
•Optical Interface test is possible on 10G/2.5G Port 1 and Port 2.
•For 10G/2.5G Optical Interface Type, plug-in SFP Transceivers to the optical ports and connect LC optical cable to 10G/2.5G:
Ports 1 & 2, (refer to figure).
Note:
•Make sure SFP is properly locked, and the Optical cable is properly plugged in.
Perform Test on 1G (Electrical or Optical Interface)
•For 1G Electrical Interface type, cross-connect 1G: Port 1 to 2 and 1G: Port3 to 4 using Ethernet cable. Plug-in Electrical SFP
Transceivers to Port 3 and Port 4 as shown below.
•For 1G Optical Interface type, plug-in SFP Transceivers to the optical ports and connect LC optical cable to 1G: Ports 1 and 2, and
Ports 3 and 4 (refer to figure).
Note:
•Make sure SFP is properly locked, and the Optical cable is properly plugged in.

Page 2
PacketExpert™10GX Bert (PXN100)
Quick Verification Guide
Step2: Launch PacketExpert 10GX Application
•Click on the PacketExpert 10GX shortcut icon created on the desktop and launch PacketExpert 10GX application as
shown below.
Note:
•Ensure that the additional Warranty License is installed before invoking
the application, else the Warranty Error message is prompted as shown.
Refer to PacketExpert 10GX Quick Install Guide for installation
procedure.
•If the Warranty License is expired, please contact GL to renew the
warranty license.
•If optional license PXN101 (license for 10G/2.5G ports) is installed, then
the launch window appear to choose 1G/2.5G/10G type testing as shown
below. If the PXN101 license is not installed, by default, the application is
loaded on 1G ports.
•Click on Launch 10G option, to invoke the application with 10G ports.
•Click on Launch 2.5G option, to invoke the application with 2.5G ports.
•Or click on Launch 1G option, to invoke the application with 1G ports.
•The application may take some time to get started due to hardware and software initializations.
For 10G/2.5G Optical Connections,
On launch by default, the All Port Bert application is loaded. Also, a default configuration file is automatically loaded with the pre-
configured settings. On the RHS side, in the Interface pane, select the ports from the drop-down list and verify the following settings
for each port.
•Interface Type = Optical
•Speed = 10000 Mbps (for 10G), 2500Mbps (for 2.5G)
•Verify IP Addresses for 10G: Ports 1 & 2 are configured as listed
below:
➢Port1: 192.168.1.11
➢Port2: 192.168.1.12
Similarly, For 1G Electrical or 1G Optical Connections,
On the RHS side, in the Interface pane, select the ports from the Port
Selection drop-down list and set the following for each port:
•Select Interface Type = Electrical (or) Optical (depending on the
ports connected)
•Speed = 1000Mbps
•Verify IP Addresses for 1G: Ports 1 & 2, and Ports 3 & 4 which are
configured as listed below:
➢Port1: 192.168.1.11
➢Port2: 192.168.1.12
➢Port3: 192.168.1.13
➢Port4: 192.168.1.14
•Click on the Apply button (this will set the Interface Type in the hardware).

Page 3
PacketExpert™10GX Bert (PXN100)
Quick Verification Guide
Step3: Verify Links
To verify PacketExpert 10GX basic functionality on 10G ports, run a BERT test between 10G: Ports 1 and 2 (this means the
destination for 10G Port1 is 10G Port2 and vice versa)
•Verify that the Link Status is UP on both ports, that is, on launch, the LHS tree
should display 10G: 2 ports with green LEDs link status (refer to the
screenshot). If the LED shows red (refer to the screenshot), then link is down.
•Refer to troubleshooting steps below to get the links UP:
➢Check if the Optical cables are connected to the correct ports (i.e., Ports 1
and 2 are connected) - refer to the figure above.
➢Check if there are any loose connections and secure the cables properly
➢If still link is not UP, double click "Interface" under the port in the LHS
tree to launch the "Interface" dialog in one of the RHS panes. Click the
"Apply" button. This will reinitialize the port and will force it to go through
the auto negotiation cycle again.
➢The above steps should get the link UP. If problem still persists, contact GL
Communications Inc.
•Similarly, verify the Link UP status on all the four 1G ports when configured for 1G BERT testing.
Step4: Configure MAC Addresses
Each port should have the destination MAC addresses configured
correctly. Follow the steps below to configure destination MAC
addresses correctly:
For 10G: Port1,
•In the LHS tree, under Port 1 →Bert, double click Tx
Config. The Tx Config window pop up in one of the RHS
panes.
•Go to MAC tab.
•Check the Interface Address, to use the Source MAC
Address as in the Interface settings. Similarly make sure that
Interface Address is checked for all other ports
•Click Resolve button next to Destination MAC address (refer
to screenshot).
•Choose IPv4 option (Note: Also supports IPv6 configurations)
•Enter the IP Address of the destination port (10G: Port2) as
192.168.1.12.
•Click Resolve.
•It will run ARP and returns the MAC Address of the destination port,
with Result displayed as "Success" (refer to the screenshot).
•Click OK, this will configure destination MAC address for the port.
•Repeat the above steps for 10G: Port2 to configure its MAC address
(Enter the IP Address of the destination port - 10G Port1 as:
192.168.1.11)

Page 4
PacketExpert™10GX Bert (PXN100)
Quick Verification Guide
For 1G: Port1, Port2, Port3, Port4
•In the LHS tree, under Port 1 →Bert, double click Tx
Config. The Tx Config window is displayed in one of the
RHS panes.
•Go to MAC tab.
•Check the Interface Address, to use the Source MAC
Address as in the Interface settings. Similarly make sure that
Interface Address is checked for all other ports.
•Click "Resolve" button next to Destination MAC address
(refer to the screenshot).
•Choose IPv4 option (Also supports IPv6 configurations).
•For Port1, enter the IP Address of the destination port (1G:
Port2) as 192.168.1.12 and vice-versa.
•For Port3, enter the IP Address of the destination port (1G:
Port4) as 192.168.1.14 and vice-versa.
•Click Resolve.
•It will run ARP and returns the MAC Address of the
destination port, with Result displayed as "Success" (refer to the
screenshot).
•Click OK, this will configure destination MAC address for the Port.
•Repeat the above steps for Port2, Port3, and Port4.
•For reference, to Resolve IP to MAC, enter the IP addresses as
mentioned below.
➢Port1, Destination IP Address as 192.168.1.12
➢Port2, Destination IP Address as 192.168.1.11
➢Port3, Destination IP Address as 192.168.1.14
➢Port4, Destination IP Address as 192.168.1.13
Step5: Start Test
•From the LHS tree, hold the keyboard Control key and in the
GUI select Bert using mouse under Port1, and Port2 tree
simultaneously.
•Click Start (refer to the screenshot).

Page 5
PacketExpert™10GX Bert (PXN100)
Quick Verification Guide
Step6: Verify Results
•Follow below steps to verify the Results while the test is running, in
the RHS pane.
•Under 10G: Port1, from LHS tree, click Results under Port1→Bert,
the Results pane is di in one of the four RHS panes
•Under Bert Status pane, verify these LEDs →Sync Status LED =
Green, Bit Errors LED = Green, Out of Sequence Packets LED =
Green
•Under Bert Statistics pane, verify these values:
➢Bert Status = Sync
➢Bit Error Count = 0
➢Bit Error Rate = 0.000E+000
➢Bit Error Seconds = 0
➢Sync Loss Count = 0
➢Sync Loss Seconds = 0
➢Out of Sequence Count = 0
➢Out of Sequence seconds = 0
Repeat this step for 10G: Port 2 and verify correct results for both the ports. If any port shows errors, contact GL Communications
Inc.
Step7: Stop Test
•To stop the test after verifying the results, again hold the keyboard Control key and select Bert using mouse from the LHS tree
under Port1, and Port2 and click Stop (refer to the screenshot).
This manual suits for next models
1
Table of contents
Other GL Communications Network Hardware manuals
Popular Network Hardware manuals by other brands

SICK
SICK IO-Link Master IOLG2EI-03208R01 EtherNet/IP operating instructions

Mimosa
Mimosa Backhaul B5 manual

Grandstream Networks
Grandstream Networks UCM6510 user manual

D-Link
D-Link ShareCenter Quattro DNS-345 Specifications

FieldServer
FieldServer X-25 Startup guide

FrontLine
FrontLine ComProbe USB 2.0 quick start guide

Centrica
Centrica Panoramic Power Programmer's guide

Fike
Fike FSM-IP Installation and operation manual

Garmin
Garmin GND 10 installation instructions

Paradyne
Paradyne COMSPHERE 6700 Series user guide

HMS Networks
HMS Networks Ewon Cosy+ installation guide

Moxa Technologies
Moxa Technologies Airworks AWK-3131A-M12-RCC Quick installation guide