Glasdon U.K. Limited
Preston New Road
BLACKPOOL
Lancashire FY4 4UL
Tel: 01253 600410
Fax: 01253 792558
web: www.glasdon.com
, NEXUS CITY 240 RECYCLING BINAND NEXUS CITY 140 RECYCLING BINARE
TRADEMARKS OF GLASDON GROUP OR ITS SUBSIDIARIES IN THE U.K. AND OTHER
COUNTRIES
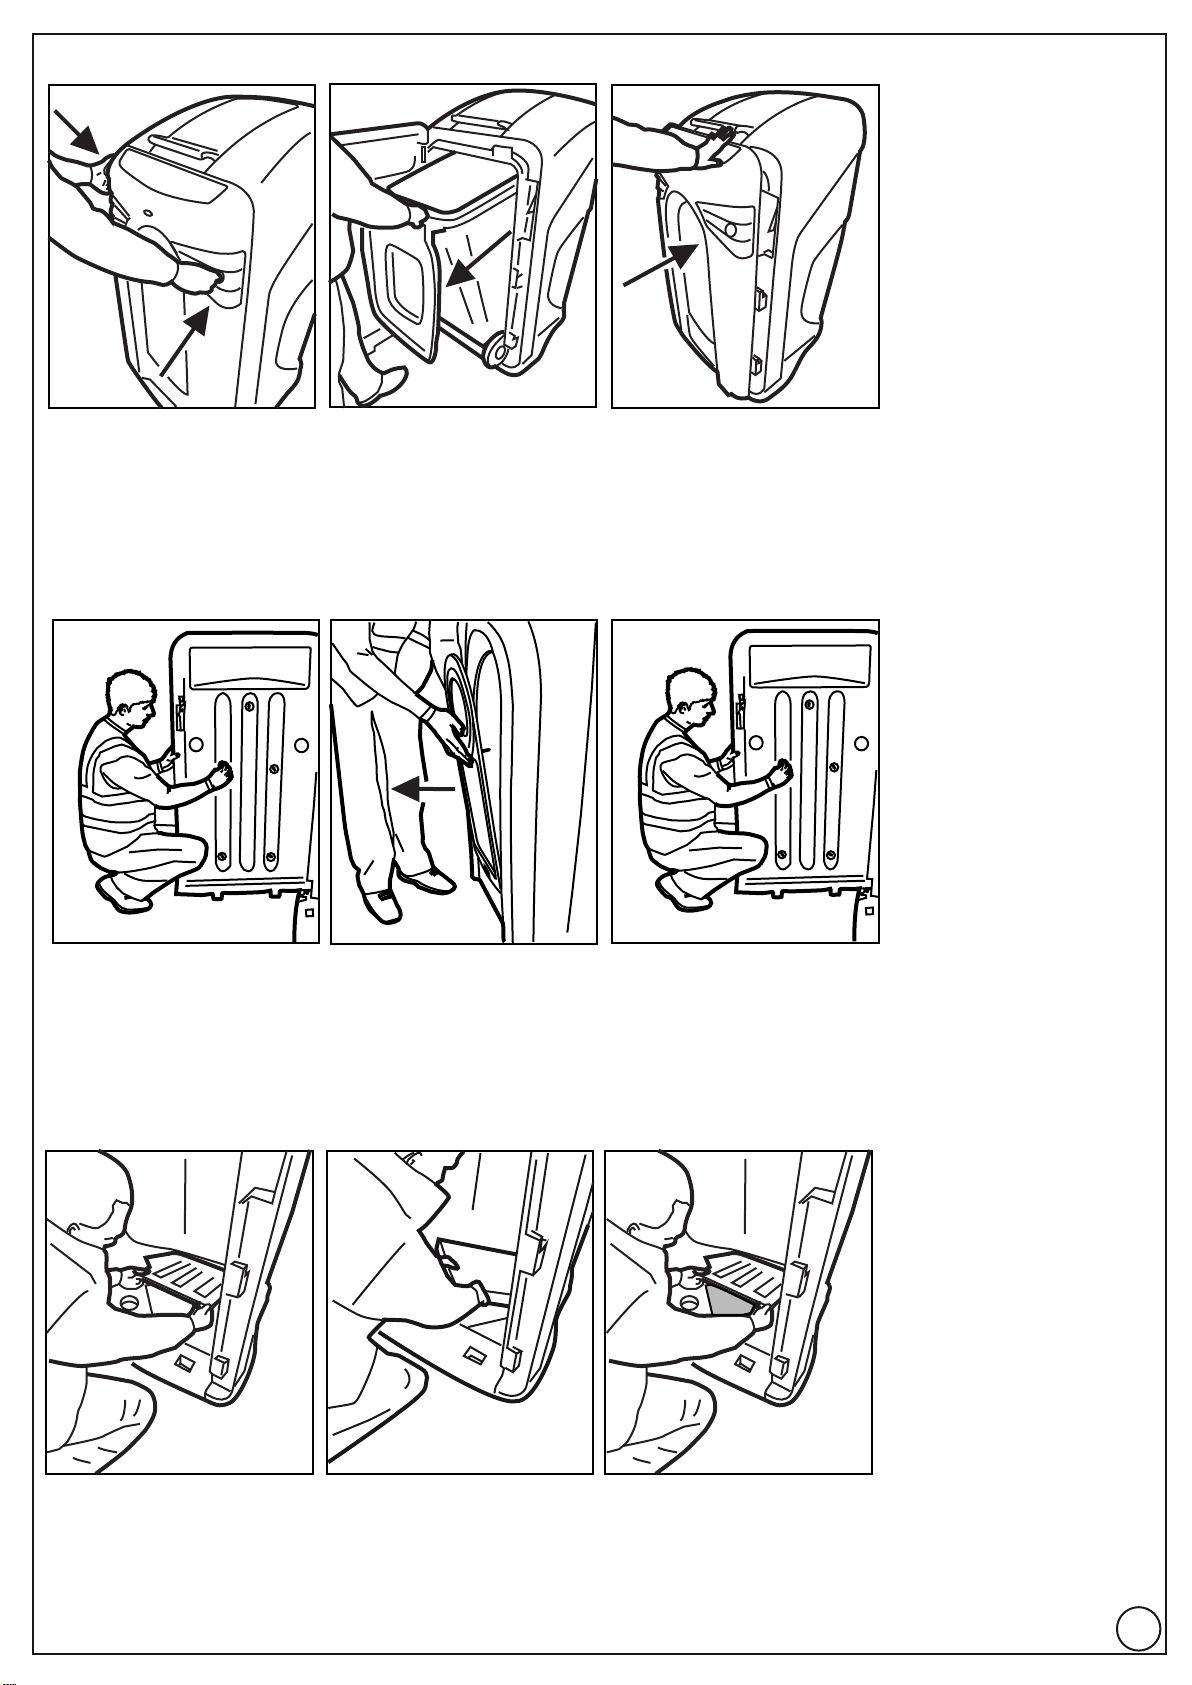
• A planned maintenance schedule of regular inspection is recommended, replacing
components as necessary.
• Replacement components are available direct from GLASDON UK LIMITED.
• GLASDON UK LIMITED cannot be held responsible for claims arising from incorrect
installation, unauthorised modifications or misuse of the product.
Issue 3 November 2015 C000/0454 DWG No. 07B351-36
© Copyright November 2015
Glasdon UK Ltd reserve the right to alter specifications without prior notice.
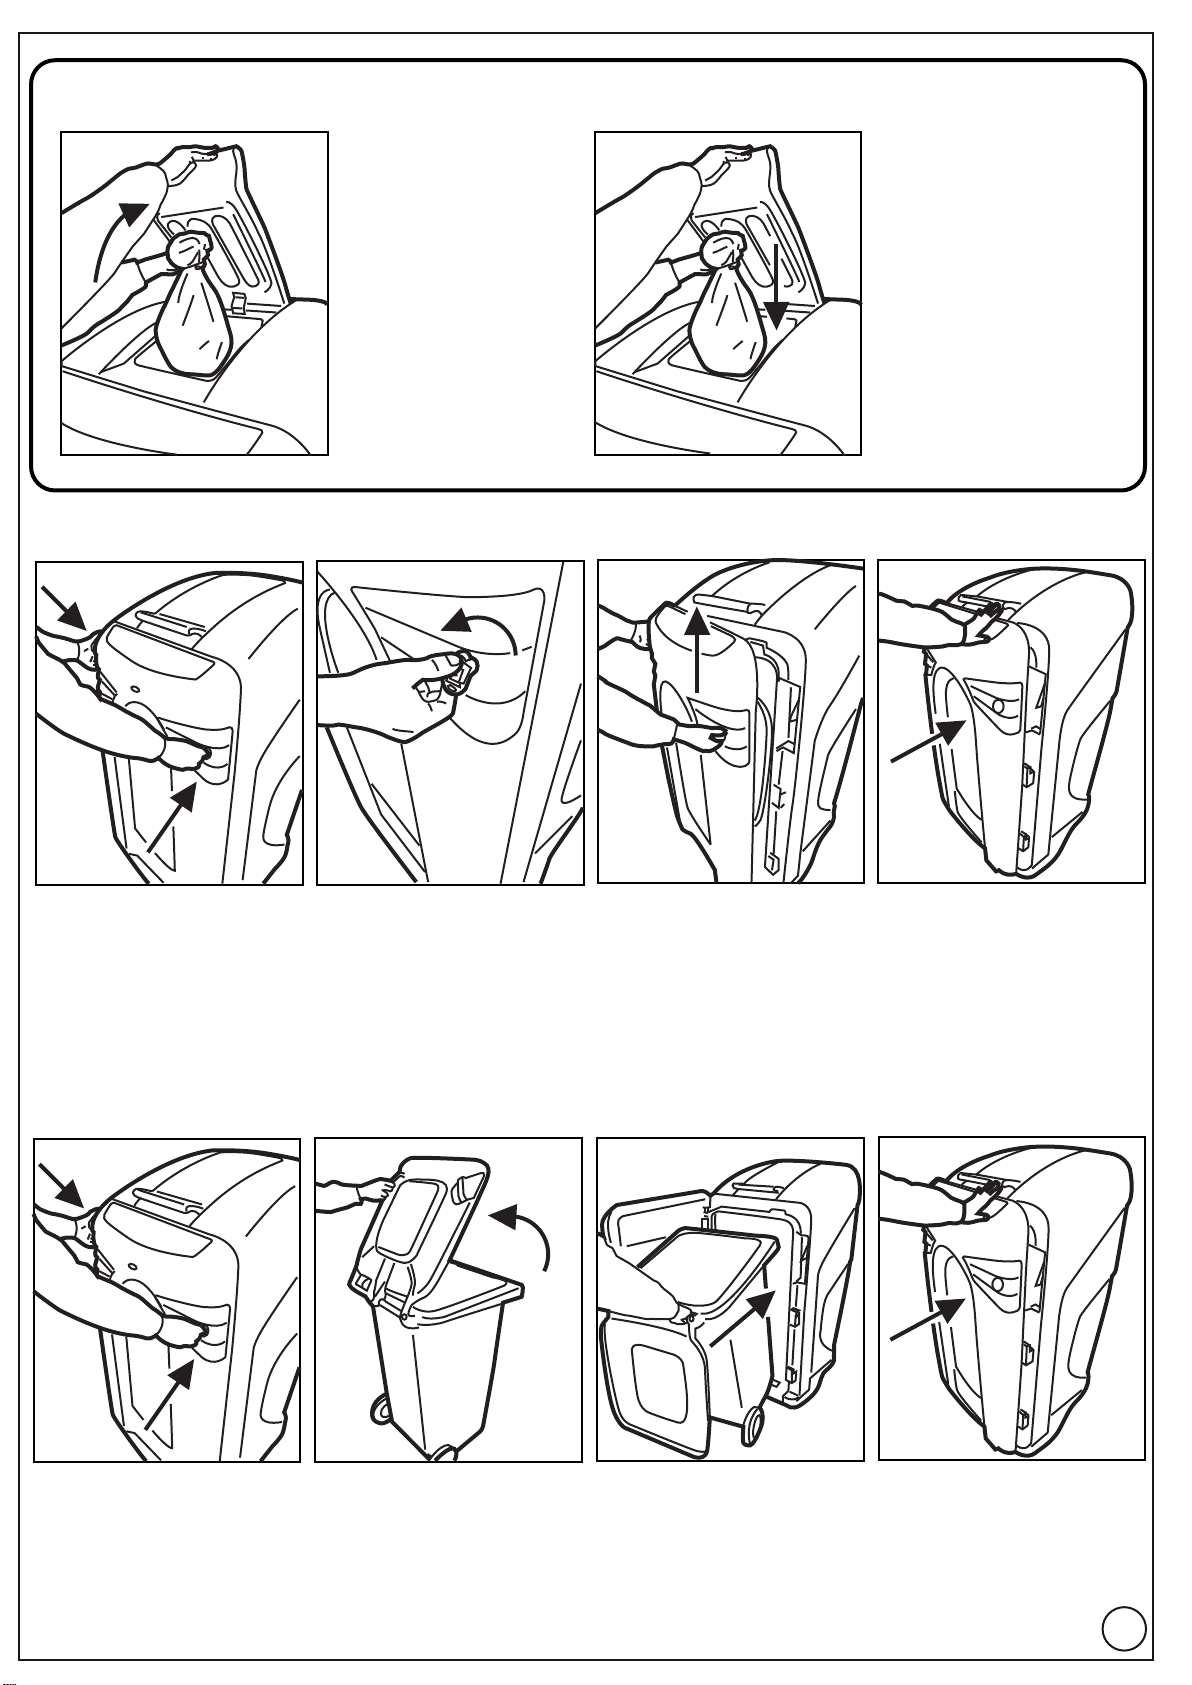
Cleaning Your Bin
We would recommend a warm pressure wash with soap or alternatively hand wash with 10% solution of mild
detergent in warm water using a soft bristle brush followed by a rinse with clean water.
Graffiti
Felt tip pen or paint may be removed from Durapol using a proprietary graffiti remover such as Glasdon Graffitix.
Carefully follow the instructions, particularly the guidelines covering safety. Ensure that all traces of chemicals are
removed then clean as detailed above.
CAUTION:
Graffiti removers can damage stickers, some protection may be afforded by masking off such areas. Please refer
to Technical Services for our recommended graffiti removal supplier.
Maintenance
A planned maintenance schedule of regular inspection is recommended and components replaced when
necessary.
INSTRUCTIONS FOR CONCRETE FIXING KIT
(INTO PREPARED CONCRETE FOUNDATION)
DISTANCE FROM EDGE OF FOUNDATION TO CENTRE OF GROUND BOLT
TO BE NO LESS THAN 110MM
Permanently sited onto a prepared concrete ground site (20-30N/mmsq) utilising 4
M10x100mm ground fixing bolts. This fixing kit is an optional extra.
1) Position bin onto siting area ensuring it is the correct distance away from the
edge of the concrete (minimum 110mm) and is in the correct orientation with
regard to the apertures.
2) From the inside of the bin mark hole positions onto the concrete through the
fixing holes in the base of the bin with a 12mm diameter masonry drill.
Remove the bin.
3) Using a 12mm diameter masonry drill bit, drill and clean out anchor holes to a
minimum depth of 130mm. Position bin back over the drilled holes.
4) Assemble the ground bolts as shown in diagram opposite by removing the
20mm washer and replacing it with the 50mm washer. Drive the ground bolts
through the holes in the base of the bin and into the holes in the concrete.
5) Tighten nut with correct spanner until fixings are secure. Max recommended
torque setting - 20lbs/ft (27Nm).
6) In the event of the bin being removed, simply remove the bolt to leave the site
hazard free.
NOTE: For alternative fixing methods please contact us for details.
IMPORTANT NOTE: TO ENSURE A SECURE AND ROBUST INSTALLATION THE BIN SHOULD BE SITED ONTO A
SOUND CONCRETE FOUNDATION AND THE 50MM DIAMETER WASHER MUST BE USED. WE STRONGLY
RECOMMEND THAT THE BIN IS NOT INSTALLED ONTO TARMAC OR BLOCK PAVED AREAS.
Base
120 -140mm
Concrete base
Ground bolt
M10 x 50mm washer
RECYCLING BIN
R R
4