WARRANTY
GlassCrafters, Inc. offers a Limited 3 Year Warranty on all mirrored cabinet products.
GlassCrafters’ warranty provides the original purchaser a guarantee that it will replace or
at its own discretion repair products shown to have substantial defects in workmanship
or materials. These claims must be led with your dealer or professional installer and for-
warded in writing to GlassCrafters within three years of the delivery date to the end user
of the product. GlassCrafters shall not be responsible for any installation or removal
costs. This warranty does not apply to the following, chemical or natural corrosion of the
mirror. The use of abrasive cleaners or cleaners containing ammonia will cause chemi-
cal damage to the mirror, voiding this warranty.
The GlassCrafters warranty does not cover product that is damaged in shipping, acci-
dents in handling during installation or if the reported defects are a result of faulty instal-
lation, abuse, misuse, abnormal wear, poor maintenance, accident or repairs by service
personnel other than the original professional installer as authorized by GlassCrafters.
After the three year period GlassCrafters shall not have any further obligation, expressed
or implied including merchantability under the Limited Warranty.
Blum hinges and soft closing cushions have a separate lifetime warranty from
Blum, Inc. This warranty is against defects in materials and workmanship as long as
the original consumer owns the product. This is a warranty of replacement. After veri-
cation of defect, Blum, Inc. will send replacement hardware without charge.
GlassCrafters shall not have any liability for any consequential damages stemming
from or in connection with the use per performance of this product. Prevailing state
law on the limits of the implied warranty will apply.
The liability of GlassCrafters under any implied or expressed warranty, including mer-
chantability, is expressly limited to the terms of this warranty. Any claim under this
warranty must be made directly to the dealer of record.
Permission to return any merchandise under this warranty must be authorized in writ-
ing by GlassCrafters and must include prepaid shipping by the purchaser.
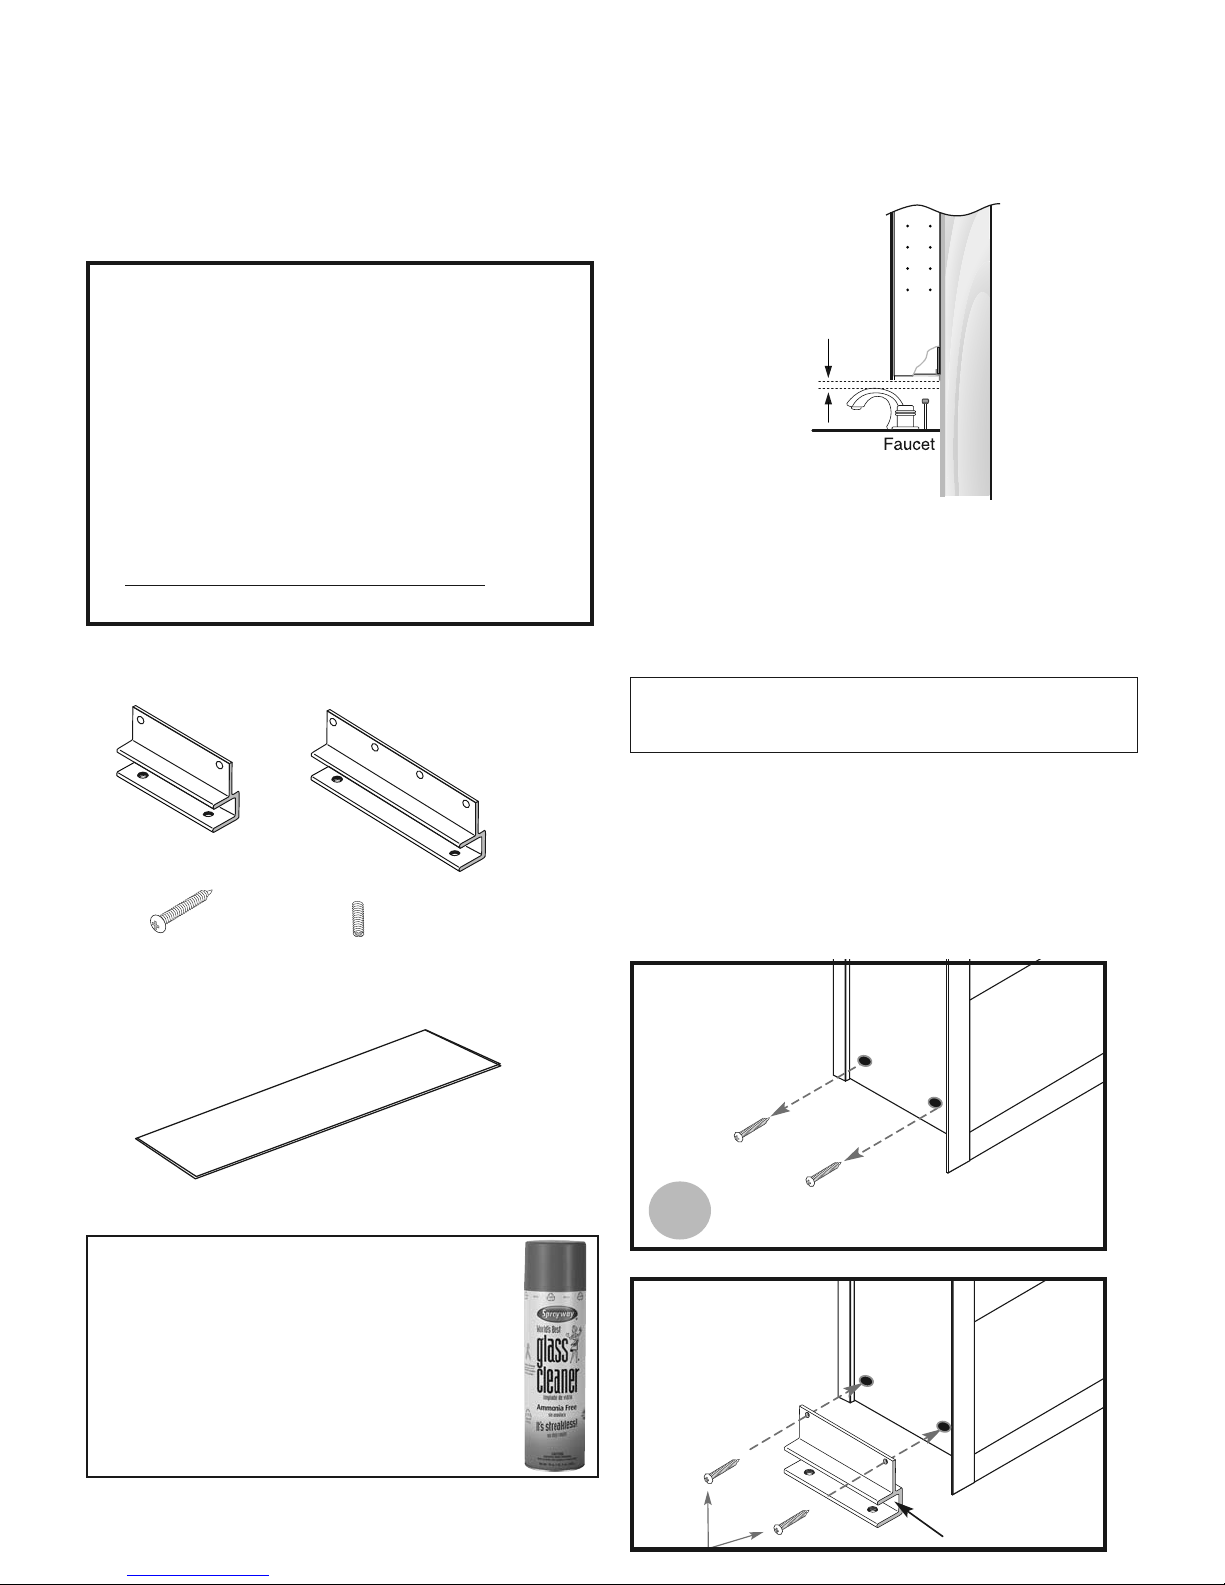
Center Glass Shelf with Decorative Wall Mirror with Two Mirrored Cabinets
4
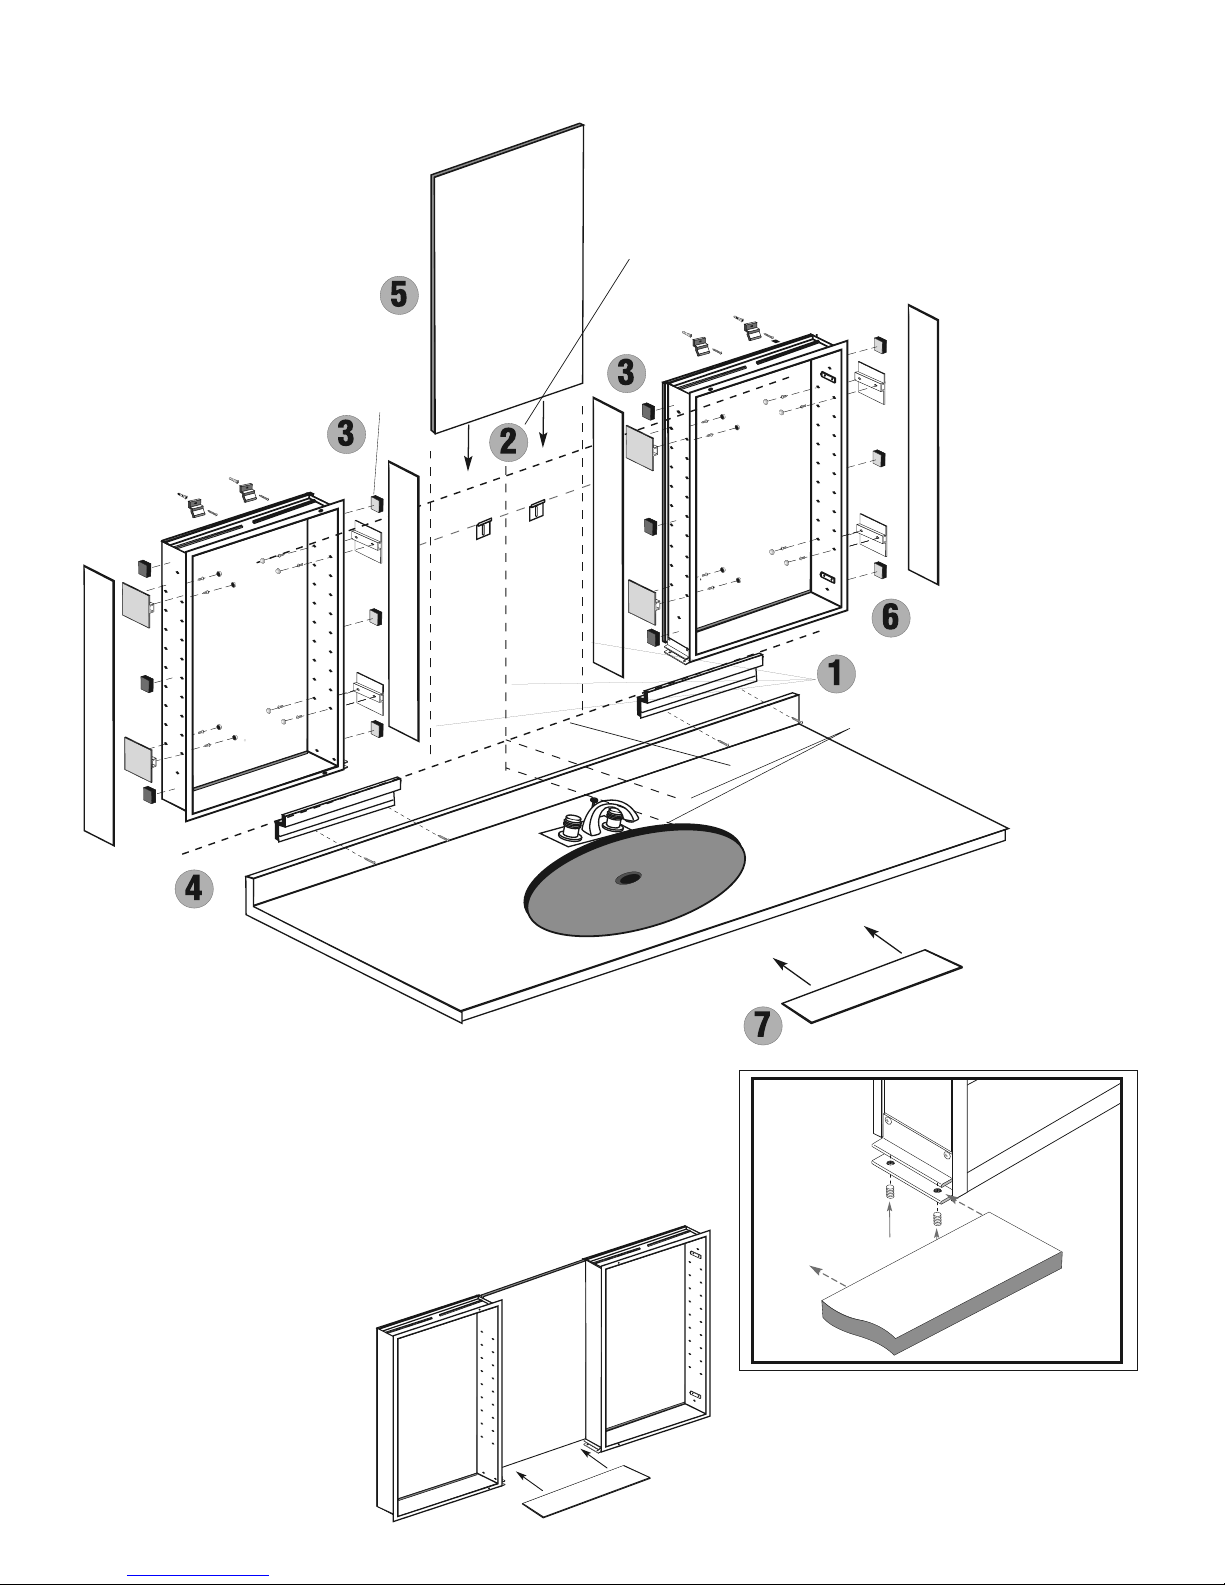
Side Mirror Kit Installation
For surface mounted 4” &6” Mirrored Cabinets and
6” semi-recessed Mirrored Cabinets.
1) Attach the side mirror kit brackets thru the pre-punched holes in
your cabinet.
2) Try to use the rst row from the top and bottom of your cabinet.
Using the eight 10-32 x 1/2” screws fasten the
brackets and nish with screw caps.
3) Attach the 2” x 2” foam pads to the outside cabinet wall above,
below and in between the position of the brackets.
4) Clean the backside of the side mirror kit panel with the Alcohol
pads. Check alignment before you attach the mirror to be sure it will
align even with the top of the cabinet.
5) Peel off paper covering of the adhesive tape on the side kit brack-
ets pads. (This holds the mirror in place). Carefully align the mirror
to the cabinet evenly on all four sides. Press rmly into place and at-
tach to the side kit mirror to the cabinet body.
(Note: Once installed, do not try to remove the mirror as it will break.)
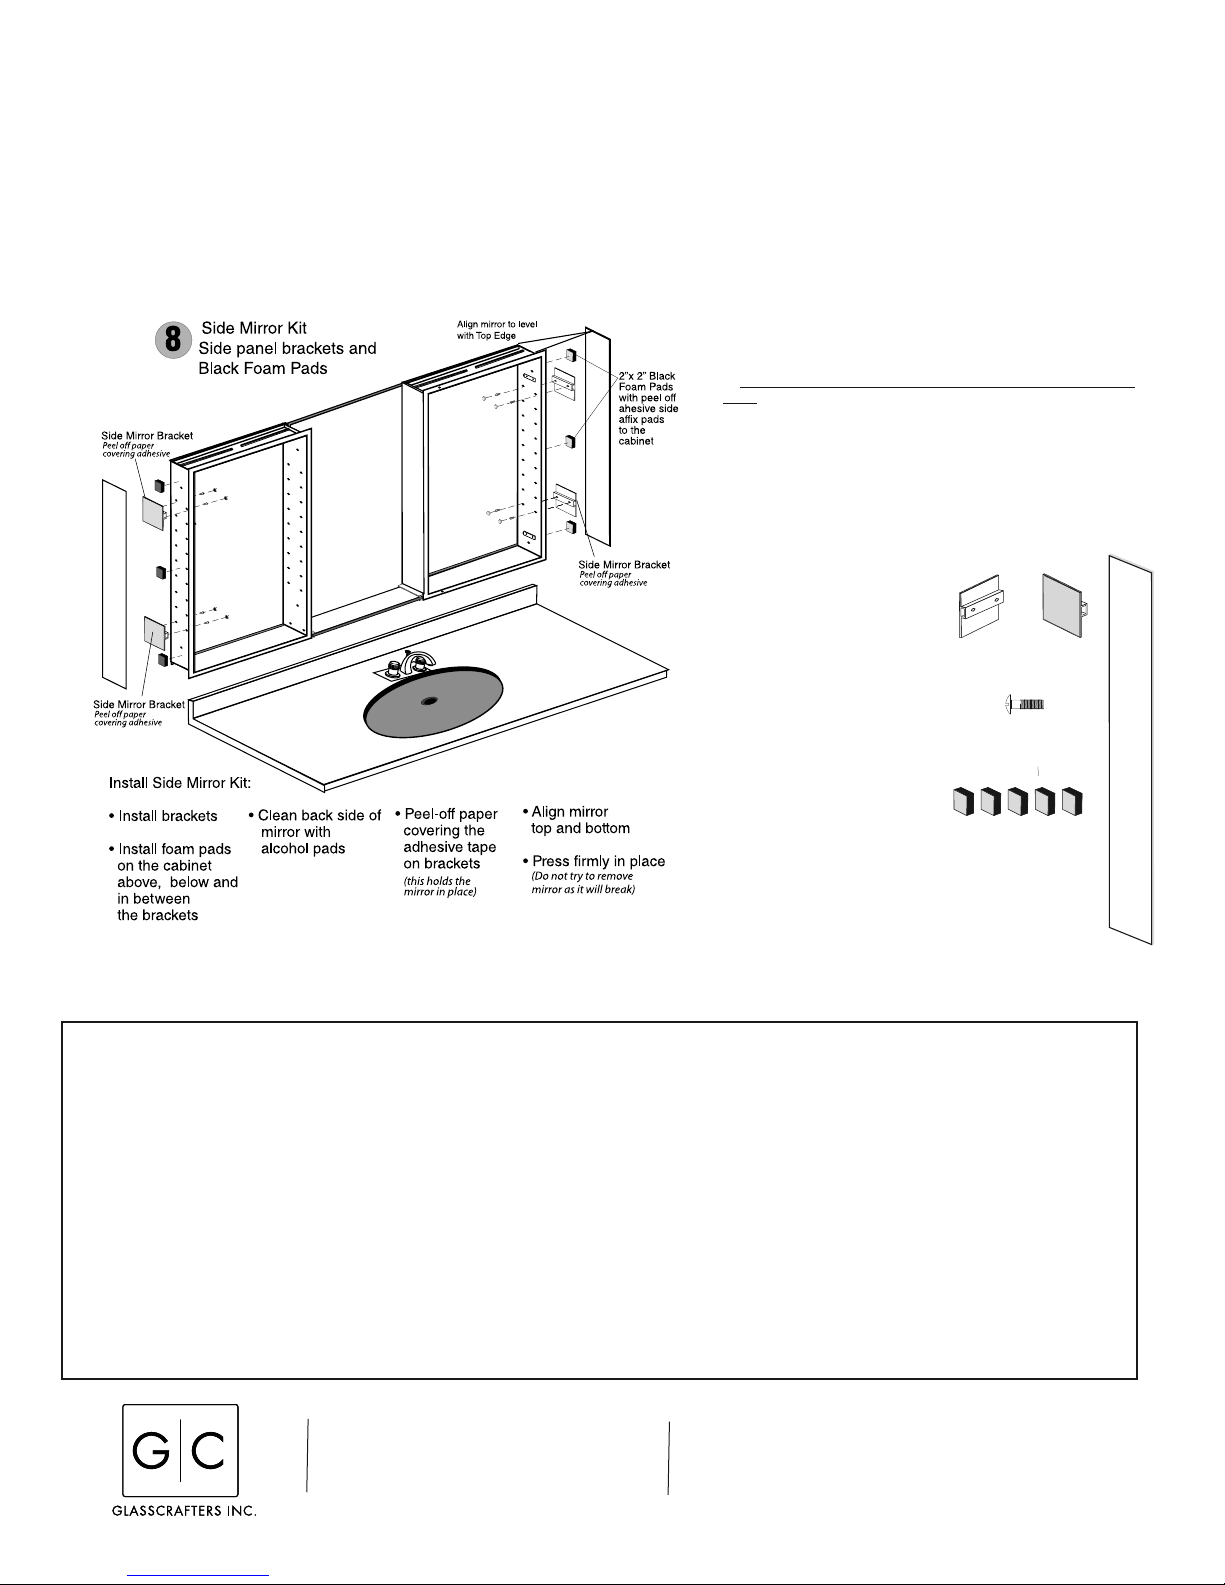
Side Mirror Kit parts list:
4 Mirror side panels to match the
model height ordered
8 Side kit brackets
12 2”x2” Black Foam Pads with
double sided tape
16 Screws, 10-32 x 1/2”
16 Screw Caps ( part # 434-00)
8 Alcohol Pads
Step 8 -- Install the two outside Side Mirror Kits
following instructions supplied with the cabinet.
Revised 05/2016
GLASSCRAFTERS, INC
193 Veterans Blvd., Carlstadt, NJ 07072
1+(800) 233-7362 (F) 1+(888) 233-7362
To view a video showing
helpful tips on how to
install mirrored side kits and
to adjust the door hinges,
please go to
GlassCraftersMirroredCabi-
nets.com
and navigate to the cabinet
product that you are in-
stalling. Simply click on the
installation tab (located
below the product images)
to view our installation
videos.
Side Mirror Bracket
Side Mirror
10-32 1/2” Screws
2” x2” Foam Pads