manuals.online logo
Brands
  1. Home
  2. •
  3. Brands
  4. •
  5. Glen
  6. •
  7. Heater
  8. •
  9. Glen GF20SN User manual

Glen GF20SN User manual

THESE INSTRUCTIONS SHOULD BE READ CAREFULLY AND RETAINED FOR FUTURE REFERENCE.
Flat Fan Heaters
Models : GF20SN, GF20TSN, GF24SN, GF24TSN & GF30TSN
Installation and Operating Instructions
Model(s)Specification
GF20SN 2.0kw Switch & Neon
GF20TSN 2.0kw Switch, Thermostat & Neon
GF24SN 2.4kw Switch & Neon
GF24TSN 2.4kw Switch, Thermostat & Neon
GF30TSN 3.0kw Switch, Thermostat & Neon
08/19219/3 Issue 3
IMPORTANT SAFETY ADVICE
READ THESE INSTRUCTIONS BEFORE USE.
DO NOT use the heater on deep pile carpets or the long
hair type of rugs, or less than 750mm (30") away from
any overhanging surface. Keep combustible materials
such as drapes and other furnishings clear from the
front, sides and rear of the heater. Do not use heater to
dry your laundry.
DO NOT use the heater in the immediate surroundings
of a bath, a shower or a swimming pool.
DO NOT place the heater directly below a fixed socket
outlet.
DO NOT COVER or obstruct in any way the air inlet slots
in the top, or the air outlet slots at the front of the heater.
DO NOT operate the heater with the mains lead
overhanging the front outlet grille.
The heater should always be used on a flat, stable
surface.
This appliance is not intended for use by children or other
persons without assistance or supervision if their
physical, sensory or mental capabilities prevent them
from using it safely. Children should be supervised to
ensure that they do not play with the appliance.
If you use this heater in conjunction with an external
thermal control, a programme controller, a timer or any
other device which switches on the heater automatically,
observe all safety warnings AT ALL TIMES since a fire
risk exists when the heater is accidentally covered or
displaced.
THE HEATER CARRIES A WARNING SYMBOL
INDICATING THAT IT MUST NOT BE COVERED.
IMPORTANT – If the mains lead of this appliance is
damaged, it must be replaced by the manufacturer or its
service agent or a similarly qualified person in order to
avoid a hazard.
Electrical connection
This heater must be used on an ~ supply only and the voltage
marked on the heater must correspond to the supply voltage.
This heater is fitted with a rewirable plug incorporating a 13 amp
fuse. In the event of replacing the fuse in the plug supplied, a 13
amp fuse approved by ASTA to BS 1362 must be used. If any
other type of plug is used, a 15 amp fuse must be fitted in the
plug, the adaptor, or at the distribution board.
IMPORTANT : If the plug is not suitable for your socket, the 13
amp plug should be removed. Before wiring the appropriate
plug, please note that the wires in this mains lead are coloured
in accordance with the following code :
BLUE : NEUTRAL
BROWN : LIVE
As the colours of the wires in the mains lead may not correspond
with the coloured markings in your plug, proceed as follows :
Connect the BROWN wire to the terminal marked ‘L’ or coloured
RED. Connect the BLUE wire to the terminal marked ‘N’ or coloured
BLACK.Note : ‘L’ or ‘N’ wire must not be connected to the EARTH
terminal marked ‘E’ or or coloured GREEN or GREEN AND
YELLOW. If in doubt, consult your electrician.
Important Operating Information
ACCUMULATION OF FLUFF AND DUST IN THE HEATER MAY
CAUSE THE ELEMENT TO OVERHEAT AND CUT OUT.
THEREFORE IT IS IMPORTANT THAT THE HEATER IS CLEANED
REGULARLY, PARTICULARLY IF THE PRODUCT IS USED OR
STORED IN AREAS WHERE HIGH LEVELS OF DUST AND/OR
FLUFF ARE PRESENT (I.E. BEDROOMS/DRESSING ROOMS)
(see section of instructions titled ‘cleaning’ for details on how
to maintain optimum performance of your heater)
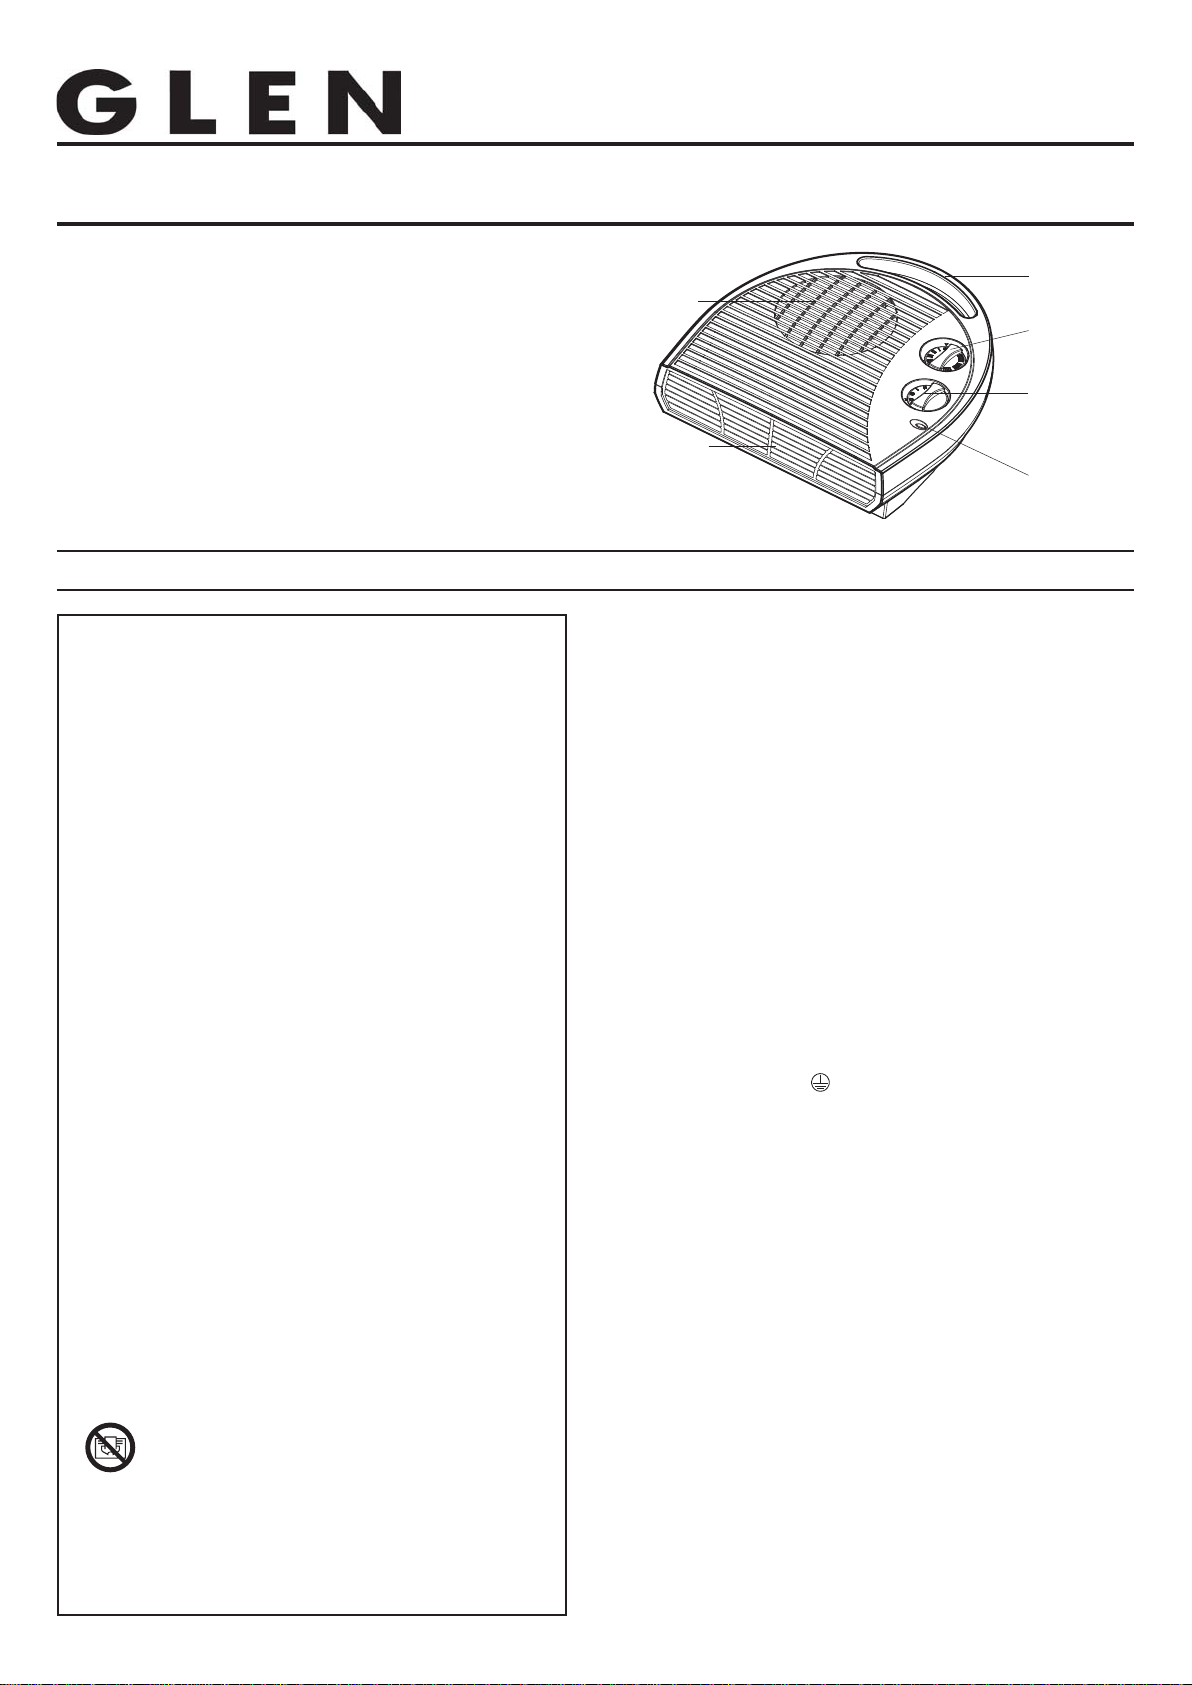
thermostat
knob - see
heat
control
handle
mains
air inlet
air outlet
Fig. 1
Using the heater
The mains neon (see Fig. 1) will light up to show that the heater
is connected to the mains supply.
Heat control (all models) - see Fig. 2
The heat control positions are as follows:
O-OFF
-Cool Blow *
I-Half heat output
I I -Full heat output
Fig. 2
Thermostat control (except GF20SN & GF24SN)
- see Fig. 3
The heat output is controlled by the thermostat, according to the
room temperature. Turn the knob to maximum setting initially.
When the room is warm enough, reduce the setting slowly until
the heater just clicks off.
The heater will now cycle on and off to maintain your selected
room temperature.
Fig. 3
NOTE: If the heater does not come on when the thermostat is
set to a low number, this is normally because the room is warmer
than the thermostat setting and is not a fault.
*When the heat control is set to for cool blow, set the
thermostat control to max position.
Position ‘ ‘ will turn the heater on and off to maintain a
temperature of approximately 5°C to help protect against frosty
conditions.
Safety – Overheat Protection
For your safety, this appliance is fitted with a thermal cut-out. In
the event that the product overheats, the cut-out switches the
heater off automatically.
To bring the heater back into operation, remove the cause of the
overheating, then unplug or turn off the electrical supply to the
heater for a few minutes.
When the heater has cooled sufficiently, re-connect and switch
on the heater.
Cleaning
ALWAYS DISCONNECT FROM THE POWER SUPPLY BEFORE
CLEANING THE HEATER.
Do not use detergents, abrasive cleaning powder or polish of
any kind on this heater.
Wipe with a dry cloth to remove dust and a damp cloth (not wet)
to clean off stains. Be careful not to allow moisture into the heater.
Ensure that dust or fluff does not accumulate inside the heater
as this could lead to overheating of the element. Use a vacuum
cleaner to remove any fluff which does accumulate.
PLEASE NOTE THERE IS AN INLET AREA ON THE UNDERSIDE OF THE
PRODUCT WHICH WILL REQUIRE CLEANING
After Sales Service
Your product is guaranteed for one year from the date of purchase.
Within this period, we undertake to repair or exchange this product
free of charge (subject to availability), within the guarantee period
provided it has been operated in accordance with these
instructions.
Your rights under this guarantee are additional to your statutory
rights, which in turn are not affected by this guarantee.
Should you require after sales information or assistance with
this product please go to www.dimplex.co.uk where you will
find our self help guide by clicking on “After Sales” or ring our
helpdesk on 0845 600 5111 (UK) or 01 842 4833 (R.O.I.) .
Spare parts are also available on the website
www.dimplex.co.uk
Please retain your receipt as proof of purchase.
Dimplex UK Ltd.
Millbrook House
Grange Drive
Hedge End
Southampton
Hampshire. SO30 2DF
[c] Dimplex UK Limited
All rights reserved. Material contained in this publication may not be reproduced in whole or in part, without prior permission in writing of Dimplex UK Limited.
www.dimplex.co.uk
Republic of Ireland Tel. 01 8424833
The product complies with the European Safety Standards EN60335-2-30 and the European Standard Electromagnetic Compatibility (EMC) EN55014,
EN60555-2 and EN60555-3 These cover the essential requirements of EEC Directives 2006/95/EC and 2004/108/EC

This manual suits for next models

4

Other Glen Heater manuals

Glen 2150 User manual

Glen

Glen 2150 User manual

Glen GDF20 User manual

Glen

Glen GDF20 User manual

Glen GU2TS User manual

Glen

Glen GU2TS User manual

Glen GL 7017 User manual

Glen

Glen GL 7017 User manual

Glen SA 7015 User manual

Glen

Glen SA 7015 User manual

Glen GL 7011 User manual

Glen

Glen GL 7011 User manual

Glen GL 7012 User manual

Glen

Glen GL 7012 User manual

Glen 2570 User manual

Glen

Glen 2570 User manual

Glen GL 7015 9 Fins User manual

Glen

Glen GL 7015 9 Fins User manual

Glen 2150N User manual

Glen

Glen 2150N User manual

Glen GL 7013 User manual

Glen

Glen GL 7013 User manual

Glen GL 7016 User manual

Glen

Glen GL 7016 User manual

Popular Heater manuals by other brands

Serene S2026 Operating & installation manual

Serene

Serene S2026 Operating & installation manual

TESY CN203ZF Usage and Storage Instructions

TESY

TESY CN203ZF Usage and Storage Instructions

RADSON MUNA E T - MOUNTING Instruction

RADSON

RADSON MUNA E T - MOUNTING Instruction

Broan 165FT manual

Broan

Broan 165FT manual

Orbegozo FH 5009 instruction manual

Orbegozo

Orbegozo FH 5009 instruction manual

Myson iVector S2 installation manual

Myson

Myson iVector S2 installation manual

Thermosafe 3208 operating instructions

Thermosafe

Thermosafe 3208 operating instructions

Power Fist 120 user manual

Power Fist

Power Fist 120 user manual

Sunbeam SFH431-UM owner's guide

Sunbeam

Sunbeam SFH431-UM owner's guide

Inelco Dania SSH instruction manual

Inelco

Inelco Dania SSH instruction manual

Amerec Pro 14.4 Installation and operating instructions

Amerec

Amerec Pro 14.4 Installation and operating instructions

Sonniger Heater R1 Operation and maintenance manual

Sonniger

Sonniger Heater R1 Operation and maintenance manual

Outwell Hekla Camping Heater instructions

Outwell

Outwell Hekla Camping Heater instructions

Desa 150 Ower's manual

Desa

Desa 150 Ower's manual

Holmes HFH442 owner's guide

Holmes

Holmes HFH442 owner's guide

Toyostove Laser 73 user guide

Toyostove

Toyostove Laser 73 user guide

Marley PH4AB Installation & maintenance instructions

Marley

Marley PH4AB Installation & maintenance instructions

Chromalox CXH-A-03 Installation and operation instructions

Chromalox

Chromalox CXH-A-03 Installation and operation instructions

manuals.online logo
manuals.online logoBrands
  • About & Mission
  • Contact us
  • Privacy Policy
  • Terms and Conditions

Copyright 2025 Manuals.Online. All Rights Reserved.