LIT-181 Page 2 of 4
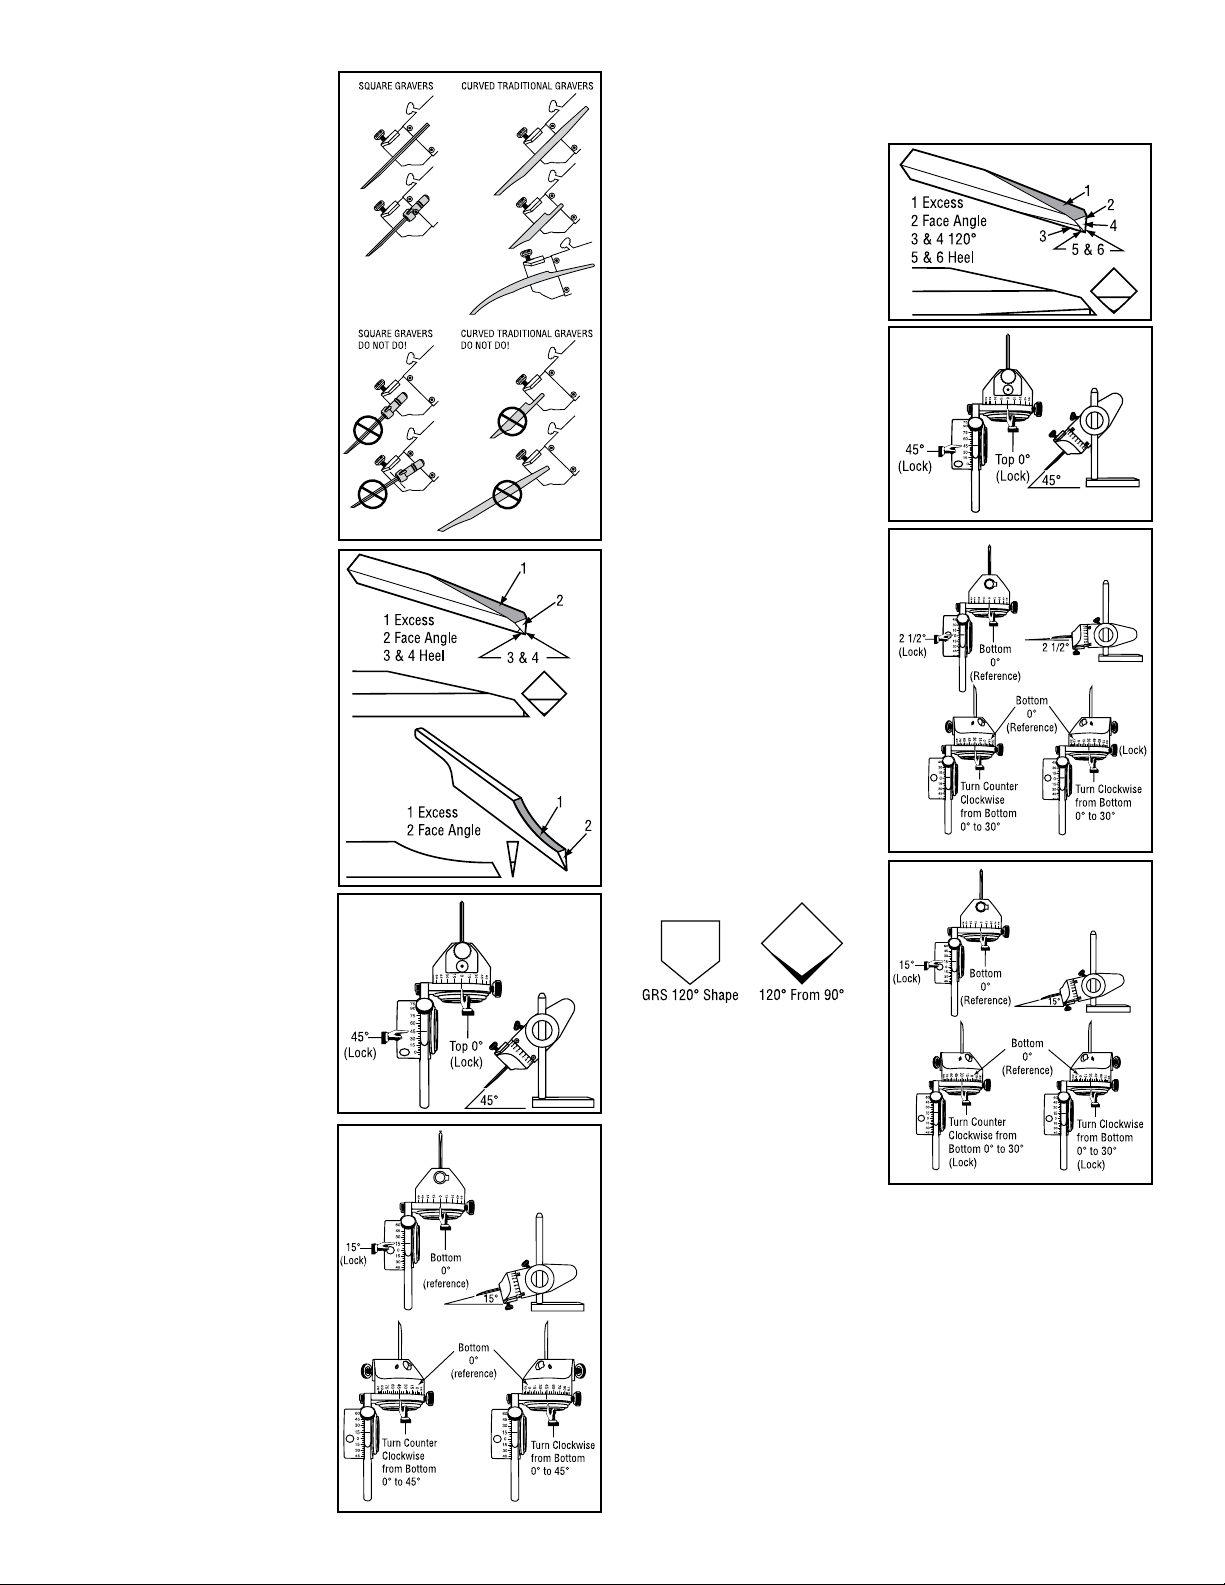
Square Gravers in Quick
Change holders (FIG. F), must
be inserted into the jaws from
the back. DO NOT hold tool by
the Quick Change holder in the
jaw.
Hold Curved Traditional
Graver (FIG. G) as shown.
NOTE: Because of the
tools curve, you will need to
guesstimate the angle needed
to set the face angle.
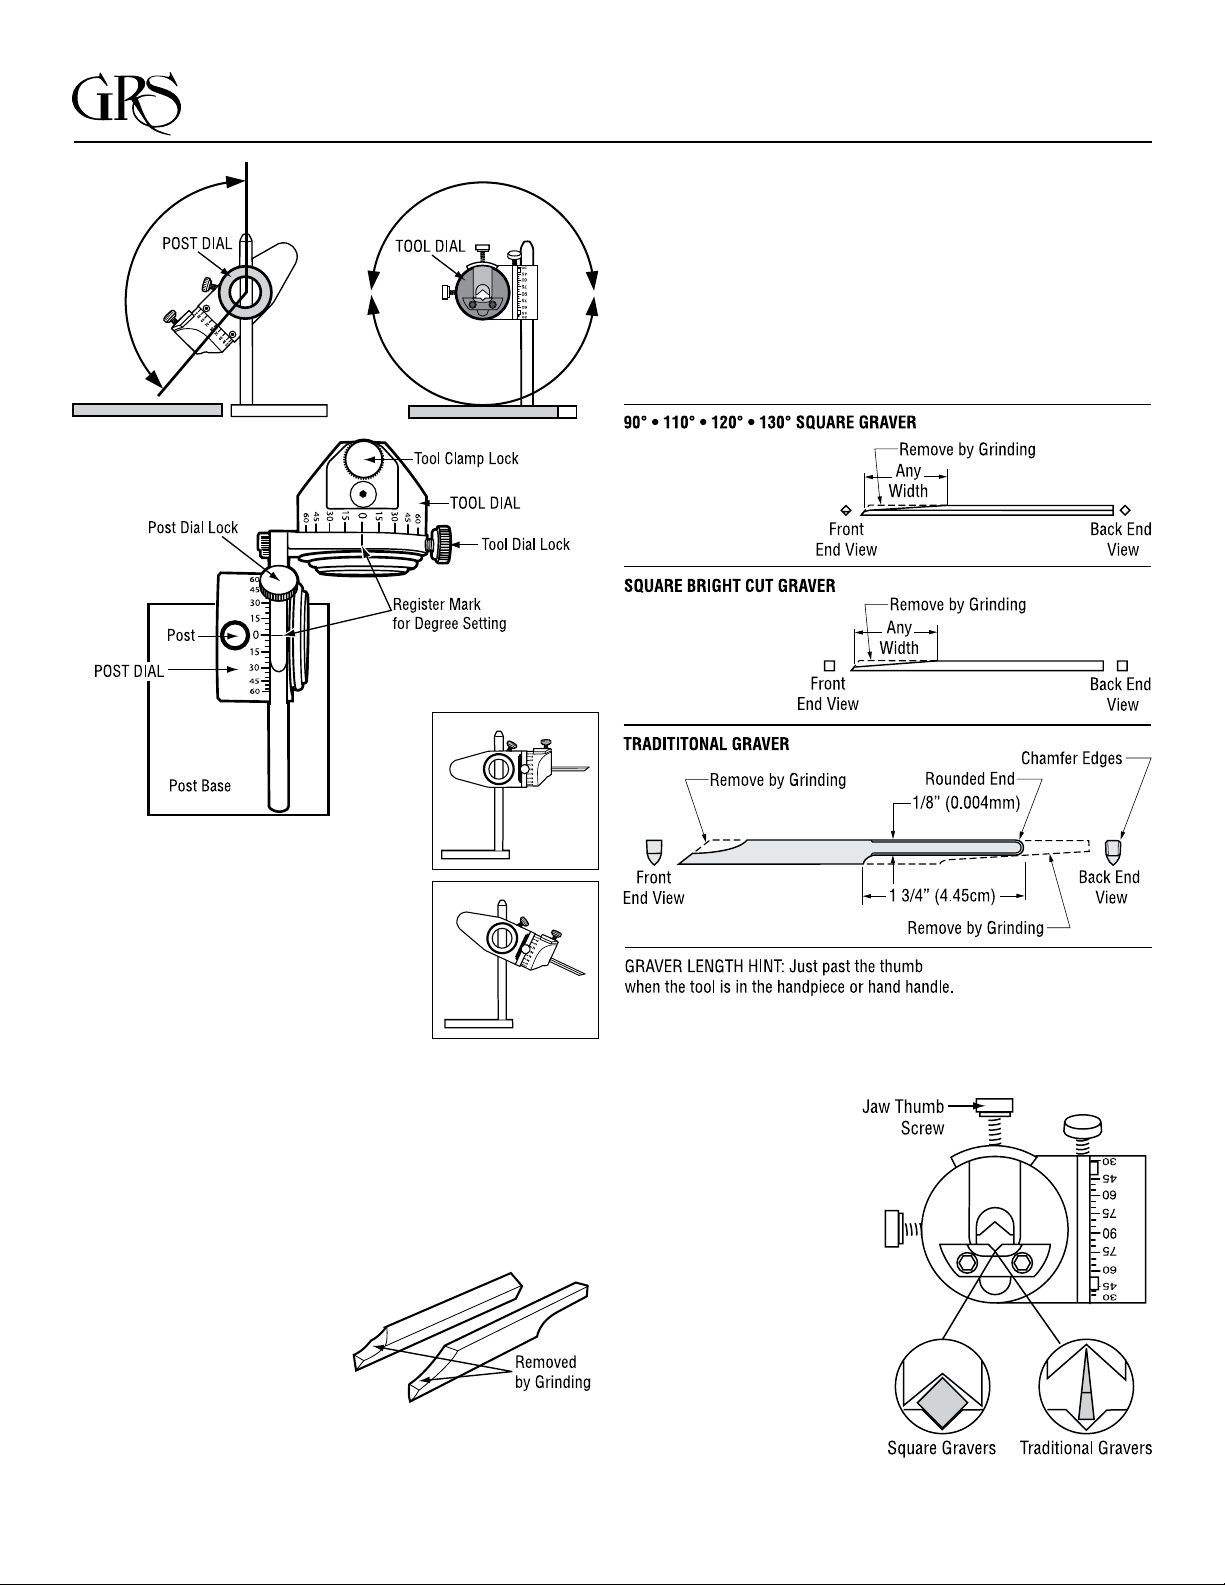
90 DEGREE SQUARE GRAVER
With the graver’s excess metal
removed (see getting the graver
ready to sharpen, (FIG. G-1)
you are ready to make the face
angle (FIG. G-2). With the tool
mounted, face angle down, and
the TOOL DIAL locked at 0°, set
the POST DIAL at 45°. This is
just an example, you may change
face angles to t your needs. If
you are using a square blank
graver, start your face angle by
using a 260 grit wheel on the
Power Hone. Then nish the face
surface by stepping up to a 600
grit, then a 1200 grit. Once you
have nished the face you will
need only to take these steps
again if the tip becomes severely
damaged. If you’re not using a
Power Hone, shape the face as
close as possible on a bench
grinder and nish with this xture
and a stone.
A 15° heel will be used for this
example (FIG. G-3 & 4). Set the
POST DIAL at 15° and lock it.
Rotate the TOOL DIAL halfway
around or 180°, go from the top
0° setting until the bottom 0°
setting is on top. From the new
0°, tool pointing away from
you, turn dial clockwise, until
it reads 45° and lock. Sharpen
on a ceramic wheel making the
heel about 1/32" long. If you
heel on a 1200 grit wheel, use
the xture and stroke the graver
a couple times without turning
the Power Hone on. After
forming this heel turn the dial
counterclockwise going past the
0° until it reads 45° and lock in
position. Finish the heel on this
side using the same method. It
is important that both heels are
the same size and symmetrical.
MAKING A 120 DEGREE GRAVER FROM A SQUARE GRAVER
Refer to “SHARPENING A 90° GRAVER”, for details. With the
graver’s excess metal removed (FIG. H-1) mount the tool face
angle down in the TOOL DIAL
and lock at 0°. Set the
POST DIAL at 45° (or desired
face angle) and grind the face
(FIG. H-2). Turning the TOOL
DIAL around 180° to reference
0° and change the POST DIAL
to 2-1/2° (halfway between 0°
and 5°) and lock in position.
From reference 0°, rotate dial
clockwise to 30° and grind angle
(FIG. H-3). Make this angle
grind about 1/2" long. Rotate
TOOL DIAL counter clockwise
past reference 0° to 30°, lock
and grind angle (FIG. H-4).
Make this side the same length
as the other side (FIG. H-3).
TIP: To measure how much you
are grinding off, time it or count
while it’s grinding. It may be
necessary to regrind the other
side to make both sides equal.
But it is important that the sides
are equal and symmetrical.
Make the heel (FIG. H-5 & 6)
by changing the POST DIAL
to 15° (or desired heel angle).
The TOOL DIAL is already at
30° left, so make this heel and
rotate TOOL DIAL right, past
reference 0° to 30° and make
the other heel. The 120° graver
is complete.
HOW TO MAKE A 110 DEGREE
& 130 DEGREE OUT OF A
SQUARE GRAVER
Basically, making a 110° or
130° graver is the same as
making a 120° graver, just
change the TOOL DIAL angle
for different side angles.
110° graver (FIG. H-3, 4): The side angle POST DIAL is set at
2-1/2°, but set the TOOL DIAL from reference 0° left 35° and make
one side, then right 35° from reference 0° to make the other side.
130° graver (FIG. H-3, 4): The side angle POST DIAL is set at
2-1/2°, but set the TOOL DIAL from reference 0° left 25° and make
one side, then right 25° from reference 0° to make the other side.
How do you gure this angle setting? The sides of a 90° tool
mounted in a xture, dial set at 0°, are 45° from the wheel. Adding
all angles: 45° + 45° + 90° = 180° (a at plane). Using 180° minus
(desired tool angle) let’s say, 110° = 70°. There are two sides to
the tool, so you divide 70° by 2 which equals 35°, the setting to
make a 110° graver.
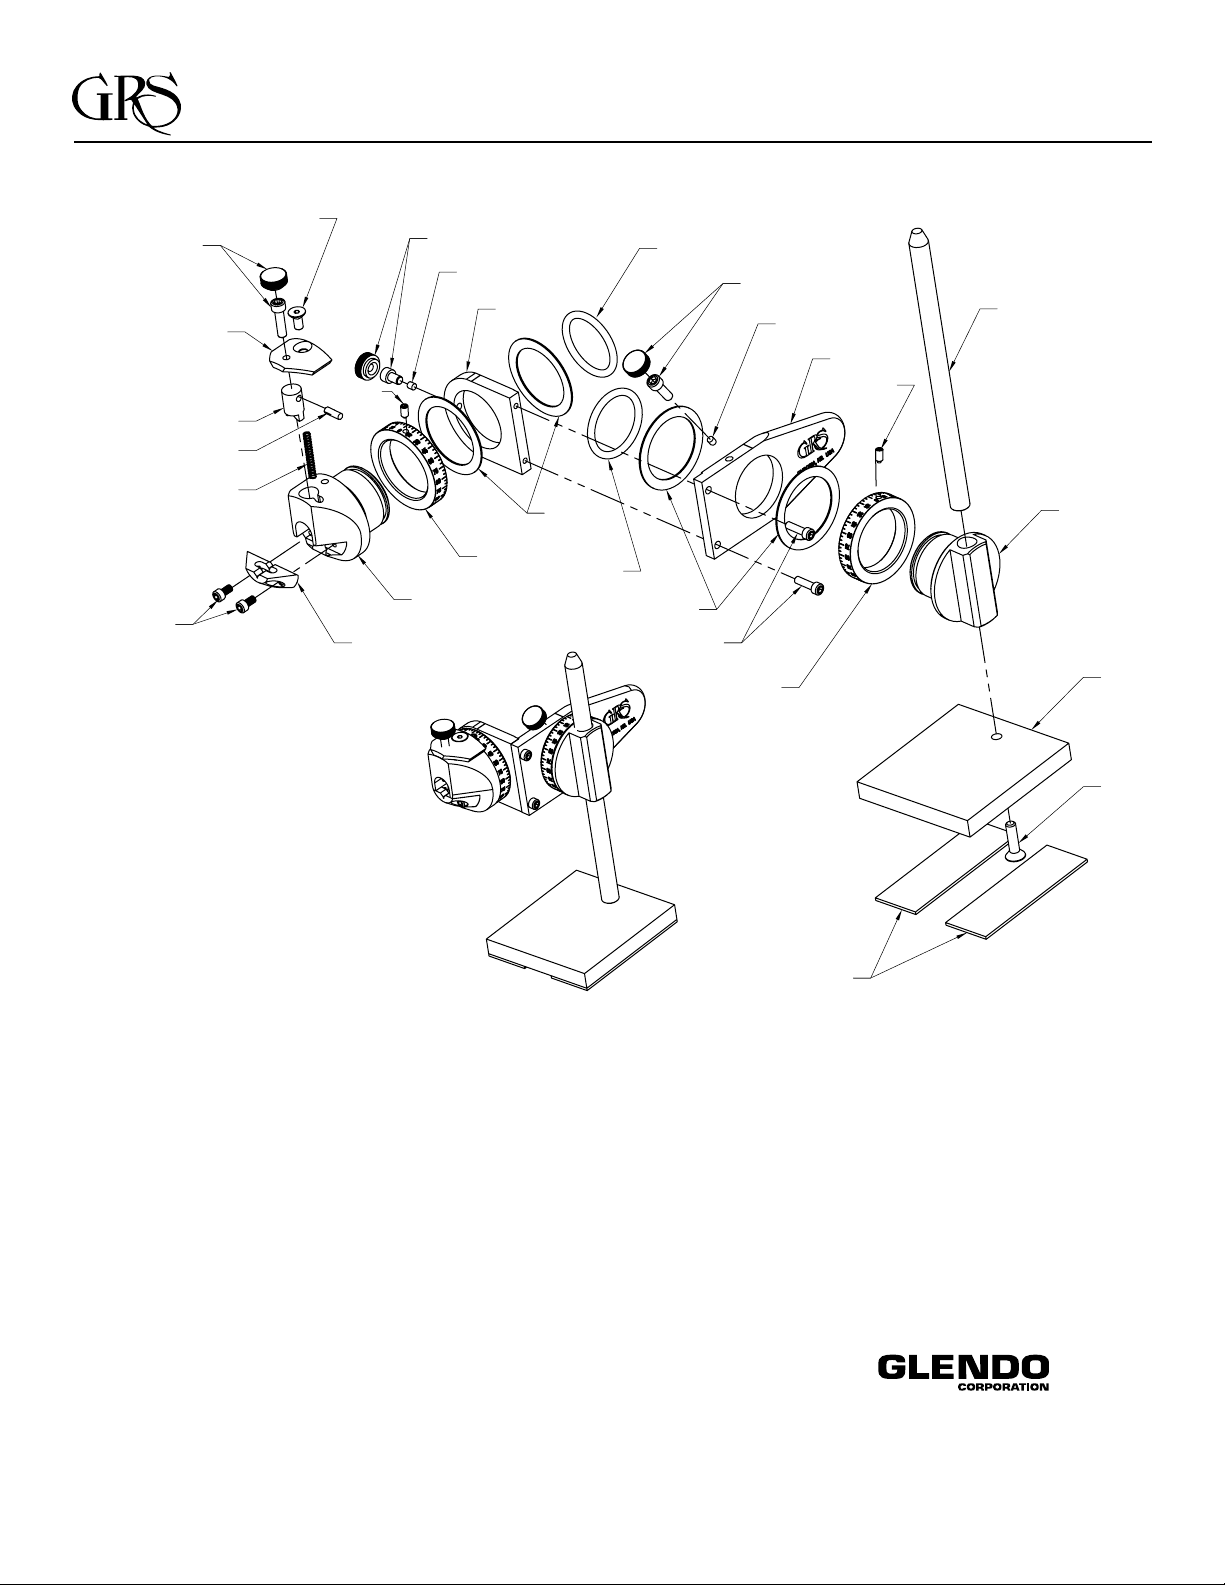
FIG. F
FIG. H
FIG. G-2
Face Angle
FIG. G-3&4
HEEL
FIG. G
FIG. H-2
Face Angle
FIG. H-3, 4
Heel
FIG. H-5&6
Heel