9
With the small camera adaptor, the Glidegear SYL-1000 has the capability to
stabilize cameras from 1 oz. (28 g.) to 3 lbs. (1.36 kg.).
Always begin your balancing with the batteries and memory card installed in
your camera. There are three axes of balance that need to be achieved:
vertical (Y-axis), horizontal (X-axis), and fore/aft (Z-axis). To keep it simple,
better do them one at a time.
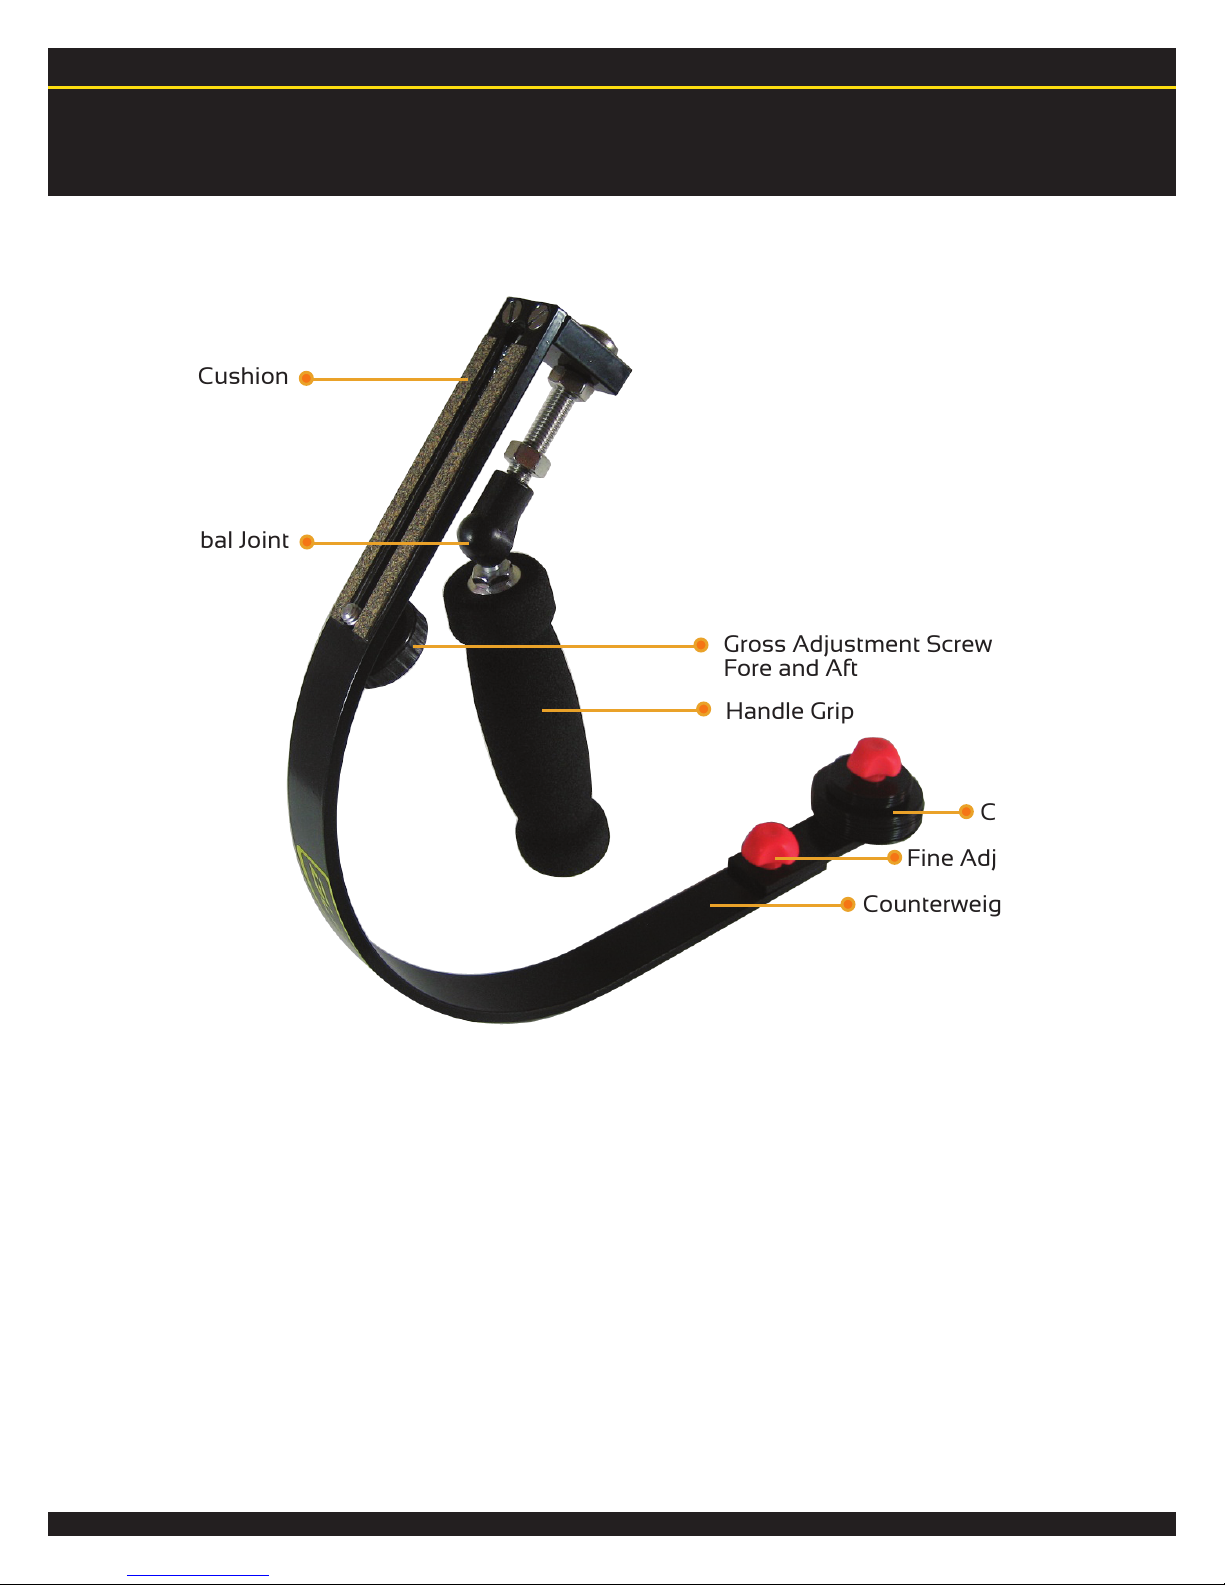
Vertical
For this explanation we will start with the vertical balancing. You can simply
start with all weights removed and keep adding weight until the system is
vertically balanced. The large counterweight discs are 0.6 oz., and the small
counterweight discs are 0.25 oz. It is an important point to make that the nut
that holds the weights in place also has weight and when fine tuning your
system, you may improve the balance by the addition or removal of one or
both of these nuts.
Horizontal
Next, make sure the horizontal is balanced by use of the counterweight arm.
Some cameras will have the mounting hole well off to the left or right of the
center of mass of the camera. To compensate for this simply loosen the
attachment knob and carefully adjust the counterweight arm to the opposite
direction that the system is leaning. You will know the horizontal has been
balanced properly when the system is completely level along the X-axis.
(Hint: use a small camera bubble leveler for precision).
Fore-and-Aft
If your camera is way out of balance in the Fore and Aft department, you may
want to make this adjustment first. Simply slide the camera forward or
backward along the mounting cushion strips with the gross adjustment
screw.
This process will be a little different for every type of camera so it always
takes a little fiddling and fine-tuning adjustments. So, how do you know if
your system is balanced? Your system will be balanced when it is completely
level and you can move right to left and forward to aft without the camera
tipping over, and with negligible pendulum effect from the bottom of the
counterweight arm.