Globalstar Sat-Fi2 User manual

Globalstar Sat-Fi2 User Guide
USER GUIDE
This guide is based on the Globalstar Sat-Fi2 and Sat-Fi2 Apps. Software changes may have occurred after this
printing.
Globalstar reserves the right to make changes in technical and product specifications without prior notice.
Globalstar Inc.
1351 Holiday Square Blvd.
Covington, LA 70433
Copyright©2019 Globalstar®Incorporated.
All rights reserved.
Globalstar®is a registered trademark of Globalstar Incorporated.
Sat-Fi2®is a registered trademark of Globalstar Incorporated.
Android®is a registered trademark of Google Incorporated.
iPhone®is a registered trademark of Apple Incorporated
All other trademarks and registered trademarks are properties of their respective owners.
Revision date 10/24/19

Globalstar Sat-Fi2 User Guide
WELCOME ................................................................................................................................ 1
WHAT’S IN THE BOX? .........................................................................................................................................1
ACTIVATING THE SAT-FI2....................................................................................................................................1
ADVANCED SETUP AND QUICK START.................................................................................................................1
REGISTERING A MY ACCOUNT PROFILE.................................................................................... 2
USER REGISTRATION.........................................................................................................................................2
GETTING STARTED ................................................................................................................... 3
SAT-FI2 DEFAULT USERNAME & PASSWORDS .....................................................................................................3
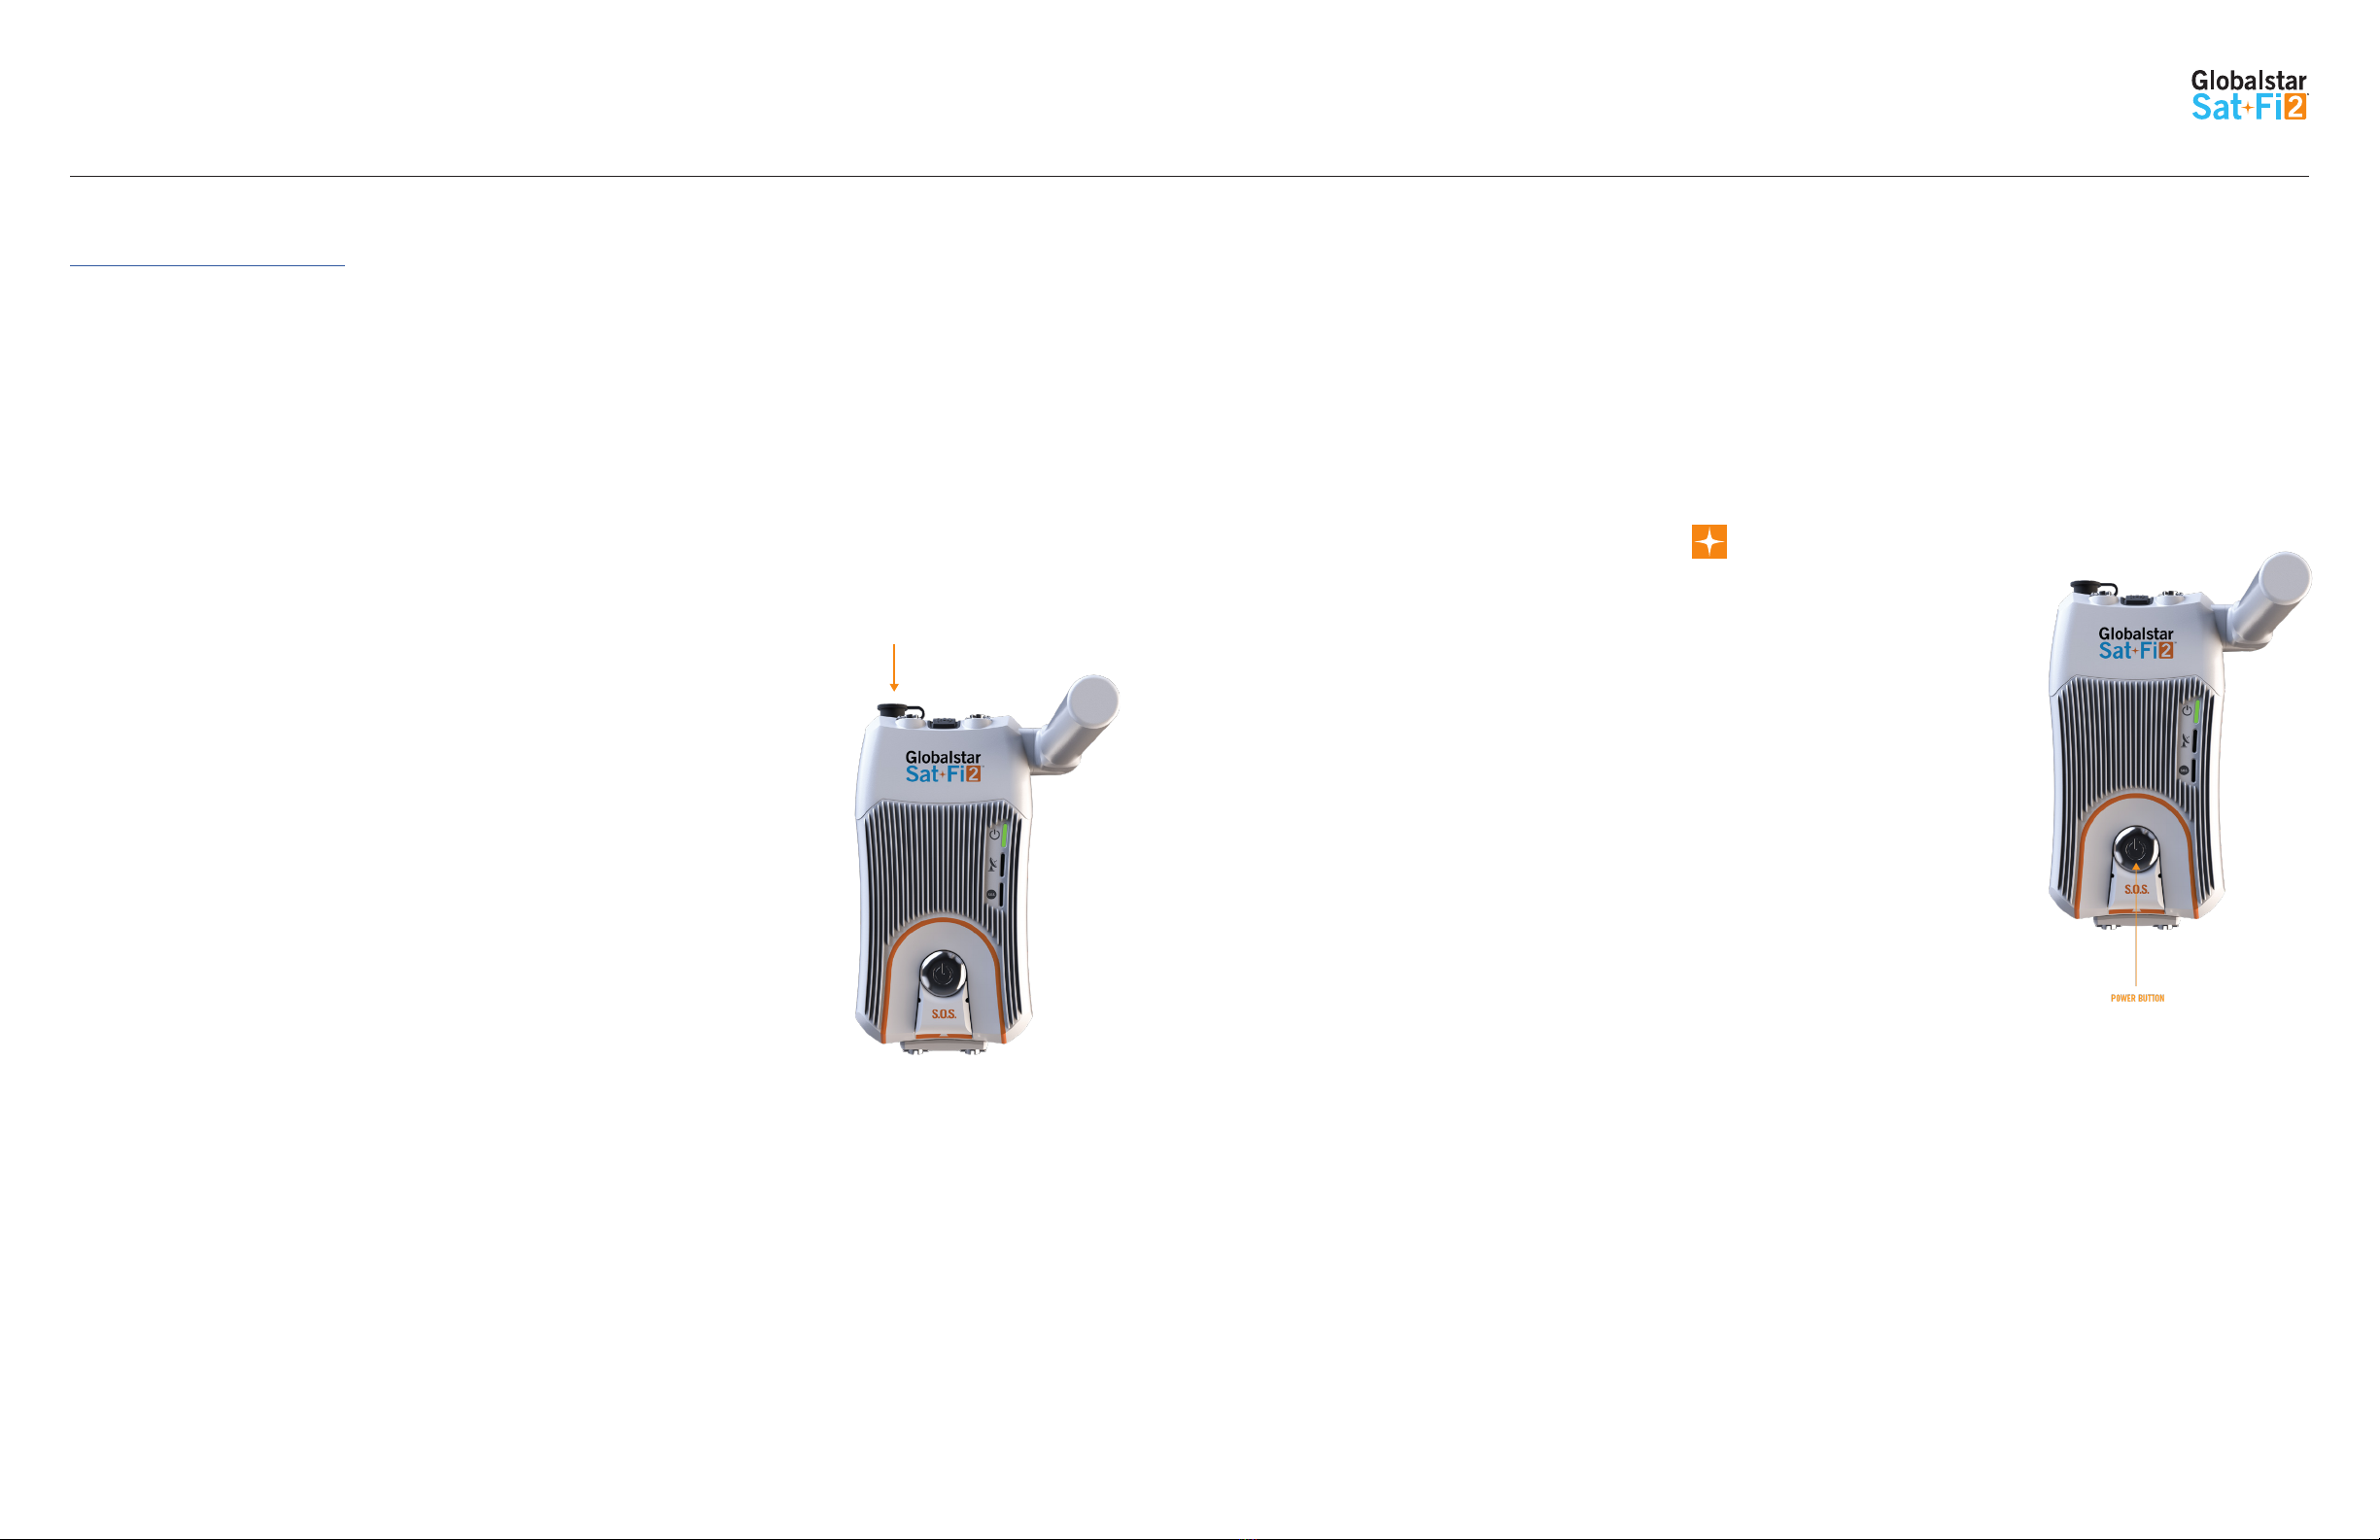
STEP 1 – CHARGE THE SAT-FI2 ..........................................................................................................................3
STEP 2 – INSTALL THE SAT-FI2 APP ON A SMARTPHONE ....................................................................................3
STEP 3 – POWER ON THE SAT-FI2 AND OPEN THE SAT-FI2 APP...........................................................................3
STEP 4 – SAT-FI2 APP ADVANCED SETUP CONFIGURATION .................................................................................4
Sat-Fi2 App Quick Start................................................................................................................................4
STEP 5 – HOW TO MAKE A USER AN ADMIN ......................................................................................................5
STEP 6 – TEST SAT-FI2 CONFIGURATION AND CONNECTION ..............................................................................6
BEST PRACTICE USES........................................................................................................................................6
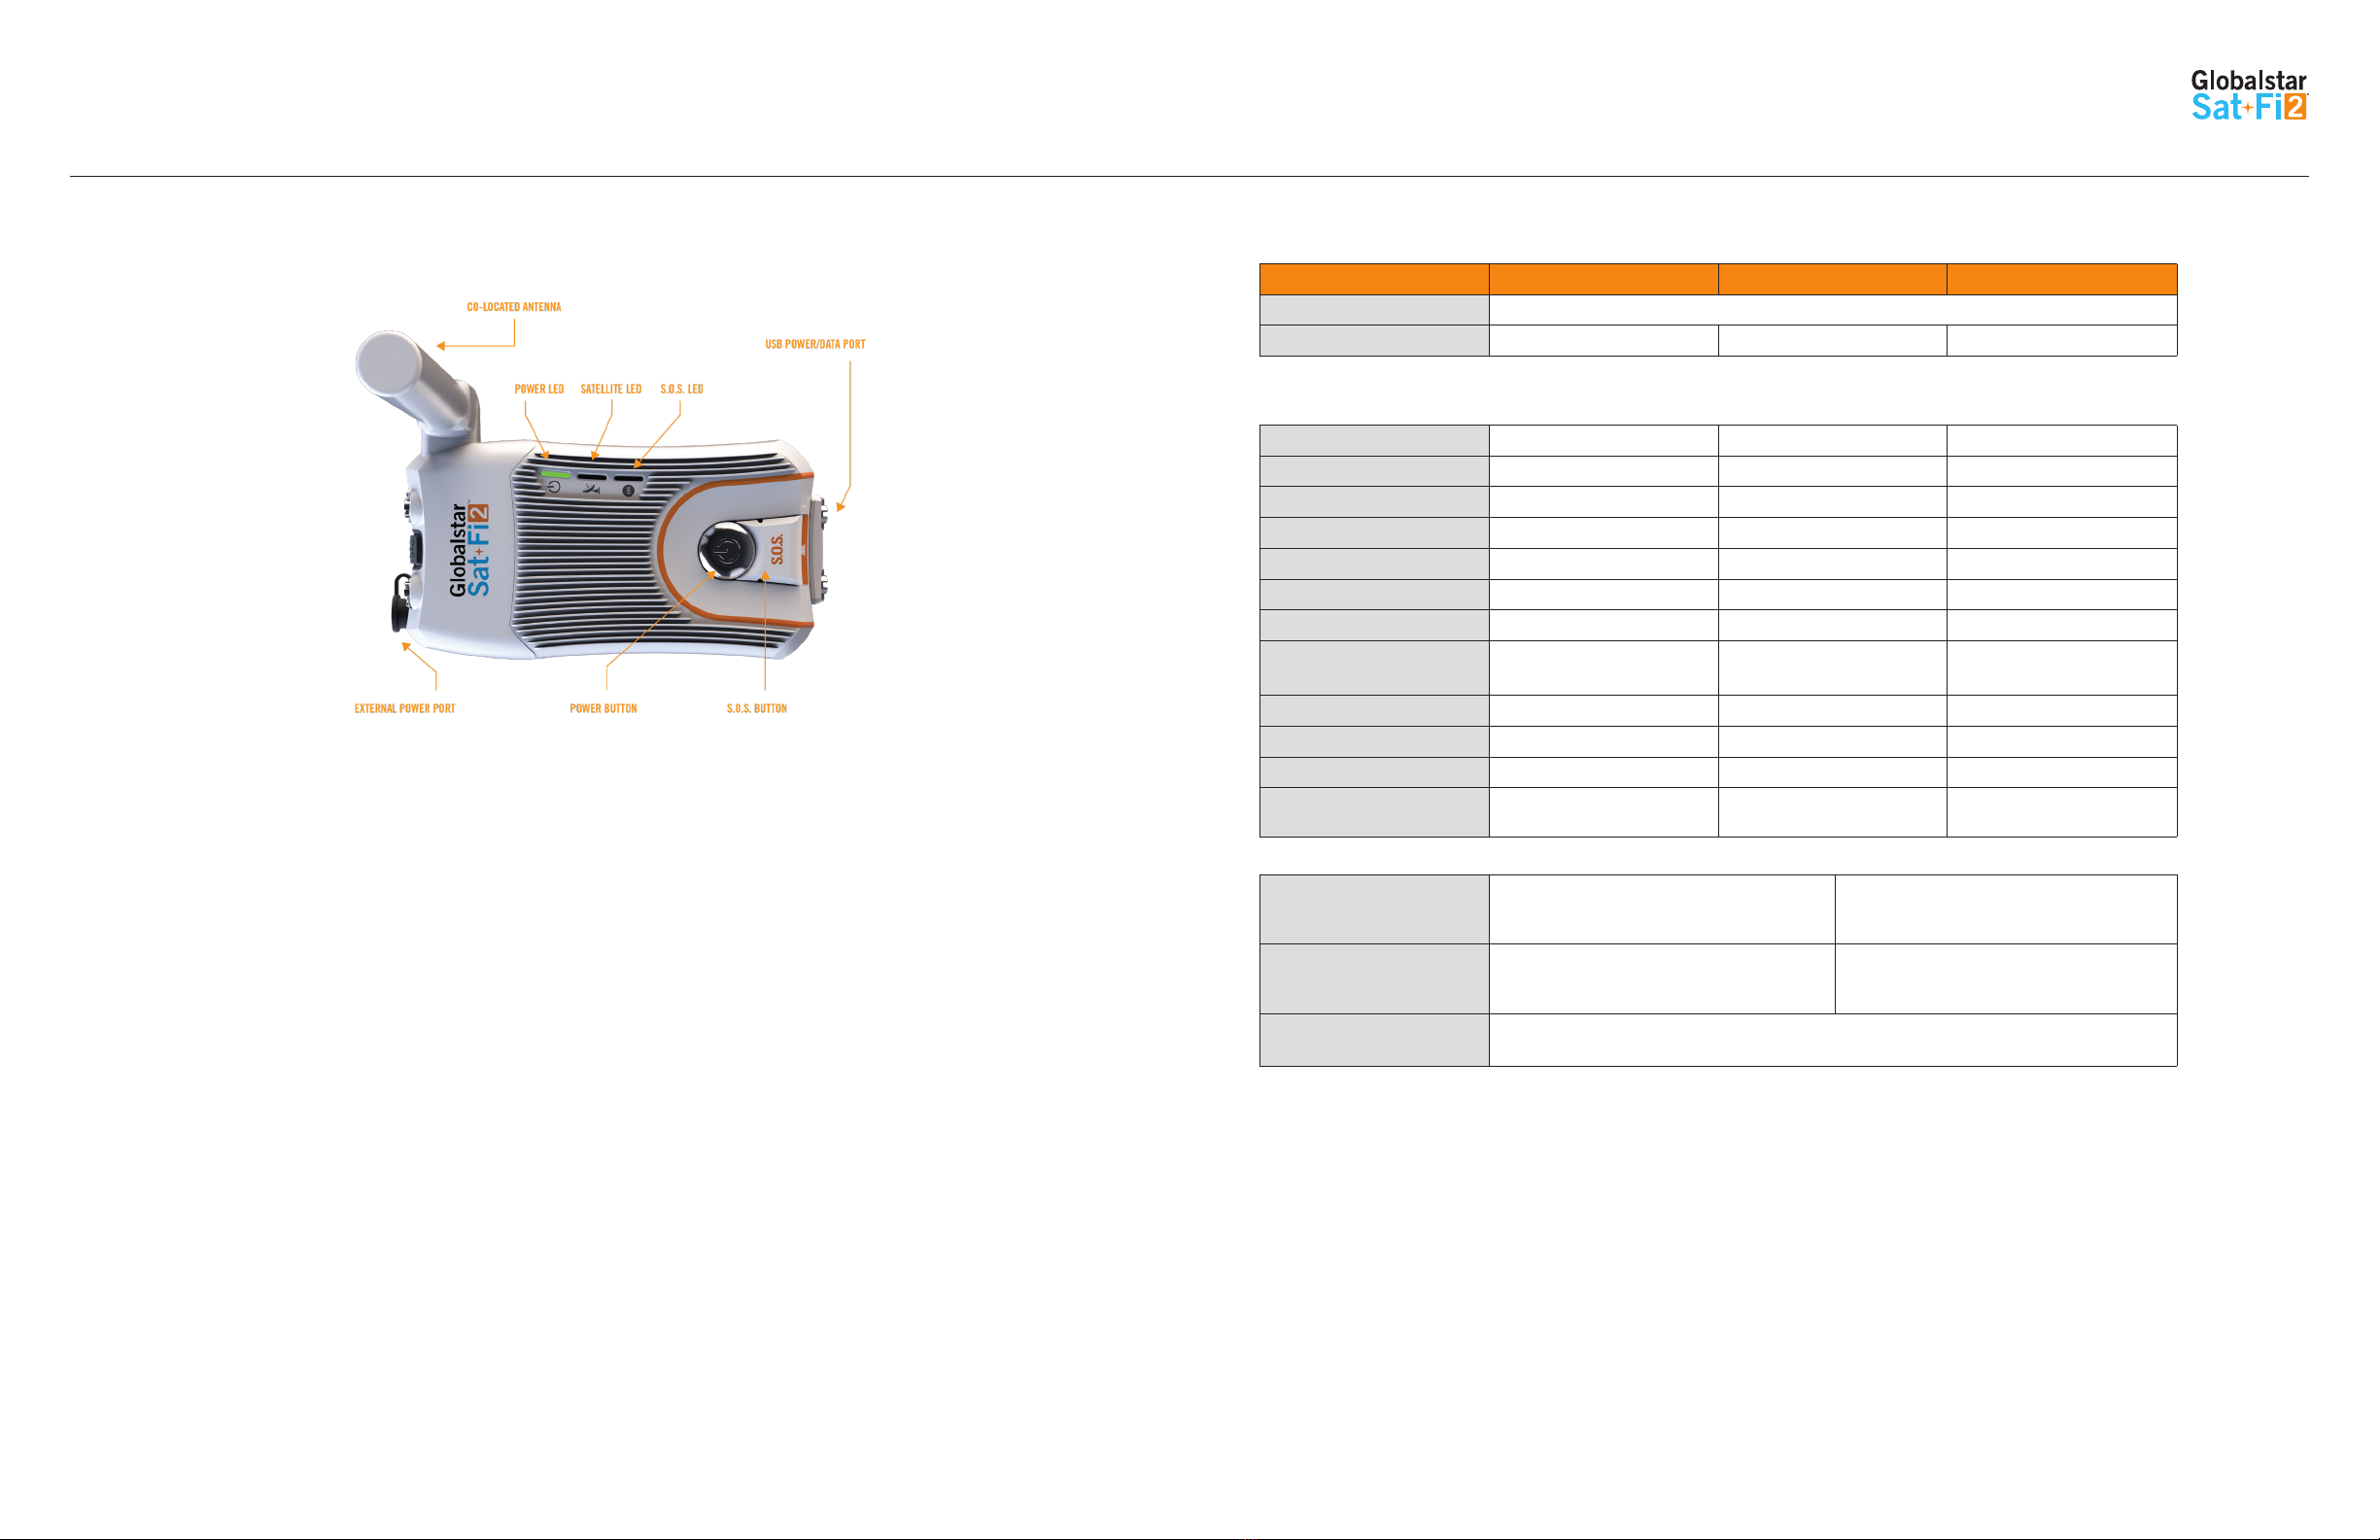
SAT-FI2 OVERVIEW ................................................................................................................... 7
SAT-FI2 AT A GLANCE.........................................................................................................................................7
SAT-FI2 LEDS.....................................................................................................................................................7
SAT-FI2 APP HOME SCREEN ...............................................................................................................................8
LOGGING INTO THE SAT-FI2 APP ........................................................................................................................8
LOGGING OUT OF THE SAT-FI2 APP ...................................................................................................................9
CLOSING THE SAT-FI2 APP ................................................................................................................................9
VOICE COMMUNICATIONS....................................................................................................... 10
OVERVIEW .......................................................................................................................................................10
MAKING A VOICE CALL.....................................................................................................................................10
RECEIVING A VOICE CALL.................................................................................................................................11
VOICEMAIL ......................................................................................................................................................11
Voicemail using a Sat-Fi2 Connected Smartphone .........................................................................................11
Voicemail using a Landline/Mobile Phone .....................................................................................................11
SMS/TEXT MESSAGING........................................................................................................... 13
SENDING AN SMS/TEXT MESSAGE ...................................................................................................................13
RECEIVING AND REPLY TO AN SMS/TEXT MESSAGE..........................................................................................13
SENDING SMS/TEXT MESSAGES TO MULTIPLE CONTACTS ................................................................................13
DELETING MESSAGE THREADS ........................................................................................................................13
DELETING INDIVIDUAL MESSAGES...................................................................................................................14
EMAIL.................................................................................................................................... 15
OVERVIEW .......................................................................................................................................................15
Inbox Screen .............................................................................................................................................15
Compose Message Screen ...........................................................................................................................15
View Email Screen......................................................................................................................................15
CONFIGURING EMAIL ACCOUNTS.....................................................................................................................16
Email Accounts – Gmail, Yahoo, iCloud, Outlook, Hotmail & AOL....................................................................16
Email Accounts – Exchange ........................................................................................................................17
Email Accounts – IMAP & IMAPS ................................................................................................................18
VIEWING EMAIL ...............................................................................................................................................19
COMPOSING AND SENDING EMAIL...................................................................................................................19
ATTACHING IMAGES TO AN EMAIL....................................................................................................................20
HIBERNATION MODE:.......................................................................................................................................20
S.O.S./GEOS ........................................................................................................................... 21
INITIATING AN S.O.S........................................................................................................................................21
S.O.S. from the Device ...............................................................................................................................21
S.O.S. from the Sat-Fi2 App........................................................................................................................21
Communicating with GEOS via text ..............................................................................................................22
CANCELLING AN S.O.S.:...................................................................................................................................23
S.O.S. from the Device ...............................................................................................................................23
S.O.S. from the Sat-Fi2 App........................................................................................................................23
SAT-BROWSE.......................................................................................................................... 24
OVERVIEW .......................................................................................................................................................24
WEB BROWSING ..............................................................................................................................................24
SOCIAL MEDIA & EXTERNAL APPLICATIONS............................................................................ 25
TWITTER..........................................................................................................................................................25
Configuring the Sat-Fi2 App for Twitter.........................................................................................................25
Posting to Twitter .......................................................................................................................................25
WHATSAPP ......................................................................................................................................................26
Enabling WhatsApp Support........................................................................................................................26
WEATHER............................................................................................................................... 27
CURRENT WEATHER SCREEN...........................................................................................................................27
FORECAST WEATHER SCREEN..........................................................................................................................27
Weather Configuration.................................................................................................................................27
VIEW CURRENT WEATHER................................................................................................................................28
QUEUE................................................................................................................................... 29
QUEUE SCREEN...............................................................................................................................................29
DELETE A MESSAGE FROM THE QUEUE ...........................................................................................................29
ADD MESSAGES TO THE QUEUE.......................................................................................................................30
APP SETTINGS ....................................................................................................................... 31
APP SETTINGS SCREEN ...................................................................................................................................31
THE SETTINGS SCREEN ON THE IPHONE APP DISPLAYS THE FOLLOWING INFORMATION:.................................31
• General..................................................................................................................................................31
VIEWING THE APP SETTINGS SCREEN..............................................................................................................32
FIRMWARE UPDATE .........................................................................................................................................33

Globalstar Sat-Fi2 User Guide
SAT-FI2 SPECIFICATIONS........................................................................................................ 55
SAT-FI2 CERTIFICATIONS........................................................................................................ 56
FCC COMPLIANCE STATEMENT .........................................................................................................................56
FCC Part 15 Clause 15.21..........................................................................................................................56
ISED RF Exposure Guidance Statement (in English and French): ....................................................................56
Radio & Television Interference....................................................................................................................56
INDUSTRY CANADA CERTIFICATION..................................................................................................................56
RADIO ASTRONOMY SITE .................................................................................................................................56
REGULATORY CERTIFICATION NUMBERS ..........................................................................................................56
DÉCLARATION DE CONFORMITÉ AVEC LA FCC...................................................................................................57
FCC: Section 15 Clause 15.21 ....................................................................................................................57
ISED RF Déclaration d'orientation sur l'exposition .........................................................................................57
Interférence Radio et Télévision...................................................................................................................57
CERTIFICATION D’INDUSTRIE CANADA .............................................................................................................57
SITE DE RADIO ASTRONOMIE...........................................................................................................................57
NUMÉROS DE CERTIFICATION RÉGLEMENTAIRE...............................................................................................57
SAT-FI2 GENERAL WARNINGS................................................................................................. 58
DEVICE SETTINGS .................................................................................................................. 34
VIEWING THE DEVICE SETTINGS ......................................................................................................................34
ADMIN CONSOLE .............................................................................................................................................34
USERS.............................................................................................................................................................35
WI-FI CONFIGURATION.....................................................................................................................................35
Wi-Fi Configuration – Settings Tab ...............................................................................................................35
Wi-Fi Configuration – Clients Tab .................................................................................................................36
USERS CAN SEE ALL THE CONNECTED DEVICES AS WELL AS THEIR IP ADDRESSES.........................................36
FIREWALL........................................................................................................................................................36
Firewall – Domains Tab ...............................................................................................................................36
Firewall – IP Tab ........................................................................................................................................37
Firewall – Port Tab......................................................................................................................................37
Firewall – App Tab......................................................................................................................................37
DEVICE CONFIGURATION..................................................................................................................................38
Status .......................................................................................................................................................38
Configuration .............................................................................................................................................39
System Update ..........................................................................................................................................40
Factory Reset.............................................................................................................................................41
GLOBALSTAR MY ACCOUNT .................................................................................................... 42
LOGGING IN TO MY ACCOUNT ..........................................................................................................................42
MY DEVICES MAIN SCREEN..............................................................................................................................43
Filtering Devices ........................................................................................................................................43
View Device Details ....................................................................................................................................44
View/Edit...................................................................................................................................................44
MY ACCOUNT – MY DEVICES ............................................................................................................................45
Sat-Fi2 My Devices Overview.......................................................................................................................45
Name Tab..................................................................................................................................................46
S.O.S. Tab.................................................................................................................................................46
Voice/Text Blocker Tab ................................................................................................................................47
Support Tab...............................................................................................................................................48
Factory Reset Tab.......................................................................................................................................49
MY ACCOUNT – SETTINGS & BILLING ...............................................................................................................49
Overview....................................................................................................................................................49
Username Settings .....................................................................................................................................50
Password Settings ......................................................................................................................................50
Credit Card Information ..............................................................................................................................51
Customer Information .................................................................................................................................51
Monitor Message Usage ..............................................................................................................................52
Billing History............................................................................................................................................54

Globalstar Sat-Fi2 User Guide
Page 1
WELCOME
No matter how far off the grid you go, Globalstar’s Sat-Fi2 satellite Wi-Fi hotspot keeps you connected to what
matters. Sat-Fi2 fills the gap when your cellular or radio coverage is gone, keeping voice and data communication
channels open when you need it the most. With Sat-Fi2, you can use your personal Wi-Fi enabled devices and
stay connected over the newest and most modern mobile satellite network with data speeds up to 72 kbps! Up
to 8 different users can connect to a single Sat-Fi2 for web browsing, email, 2-way texting, voice calls, data,
weather updates and much more. Sat-Fi2 is lightweight, water & impact resistant and fits right in the palm of
your hand. Sat-Fi2 is the last device you’ll ever need to stay in touch with family, friends, business contacts and
emergency services.
NOTE: Before using the Sat-Fi2, Globalstar recommends spending a few minutes reading through this User
Guide prior activation ensuring a successful Sat-Fi2 configuration. Complete each step before moving on to the
next step.
What’s in the Box?
Activating the Sat-Fi2
In order to begin using the Sat-Fi2, please ensure you have an active subscription. Please check to see if you have
received a Globalstar Activation Submission email from message-noreply@globalstar.com. This email will have the
Account Number (i.e. AC00123456), needed for registering a My Account Profile. If you do not have an active
subscription or encounter any issues with your device please visit Globalstar.com/Sat-Fi2Support for assistance.
Advanced Setup and Quick Start
There are two types of user accounts associated with the Sat-Fi2:
• Advanced Setup – For users who want to configure email and social media accounts
○Voice calls - Make voice calls
○Text messaging – Send and receive text messages
○Email – Access personal email account
○Social Media – Send posts to Twitter
○Weather – View local weather conditions
○Administrative privileges
• Change Sat-Fi Wi-Fi password
• Delete messages from Queue
• Quick Start – No username or password needed to use Sat-Fi2
○Voice calls - Make voice calls using the Sat-Fi2 Mobile Device Number
○Text messaging – Send and receive texts using the Sat-Fi2 Mobile Device Number
○Email – Access personal email account
○Social Media – Send posts to Twitter
○Weather – View local weather conditions
• Globalstar Sat-Fi2 Device
• Wall Adapter
• Best Practice Card
• Quick Start Guide
• 18” Micro USB Cable
Recommended use: Firmware updates only.
• GEOS Information Card
• AC/DC 12V Charging Cable
Packaged and/or shipped separately

Globalstar Sat-Fi2 User Guide
Page 2
REGISTERING A MY ACCOUNT PROFILE
User Registration
Access to additional device and account management features such as Message Usage, Billing & Payments
information. Perform the following steps for new user registration.
1. In a web browser enter https://mysatfi.globalstar.com/
2. Select Register
3. Enter e-mail address used when activating the device and Globalstar Account Number located on the
activation email confirmation
4. Select Confirm
5. Select Language Preference
6. Create username, password and secret question information
7. Select Register
8. My Account registration is complete.

Globalstar Sat-Fi2 User Guide
Page 3
GETTING STARTED
The following instructions are for iOS and Android users only. If you are not an iOS or Android user, please visit
Globalstar.com/Sat-Fi2Support for setup instructions.
Sat-Fi2 Default Username & Passwords
• Sat-Fi2 Wi-Fi
○Wi-Fi name: satfi2_XXXXXX
○Password: satfi1234
• Sat-Fi2 Admin
○Username: admin
○Password: admin
Step 1 – Charge the Sat-Fi2
The Sat-Fi2 must have a sufficient charge before it can be configured for use.
Perform the following steps to charge the Sat-Fi2 battery:
1. Remove the protective cover from the Power Port. Screw in the 12V
DC Power Adapter until it is all the way flush.
2. Plug the 12V DC Power Adapter to the wall. The Sat-Fi2 will perform
the power on cycle (the LEDs will blink in sequence), and then
begin charging.
3. For best results please leave the Sat-Fi2 connected to the charger
for at least 3 - 4 hours. The Power LED will turn solid GREEN when
fully charged.
4. Remove the 12V DC Power Adapter from the External Power Port.
Then re-install the protective cover over the External Power Port.
NOTE: If while using the Sat-Fi2 the Power LED starts blinking RED, the battery
requires further charging.
Step 2 – Install the Sat-Fi2 App on a Smartphone
1. Using an Internet or cellular connection, download and install the Sat-Fi2 App from the Google Play
Store or the Apple Store.
Step 3 – Power on the Sat-Fi2 and Open the Sat-Fi2 App
1. Power on the Sat-Fi2.
2. Ensure the smartphone has a cellular or Wi-Fi Internet connection.
3. Open the Sat-Fi2 app by selecting .
NOTE: The Sat-Fi2 App will download a few files necessary for
setup/configuration. Do not close the Sat-Fi2 App during the process.
Sat-Fi2
EXTERNAL POWER PORT

Globalstar Sat-Fi2 User Guide
Page 4
Step 4 – Sat-Fi2 App Advanced Setup Configuration
Perform the following to create a personal user login:
1. Ensure your device has a LTE or Wi-Fi connection and then Select the Sat-Fi2 App.
2. Select Allow for the following steps:
Taking photos, alternate GPS locations, sending and attaching photos, access contacts, talk when making a
voice call and make a phone call.
3. Select Let’s Get Started
4. Select Advanced Setup
5. Select Setup Email (Optional. Instructions on how to setup Email page 16)
6. Select Setup Twitter (Optional. Instructions on how to setup Twitter on page 25)
7. Select Next.
8. Turn on Sat-Fi2.
9. Turn on the smartphone’s Wi-Fi and select the Sat-Fi2 Wi-Fi – Default name is: satfi2_ <xxxxxx> (where
xxxxxx is the last 6 digits of the ICCID)
10. Enter the default Sat-Fi2 Wi-Fi password: satfi1234
11. Go back to the Sat-Fi2 app
12. Select I’M CONNECTED
13. Create user profile
For Android: A background battery usage message will be displayed, select OK. Then select NO when
prompted to ignore battery optimizations
14. Select SUBMIT when all fields have been completed.
NOTE: To make a user profile an Admin, see Step 5.
SAT-FI2 APP QUICK START
Quick Start allows immediate access as a guest user to main features of the Sat-Fi2. Perform the following steps to
create access for guest accounts:
1. Select WI-FI SETTINGS
2. Turn on the smartphone’s Wi-Fi
3. Select the Sat-Fi2 Wi-Fi – The default Wi-Fi name is satfi2_ <xxxxxx> (where xxxxxx is the last
6 digits of the ICCID)
4. Enter the default Sat-Fi2 password: satfi1234
5. Select CONNECT/JOIN
6. Select Let's Get Started
7. Select QUICK START

Globalstar Sat-Fi2 User Guide
Page 5
Step 5 – How to make a user an Admin
To update the firmware on your Sat-Fi2, it is necessary to give admin privileges to a user.
Perform the following steps to make a Sat-Fi2 user an admin:
1. Open a web browser
2. In the address bar enter:
http://192.168.1.1 or http://192.168.0.1
3. A Sat-Fi2 login screen will be displayed.
• In the Username field, enter the Admin Username
(Default is admin)
• In the Password field, enter the password (Default is admin)
• Select the Login button.
4. The Sat-Fi2 Admin Console screen will be displayed.
5. Select Users
6. The list of users will be shown. Then select the pencil icon next to the user you would like to
make an admin.
7. The Account Info will appear. Select Admin User
8. Select Save
9. You can verify a user has been made an admin by looking at the checkmark next to the username.

Globalstar Sat-Fi2 User Guide
Page 6
Step 6 – Test Sat-Fi2 Configuration and Connection
Perform the following to make a satellite call, send a text message, receive a call or browse and confirm the Sat-Fi2
is configured and operational:
1. Verify the following:
- The Sat-Fi2 is outside with 360 clear view of the sky with no obstructions (buildings, trees, etc.)
- The Sat-Fi2 is facing up – logo/power button facing up
- The Sat-Fi2 co-located antenna is fully extended in the upright position and powered on
2. Verify the and the are displayed on the Sat-Fi2 app indicating the Sat-Fi2 has a good
satellite connection.
3. Select the Phone icon
4. On the telephone key pad either:
- Enter a telephone number
- Select a contact
5. Select the phone icon to place the call
6. Within a few seconds you will hear a dial tone and be connected
7. Select to disconnect/hang-up
8. The Sat-Fi2 is now configured and operational
Best Practice Uses
• The Sat-Fi2 WILL NOT work indoors and needs to
be outside
• The Sat-Fi2 co-located antenna needs to be fully extended
in the upright position
• Power on the Sat-Fi2 prior to use – The Sat-Fi2 can take
up to 5 minutes to boot up and acquire a GPS fix
• For optimal performance:
○The Sat-Fi2 needs a clear 360° view of the sky with
no obstructions (buildings, trees, etc.)
○The Sat-Fi2 should be placed on a flat surface with the Power Button and Sat-Fi2 Logo facing
up towards the sky
○The Sat-Fi2 will work best if it is on a higher surface
NOTE: LTE and Wi-Fi interference may degrade the Sat-Fi2's performance.
• Ensure all users download and install the Sat-Fi2 App prior to leaving Internet/Cellular service
• Before making a voice call or sending a text message, ensure and the are displayed on the Status Bar of
the Sat-Fi2 App, indicating that the Sat-Fi2 has a good satellite connection

Globalstar Sat-Fi2 User Guide
Page 7
SAT-FI2 OVERVIEW
Sat-Fi2 at a Glance
• Co-Located Antenna – Must be fully extended and pointing straight to the sky for optimal performance
• Power LED – Displays Power status
• Satellite LED – Displays Satellite connectivity status
• S.O.S. LED – Displays S.O.S. status
• USB Power/Data Port
○Remove cover to access USB Power/Data Port
○Use port to charge the battery and connect to AC Power Adapter
• External Power Port – Use with 12V charger (coming soon)
• Power Button
○Power On – Press and hold for 1 second
○Power Off – Press and hold for 3 seconds
• S.O.S. Button
○Initiate S.O.S. with GEOS – Press and hold S.O.S. button until S.O.S. LED blinks GREEN
○Cancel S.O.S. with GEOS – Press and hold the S.O.S. button until S.O.S. LED blinks RED
Sat-Fi2 LEDs
OPERATIONAL/STATUS
LED Pattern Definitions
• Normal blink: Blinks in slow rate
• Fast blink: Blinks in fast rate
• Double blink: Blinks twice and off
• Forward Reverse: The boot up LED pattern scrolls green from the power to the S.O.S. then all 3-blink green
• Solid ON: Stays ON continuously
• Power Mode dimming: LED slowly dims / turns OFF & turns ON / slowly brightens in slow smooth pace
LED STATUS POWER LED SATELLITE LED S.O.S. LED
POWERING ON All Green LEDS Blink in Forward/Reverse Direction until Sat-Fi2 Powers On
POWERING OFF Fast Blink Orange Fast Blink Orange Fast Blink Orange
POWER BUTTON
Press the Power button to turn the Sat-Fi2 on.
The LEDs will light up, notifying you that the
device is on.
Press and hold the Power button down until all
the LEDs start flashing orange. The device will
then power off.
S.O.S. BUTTON
Press and hold the S.O.S. button until the
S.O.S. LED turns green to initiate an S.O.S. with
GEOS IERCC.
While S.O.S. is active, press and hold the
S.O.S. button until the S.O.S. LED turns red to
cancel S.O.S. with GEOS IERCC.
USB DATA PORT Connect the USB Data Cable to connect the Sat-Fi2 to a computer.
POWERED ON Normal Blink Green N/A N/A
POWERED OFF No LED No LED No LED
BATTERY FULL Solid Green N/A N/A
BATTERY CHARGING ON Double Blink Green N/A N/A
BATTERY CHARGING OFF Slow Blink Green N/A N/A
BATTERY < 25% Fast Blink Red N/A N/A
CONNECTED TO SATELLITE N/A Normal Blink Green N/A
NOT CONNECTED
TO SATELLITE N/A Normal Blink Red N/A
S.O.S. CONNECTING MODE N/A N/A Solid Green
S.O.S. ESTABLISHED MODE N/A N/A Normal Blink Green
CANCEL S.O.S. MODE N/A N/A Normal Blink Red
HIBERNATION MODE Green + Orange
(Bright/Dims/Off) No LED No LED

Globalstar Sat-Fi2 User Guide
Page 8
Logging Into the Sat-Fi2 App
Perform the following steps to log into the Sat-Fi2 App:
For Android:
1. Open the Sat-Fi2 App
2. Select WI-FI SETTINGS
3. Select the Sat-Fi2 Wi-Fi – The default Wi-Fi name is: satfi2_<xxxxx>
4. Go back to the Sat-Fi2 App
5. Select RECONNECT
6. Enter Username
7. Enter Password
8. Select Sign in
9. Login is complete
NOTE: If the phone has its Wi-Fi on, but isn't connected to anything, it will go to the Sat-Fi2 app login
page. The user must enter username and password then hit Sign in. The reconnect page will
appear. This is where you select WI-FI SETTINGS, choose the Sat-Fi2's Wi-Fi, and then the app
will automatically connect and go to the main app screen.
For iPhone:
1. Open the Sat-Fi2 App
2. If not already connected to the Sat-Fi2, select WI-FI SETTINGS and follow the instructions
3. Select the Sat-Fi2 Wi-Fi – The default Wi-Fi name is: satfi2_<xxxxx>
4. Go back to the Sat-Fi2 App
5. Re-enter your login credentials if you did not select auto login when setting up the app
6. Select SUBMIT
7. Login is complete
NOTE: If credentials have already been entered before, the phone will auto-login and go straight to the
reconnect screen. Here the user needs to select WI-FI SETTINGS, choose the Sat-F2i's Wi-Fi, and then the
app will automatically connect and go to the main app screen.
Sat-Fi2 App Home Screen
Application Menu
• Phone – Make and receive phone calls to friends, family and contacts
• Text – Send and receive SMS/Text messages to friends, family and contacts
• Internet – Browse the Internet using Sat-Browse
• Email – Send and receive emails from personal or corporate email accounts
• Social – Share photos and post updates to linked social media accounts
• Weather – View local weather conditions anywhere in the world
• Emergency – Initiate an S.O.S. with direct 2-way voice and text communications with GEOS Emergency
Response Coordination Center
• Queue – View a list of messages in the queue that are waiting to be sent
Status Bar
Application Menu
Current GPS Location
Connected Users

Globalstar Sat-Fi2 User Guide
Page 9
Logging Out of the Sat-Fi2 App
NOTE: If logged out of the Sat-Fi2 App, the smartphone will not receive any Sat-Fi2 voice calls, emails and
texts until logged back into the Sat-Fi2 App.
Perform the following steps to log out of the Sat-Fi2 App:
1. From the main menu screen:
• Select the Menu icon (For Android)
• Select Logout (For iPhone)
2. Select Logout (For Android) / Confirm (For iPhone)
3. The Login screen will be displayed and logging out is complete
Closing the Sat-Fi2 App
NOTE: To receive voice calls and texts, the Sat-Fi2 App needs to remain running in the background. If the
Sat-Fi2 App is closed, the smartphone will not receive any Sat-Fi2 voice calls, emails and texts until logged
back into the Sat-Fi2 App.
Globalstar recommends closing the Sat-Fi2 App only if powering off the Sat-Fi2 device.
Perform the following steps to close the Sat-Fi2 App:
For Android:
1. Select the Menu icon
2. Select close app
3. Confirm you want to close the app by selecting Yes
4. The Sat-Fi2 app will close and the smartphone will be brought to its home screen.
5. Press the multitasking button (usually a square next to the home button)
6. Swipe left or right or tap the X to close the app.
For iPhone:
7. Double press the circular button on the bottom of your iPhone
8. The screen will shrink
9. Slide up.

Globalstar Sat-Fi2 User Guide
Page 10
Overview
Dials the smartphone’s contact list
Displays the smartphone’s contact list
Displays the number of voicemails and dials voicemails
(Android only)
Dials voicemail while pressing and holding down
(Android and iPhone)
Displays the dialing pad
Displays the call history
Making a Voice Call
Perform the following steps to make a voice call on the Sat-Fi2.
1. Open the Sat-Fi2 app and log in as Admin or Guest
2. Select the
3. Verify and the are displayed indicating the Sat-Fi2 has a good satellite connection
4. Enter a phone number on the telephone key pad or select a contact
5. Press the green phone icon to dial. Within a few seconds you will hear a dial tone and be connected
VOICE COMMUNICATIONS
Places the caller on hold
Displays the dial pad
Toggles the speaker phone on/off
Transfers the call to another phone

Globalstar Sat-Fi2 User Guide
Page 11
Receiving a Voice Call
Perform the following to receive a voice call on the Sat-Fi2:
1. An incoming call will be displayed on the screen.
2. Answer the phone by selecting the green phone icon on Android or the accept icon on iPhone
Voicemail
With voicemail you can check your messages from your Sat-Fi2 connected smartphone at standard airtime rates.
There is no connection fee from Globalstar to receive a message or check your messages from a landline/mobile
phone (local carrier fees may apply).
• Store up to 25 messages
• Callers can record a message up to 3 minutes in length
• Once a message has been played it will only be stored for 30 days
VOICEMAIL USING A SAT-FI2 CONNECTED SMARTPHONE
Voicemail Setup & Configuration using the Sat-Fi2
Perform the following steps to setup and configure voicemail using a Sat-Fi2 connection:
1. On the main screen, select the phone icon
2. The telephone keypad on the Android will display the voicemail icon, press and hold. For the iPhone press
and hold the 1.
3. At the voice prompt, enter the Sat-Fi2 telephone number.
Example: 1-254-555-1234 (<Country Code>+<Telephone Number>)
4. At the voice prompt, select your desired language.
5. At the voice prompt, setup/configure the following voicemail settings:
• Voicemail Greeting
• Voicemail Pass Code
6. At the voice prompt, select 4 to manage the following greetings:
• Name
• Unavailable
• Temporary
7. When finished, select to disconnect/hang-up. Setup and configuration of
voicemail is complete.
NOTE: Hibernation mode does not affect voicemail. Hibernation shuts down a lot of processes to save
battery and just prevents the user from receiving calls and push notifications.
Accessing Voicemail using the Sat-Fi2
Perform the following steps to setup and configure voicemail using a Sat-Fi2 connection:
1. On the main screen, select phone icon.
2. The telephone keypad on the Android version will display the voicemail icon which can be selected to
access voicemail. On the iPhone, voicemail can be accessed by pressing and holding the 1.
3. At the voice prompt, select your desired language.
4. At the voice prompt, enter the Sat-Fi2 telephone number.
Example: 1-254-555-1234 (<Country Code>+<Telephone Number>)
5. At the voice prompt, enter your Pass Code. Then follow the audible instructions.
VOICEMAIL USING A LANDLINE/MOBILE PHONE
Voicemail Setup & Configuration using a Landline/Mobile Phone
Perform the following steps to setup and configure voicemail using a landline/mobile phone:
1. On a landline/mobile phone, dial:
• North America 1-877-426-0308
• Caribbean & Latin America Call the Sat-Fi2’s number
• Europe +353-828-80420
• Africa +353-1-290-9505
2. At the voice prompt, select your desired language.
3. At the voice prompt, enter the Sat-Fi2 telephone number.
Example: 1-254-555-1234 (<Country Code>+<Telephone Number>)
4. At the voice prompt, select your desired language.
5. At the voice prompt, setup/configure the following voicemail settings:
• Voicemail Greeting
• Voicemail Pass Code
6. At the voice prompt, select 4 to manage the following greetings:
• Name
• Unavailable
• Temporary
7. When finished, hang up and voicemail will be setup and configured.

Globalstar Sat-Fi2 User Guide
Page 12
Accessing Voicemail using a Landline/Mobile Phone
Perform the following steps to access voicemail using a landline/mobile phone:
1. On a landline/mobile phone, dial:
• North America 1-877-426-0308
• Caribbean & Latin America Call the Sat-Fi2’s number
• Europe +353-828-80420
• Africa +353-1-290-9505
2. At the voice prompt, select your desired language.
3. At the voice prompt, enter your Sat-Fi2 telephone number/MDN followed by #
Example: 254-555-5555#.
4. A voice prompt, enter your pass code.
5. At the voice prompt, select 1 to listen to voicemail messages.

Globalstar Sat-Fi2 User Guide
Page 13
Sending an SMS/Text Message
Perform the following steps to send an SMS/Text message using the Sat-Fi2:
1. From the main menu, select Text
2. On Android phones, select the + sign to create a new message
On iPhone, select the compose icon to create a new message
3. Select contacts or enter a text number on the Android
Select the plus sign to add a contact
4. Enter text message and send
5. The text message will be sent and displayed as a message thread
Receiving and Reply to an SMS/Text Message
Perform the following steps to receive and reply to an SMS/Text message using the Sat-Fi2:
1. When an incoming text message arrives, the following will be displayed:
• An incoming text message pop up
• The number of unread text messages received
2. To view the text messages, select text
3. Select the text threat to view
4. To reply, type the text message and select send when finished
Sending SMS/Text Messages to Multiple Contacts
NOTE: Sending SMS/text messages to multiple contacts is not group texting. When sending SMS/Text to
multiple contacts the Sat-Fi2 App will create individual message threads for each individual contact and send
multiple messages. You will be charged for each SMS/Text message that is sent.
Perform the following steps to receive and reply to an SMS/Text message using the Sat-Fi2:
1. From the main menu, select Text
2. On Android phones, select the + sign to create a new message
On iPhone, select the compose icon to create a new message
3. On Android select SEND TO MULTIPLE CONTACTS
On iPhone, select the contact by pressing the plus sign. Once a contact is selected, press the plus sign and
repeat again to add more.
4. After selecting the contacts, type the text message, then send.
*On Android, it will show a disclaimer asking you if you are sure you want to send the message to multiple
contacts. Select OK to proceed.
5. The message will be sent and the Sat-Fi2 App will create two separate message threads for each contact.
Deleting Message Threads
Perform the following steps to delete a message thread:
1. On the Android, select and press down on the message thread to be deleted
On the iPhone, select and slide to the left and the word delete will appear
2. On Android, you will be asked if you want to delete the conversation
On iPhone, you will select “delete”
3. The selected message thread will be deleted
4. The selected message will be deleted
SMS/TEXT MESSAGING

Globalstar Sat-Fi2 User Guide
Page 14
Deleting Individual Messages
Perform the following steps to delete an individual message within a message thread:
Android:
1. Select and press down on the individual message to be deleted
2. Select Yes when asked if you want to delete the message
3. The selected message will be deleted
iOS:
1. Select and slide to the left and the word delete will appear
2. Select delete

Globalstar Sat-Fi2 User Guide
Page 15
Overview
Sat-Fi2 allows for the use of most personal and corporate email accounts including:
• Gmail
• Yahoo
• Exchange
• iCloud
• Outlook
• Hotmail
• AOL
• Other IMAP and IMAPS Accounts
NOTE: Some e-mail providers require an app specific password and/or 2-Step Verification for e-mail configura-
tion. Access to LTE or Wi-Fi is necessary in order to get the app-specific password.
For more information on how to create an app-specific password and 2-Step Verification, please visit your e-mail
provider’s support page or follow the instructions provided during the e-mail setup.
INBOX SCREEN
Displays email folder menu (i.e. Inbox, Draft, Trash)
Opens the email search field
Performs an automatic email fetch
Displays the email settings menu
Display the Compose new email screen
COMPOSE MESSAGE SCREEN
Send the email
Include an attachment
Attach a picture
Displays the email settings menu
Displays the contact list
Displays the contact list on iPhone
VIEW EMAIL SCREEN
Deletes the email
Displays the email settings menu
Replies to the email
Replies to all recipients in the email
Forwards the email
EMAIL

Globalstar Sat-Fi2 User Guide
Page 16
Configuring Email Accounts
EMAIL ACCOUNTS – GMAIL, YAHOO, ICLOUD, OUTLOOK, HOTMAIL & AOL
Perform the following to configure personal email using the Sat-Fi2 App:
For Android:
1. Select Email icon
2. Select the Menu icon
3. Select Account Settings
4. Select the plus icon
5. Enter the Account Name to be displayed within the Sat-Fi2 App
6. Enter the Email address to be used with Sat-Fi2
7. Select the Email type to be used with Sat-Fi2
8. Select the “View tips for setting up this account type” to learn how to create the App Password
9. Enter the App Password associated with the Email address
10. Email defaults to Text Email Format- To display Email in HTML format and/or display HTML Images, place a
checkmark in the appropriate checkboxes
(NOTE: Displaying Email and/or images in HTML will use more data.)
11. Select and choose the number of Email messages to be fetched and displayed
12. Select and choose the Email Fetch Start Date
(NOTE: Selecting this option will bring up a calendar so the user can select from what day to start
fetching emails.)
13. Select to verify the account settings are correct – If not, repeat Step 5 through Step 12
14. Select to save the Email account settings
15. The Email account will be configured and ready for use
For iPhone:
1. Select Email icon
2. Select the Plus icon at the bottom left corner
3. Enter the Account Description to be displayed within the Sat-Fi2 App
4. Enter the Email address to be used with Sat-Fi2
5. Enter the Username associated with the Email address
6. Select the Email type to be used with Sat-Fi2
7. Select the “View Information on 2 Factor Authentication” to learn how to create the App Password
8. Enter the App Password associated with the Email address
9. Select the number of Email messages to be displayed
10. Select the number of Days to Sync
11. Turn on or turn off Auto Sync
12. Turn on or turn off Text Only
(NOTE: Displaying Email and/or images in HTML will use more data.)
13. Turn on or turn off Load Images
14. Select the number of Retries on Error
15. Select Save
16. The Email account will be configured and ready for use

Globalstar Sat-Fi2 User Guide
Page 17
EMAIL ACCOUNTS – EXCHANGE
Perform the following to configure personal email using the Sat-Fi 2 App:
For Android:
1. Select Email icon
2. Select the Menu icon
3. Select Account Settings
4. Select the plus icon
5. Enter the Account Name to be displayed within the Sat-Fi2 App
6. Enter the Email address to be used with Sat-Fi2
7. Select the Email type to be used with Sat-Fi2
8. Select the “View tips for setting up this account type” to learn how to create the App Password
9. Enter the App Password associated with the Email address
10. Enter the Exchange Active Directory Domain
11. Email defaults to Text Email Format- To display Email in HTML format and/or display HTML Images, place a
checkmark in the appropriate checkboxes
(NOTES: Displaying Email and/or images in HTML will use more data.)
12. Select and choose the number of Email messages to be fetched and displayed
13. Select and choose the Email Fetch Start Date
(NOTE: Selecting this option will bring up a calendar so the user can select from what day to start
fetching emails.)
14. Select to verify the account settings are correct – If not, repeat Step 6 through Step 12
15. Select to save the Email account settings
16. The Email account will be configured and ready for use
For iPhone:
1. Select Email icon
2. Select the Plus icon at the bottom left corner
3. Enter the Account Description to be displayed within the Sat-Fi2 App
4. Enter the Email address to be used with Sat-Fi2
5. Enter the Username associated with the Email address
6. Select the Email type to be used with Sat-Fi2
7. Select the “View Information on 2 Factor Authentication” to learn how to create the App Password
8. Enter the Password associated with the Email address
9. Select the number of Email messages to be displayed
10. Select the number of Days to Sync
11. Turn on or turn off Auto Sync
12. Turn on or turn off Text Only
(NOTE: Displaying Email and/or images in HTML will use more data.)
13. Turn on or turn off Load Images
14. Select the number of Retries on Error
15. Enter the Exchange Domain Information
16. Select Save
Other manuals for Sat-Fi2
5
Table of contents
Other Globalstar Wireless Router manuals

Globalstar
Globalstar Sat-Fi2 User manual

Globalstar
Globalstar Sat-Fi2 User manual

Globalstar
Globalstar Sat-Fi User manual

Globalstar
Globalstar Sat-Fi 2 User manual

Globalstar
Globalstar 9600 User manual

Globalstar
Globalstar Sat-Fi2 User manual

Globalstar
Globalstar Sat-Fi User manual

Globalstar
Globalstar 9600 User manual

Globalstar
Globalstar 9600 User manual

Globalstar
Globalstar Sat-Fi Operator's manual