Globalstar Sat-Fi Operator's manual


Sat-Fi Installation & Configuration Guide
This guide is based on the production version of the Globalstar Sat-Fi and Sat-Fi Apps.
Software changes may have occurred after this printing.
Globalstar reserves the right to make changes in technical and product specifications
without prior notice
Globalstar Inc.
300 Holiday Square Blvd
Covington, LA 70433
Copyright©2014 Globalstar®Incorporated
All rights reserved
Globalstar®is a registered trademark of Globalstar Incorporated
Sat-FiTM is a registered trademark of Globalstar Incorporated
Android®is a registered trademark of Google Incorporated.
iPhone®is a registered trademark of Apple Incorporated.
All other trademarks and registered trademarks are properties of their respective
owners
Printed in the United States of America

Sat-Fi Installation & Configuration Guide
Table of Contents
1. WELCOME............................................................................................................................................1
HOW SAT-FI WORKS...................................................................................................................................1
ABOUT THIS GUIDE .....................................................................................................................................2
2. WHAT’S INCLUDED.............................................................................................................................3
3. GLOBALSTAR SAT-FI INSTALLATION..............................................................................................4
INSTALLATION PROCESS OVERVIEW.............................................................................................................4
EXTERNAL SATELLITE ANTENNA INSTALLATION.............................................................................................4
Marine Antenna Installation...................................................................................................................5
Magnetic Patch (Car Antenna) Installation............................................................................................6
Helix Antenna Installation......................................................................................................................7
SAT-FI UNIT MOUNTING...............................................................................................................................8
3M Dual Lock Tape...............................................................................................................................8
3M Bumpon Feet...................................................................................................................................8
COAXIAL CABLE CONNECTIONS....................................................................................................................9
Cable Connection to the External Antenna...........................................................................................9
Cable Connection to the Sat-Fi Unit......................................................................................................9
WI-FI ANTENNA AND POWER CONNECTION ................................................................................................10
POWERING ON THE SAT-FI.........................................................................................................................11
4. SETUP AND CONFIGURATION OF GLOBALSTAR SAT-FI............................................................12
CONNECTING TO THE GLOBALSTAR SAT-FI WIRELESS NETWORK................................................................12
ACCESSING THE GLOBALSTAR SAT-FI USER INTERFACE .............................................................................13
5. SAT-FI UNIT USER INTERFACE.......................................................................................................14
MONITORING NETWORK CONNECTIVITY......................................................................................................14
Satellite Status Section........................................................................................................................15
Wi-Fi Clients Section...........................................................................................................................16
DHCP Leases Section.........................................................................................................................17
WI-FI CONFIGURATION PAGE.....................................................................................................................18
Changing the SSID and Password......................................................................................................19
Changing the Wi-Fi Channel...............................................................................................................20
SERVICE INTEGRATION ..............................................................................................................................21
ADMINISTRATION PAGE..............................................................................................................................22
Changing Administrator Username and Password.............................................................................23
Resetting the Sat-Fi to Factory Default...............................................................................................23
LOG FILE PAGE.........................................................................................................................................24
6. GLOBALSTAR SAT-FI SPECIFICATIONS........................................................................................25
7. REGULATORY APPROVAL ..............................................................................................................27
FCC/IC NOTICE........................................................................................................................................27
CE NOTICE...............................................................................................................................................28
GENERAL NOTICES....................................................................................................................................28

Sat-Fi Installation & Configuration Guide
8. GENERAL WARNINGS......................................................................................................................29
9. WARRANTY INFORMATION.............................................................................................................30

Sat-Fi Installation & Configuration Guide Page 1
1.WELCOME
Today’s smartphones provide more options for staying in touch with friends and family than ever before.
Unfortunately, they are dependent on the cellular network. Now you can take your smart phone beyond
cellular with the world’s most reliable satellite hotspot.
Easily make calls, send emails and SMS from any Wi-Fi enabled device
Conveniently use existing device contacts via the
Sat-Fi App
Enjoy affordable crystal-clear voice quality with
seamless connectivity
Fastest data speeds in the industry for sending
and receiving email
Designed for both vehicle/vessel-based and fixed
locations
Connect up to 8 users to Sat-Fi at one time
Powered by the world’s newest, most modern satellite network
How Sat-Fi Works
Sat-Fi is a VoIP to satellite bridge allowing you to send and receive satellite calls through your
smartphone. You will be able to carry just a single phone and use that smartphone on both your cellular
and Globalstar’s satellite network.
Sat-Fi is designed for both vehicle-based and fixed locations. Vehicle-based examples may include cars,
trucks, RVs, ATVs as well as boats. Fixed location solutions may include remote areas where there is no
cellular coverage and satellite communication is desired or needed.
An example of a typical Sat-Fi user would be a boat owner who uses a satellite phone when heading out
on the water. With a Sat-Fi onboard, the owner does not have to carry both a smartphone and satellite
phone; all he needs to do is simply register his smartphone on Sat-Fi when he boards. The owner is now
free to move about the vessel while maintaining both cellular (if available) and satellite connectivity all on
one phone. Additionally with a smartphone there is no need to achieve proper antenna alignment or have
a clear view of the sky to send or receive satellite calls. If Sat-Fi is properly mounted, the owner can send
or receive satellite calls anywhere on the vessel with his smartphone.
While normal mobile satellite phones are single user devices, Sat-Fi allows for multiple simultaneous user
connections. While only one satellite call can be made at a time, up to 8 users may connect to a single
Sat-Fi sharing its satellite connection. Once you are registered and connected to the Sat-Fi device you
are immediately able to make outbound calls. Additional users and guests will be able to register their
smartphones on Sat-Fi and make calls or data connections.
All calls and data connections are made through the Sat-FI App. This app needs to be downloaded on
your Android or iOS device in order to connect to the Globalstar network.

Sat-Fi Installation & Configuration Guide Page 2
Sat-Fi turns your smartphone or wireless device into a satellite phone
1. Download and install the Sat-Fi Apps to your smartphone
or other wireless device.
2. Connect your device to the Sat-Fi via a Wi-Fi connection.
3. Sat-Fi links your device to the Globalstar Satellite
Network.
4. Your device is now a connected for voice and data.
About This Guide
The installation and configuration sections of this guide step through all aspects of setup, testing, and
operation of the Sat-Fi. Please be sure to read this guide thoroughly and retain it for future reference. .
Professional installation is recommended.

Sat-Fi Installation & Configuration Guide Page 3
2.WHAT’S INCLUDED
Your Globalstar Sat-Fi System comes with the following components:
Globalstar Sat-Fi Unit
Globalstar Sat-Fi Power Supplies
o(1) 120-240VAC/12VDC Power Supply
o(1) 12VDC Car Power Adapter
o(1) Waterproof –DC Power Cable
Globalstar External Antenna (one of the following antennas)
oMarine Helix Antenna
oHelix Antenna
oCar Antenna
Accessory Kit
o(6) 3M Dual Lock Mounting Tape (5” (12cm) Length
o(4) 3M Bumpon Feet
o(1) 14 feet/4.25 m Coaxial Antenna Cable
o(1) Wi-Fi Antenna
o(1) Rubber O-Ring

Sat-Fi Installation & Configuration Guide Page 4
3.GLOBALSTAR SAT-FI INSTALLATION
Installation Process Overview
The Globalstar Sat-Fi hardware installation process is very simple:
Install/mount external antenna
Secure Global Sat-Fi Unit to a flat surface area
Connect Sat-Fi unit with external antenna
External Satellite Antenna Installation
The Sat-Fi does not have an internal satellite antenna and the external satellite antenna is necessary for
communication between the satellite and the Globalstar Sat-Fi unit. The single most important
consideration of the Globalstar Sat-Fi installation is the location of the external antenna. The Sat-Fi
external antenna needs a clear and unobstructed view of the sky in all directions. It must be in a position
that minimizes obstructions that block the signal from the satellites and far enough away from other RF
devices to prevent interference.
Your Globalstar Sat-Fi comes with one of the following external antennas, depending upon kit that you
purchased:
Marine Helix Antenna
Helix Antenna
Magnetic Patch Antenna

Sat-Fi Installation & Configuration Guide Page 5
Marine Antenna Installation
There is more than one approach to mounting the marine external antenna and every vessel installation is
different. Follow the below generic steps while installing the antenna:
For best results the antenna should be mounted at the highest point on the vessel with a 360
degree view of the sky.
The antenna must not be positioned within range of radar equipment or other RF interference.
The antenna must be at least 3 feet (1 Meter) from other antennas (including GPS antennas).
Use only the coaxial cables that come with the antenna kit.
oDo not cut or modify the coaxial antenna cable.
oDo not kink the coaxial cables
Use adhesive lined heatshrink tubing to seal all external cable connections to prevent moisture
and corrosion damage. Heatshrink tubing is available without the adhesive lining, but it does not
completely protect the cables/connectors from salt and water ingress.
Attach the Marine antenna to a standard 14 threads per inch marine mast (Not Included).
NOTE: Ensure to use appropriate and sufficient mounting hardware to ensure proper and secure
installation of the marine mast.

Sat-Fi Installation & Configuration Guide Page 6
Magnetic Patch (Car Antenna) Installation
An external magnetic patch (car antenna) is required for satellite communication when the Sat-Fi is used
inside a vehicle.
The external car antenna should be mounted on the roof of the vehicle with an unobstructed view
of the sky.
The external car antenna is easily mounted to the roof of your vehicle via its magnetic base.
Inspect the surface of the magnet for damage before placing the antenna on the car.
The external car antenna is not designed for high speed driving - use moderate speeds when
mounted on the roof.
The metal surface on the underside of the external car antenna can get hot; use caution when
taking it off the roof.
Do not mount the external car antenna on the trunk or a lower surface –performance could
be affected.
The external antenna uses coaxial cables that connect the antenna to the Sat-Fi. Use only the
coaxial cables that come with the antenna kit. Do not cut or modify the coaxial antenna cable.
Use existing slots and channels in the vehicle for routing
Route cables so that they will not tangle or interfere with the movement of seats, pedals and
emergency brakes
Avoid routing cables under floor mats so as not to catch on your feet
Route cables so they are at least 6 inches from electrical cables so not to cause electrical
interference
Use coaxial sealant, shrink-wrap tubing, electrical tape, or other suitable products to seal all
external cable connections to prevent moisture and corrosion damage.

Sat-Fi Installation & Configuration Guide Page 7
Helix Antenna Installation
When selecting a location to mount the external antenna there are several issues to take into
consideration:
Mount the helix antenna so that it has a 360 degree view of the sky from 10 degrees above the
horizon.
The antenna must be at least 3 feet (1 Meter) from other antennas (including GPS antennas).
If mounting on a flat roof, avoid placing antenna near chimneys and other physical structures such
as air handling units etc.
If the roof is inclined, place the antenna far enough above the peak so the roof does not cause
signal blockage.
Mount the antenna so that it is stable and not susceptible to vibration and movement in windy
environments
Use only the coaxial cables that come with the antenna kit. Do not cut or modify the coaxial
antenna cable.
Use coaxial sealant, shrink-wrap tubing, electrical tape, or other suitable products to seal all
external cable connections to prevent moisture and corrosion damage.

Sat-Fi Installation & Configuration Guide Page 8
Sat-Fi Unit Mounting
Identify an appropriate location for the Sat-Fi unit to be mounted. The ideal location for the Sat-Fi unit
should be within the cable length of the external antenna and in a dry location close to an AC/DC power
source. Additionally, should be in a central location, centering it in a location you wish to cover, to
maximize its 100ft Wi-Fi radius.
The following materials are provided to mount the Sat-Fi unit:
3M Dual Lock Tape
3M Bumpon Feet
3M Dual Lock Tape
The 3M Dual Lock Tape that is included in the accessories kit is recommended for mounting in vehicles
and boats.
3M Bumpon Feet
The 3M Bumpon Feet that is included in the accessories kit is recommended for fixed locations on land.

Sat-Fi Installation & Configuration Guide Page 9
Coaxial Cable Connections
After the external antenna and Sat-Fi unit have been installed and mounted in their appropriate locations,
the antenna cables and power need to connected.
Cable Connection to the External Antenna
1. Connect the Transmit (Tx) connector of the antenna coaxial cable to the Transmit (Tx) port on the
external antenna.
2. Connect the Receive (Rx) connector of the antenna coaxial cable to the Receive (Rx) port on the
external antenna.
Cable Connection to the Sat-Fi Unit
1. Connect the Transmit (Tx) connector of the antenna coaxial cable to the Transmit (Tx) port on the
Sat-Fi unit.
2. Connect the Receive (Rx) connector of the antenna coaxial cable to the Receive (Rx) port on the
Sat-Fi unit.

Sat-Fi Installation & Configuration Guide Page 10
Wi-Fi Antenna and Power Connection
Perform the following for the Wi-Fi Antenna connection:
1. Place the rubber O-Ring over the Wi-Fi antenna port.
2. Connect the Wi-Fi antenna to the Wi-Fi port on the back of the Sat-Fi Unit - Finger tighten only.
3. Connect the appropriate power cable (120-240VAC/12VDC Power Supply or 12VDC Car Power
Adapter) to the 12VDC power port on the Sat-Fi unit.

Sat-Fi Installation & Configuration Guide Page 11
Powering on the Sat-Fi
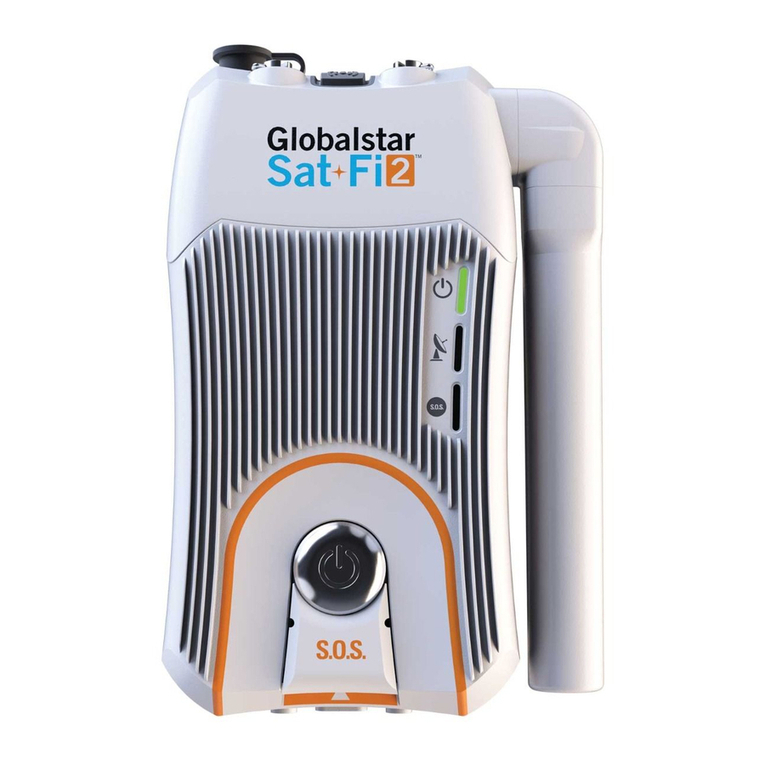
The Sat-Fi automatically powers on when it is connected to a power source. The single push button in
the front acts as a hard power reset switch allowing the Sat-Fi to be easily restarted without having to
physically disconnect the power. Once powered on the Sat-Fi performs the following sequence:
Automatically boots
Enables the Wi-Fi
Attempts to register with the Globalstar Satellite Network
This process may take up to 30 seconds to complete.
The LED on the front panel provides a visual indication of the Sat-Fi’s status:
ON (Solid) –The Sat-Fi is registered with the Globalstar Satellite Network and is able to
send/receive calls and data
Fast Blinking –The Sat-Fi is searching for service and/or registering with the Globalstar Satellite
Network
Slow Blinking –The Sat-Fi is in use; either sending/receiving a call or data transmission
OFF –The Sat-Fi is powered off and not connected to a power source

Sat-Fi Installation & Configuration Guide Page 12
4.SETUP AND CONFIGURATION OF GLOBALSTAR SAT-FI
Connecting to the Globalstar Sat-Fi Wireless Network
Your smartphone or other wireless device must connect via Wi-Fi to the Sat-Fi to access the user
interface. The Sat-Fi is shipped with a default Wi-Fi configuration as follows:
Wi-Fi Network Name: SatFi<XXXX> (<XXXX> is a unique identifier of the Sat- Fi Unit)
Example: SatFi6A3E90
Password: Satfi1234
Perform the following steps to connect your smartphone or other wireless device to the Sat-Fi:
1. On your smartphone or other wireless device turn on your Wi-Fi connection and attempt to
connect to the SatFi<Unique Identifier> network.
2. A Wi-Fi connection dialog will be displayed. In the Password text-entry field, enter the appropriate
password.
3. Press the Connect button.
4. You should now be connected to the Sat-Fi Wi-Fi network.

Sat-Fi Installation & Configuration Guide Page 13
Accessing the Globalstar Sat-Fi User Interface
If for any reason you would like to change the Sat-Fi logon password or for other administrative purposes,
the Sat-Fi User Interface may be accessed by any web browser from a smartphone, computer or other
wireless device connected to the Globalstar Sat-Fi Wireless Network.
Perform the following to access the Sat-Fi User Interface:
1. Open your web browser
2. In the address bar enter: http://192.168.1.1
3. A Sign In dialog will be displayed.
In the Name field, enter the administrator name.
In the Password field, enter the password.
Press the Sign in button.
NOTE: By default the username is admin and the password is admin.
4. You will now be logged into the Sat-Fi User Interface.

Sat-Fi Installation & Configuration Guide Page 14
5.SAT-FI UNIT USER INTERFACE
The Sat-Fi Unit is configured via a web-based interface. This interface allows you to:
Monitor network connectivity
Configure the Wi-Fi
Change administrator’s password
Reset system to Factory Defaults
View diagnostic information
Monitoring Network Connectivity
The Sat-Fi Status Page provides an overview of the systems health and status. This page is helpful in
diagnosing problems with sending and receiving phone calls. Additionally the Sat-Fi Status page
refreshes every 30 seconds providing a real time view of the system.
The Sat-Fi Page consists of three sections:
Satellite Status
Wi-Fi Clients
DHCP Lease

Sat-Fi Installation & Configuration Guide Page 15
Satellite Status Section
The Satellite Status section displays the following satellite connectivity characteristics:
State –Displays the connection status:
oidle –The Sat-Fi is ready to send and receive calls, but is not currently active
ounregistered –The Sat-Fi is not yet registered with the Globalstar Network
odialing –The Sat-Fi is placing an outbound call
oringing –The Sat-Fi is receiving an inbound call or in the process of connecting an
outbound call
oactive –The Sat-Fi currently in a call
ounknown –The Sat-Fi is not responding and has encountered an error.
Online –Displays whether the Sat-Fi is communicating with the Globalstar Network
oyes
ono
Mode –Displays the Sat-Fi communication mode
ovoice –A voice call is taking place
odata –A data transmission session is taking place
Provider –Displays the satellite network provider
Gateway –Displays the connecting Sat-Fi gateway
RSSI –Displays the receive signal strength of the satellite
Roaming –Displays if the Sat-Fi is roaming from its home network
oyes –Additional charges may apply when sending or receiving satellite communications
ono –The Sat-Fi is within its home network and no roaming charges will apply

Sat-Fi Installation & Configuration Guide Page 16
Wi-Fi Clients Section
The Wi-Fi Clients section displays the following characteristics of all current and recently connected
smartphones and other wireless devices.
MAC Address –Displays the Media Access Control (MAC) address of the connected device.
This is the unique hardware address of the Wi-Fi system within your device
Signal Avg –Displays the average received signal strength of the connected device. A series of
four bars displays the strength of the signal from the smartphone or other device. Devices with
fewer bars may have problems sending/receiving phone calls and data.
Bitrate –Displays the communication rate with the connected device
Authenticated –Displays whether the device has been authenticated
oyes –The device will be able to send/receive calls and data
ono - The device will not be able send/receive calls and data
Rx Bytes –Displays the total number of bytes that the Sat-Fi unit has received from a connected
device
Tx Bytes –Displays the total number of bytes that the Sat-Fi unit has transmitted to the
connected device
Inactive Time –Displays the amount of time since the smartphone or other wireless device has
last communicated with the Sat-Fi
Other manuals for Sat-Fi
2
Table of contents
Other Globalstar Wireless Router manuals

Globalstar
Globalstar 9600 User manual

Globalstar
Globalstar Sat-Fi2 User manual

Globalstar
Globalstar Sat-Fi2 User manual

Globalstar
Globalstar Sat-Fi2 User manual

Globalstar
Globalstar Sat-Fi User manual

Globalstar
Globalstar 9600 User manual

Globalstar
Globalstar Sat-Fi 2 User manual

Globalstar
Globalstar Sat-Fi2 User manual

Globalstar
Globalstar 9600 User manual

Globalstar
Globalstar Sat-Fi User manual